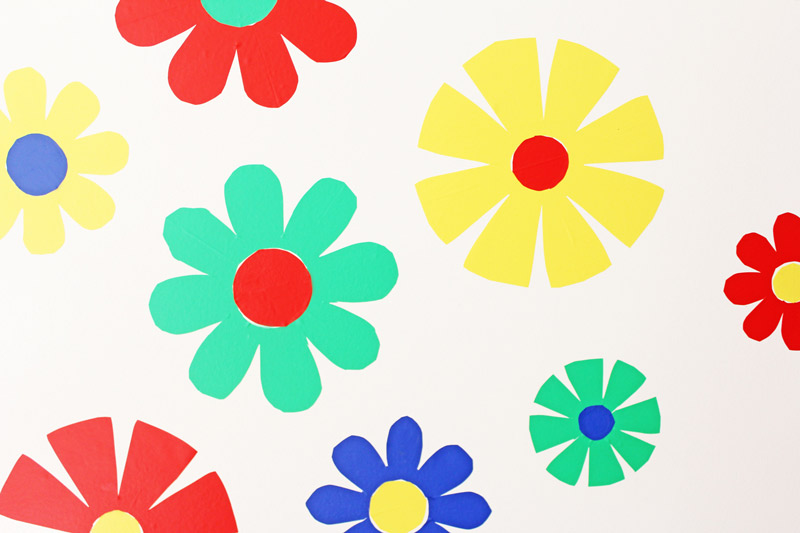
When I was a teen I used to daydream about living in the late 60’s. I was obsessed with the Monkees, Jefferson Airplane, and Valley of the Dolls and whenever I hear the song “Crimson and Clover” I want to shed a couple tears at how psychedelically amazing that song is….but alas I was a child of the 70’s and played out my young adult life blasting Smashing Pumpkins and frequenting Lollapalooza. Still, any chance I have to live it up 60’s style I’m on it! So when I was dreaming up projects I thought it would be groovy to make some DIY “Flower Power” Wall Decals. These are simple wall decals kids can cut and configure themselves; wouldn’t they be far out in your little hippie’s bedroom?
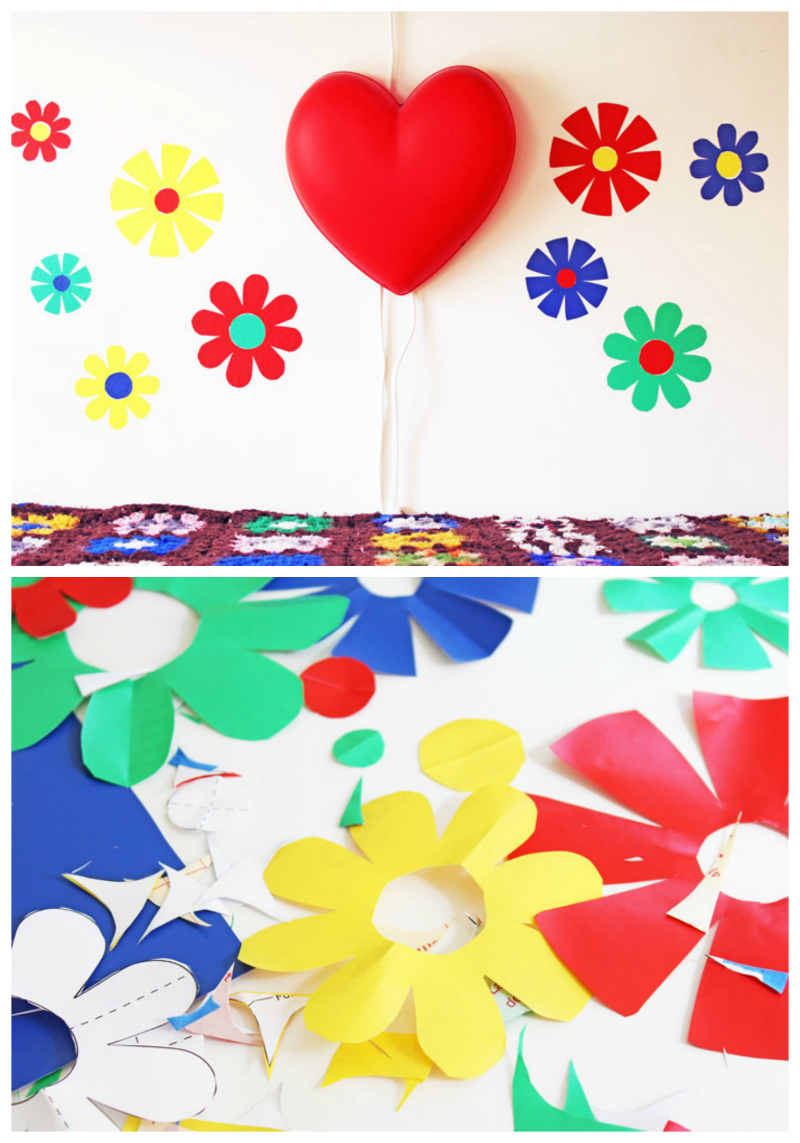
 The basic idea is to make wall decals using contact paper. Why contact paper? It’s just sticky enough to adhere to walls, furniture, just about anything, but can be removed with ease and doesn’t ruin the surface below. You can dream up any motif you want, print it, then copy and cut it from contact paper. If you love the 60’s look of these decals, then by all means, download my Flower Power Template!
DOWNLOAD THE FLOWER POWER TEMPLATE HERE!
DIY Wall Decals
Materials
- Flower Power Wall Decal Template
- Colored Contact Paper– I bought mine at Staples, you can also find it online or at hardware stores, sold as shelf liner
- Scissors
- Tape
Instructions
 Cutting

- Step One Download your Flower Power Wall Decal Template and print it onto regular paper. You can also try printing directly to the contact paper using these instructions: Instructables: How to Print on Contact Paper.
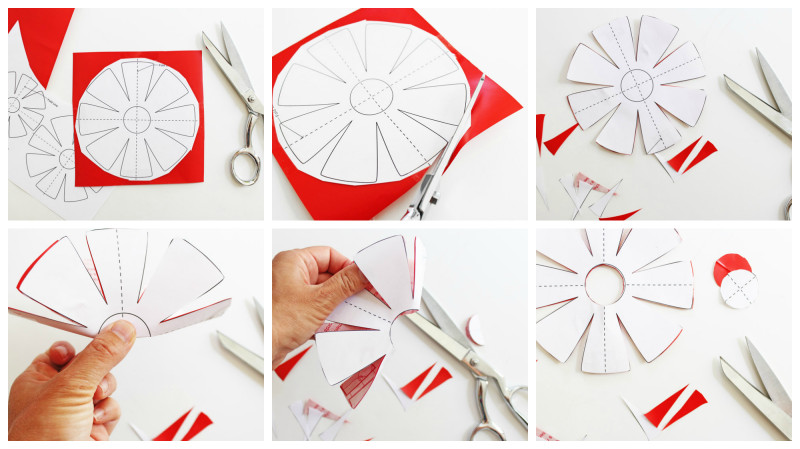
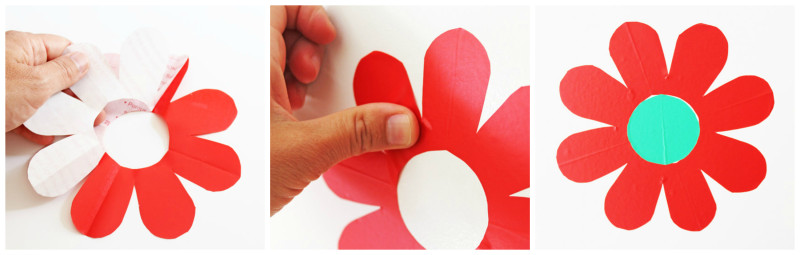
- Step Two Cut out the flower you are working on from the template, then cut a piece of contact paper and tape the template to the contact paper. Trim around the flower. TIP: After trimming around the flower you will need to tape the template to the contact paper again over the edges so it stays in place.
- Step Three Cut out your flower. If you are mass-producing these use the folded cutting alternative below.
- Step Four Cut out the center. Fold your flower in half and then cut out the circle. Save center circle.
Alternative Cutting Method Instructions
If you want to breeze through making these you can cut them while folded to save time. Here’s how:
- Step One Download the template, print and cut as described above, then tape it to a piece of contact paper.
- Step Two Using the fold lines on the template, fold the flower in half once, then in half again. You will now have a quarter of the flower showing. Tape the outside edges to hold all the layers together, this will making cutting easier.
- Step Three Cut out the flower from the folded paper, saving the center circle.
- Step Four Carefully unfold the flower.

Sticking
- Step One Carefully remove the backing and stick to the wall in the location you desire. TIP: Work from the center out, pushing air pockets away from the middle of the flower
- Step Two Burnish the sticker tp the wall using your fingertips
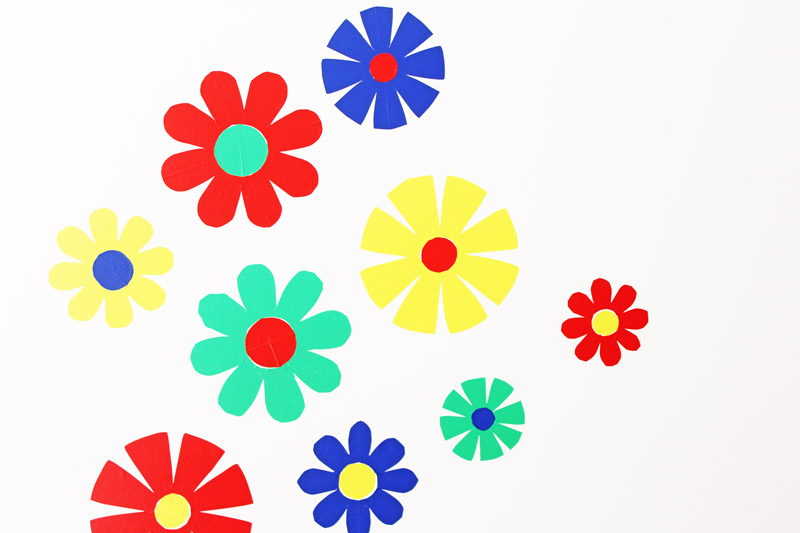
- Step Three Either cut out a circular center from a contrasting color or use one of your saved center circles and place it in the center of your flower
 You’re done!
After making these my husband casually commented that they looked like bathtub anti-slip stickers from the seventies, AKA Rickie Tickie Stickies. Cringing just a little as my wall art was compared to a shower mat, I took it as a compliment that the graphics were spot on!
 Later I rehung these by Clara’s bed for a little flair!
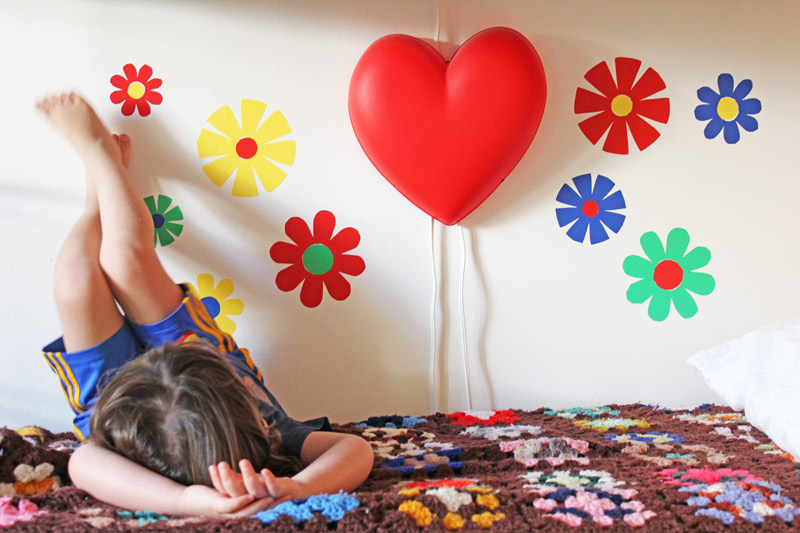
Now go have a sunshine day and make some Flower Power Wall Decals!
DOWNLOAD THE FLOWER POWER TEMPLATE HERE!
If you have a template or design (original illustrations only please) that would make a wonderful wall decal, post a comment below!
Please note this post contains affiliate links to products I love and recommend to my readers!
Linking up at: Made By You Mondays
These are awesome! My inner hippie is smiling 😉
Thanks Stephanie! Two-daloo is one of my fave creative blogs! Great to connect with a fellow hippie at heart blogger 🙂
These are so groooovy. 🙂 Love, love, love them.
I love me some groovy wall art!
I love how easy this is to change the whole atmosphere of the room! I’ll be sharing it on The Crafty Crow soon 🙂
Hi Stephanie,
Thank you for DIY directions for making “hippie flower power” flowers! I will be putting mine on my trash container to make it eye-catching! I could not find colorful Contact Paper, as you suggested, but I did find “Silhouette Glossy Permanent Vinyl” in rolls 9″ x 10′ at Staples and Joann Fabric and Craft Stores. I hope this information helps felllow crafters!
Thanks for the tip!