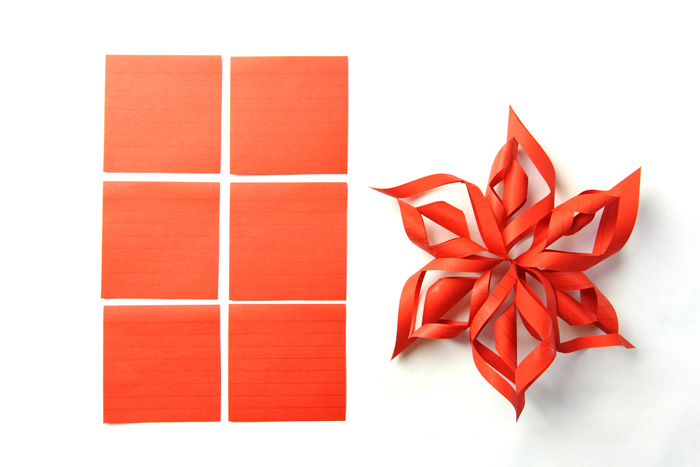
Sitting around the office or classroom this afternoon counting the minutes until the weekend? I’ve got something for you to do! Right now! Go grab 6 Post-It notes and a glue stick. C’mon I know you have them.

Now watch this and start making some holiday decorations:
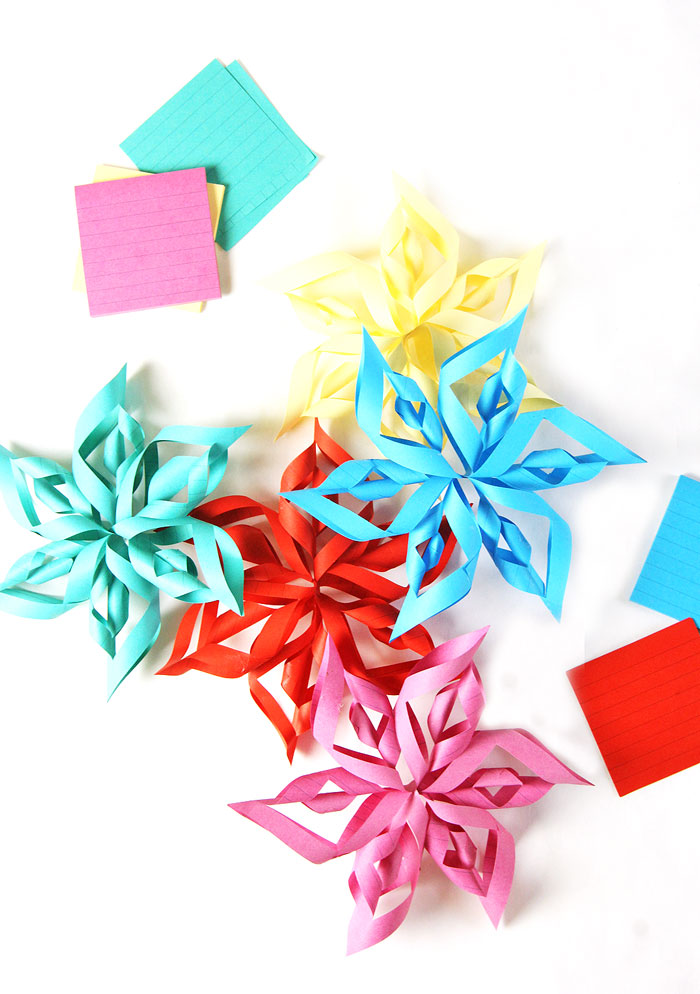
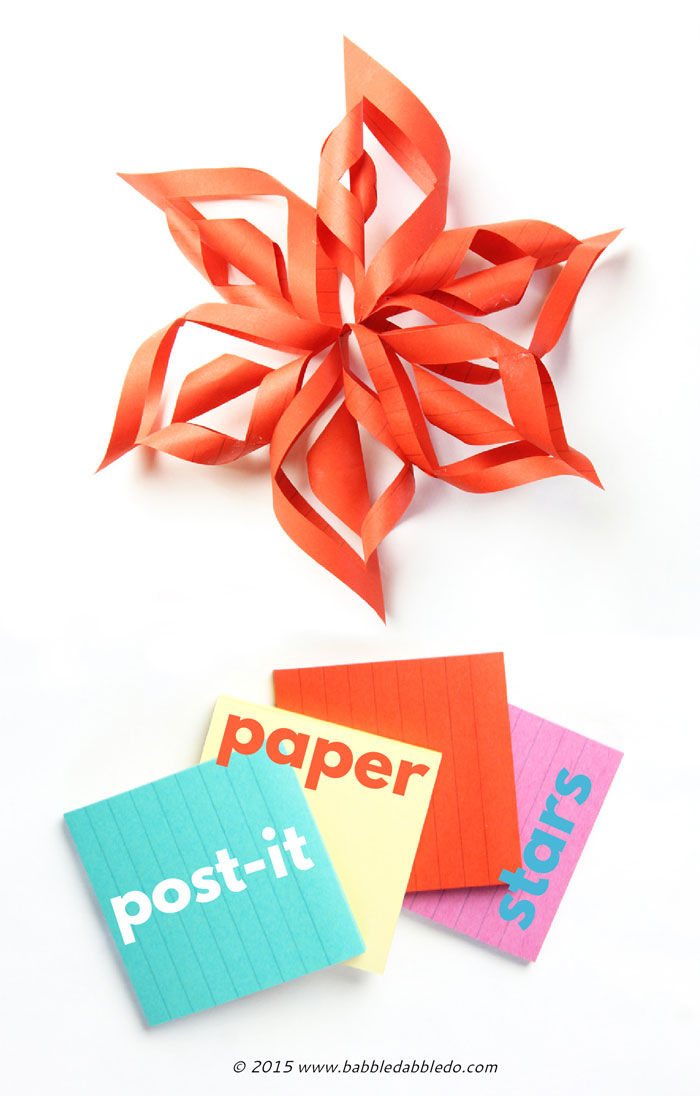
A couple years ago I took a school tour and the thing I remembered the most were the Paper Stars. They were huge, impressive and 3-dimensional. I immediately googled them when I got home and have been itching to post about them for some time, but since they are a classic craft I wanted to find a twist on the project (pun intended). Then I saw a stack of Post-its notes staring me in the face one afternoon and kablammo inspiration struck! The fact that the Post-its are pre-cut in a square shape, small and easy to handle, and most of us have them sitting in a drawer somewhere was too good to pass up!
These Paper Stars are great for adults and older children to make and cost next to nothing. In fact, I bet you could buy one package of Post-it Notes, have a classroom full of kids make one each, and you’d have one impressive holiday display!
This post contains affiliate links to products I love and recommend to my readers.
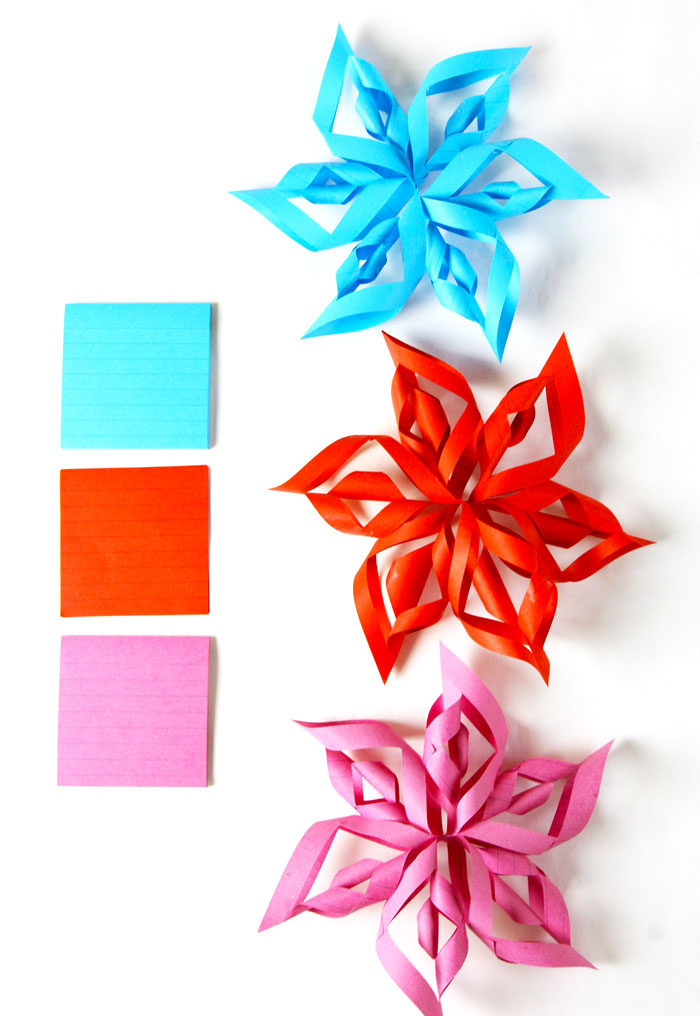
Post-It Note Paper Stars
 Materials
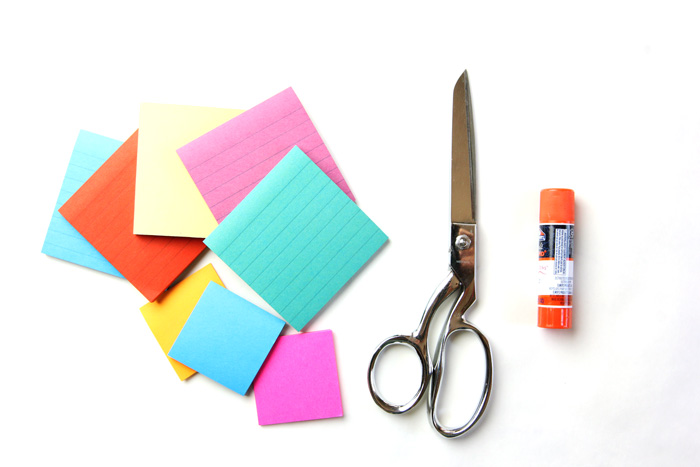 Materials
 - Post-it Notes
- Glue Stick
- Scissors
Instructions
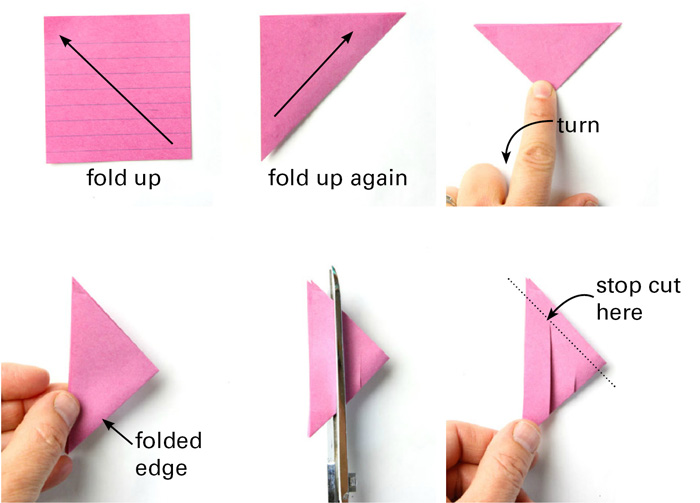
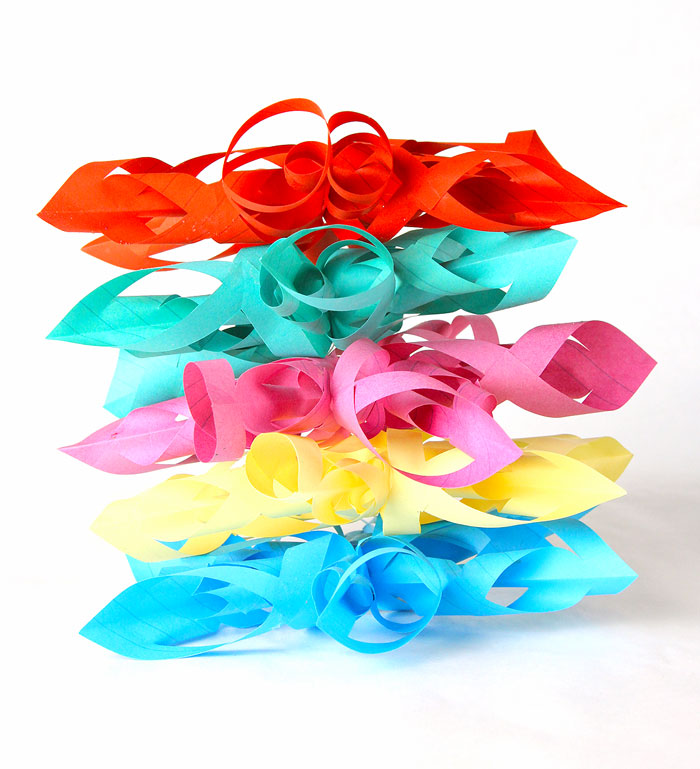
- Step One Make one section of the star. Fold one post-it note diagonally.
- Step Two Fold diagonally again.
- Step Three Turn note to the side with the folded edge facing down.
- Step Four Cut two slits in the note aligned with the long edge. Stop cutting ¼” from the edge.
- Step Five Unfold
- Step Six Gently curl inside edges together and glue. Use a crayon to help shape the curl. It will also give you a hard surface to press down on as you glue the edges together.
- Step Seven Glue the outermost edges together.
- Step Eight Turn the section over and glue the center edges together in the opposite direction of the other two curls.
- Step Nine Repeat 5 more time so that you have a total of 6 sections.
- Step Ten Glue the center point of three sections together and repeat with the other three sections.
- Step Eleven Finally glue two halves together.

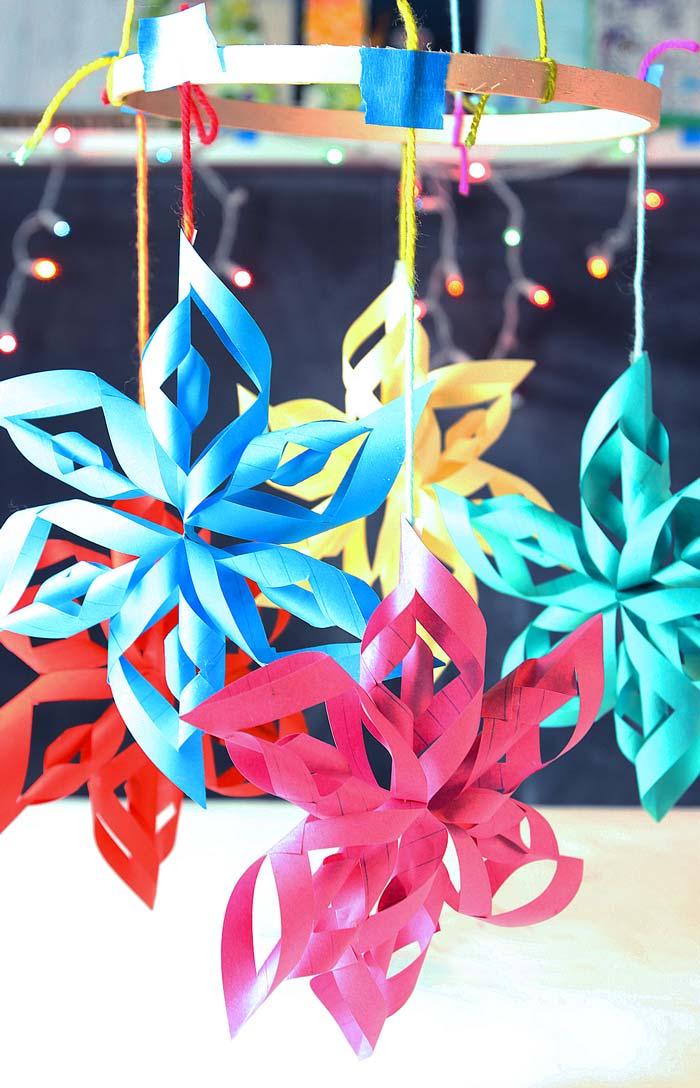
You’re done! Make a few of these to hang around your home! No one will ever believe you made them from 6 Post-it Notes
Tips
 Tips
Tips- Have a pen and marker handy as well to help you shape and glue the larger section edges together.
- Speed it up! Cut your post-its two at a time!
- Be sure to press the edges together for a moment after gluing to get them to stick.
Looks Like
Yulia Brodskaya I recently discovered the work of Yulia Brodskaya and am absolutely in awe of the amazingly colorful and textured art pieces she creates using only paper and glue. Ms. Brodskaya is an artist and illustrator whose work has been featured in magazines and whose huge list of clients who go by names like Starbucks and Target. She says she likes to “draw with paper” rather than on it! Hop over here to see her stunning work.
More Ways to Make Paper Stars
Once you get started making paper stars it’s pretty hard to stop! Here are two more other methods of making paper stars that you should check out:
Simple 3D Paper Stars from Red Ted Art
Kirigami Paper Stars from Paper Origami Blog

Painted Origami Stars from Hello,Wonderful
Fold & Cut Stars from Pink Stripey Socks
Transforming Ninja Stars from What Do We Do All Day
GIANT Holiday Stars from Tinkerlab

More amazing things to make with paper:
Paper Toys Play Pack
Spread Creativity like wildfire: PIN THIS!
These are amazing! x