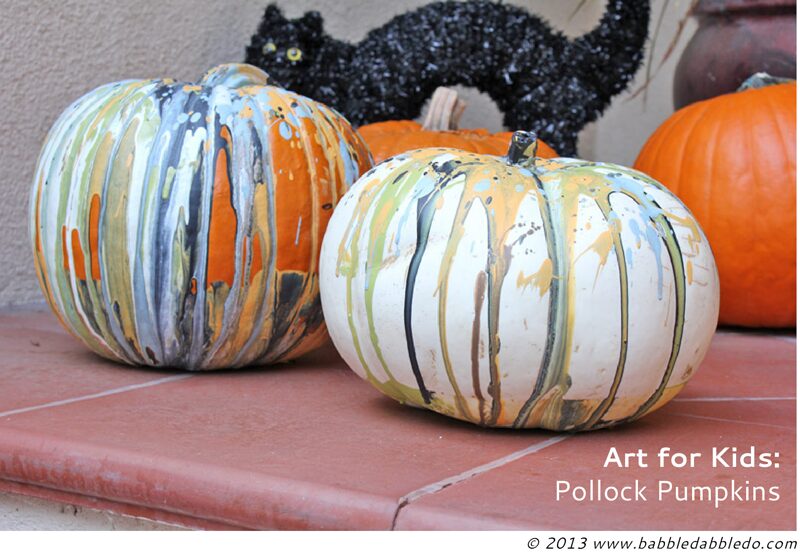
I’m always impressed by the number of awesome pumpkin decorating ideas on the web. There is never a shortage of unique and interesting ways to decorate a pumpkin with or without carving! For our little twist on pumpkin decorating ideas we turned to a great modern artist: Jackson Pollock.
So c’mon, what kid wouldn’t love throwing and dripping paint all over pumpkins? Well as it turns out, my kids! I was surprised how locked into using tools in a certain way my kids already are. No matter how many times I told my 4 year old we were going to be painting the pumpkins without a brush she insisted SHE wanted to paint them with a brush. I told her we would be working with paint and using the brush but not like we normally do. After showing my kids how to drip paint I gave my daughter the brush anyway and she used it in the traditional manner but at least she got a peek at how to “paint” something in an unconventional way.
A note on the paint:
We used leftover interior latex paint from our home. Yes, this is not the most child-friendly paint, but if your child is old enough to properly understand that paint doesn’t go anywhere near their mouth and is not intended for finger-painting, then you can decide if you are comfortable using it as an art material. Interior latex paints are of low toxicity as long as you steer clear of brands that include formaldehyde. And the primary toxicity to working with latex paints has to do with inhaling the fumes. So do this project outside! For more info on interior latex paint see this article: Latex Paint.
If you wish to use a more child friendly paint I suggest powdered tempera mixed to a pourable consistency.
Pollock Pumpkins
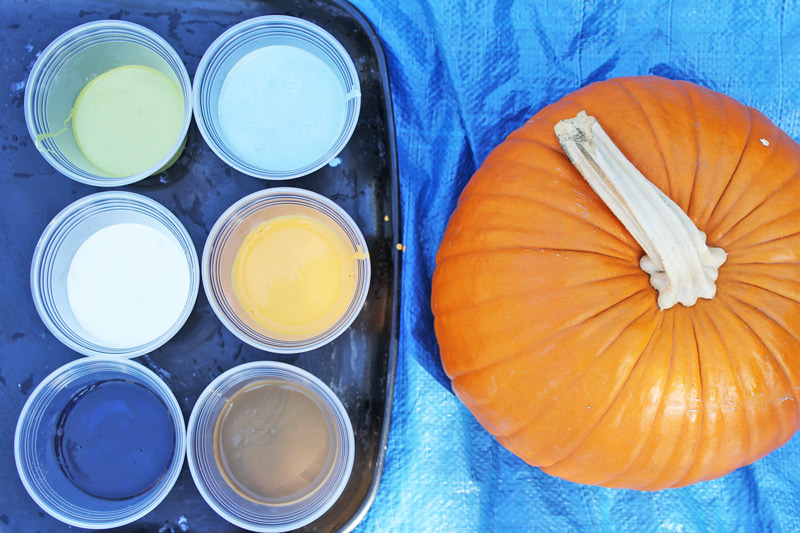
Materials
- Paint- see note above
- Tarp or plastic sheeting
- Cups
- Pumpkins
- Wide bowls you don’t mind donating to the cause of art!
- Large paintbrushes- the type you would use to paint trim inside a house
Instructions

- Step One Lay your tarp outside in a comfortable, preferably as flat as possible, location.
- Step Two Place each pumpkin on the top of an upside down bowl. Make sure the pumpkin is relatively stable. This will allow paint to drip off the pumpkin rather than have the pumpkin sit in pool of paint. Trust me I learned this the hard way and the pics can testify to that!
- Step Three Pour each of your paints into a large plastic cup.
- Step Four Get pouring! Start by pouring one color of paint on top of a pumpkin. You’ll want to pour enough so that it drips down the sides.
- Step Five Continue pouring using different colors. To move evenly distribute the paint you can slightly tilt the pumpkin to make the paint drip in the direction you desire.

- Step Six Pollock it up! Now take your paintbrush and lightly fling or drip paint onto it. Since this can quickly get super messy be sure that only one child is doing this at a time. Anyone within the vicinity can get dripped on! I opted to let my kids drip only since flinging the paint from a brush in a controlled manner is still slightly above their skill set. But if you are using tempera paints, wearing old clothes, and don’t mind a mess, let your kids go to town with this step. I can see them loving it.
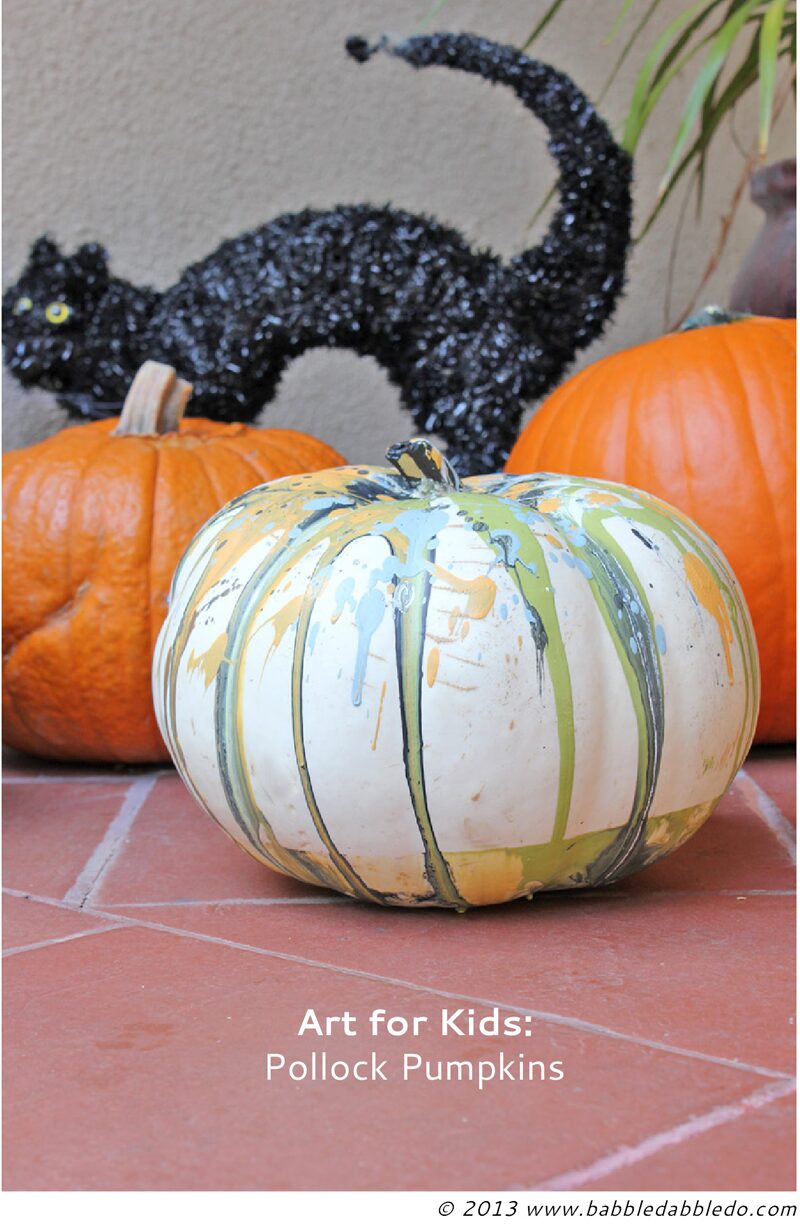
- Step Seven Let your pumpkins dry.
You’re done! Display them on your front porch. If you plan to place them indoors make sure the paint is completely dry first. You’ll see here that my daughter lovingly tried my technique but eventualy made her way back to the paintbrush!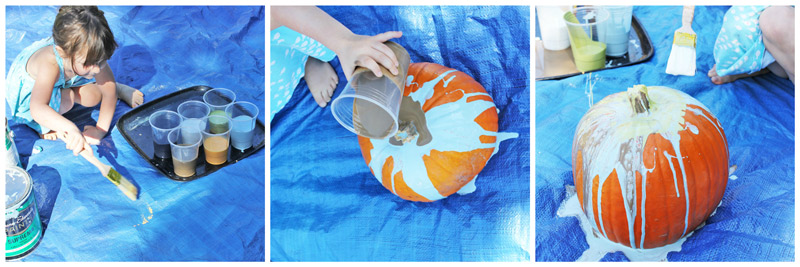
Looks Like
Jackson Pollock of course! I remember my dad enlisting our help as kids to create some Pollock inspired artwork for his office and after that introduction to the great artist I have continued to be inspired by his work. Pollock popularized the technique which is now called drip painting and refers to paint being dripped onto a canvas. In reading about him again for this post I learned he may have been influenced by Janet Sobel, a female artist whose work is also stunning.
More
Do you like working with art materials in unusual ways? Try out our melted crayon art project. And if you like painting on usual objects don’t miss the Rainbow Tree!
With so many ideas out there for decorating pumpkins this fall, I just knew we had to get in there and get creative! Sometimes I beat myself up when things don’t look at pretty as I imagined or when my kids don’t share the same level of enthusiasm for a project as me. Still I persevere because process is really more important than product. And I think it’s perfectly fine to show a child how you intended the project to work but then let them give them the freedom to do it as they see fit or at all. As a control freak by nature this is still a lesson I struggle with on a daily basis….hands off the kid’s art, mom!
Leave a Reply