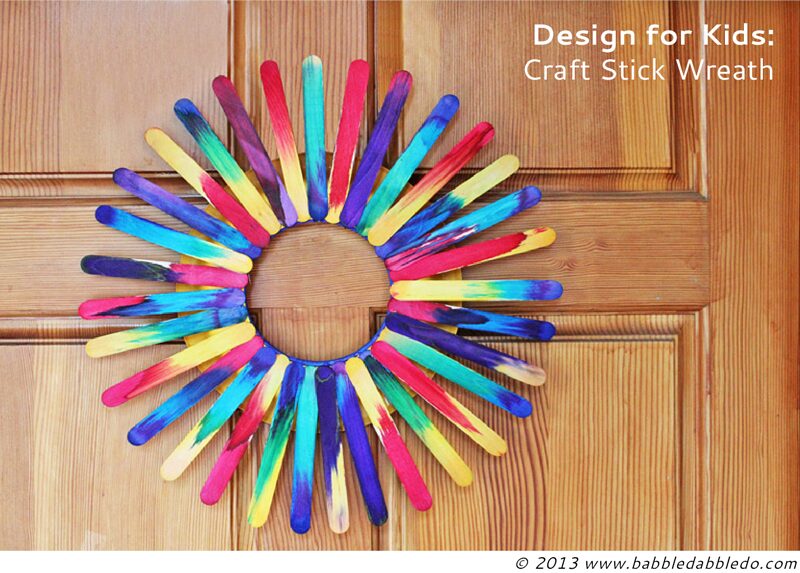
Anyone else out there love wreaths any time of the year? I LOVE a good DIY wreath and I knew this Craft Stick Wreath would be a great way to put our funky Dip Dyed Craft Sticks to good aesthetic use! It’s unbelievably easy, just crafts sticks, glue and a paper plate! Who knew something so fancy could be made from such humble materials.
 I think it turned out be a nice little design project for kids and grown-ups alike. Our version is more geared towards older kids and grown-ups but if you like the simplicity of the craft stick and paper plate wreath we have some tips below for making it more suitable for the littler ones.
Note: This post contains affiliate links to products.
Craft Stick Wreath
Age Appropriateness: 7+ (must be comfy using a hot glue gun). See below for instructions for ages 4+
Materials
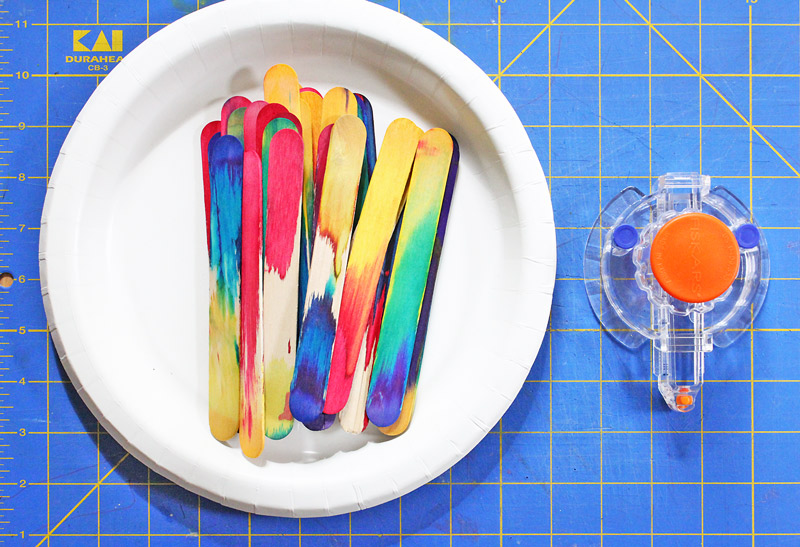
- Dip Dyed Craft Sticks
- Paper Plate
- Scissors or Circle Cutter
- Spray Paint (optional)
- Hot Glue Gun and Glue
- Hole Punch
Instructions

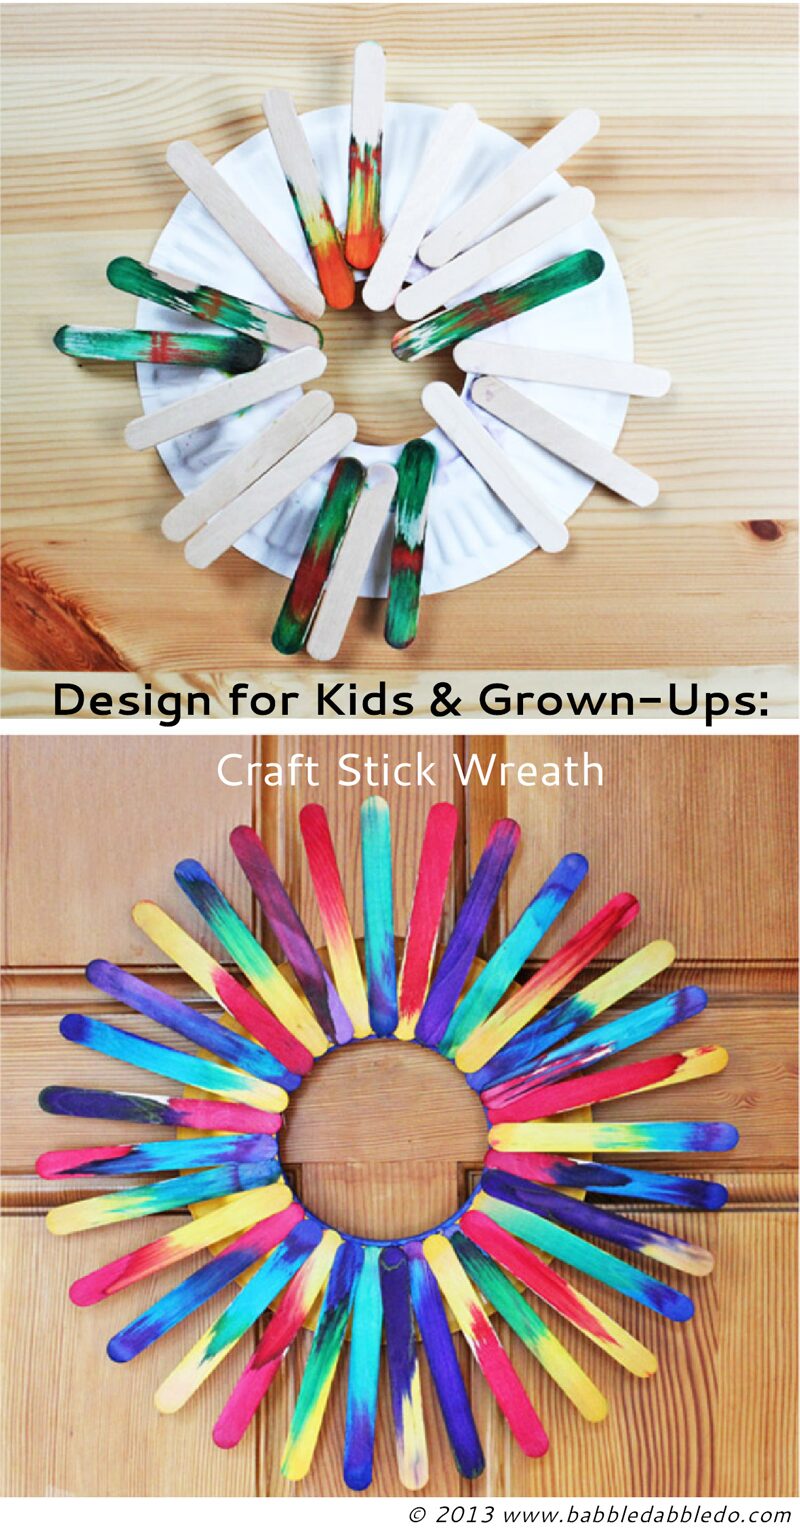
- Step One Using a round dessert plate draw a circle on the plate roughly 4-5” in diameter. Cut out the circle. If you have a fancy circle cutter (I finally get to use it!) you will get a nice clean circular cut.
- Step Two Spray Paint the plate a nice background color that matches your craft stick palette. Let dry.
- Step Three Start laying out your craft sticks around the paper plate. Start by placing sticks in the 12, 3, 6, and 9 o’ clock positions. Glue the sticks down placing a dab of hot glue on the back of each stick. Align the tip of the stick with the edge of the center hole. Also make sure to adjust the sticks so that they point toward the center of the circle.
- Step Four Add your diagonal sticks and glue those down.
- Step Five Continue filling in the remaining spaces and gluing your sticks down, making sure the sticks are pointing to the center of the wreath.
- Step Six (optional) Add a dyed embroidery hoop at the wreath center to give the wreath some depth. I couldn’t help myself, the industrial designer in me had to have an edge here but it’s not necessary unless you’re Type A like me!
- Step Seven Punch a hole in the top of the paper plate to be able to hang your wreath.
You’re done! Display that puppy!
Make it more kid-friendly (ages 4+):
- Make your wreath from a small paper dessert plate. Cut out the hole in the center leaving a generous flat surface that allows the sticks to naturally sit level on the back of the plate. Use mini craft sticks and white glue in place of the hot glue.
- Skip dying the sticks. Make the wreath using plain craft sticks and have your child paint the sticks and wreath using tempera or acrylic paints.
Here is my 4 year old daughter’s version. I think it’s very sweet.

Looks Like
I can’t make anything in a starburst shape and not immediately think of George Nelson. I know that this wreath looks nothing like Nelson’s iconic Atomic Ball Wall Clock but the simplicity of the star shape in decorative design reminded me of this famous modern object. Nelson was one of the first modernist industrial designers and modernism is all about clean simple lines and straightforward design. I happen to think our wreath has some of those ideas packed in there since it’s made of just a few very basic materials: craft sticks and a paper plate.
More
If you liked making something pretty out of very basic materials you should check out our Cosmic Suncatchers. If you love wreaths be sure to stop in here for some grown-up ideas for holiday wreaths. And if you like fun art projects for kids to fancy up your home be sure to make some Faux Stained Glass!
Tis the season to make a wreath! Our Craft Stick Wreath is an all year round wreath, the colors actually make me think of spring or summer. To make it more wintery you could use sticks dyed in holiday colors. There so many offshoots for this DIY wreath. And if you love design for kids this is the perfect easy project to get them excited about all things design!
Oh, I love your dip dyed sticks! Beautiful project 🙂
Thanks Onel! I love love love your log roll hairpin! Pinned!
How pretty! My name is Katie and I host Fall Into the Holidays. All entries get pinned. I would love to have you link up! This week’s round is still open!
Hi Kate! Thanks for inviting me! I love your blog and especially the name. Makes me smile every time!
Such a cute idea! I bet kids would love making this. I’m hosting a pillow covers giveaway that you should enter.
Thanks for stopping by and letting me know about your giveaway Kayla!