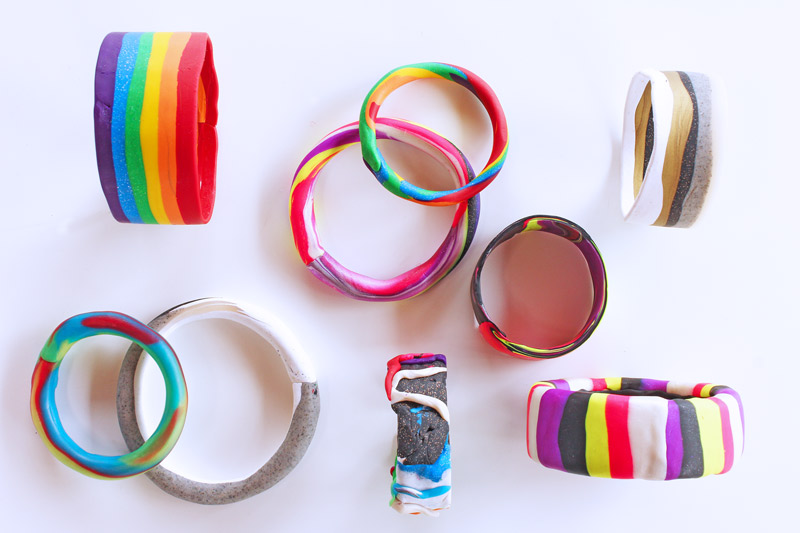
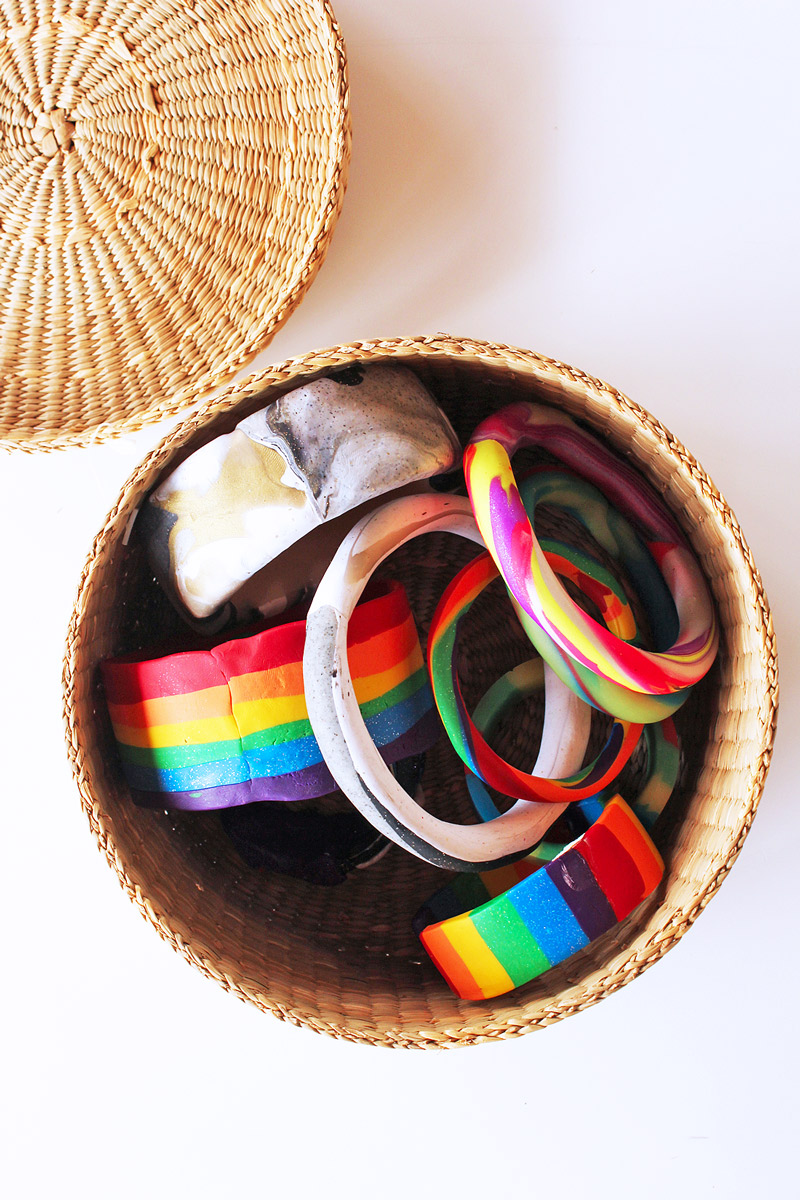
You need more clay in your life…no really you do, especially if it’s polymer clay! Today’s polymer clay tutorial will walk you through how to make 6 different types of bracelets using this wonderful material.
This post contains affiliate links to products I love and recommend to my readers.
Polymer Clay is one of my favorite art materials because it’s easy to create with, colorful, and you can cure it in the oven in about 15 minutes! But despite all that I am constantly surprised by how many people tell me they are terrified of clay, especially polymer clay because they say it looks too complicated to use…. For that reason I created today’s tutorial; I bet after reading this you’ll be creating clay projects like a champ! The projects are suitable for both kids and adults and are noted as such. Now go forth and make some awesome jewelry!
Note: For this project I experimented with Premo Clay by Sculpey. Premo is a little fancier than your basic Scupley; it comes in some really interesting variations, like stone, glitter, fluorescents and even translucent colors. The added dimensions give a little extra flair to clay projects, and since we are tackling jewelry I thought this would be the perfect time to flair it up!
This post was sponsored by the wonderful Create for Less. All opinions are my own. Create for Less is fantastic online supply source for all things creative! I highly recommend you check out the great discounts they offer on art and project supplies.
6 Clay Bracelet Tutorials
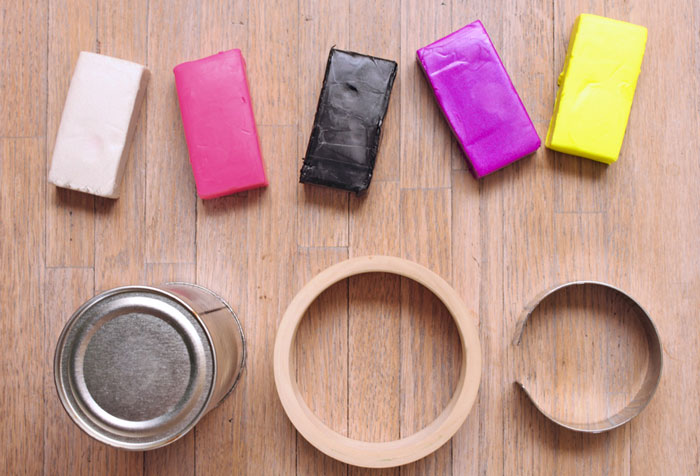
Materials
- Polymer Clay This is fun variation to try: Premo Clay by Sculpey
- Wood Bracelet Form
- Metal Bracelet Form
- Empty Aluminum Cans (various sizes)
- Rolling Pin
- Xacto knife (adults only) or Clay Cutting Tools (kids)
- Baking sheet
- Oven
Instructions
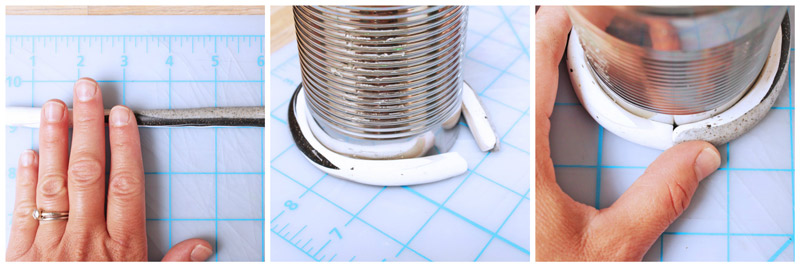
Polymer Clay Tutorial 1: Wrapped Can
Best for grown-ups and older children!
Did you know you can use empty metal cans as forms for bracelets? Score for recycling! Small cans are great for child-sized bracelets, soup cans and large cans are perfect for adults’ wrist sizes. Make sure all sharp can edges are removed or dulled.
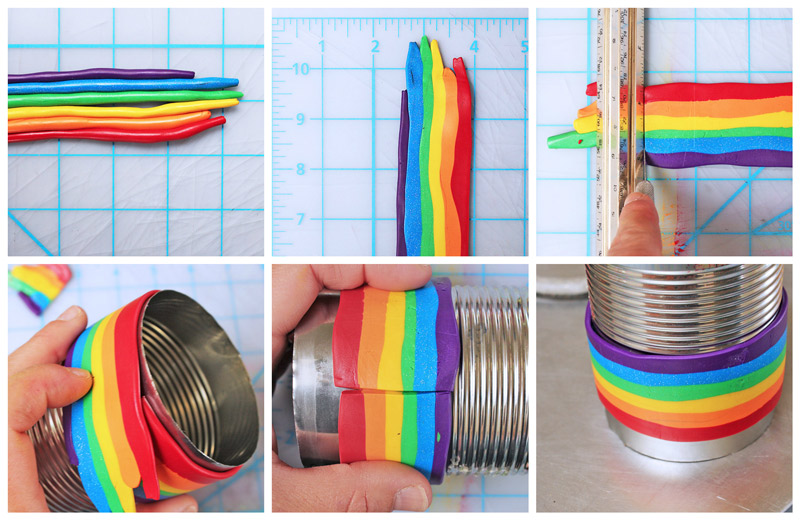
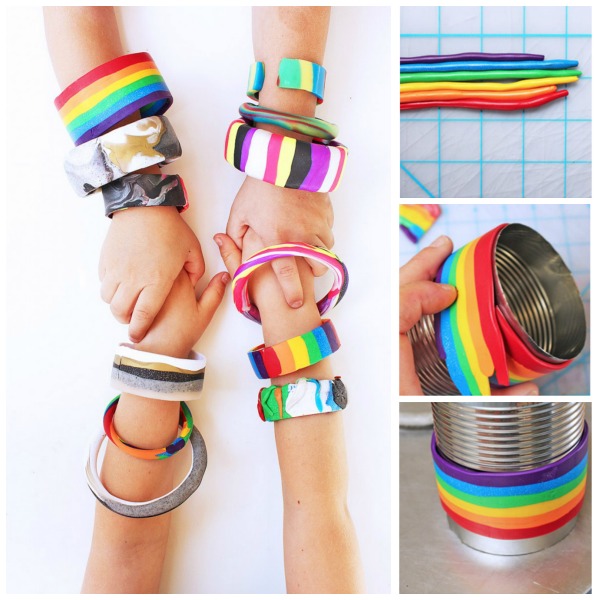
- Step One Select the color palette you will be using. We used this Sculpey color set to make RAINBOW bracelets!
- Step Two Start kneading each individual color to soften it up.
- Step Three Roll out each color into a long strand and group together to form stripes.
- Step Four Flatten the clay using a rolling pin. A continuous loop clay bracelet can be thinner than the open cuff style because it won’t be subject to bending and therefore is less fragile. I made ours about 1/8” thick.
- Step Five Wrap the can with the striped clay and trim to create a straight seam. Press the seam edges together to bond the clay.
- Step Six Bake the clay according to the manufacturer’s directions. Sculpey recommends 15 minutes per ¼” of thickness at 275 degrees Fahrenheit. I baked our bracelets for 20 minutes.
- Step Seven Remove from the oven and let cool. Gently slide a butter knife between the inner surface of the clay and the can to release the bracelet from the can. It make take a little working but it will come off!
Polymer Clay Tutorial 2: Wrapped Can 2
Best for kids!
- Step One Select the color palette you will be using.
- Step Two Start kneading the colors together to form a marbled chunk of clay.
- Step Three Roll out the clay into a long, thick strand, ours was about ½” in diameter.
- Step Four Wrap your clay strand around a an empty can. Trim the ends to form a straight seam and then press the seam together to bond the clay.
- Step Five Bake the clay according to the manufacturer’s directions. Sculpey recommends 15 minutes per ¼” of thickness at 275 degrees Fahrenheit. I baked our bracelets for 20 minutes.
- Step Six Remove from the oven and let cool. Gently slide the bracelet off the can. There is some give to baked polymer clay so keep rolling and pulling on it to remove it from the can.
You may also enjoy:
How to Make Giant Clay Beads
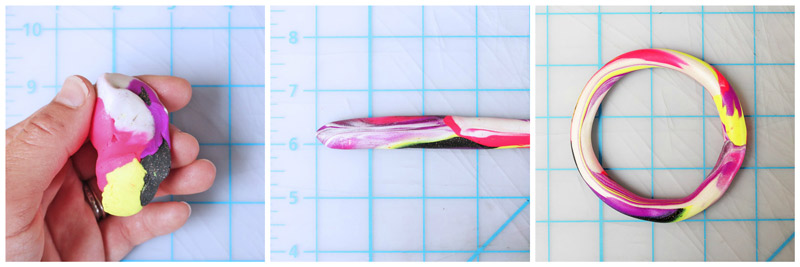
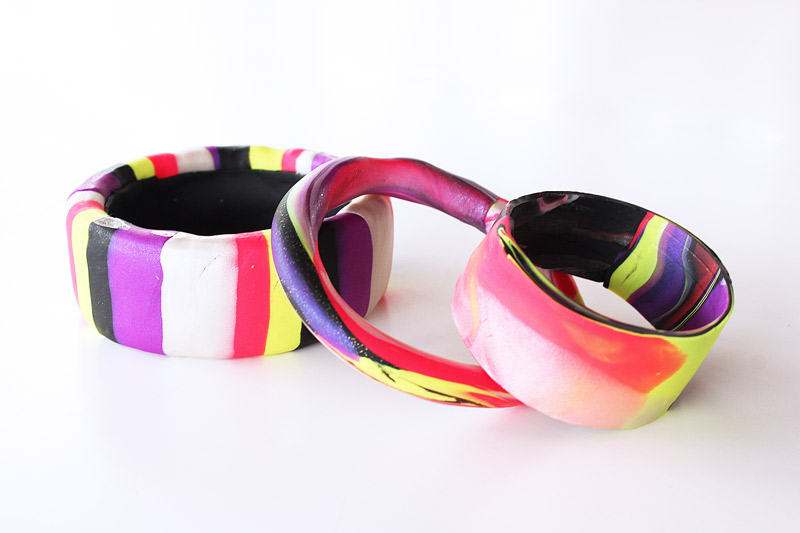
Polymer Clay Tutorial 3: Free Form
Best for Kids!
This is the same as the tutorial above but does not use a can. The final baked bracelet will not be perfectly round.
- Step One Select the color palette you will be using.
- Step Two Start kneading the colors together to forma marbled look to your clay.
- Step Three Roll out the clay into a long, thick strand, ours was about ½” in diameter.
- Step Four Form the strand into a circle of the desired bracelet diameter. Trim the ends to form a straight seam and then press the seam together to bond the clay.
- Step Five Bake the clay according to the manufacturer’s directions. Sculpey recommends 15 minutes per ¼” of thickness at 275 degrees Fahrenheit. I baked our bracelets for 20 minutes.
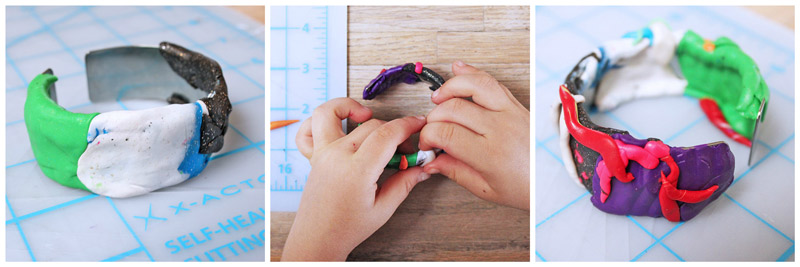
Polymer Clay Tutorial 4: Wrapped Metal
Best for Kids!
These metal bracelet forms can either be reused OR integrated into the final bracelet. For kids it’s easiest to have them completely cover the bracelet form.
- Step One Select the color palette you will be using.
- Step Two Start kneading each individual color to soften it up.
- Step Three Press your clay around the bracelet form and decorate as desired. Be sure to press details into the clay to bond.
- Step Four Bake the clay according to the manufacturer’s directions. Sculpey recommends 15 minutes per ¼” of thickness at 275 degrees Fahrenheit. I baked our bracelets for 20 minutes.
- Step Five Remove from the oven and let cool.
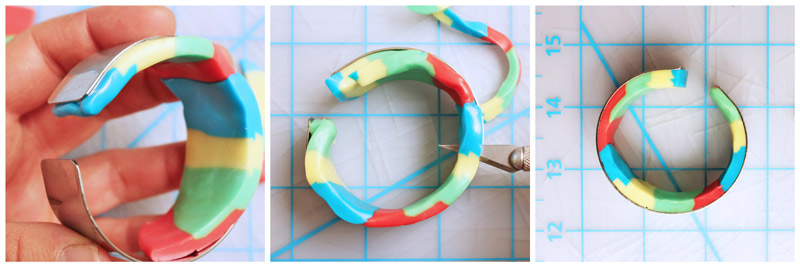
Polymer Clay Tutorial 5: Metal Formed
Best for grown-ups and older children!
This tutorial uses the metal bracelet structure as a form only.
- Step One Select the color palette you will be using.
- Step Two Start kneading each individual color to soften it up.
- Step Three Roll out each color into a long strand and group together to form stripes as in the wood wrapped bracelet tutorial.
- Step Four Flatten the clay using a rolling pin. For an open cuff style bracelet that will be made of clay only, you want to make sure the clay is at least ¼” thick. If you make it too thin, it will be fragile and might snap when bending it around your wrist.
- Step Five Cut your clay into sections that are slightly longer width of the bracelet form
- Step Six Press one section onto the metal. You can either use the outside of the form or the inside. I found that finished clay is shinier when it bakes against a metal surface so using the inside of the form will yield a shiny outer surface to your bracelet. Continue pressing the sections onto the form and to each other. Make sure your seams are pinched together and flattened. The weakest part of this bracelet is the section seams so try and bond them together by gently pressing the clay edges together and burnishing slightly.
- Step Seven Trim the dyes with an Exacto knife by running it gently along the metal edges. Soften the trimmed edges with your fingertips.
- Step Eight Bake the clay according to the manufacturer’s directions. Sculpey recommends 15 minutes per ¼” of thickness at 275 degrees Fahrenheit. I baked our bracelets for 20 minutes.
- Step Nine Remove from the oven and let cool. Gently pop the bracket out of the form.
Polymer Clay Tutorial 6: Wrapped Wood
Best for grown-ups!
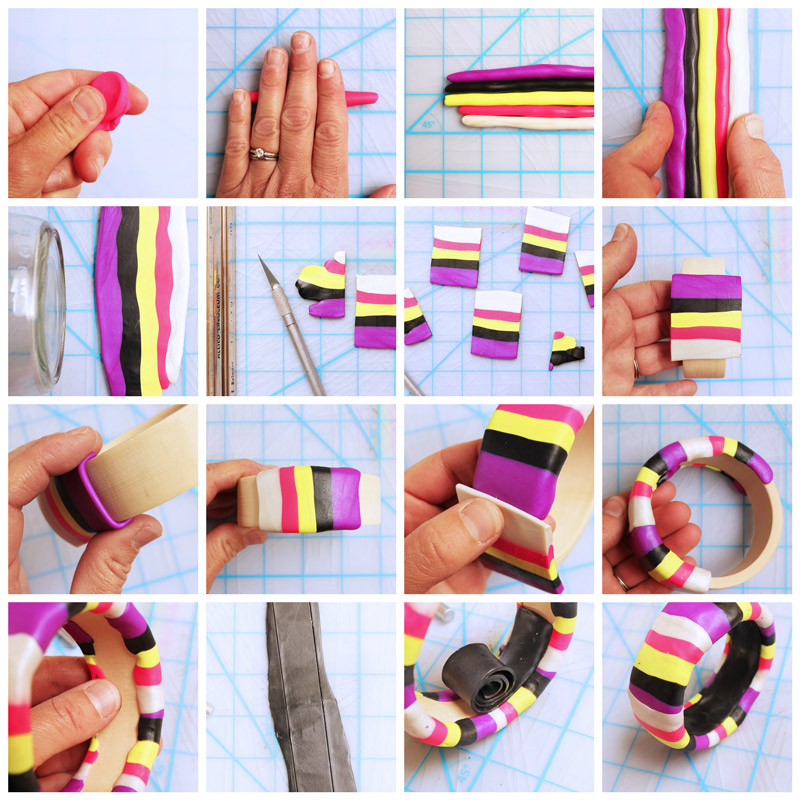
- Step One Select the color palette you will be using. I worked with 5 colors.
- Step Two Start kneading each individual color to soften it up.
- Step Three Roll out each color into a long strand and group together to form a striped pattern. Pinch the stripes together to help bond the clay.
- Step Four Flatten the clay using a rolling pin. For a wrapped bracelet you want the clay to be thin, about 1/8” inch thick.
- Step Five Cut your clay into sections that are the width of the wood bracelet + the thickness of the bracelet x 2. For a 1” wide, ¼” thick wood bracelet your sections should be 1 ½”.
- Step Six Press one section onto the wood and around the edges. Continue with the remaining sections until you have completely covered the wood bracelet.
- Step Seven Pinch the edges of the clay around to the inner part of the bracelet. Be careful not to let these edges get too thick.
- Step Eight Roll out a long piece of clay to create the bracelet inner lining. You want it to be about 1/8” thick and 1” wide. Remember that the clay you put on the inside of the bracelet will decrease the bracelet’s inner diameter and make it smaller. After rolling out a section, trim it to match the inner diameter of your bracelet.
- Step Nine Lightly roll the clay lining into a spiral and then carefully unroll it on the inside of the bracelet to cover the rough edges of the striped clay. Gently press the sides into the striped clay to connect.
- Step Ten Bake the clay according to the manufacturer’s directions. Sculpey recommends 15 minutes per ¼” of thickness at 275 degrees Fahrenheit. I baked our bracelets for 20 minutes.
- Step Eleven Remove from the oven and let cool.
Whew! Inspired yet? There are so many more variations but I had to stop myself!
I hope this polymer clay tutorial provided you with some reassurance that you can make beautiful things from clay without any previous expertise in clay or jewelry making! It’s such an inviting material for kids to create with; my daughter loves the colors and the feel of working with clay and when baked, it is very durable, making it a really great choice for jewelry.
UP NEXT:
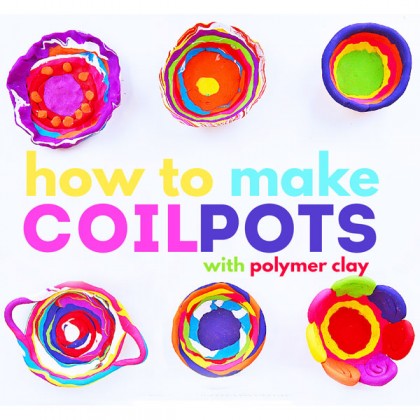
If this post got you feeling confident in your clay making skills, try making COIL POTS from Polymer Clay:
Fill your child’s life with more art, design, science, and engineering!
Subscribe to our free newsletter and check out our FB page where I share tons more creative ideas and resources from around the web.
Spread Creativity like wildfire: PIN THIS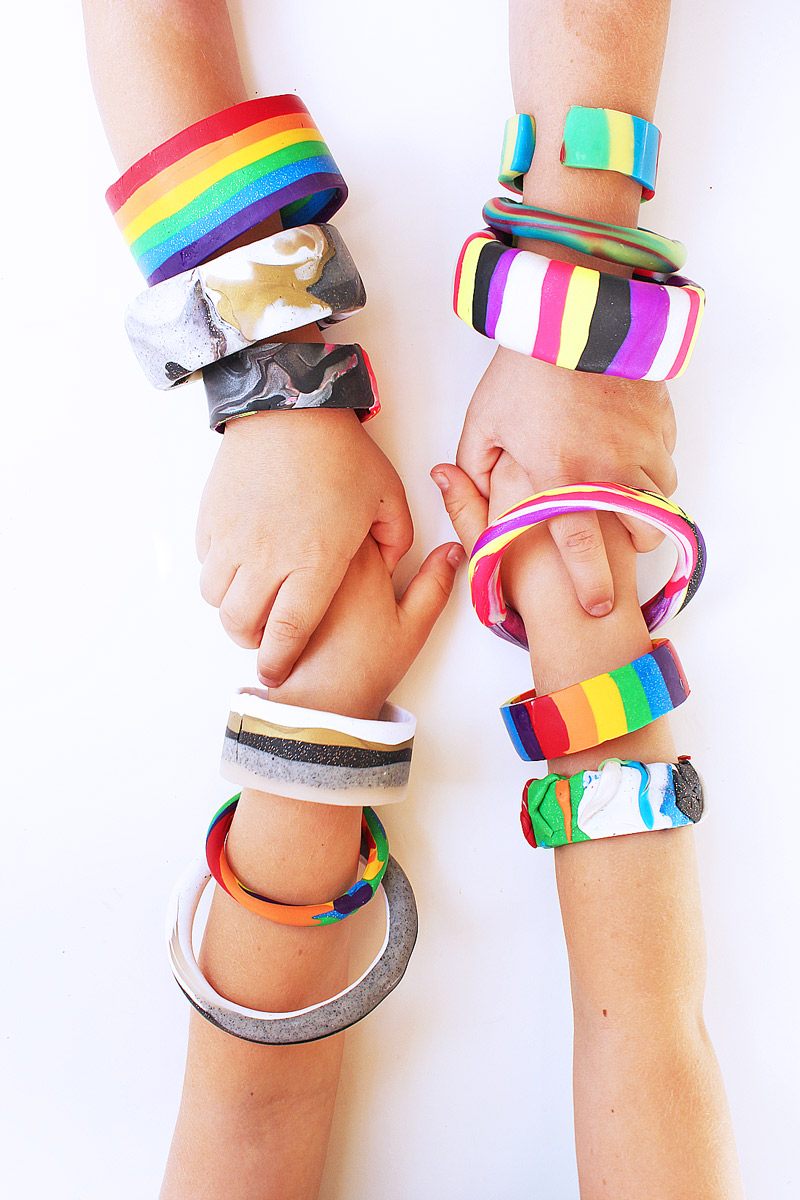
SHARE ON FB
These are SO gorgeous, Ana! What a fun craft for kiddos and their grownups 😉
Thanks Stephanie! I don’t know who had more fun, me or the kids……
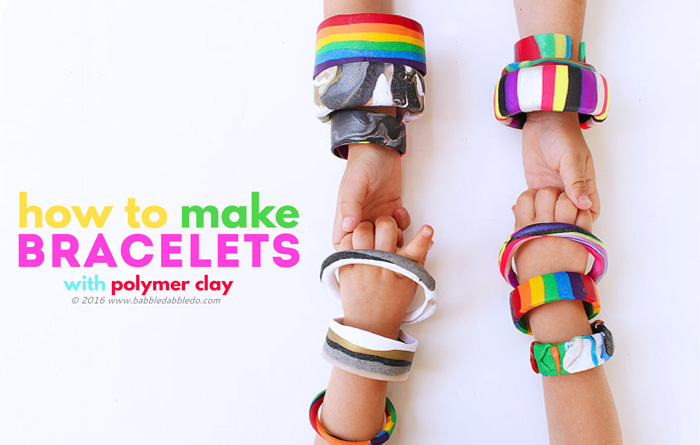
Ok. ARE YOU KIDDING ME???!!!! That hand picture might be the most beautiful thing I’ve ever seen!!!! These are fantastic and you KNOW I love me some polymer clay!!! Fantastic!!!
🙂 My kids were fighting over who got to put on more bracelets; to ease the tension I asked them to hold hands and snapped a few pics! And BTW it’s all your fault I am now into polymer clay…..
These are so fun and colorful! This would be a wonderful craft for my daughter’s birthday party. Thanks for the great post. I didn’t know about Create for Less and are happy to have discovered them.
Yay Kristen! These would make a great birthday party project and fun for kids to take home as party “swag”.
Gorgeous! Gorgeous!
Thanks Leslie! I love Sculpey colors!
Oh! I didn’t even know about Create for Less before this. Thanks for introducing me to another source I can obsess over. I’m seriously in love. And also?!?!? Your bracelets are freaking gorgeous. I haven’t ever tried Sculpey, but I have a feeling my daughter would love making these bracelets.
Thanks Jeanette! Create for Less is a very good find 😉 I avoided Scupley for the longest time because I didn’t know where to start….now I don’t know when to stop!
Wow these look so cool – I love it! Pinned 🙂
Thank you so much Anna! We had a great time making them 🙂
Hi =)
Did you put the wood and metal in the oven with the items? I know silly question but just wondering thanks
Each tutorial has specifics but yes, both the wood and metal can go into the oven briefly 🙂