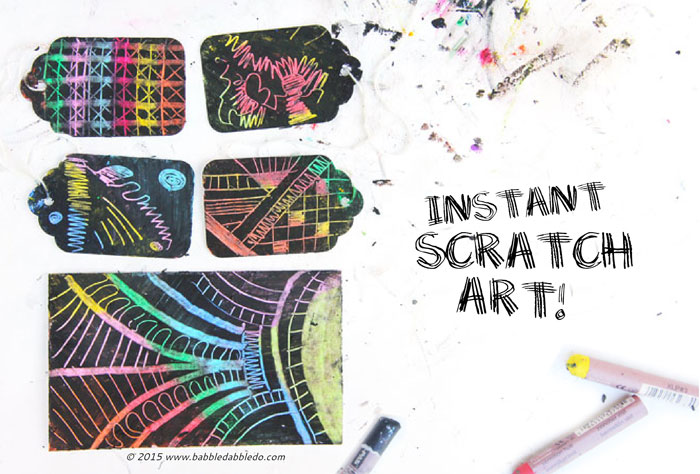
I often get asked if making your own art materials saves money. The honest answer is that sometimes it does, sometimes it doesn’t, a fact I find true of DIY projects in general. But cost is not the main reason I like to make things myself; I really just enjoy the exploration and I hope to pass on this fascination with how things are made to my kids. Case in point, these fun scratchboard cards!
 Can you purchase scratchboard at a low cost? Of course! But making it is a lot of fun, from coloring the hidden layer, to painting it, to finally scratching it. There are two methods for making scratchboard, one uses India Ink and the other uses tempera paint + liquid laundry detergent. I tried both methods and found perks to each. Here are the pros and cons to the two methods:
India Ink
Pros:
- Covers the card evenly and quickly
- Looks best when dry
Cons:
- The ink gets used up quickly
- The final surface chips a little when scratched
“Tempera paint + liquid detergent”
Pros:
- Easy to pull together on a moment’s notice with everyday materials
- Scratches really easily and doesn’t chip
Cons:
- The mixture gets a little frothy so the coverage is uneven
- Multiple coats required
In the end both methods work so pick which one is best for you! For this tutorial I used the Paint+ Detergent combo.
Scratchboard Cards
Materials

- White card stock cut into postcard size pieces (roughy 4″ x 6″) OR white note cards like these
- Crayons
- Painter’s tape
- Small roller brush
- India Ink OR Black Tempera Paint + liquid laundry detergent
- Shallow bowls
- Toothpicks or other items to scratch with
Instructions
- Step One Cover the surface you are working on; this is a messy project! Tape the back of your cards to the work surface.
- Step Two Using painter’s tape, mask off the edges of each postcard. I left about a 1/2″ border on all sides.
- Step Three Enlist your kids (or yourself) to cover the entire postcard with crayon. This is an important step. You can either use one color of crayon or multiple colors. I recommend using a few colors.
- Step Four If you are using paint and detergent, mix them together using a 1:1 ratio. Pour into a shallow bottomed bowl. I like to use recycled meat trays for this. If you are using India Ink pour it directly into a bowl/tray.
- Step Five Using your roller brush, cover the entire card with paint/detergent or India Ink. Let dry.
- Step Six Repeat with additional coats as necessary until the entire surface is covered. Let dry completely.
- Step Seven Unmask the cards carefully so as not to rip the card stock.

When the cards are finished the kiddos can scratch them using toothpicks or chopsticks to make drawings. Craftwhack did a similar project and has some fantastic ideas for different kinds of scratchers!

I absolutely love how these turned out! Scratchboard is a win win project because the final product always looks like a little piece of art no matter what the skill level of the child is, in fact I think the messier the scratching the better!

My kids loved scratching them and when they were done they asked if they could make thier own cards from scratch, pun intended.


These cards would be great as greeting cards, simply scratch your message on the front.
Also be sure to check out INSTANT SCRATCH ART using Oil Pastels!
Fill your child’s life with more art, design, science, and engineering!
Subscribe to our free newsletter and check out our FB page where I share tons more creative ideas and resources from around the web.
Spread Creativity like wildfire: PIN THIS!

FB SHARE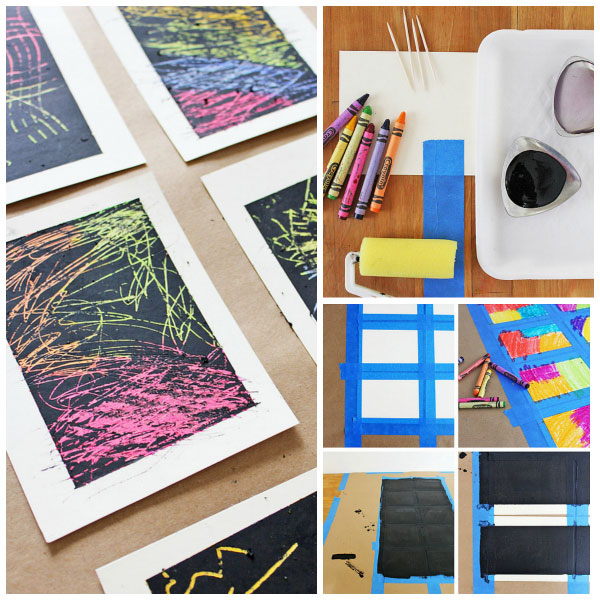
How fun! That makes really cool art. Thanks for sharing it at Monday Funday!
This is a great idea and such a fun activity! I’m pretty sure I will need like 12 million of these! Thanks for sharing. Please come link up to our Pattern Party starts the 1st of each month.
Get Your Crap Together
Thanks for the compliment Chelsea! I’ll definitely check out your linky party!
This is awesome!! Coming over from Monday Funday.
I invite you to come link up to our new #LetsMingle Monday social link party! We also have giveaways each week!
http://thefirstyearblog.com/2013/06/03/letsmingle-monday-1/
Beth @ The First Year Blog
Hi Beth, Thanks for stopping by! I’ll check out Let’s Mingle Mondays! P.S. Your blog is sweet!
I love this idea! The kids have received these as gifts (store bought), but I had no idea you could make your own. I think we will give this a try today. Thank you!! I followed you on Facebook. I would love for you to like me back. My page is Gina’s Craft Corner: http:facebook.com/ginascraftcorner. I posted on Diana Rambles, as well. I’d love for you to visit my blog: http:ginascraftcorner.blogspot.com.
Blessings,
Gina
Hi Gina,
So funny, I just commented on your Graffiti bag! I guess we have a similar aesthetic! I did check our your website and welcome to blogging. I am a 38 year old mom who is also leaning to sew, so I loved reading your bio. Following you on G+ 🙂
Ana
Thanks for the idea! I really like drawing on scratch boards but now i can just make them at home.^-^
You’re welcome! These are so much fun to make; I hope you enjoy it!
This is great! I’m going to make these for my kids to use to practice their spelling words on. Writing them on regular paper gets so boring. These are sure to cure that!
What a great idea Tara!
This looks like so much fun!
Do I have to roll the paint on or could I use a brush?
(thanks!)
You can use a brush but rollers will give you a more even coat of paint 🙂
Many years ago when I was in elementary school we use the ink but put comet in the mixture.