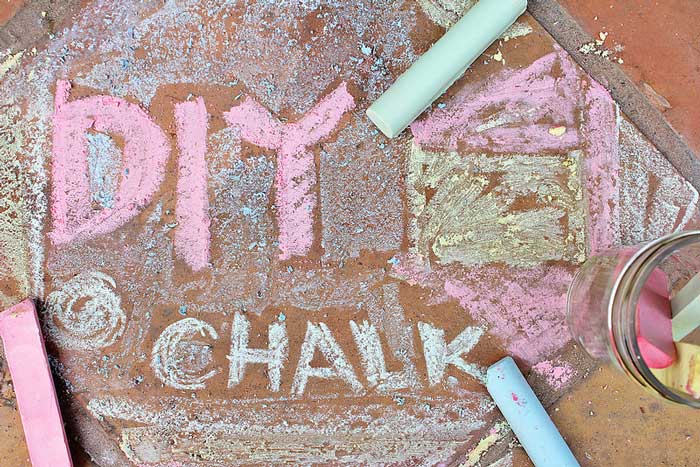
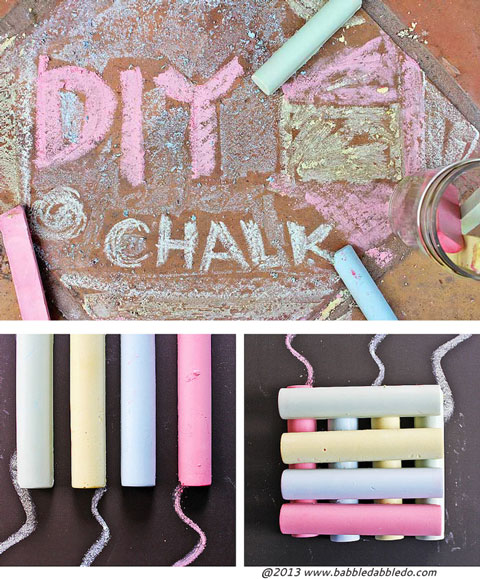
When I saw that making sidewalk chalk is literally mixing plaster with water and adding paint I almost flipped. Could it really be that easy? Well, the answer is, yes, it is that easy.
I recently purchased the book Eco-Friendly Crafting With Kids by Kate Lilley of the visually stunning blog minieco. It’s a really inspiring and beautiful book with a whole slew of cool projects for kids. In it Ms. Lilley shares a method for making homemade sidewalk chalk that I couldn’t wait to try. After googling homemade chalk I saw some other pointers and did some experimenting with different chalk batches so this tutorial is an amalgamation of what I have learned.
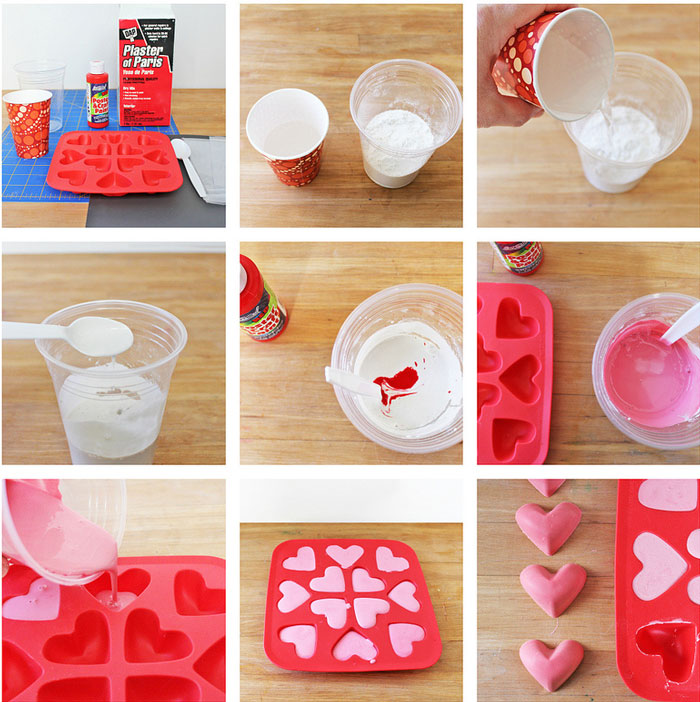
And if you caught my post earlier in the week about Chalkboard Paper Valentines you’ll see why I started out making heart shaped chalk…..until everyone I showed it to asked if they could taste it…oops! Now that’s something I remember from my days at Art Center College of Design: a product has visual cues, in this case if it looks like food it will be assumed to be food! My subsequent batches of more “chalk-like” chalk are also shown below.
DIY Chalk
Materials
- Plaster of Paris
- Cups for mixing
- Spoon
- Cold water
- Tempera (poster) paint
- Ice cube tray or flexible silicone mold
Instructions
- Step One Mix plaster in a plastic disposable cup using a 1:1 ratio of plaster to water. Make sure to really dig down to the bottom of the cup to mix everything. The mixture will be very milky and should not be too thick.
- Step Two Add paint. Eco-Friendly Crafting With Kids calls for powdered tempera but I found that liquid works just as well. Tempera is basically the same thing as poster paint. Mix well.
- Step Three Pour the plaster into your mold. Let dry for several hours.
- Step Four Pop out your chalk! After removing it from the mold you’ll want to continue to let it dry for another 72 hours or so before use.
You’re done making homemade chalk!
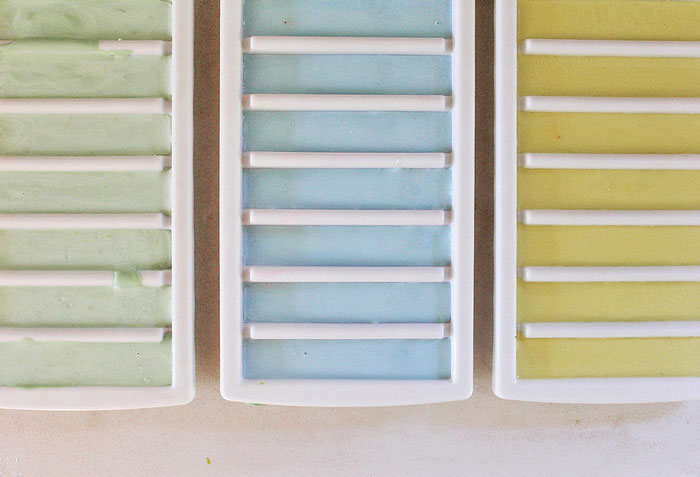
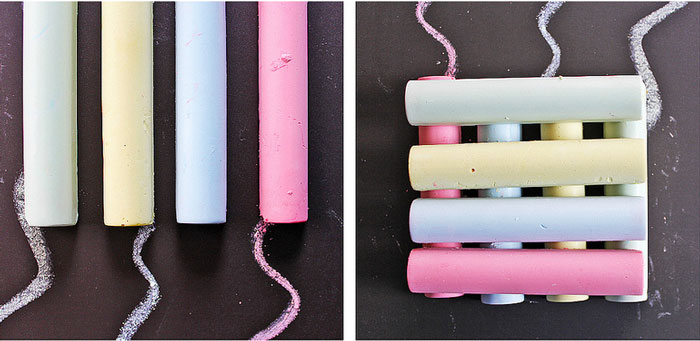
After the heart shaped batch I tried a round using ice cube tray molds that are long and skinny and designed to house ice for water bottles.
So after making 6 different batches of the good stuff here are some of my tips:
Homemade Chalk Do’s and Don’ts
- DO mix the plaster and water at a 1:1 ratio, not the ratio listed on the plaster container. The reason being that the thicker the plaster the harder it is to erase. You want your chalk to be flaky.
- DON’T add too much paint. It won’t take much to color the chalk and I’m not sure how stain resistant your chalk may end up if it’s mixed too vibrantly.
- DO let your chalk dry for as long as possible. It will be hard enough to remove from the molds within a few hours but needs time to really dry out before using. I found the best results came after waiting a minimum of 72 hours of drying time after making the chalk, 3-4 days is ideal. I said this was easy not fast! To speed up the drying process you can let the chalk sit in the sun during the day.
- DON’T use food coloring to color the chalk. I tried a batch colored this way and the food coloring tends to separate from the plaster and blend in unevenly. After a few days of drying it looks even more blotchy.
- DO use the most flexible molds you can find. The less flexible the mold, the more chance for breakage when popping out your chalk. I also found that more delicate forms have a tendency to break, so the thicker and more solid the shape you are creating from the mold, the less chance you have for breakage.
- DO designate the molds as crafting molds from here on out. I’m not sure of the safety of using them for food after use with plaster.
Have fun!
More:
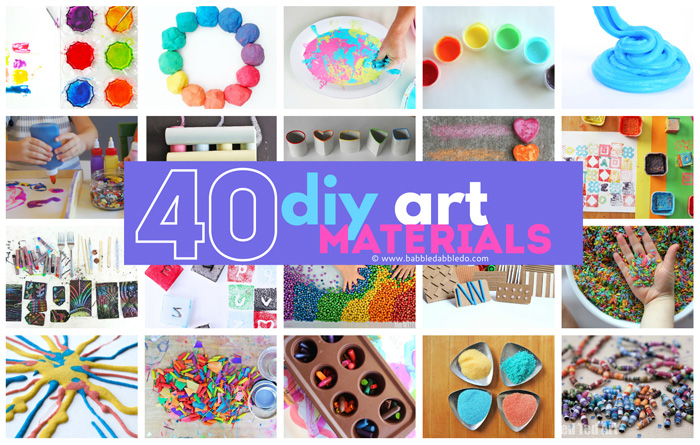
If you enjoyed this here are 40 more art supplies you can make yourself!
Spread creativity like wildfire: Pin this!
Wow, wow, wow, thank you for the tutorial! I need some flexible molds and I shall be on my way….
Let me know how the chalk turns out!
They do look good enough to eat! 🙂 Super cute to give instead of candy for Valentine’s Day!
Thanks Lorie! Love your blog BTW!
Fun idea with so many possible shapes!!
Thanks Diana!
Love your blog Ana! My boys and I have used this method to make sidewalk chalk and they LOVED it. Have you tried the chalk paint? That is fun too! 🙂
Thanks Kelsey! I have made chalk paint too but I mixed it so thick it was like painting with oobleck 😉 oops…. Glad you stopped by!
This is awesome! One tip I learned about Plaster, use Vaseline to “grease” the mold and it will pop right out,
That’s a great idea Tracy!
So if I would want to make white chalk, I would not add in the tempera paint? Or would you have to add white tempera paint? Also would washable tempera paint work? Thanks!
If you want white chalk simply leave out the paint 🙂
I don’t have any molds, but I’d love to give this a shot… Do you think dixie cups would work? The chalk would be shaped funny, but my daughter won’t know the difference.
They might work! Try the ones with a wax coated interior. If the cup sticks to the chalk you can always dampen the finished calk with water and remove any paper that is stuck on the outside.