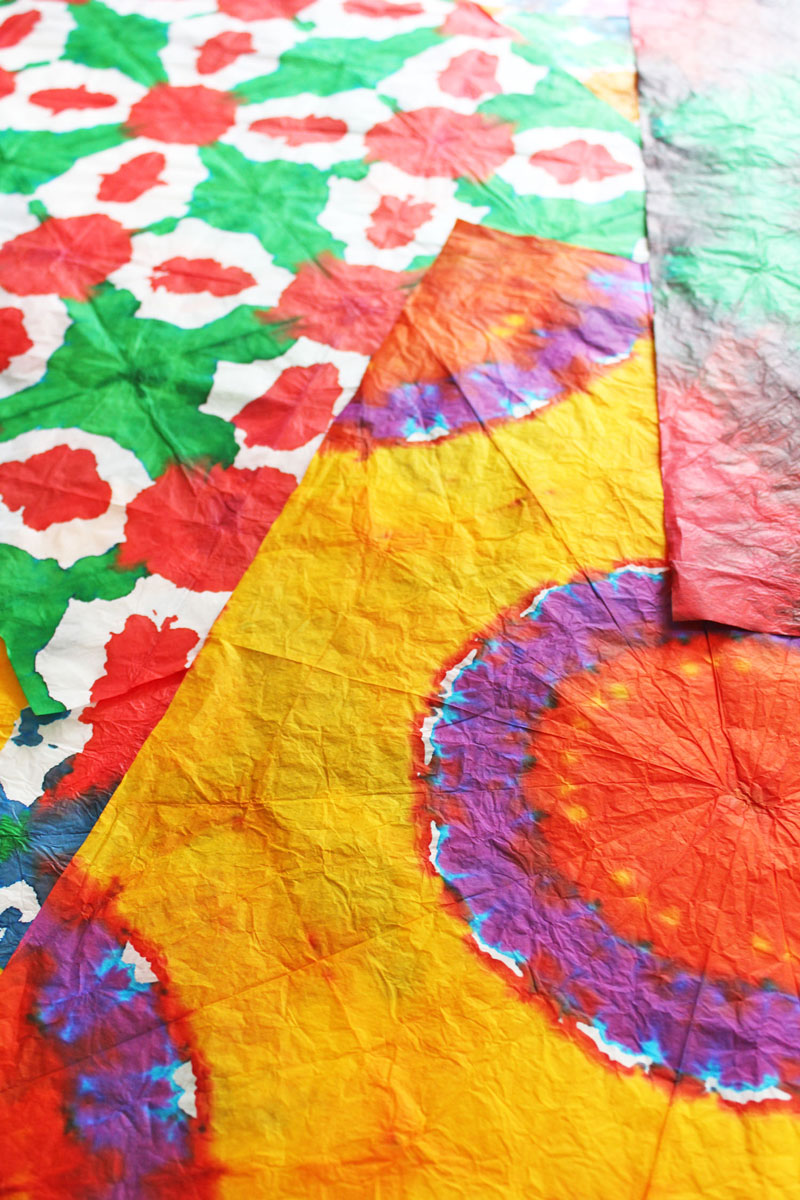
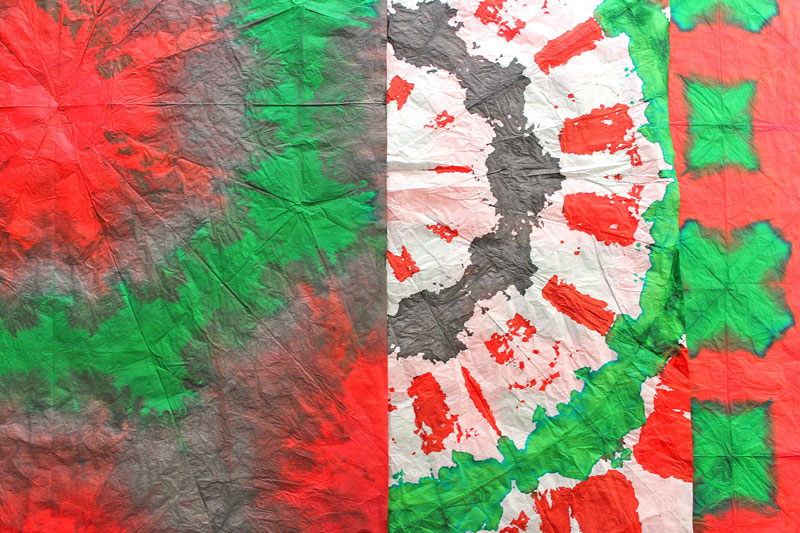
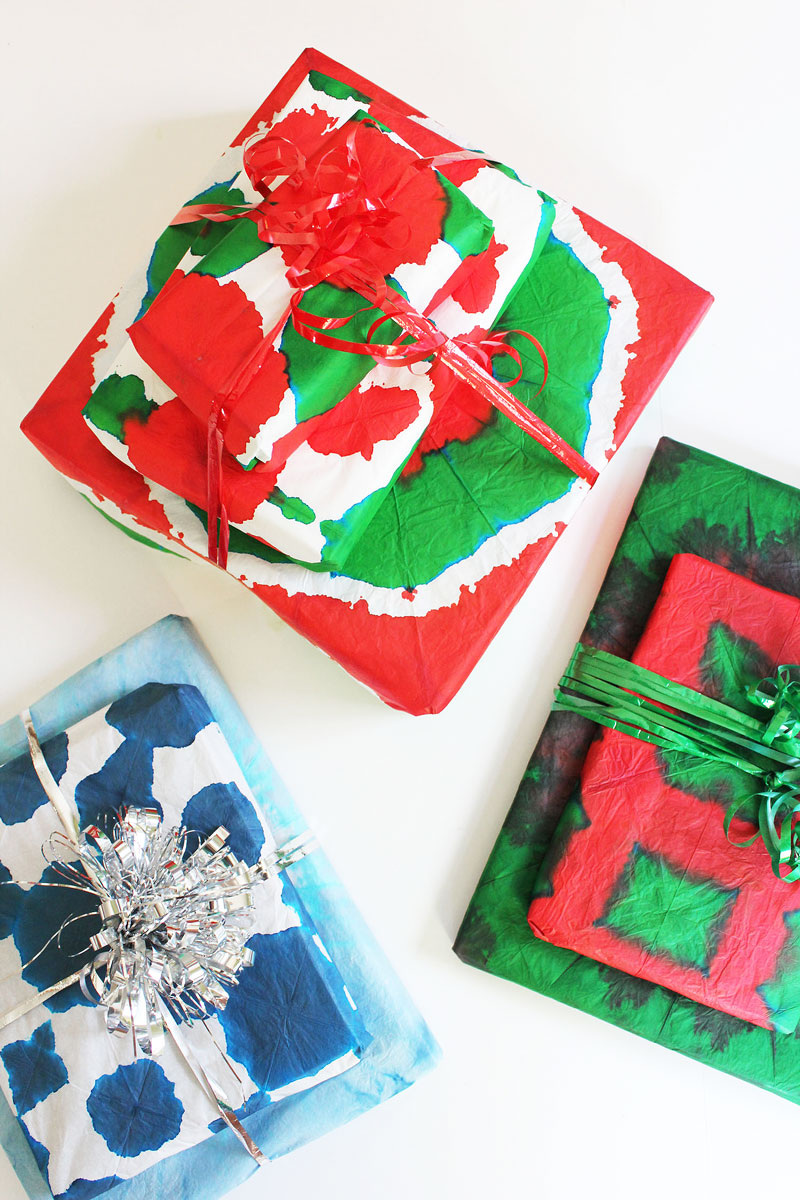
Whoever said tie-dying was just for t-shirts? Today we are going to learn how to make Tie Dye Gift Wrap, and I created three versions for the three major Winter holidays: Hanukkah, Christmas and Kwanzaa.
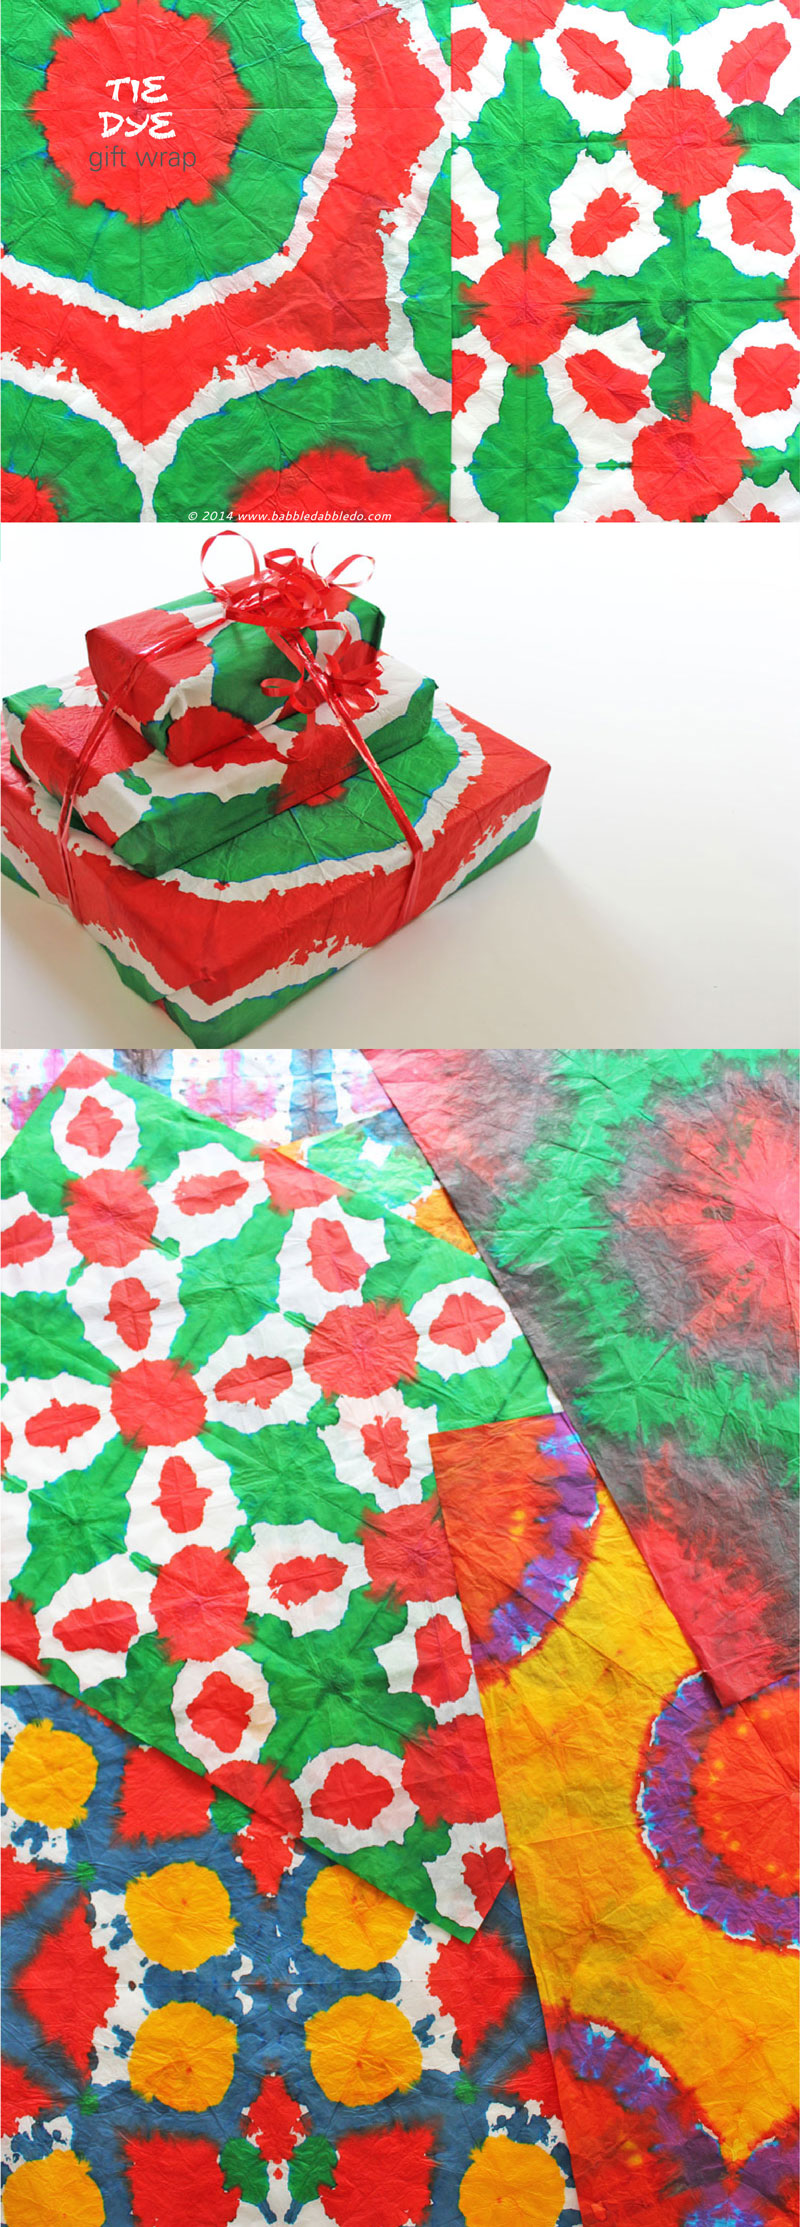
Okay so I’ve probably talked about my obsession with the 60’s before and I never ever get tired of tie dying ANYTHING. It’s just magical to unfold something that’s been wadded up and dipped in color to reveal a lovely print. This project is relatively easy, if you want to get fancy with the patterns please look online for tie dye techniques used on shirts, you can use them with tissue paper too!
This post contains affiliate links to products.
DIY Gift Wrapping Ideas: Tie Dye Gift Wrap
Materials
- White Tissue Paper We used a large size like this
but you can use smaller sizes too, just be sure they are big enough to cover gifts!
- Food Coloring / Liquid Watercolors
- India Ink
(optional for black)
- Rubber Bands
- Plastic Containers
- Newspaper
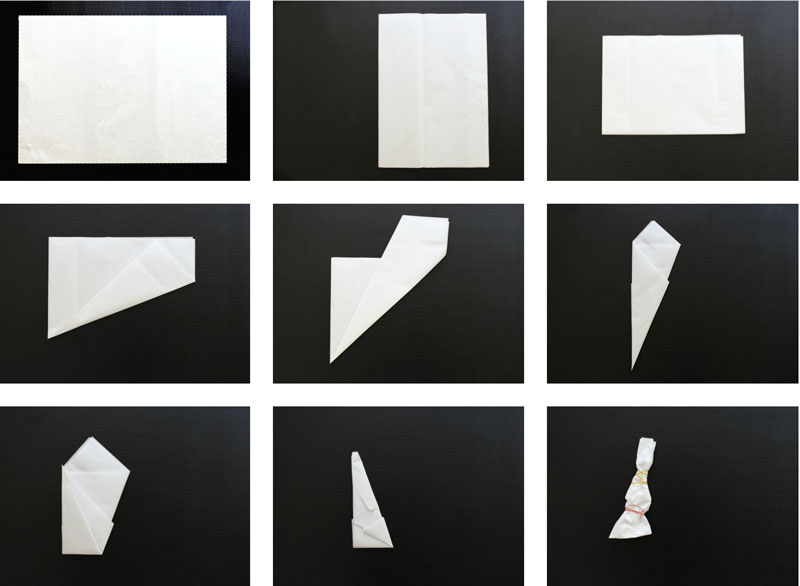
Folding Instructions
There is no right or wrong way to fold it; each type of fold will yield different results. Keep in mind is that the more folds you make the more intricate your pattern will be.
- Beginners Pattern Fold your paper half and then fold it into triangles.

- Diagonal Pattern Make your first fold diagonally across the paper, then start folding the long diagonal edge into an accordion shape. After that fold your paper into triangles.
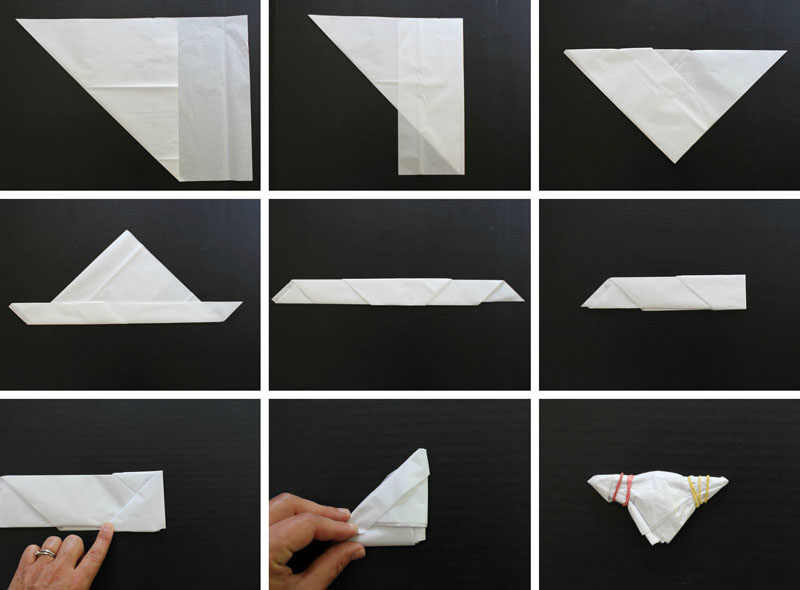
- Radial Pattern Fold your paper in half, then in half one more time. Now start folding the paper diagonally from the center point to create a radial pattern. Fold the point of your triangle in on itself a couple times and place rubber bands on the points of the triangle.
Tie Dying Instructions
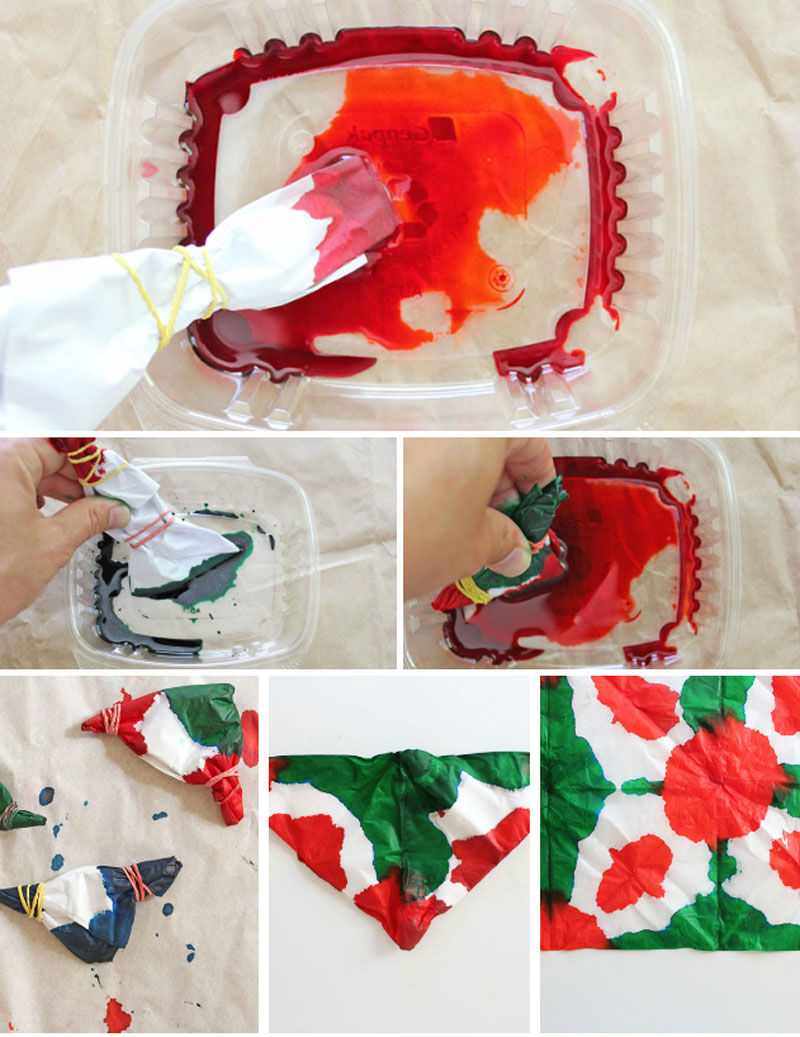
- Step 1 Create a work area by laying down newspaper over a table.
- Step 2 Add rubber bands around the end points of your folded design. Rubber bands help resist the dye.
- Step 3 Drop a generous amount of food coloring in separate bowls for each color you are working with. Use diluted India Ink (see tips below for ratio) to make black dye.
- Step 4 Dip one end of your paper into the food coloring and let the paper soak it up. This will take several seconds so be patient. Continue dipping the other points of your paper in other colors. You can also dip center sections of the paper by gently folding it and dipping the crease into the dye. Don’t worry too much about keeping the colors separate, the results of the colors mixing as they are absorbed makes for beautiful results.
- Step 5 Let the rubber banded paper dry on a piece of unfolded tissue paper (Eventually you can use this paper as holiday wrap too!). Let the paper dry for several hours.
- Step 6 Once it’s damp or dry, carefully unfold your sheet of gift-wrap making sure not to tear it. Ta-da!
- Step 7 To flatten out the paper ask an adult to iron it on a cool setting.
Tips
- Food coloring stains, so be sure to put down plenty of newspaper to protect the surface below.
- Undiluted food coloring yields the most vibrant colors. Diluting food coloring gives muted tones, causes the paper to soak up a lot of water, and distributes the color farther. This may or may not be the effect you want.
- Dilute your India Ink with water using the following ratio: 1 part ink to 1 part water. India Ink hardens as it dries and will cause your paper to stick together if undiluted.
- Let your paper dry folded up as long as possible. The longer you let the coloring absorb into the paper the better your final effects will be.
Holiday Colors
Here are the different versions for each Winter Holiday:
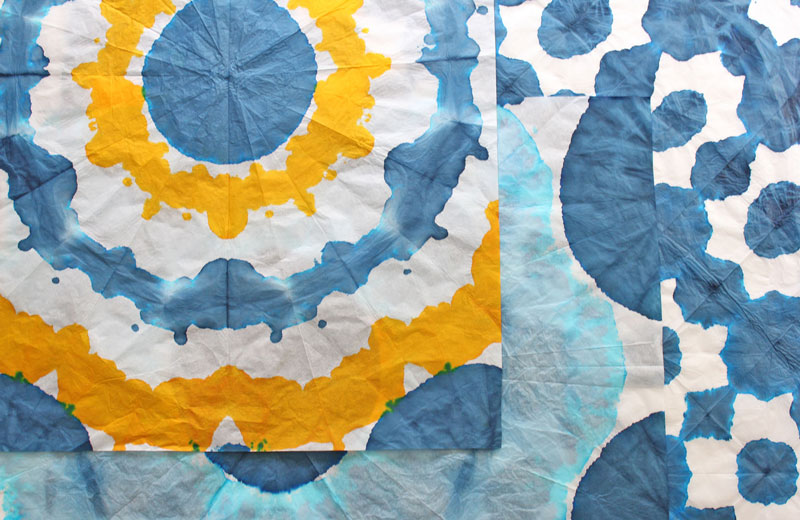
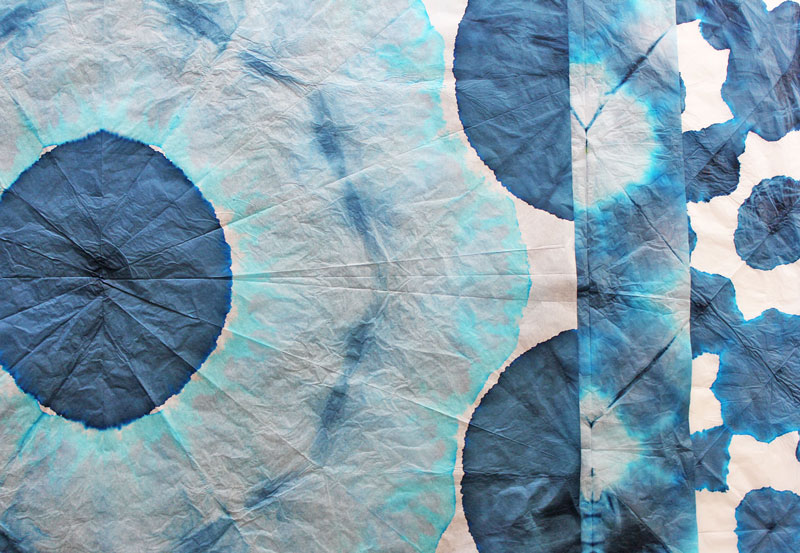
Hanukkah
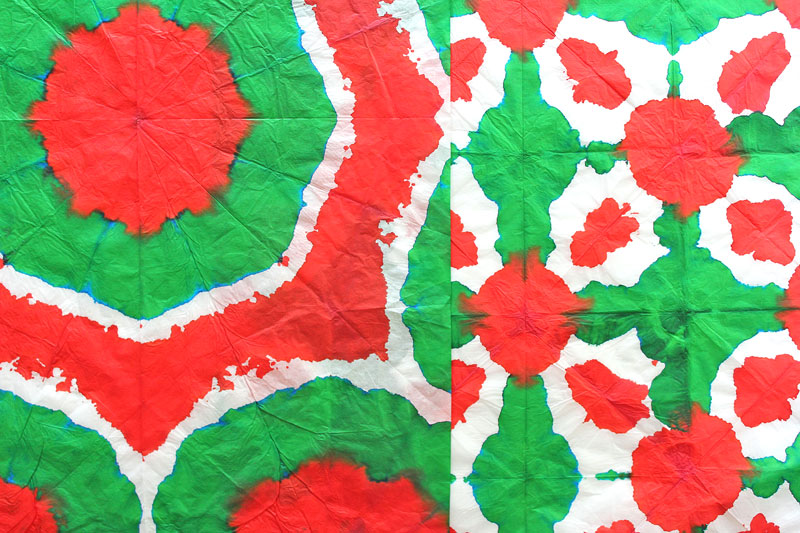
Christmas
Kwanzaa
More DIY Gift Wrapping Ideas | Rockin’ Art Mom Style
Does this leave you wanting to check out more DIY gift wrapping ideas? Here are 7 more from the Rockin’ Art Moms!
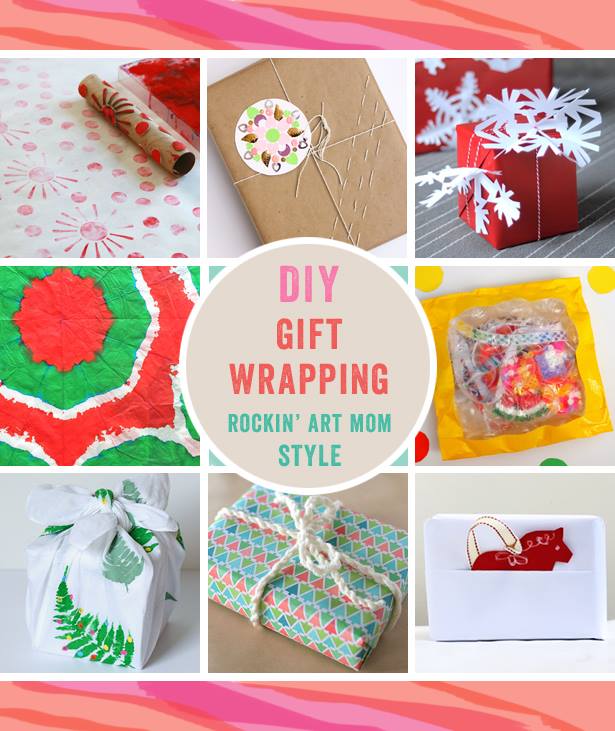
Handmade Wrapping Paper from The Artful Parent
Stitched Paper & Mandala Tag from Mama Miss
Snowflake Bombed Gifts from Tiny Rotten Peanuts
Tie Dye Gift Wrap from Babble Dabble Do
Poppable Wrapping paper From Pink Stripey Socks
Fabric Wrapping from Buggy & Buddy
Printable Braided Rope from Art Bar Blog
Swedish Horse Wrapping paper from Willowday
Picture Frame Wrapping Paper from Meri Cherry
Conclusion
I personally love receiving gifts that have a handmade touch, be it the gift itself or the wrapping. Plus I think I may have just needed an excuse to tie-dye AGAIN!
Are you passionate about raising creative kids?
Join over 14,890 parents and educators who want connect with kids and nurture their creative process through magical, easy projects you can do TOGETHER.
Send me awesome creative project ideas!
Spread creative ideas like wildfire: Pin them!

This is so psychedelic gorgeous awesome holiday festive- You are right, there aren’t enough reasons to tie dye things because it’s so fun, and I love that you did this with tissue paper!
What an awesome tutorial and gorgeous gift wrap! I would be so excited to receive something wrapped in the brilliant tissue paper. Love this!
Wow. What a well thought out tutorial, Ana! Absolutely a saver. I love this idea (as I always love your ideas when I come by!) and will definitely make these with the kids — and for me, too! Thanks for sharing such a fantastic post!
WOW just WOW – amazing Ana! Never would have thought to tie-dye gift wrap – it’s beautiful!
You are too funny! That’s how I feel about your projects! …a mandala gift tag? Brilliant!
That is gorgeous gift wrap that would bring such joy to the person receiving a gift wrapped in this. My children are fans of creating tie dye tissue paper and we have used it to cover our journals. If you are interested, I have written some ways we have enjoyed tie dye tissue paper here: http://blog.creativeplaycentral.com.au/tie-dye-tissue-paper-covered-books/
Lovely books! Great idea for using the paper!