Perler Bead Projects are just plain awesome. The ability to melt your own plastic to make stuff is like bringing an industrial process into your home. Even the simplest plastic products around us go though an enormous and expensive process to get made, often including the fabrication of metal tools and molds. So they definitely are off limits to your average crafter or kid. Enter the humble Perler Bead or Hama Bead or Melty Bead or whatever you want to call them….. They finally let us DIY’ers have fun with making things out of plastic and actually being able to fuse them together.
Tons of ideas for perler bead projects have been swirling around in my head since we started Plastic Month on Babble Dabble Do. This one popped in there as I watched my kids break open a set of these huge Perler Beads that I picked up at the store last week. They are three or four times the size of your average Perler/Hama bead and much easier for little hands (and big hands for that matter) to work with. When I saw my kids placing them on their giant square boards I immediately thought of those “ball in the maze” toys kids often get as party prizes. And so we decided to make our own. I loved that my kids had the opportunity to both design their toy and use it.
This post contains affiliate links to products.
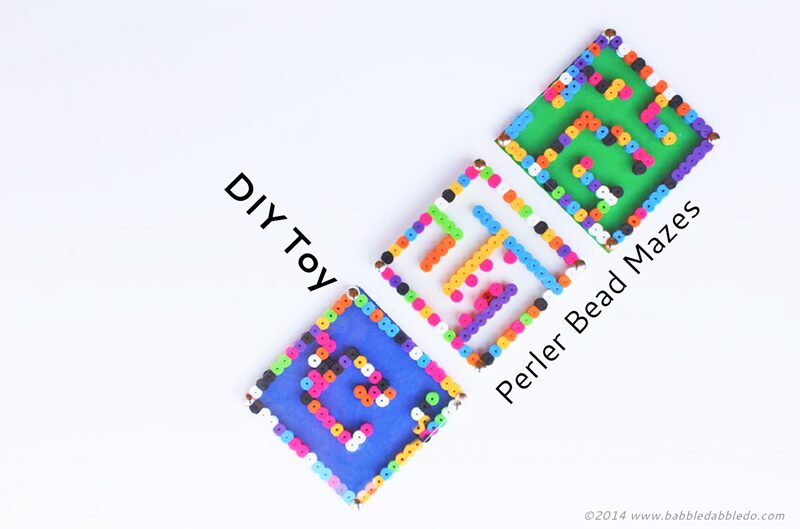
DIY Toy: Perler Bead Mazes
Materials
- Perler Beads- DO NOT use small perler beads, you MUST use this size
- Large bead boards like these
- Iron
- Colorful poster board
- (1) Small round bead per maze
- Recycled clear food packaging
- Hot glue gun and glue sticks
- Thumbtacks
Instructions
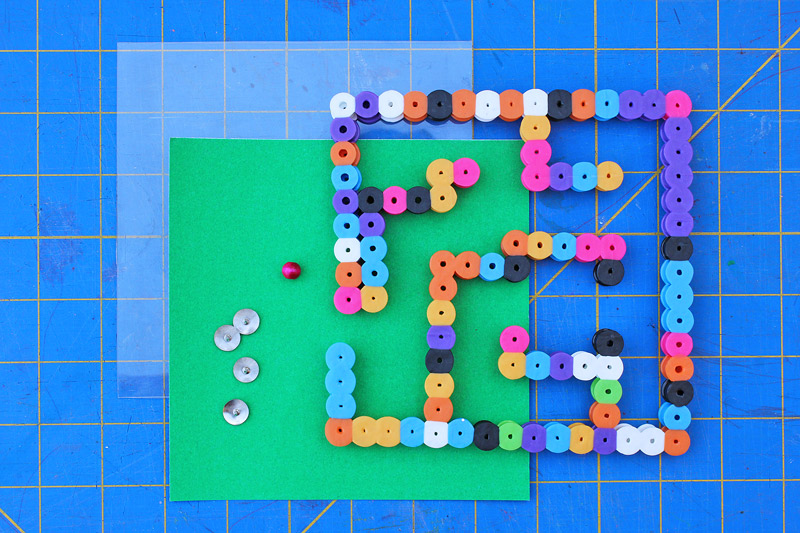
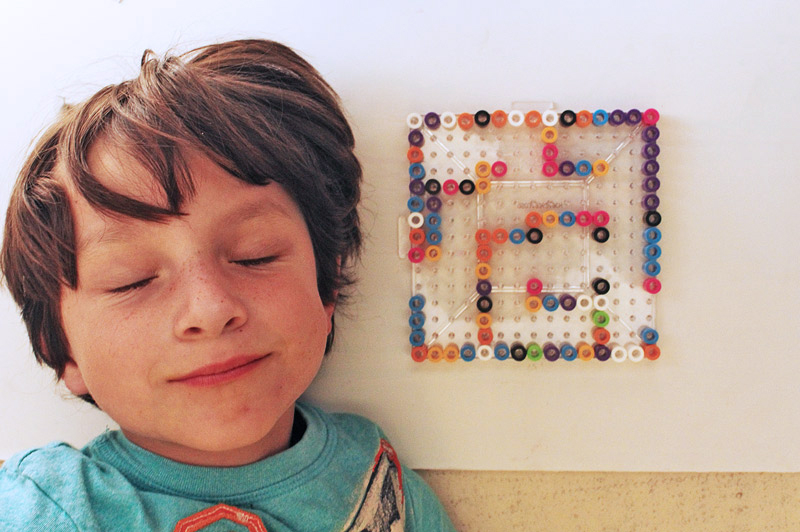
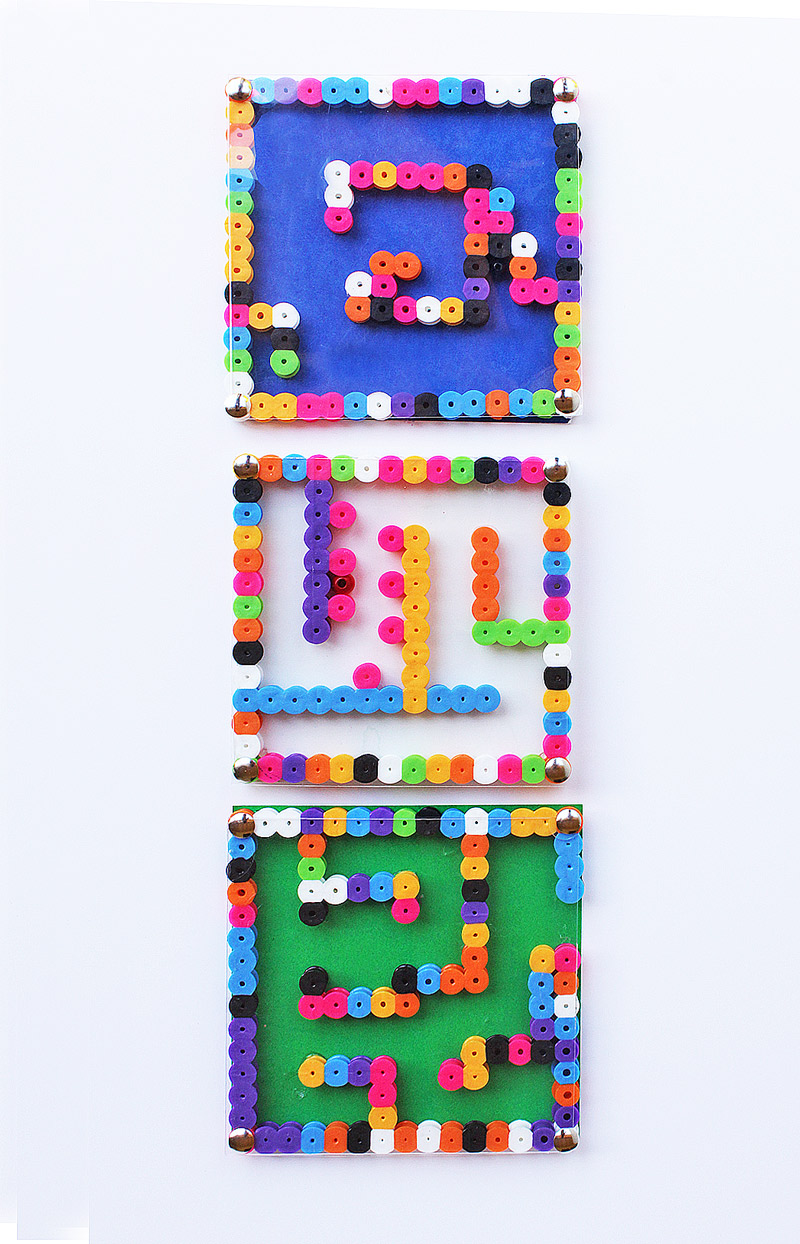
- Step One Using the square pegboard, begin by making a frame of beads along the entire perimeter of the board.
- Step Two Design your maze! Start adding in rows of beads to form a maze. When the beads are melted they get wider, so as a rule of thumb I told my kids to leave a gap of two empty peg rows between bead rows so the ball would be sure to make it through the maze.
- Step Three Make sure the bead rows connect to at least one perimeter edge. My kids designed their mazes and then I helped them fine-tune the connection points. My son insisted on having one hole in the edge of his maze so he could take the ball in and out of the maze. It’s your choice if you want to do this.
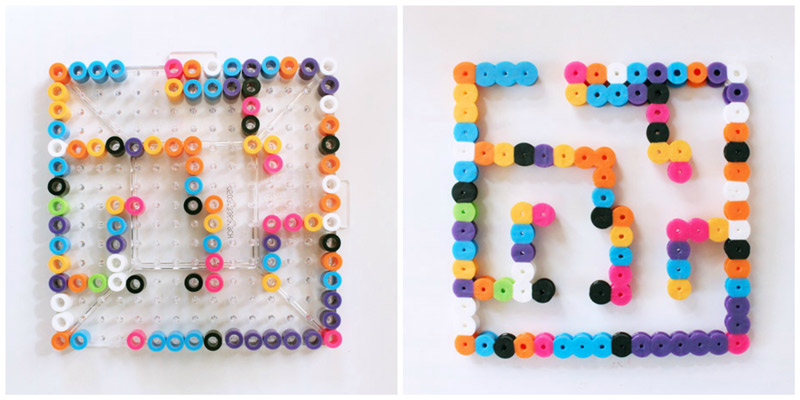
- Step Four Using the ironing paper that comes with the boards, iron your beads according to the package directions. These beads are bigger and will take a little extra time at the iron. Let cool.
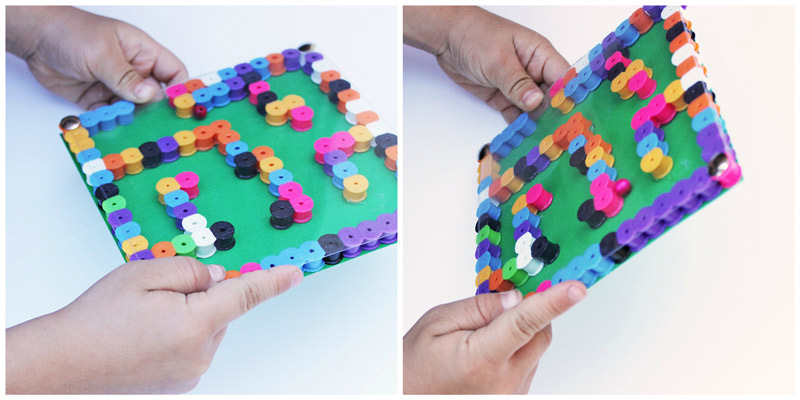
- Step Five Cut a piece of poster board or foam core to match the size of the finished maze. Ours were about 5-3/4″ square. Cut the same size out of your clear plastic recycled food packaging to make a top.
- Step Six Assemble your maze. Add hot glue to the backside of your perler bead maze. I put glue in the corners and strategic spots around the maze. Pull off any glue “strings.” Turn the maze over and gently lower it onto the poster board. Press down on the glue spots to secure the maze in place.
- Step Seven Put your round bead in the maze.
- Step Eight Place the plastic cover over the top of the maze. In each corner of the maze push a thumbtack through the plastic and into the perler bead center hole. If the connection is loose, add a little hot glue underneath.
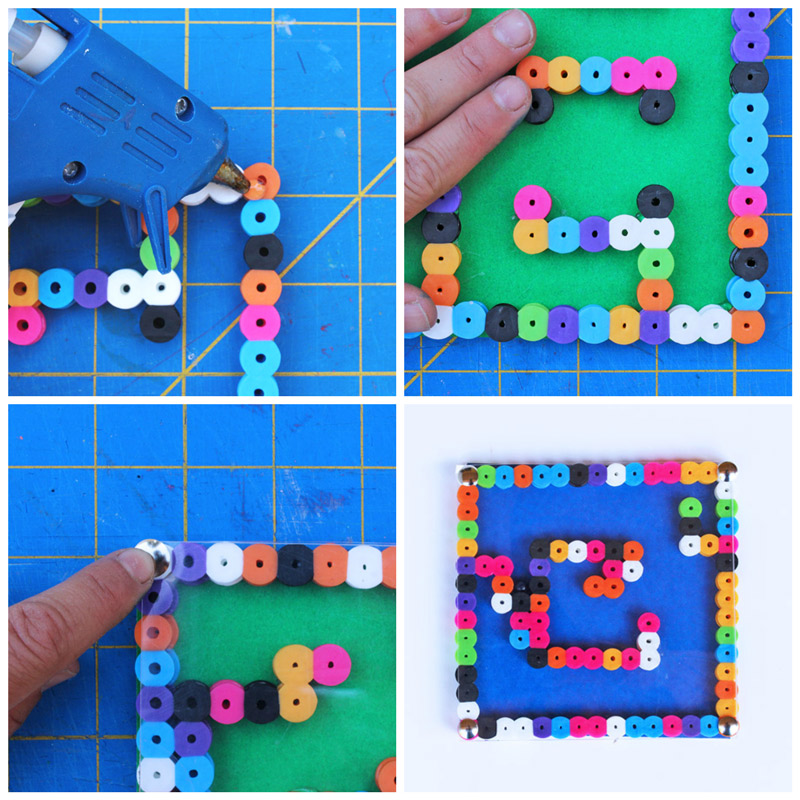
You’re done! Try and get the bead to go through the maze!

Looks Like
Robert Irwin’s Azalea Maze in the Central Garden at the Getty Center. Garden mazes are nothing new but artist Robert Irwin created a beautiful floating maze of azaleas at the Getty Center Museum in LA. Seen from above, it is a nod to the past yet a very modern use of trees as “sculpting” materials for the project. I love the combination of design, art, and landscape. If you have the opportunity to visit LA a trip to the Getty to see this garden and the museum should be on your must-do list!
Conclusion
This colorful DIY toy made from perler beads is easy to make and a great design exercise for kids. I love combining problem solving and art together in a project and my kids didn’t even catch wind they were doing both as they created their mazes. For me the best part was watching them create the maze, then discussing the parts that might need to be redesigned so that a ball could make it through the maze. Here is my son, goofily posing by his maze before we melted it.
I also loved using these huge perler beads because they helped speed up the design process a little. Plus this color geek is sort of obsessed with the vibrancy of the mazes! Oh la la!
More
40 more DIY toys to try:
Are you passionate about raising creative kids?
Join over 22,179 parents and educators who want connect with kids and nurture their creative process through magical, easy projects you can do TOGETHER.
Subscribe to our email list to receive project ideas as well as offers for some our creative products.
If you want to read our privacy policy before subscribing, hop over here.
This is Amazing!!!!!!!!!!!!! What a creative use for perler beads.
Thanks Mama!
Those toys are so cool … and unique! We love ‘em!
Thank you so much Spotty Green Frog!
Such an awesome idea! You always know how to put a cool spin on projects.
Thanks Jeanette! You also spin me right round baby right round with your fab ideas!
These are so incredibly cool Ana!!
Thanks Mama! We had fun making them 🙂
These are SO CLEVER!! Absolutely love them x