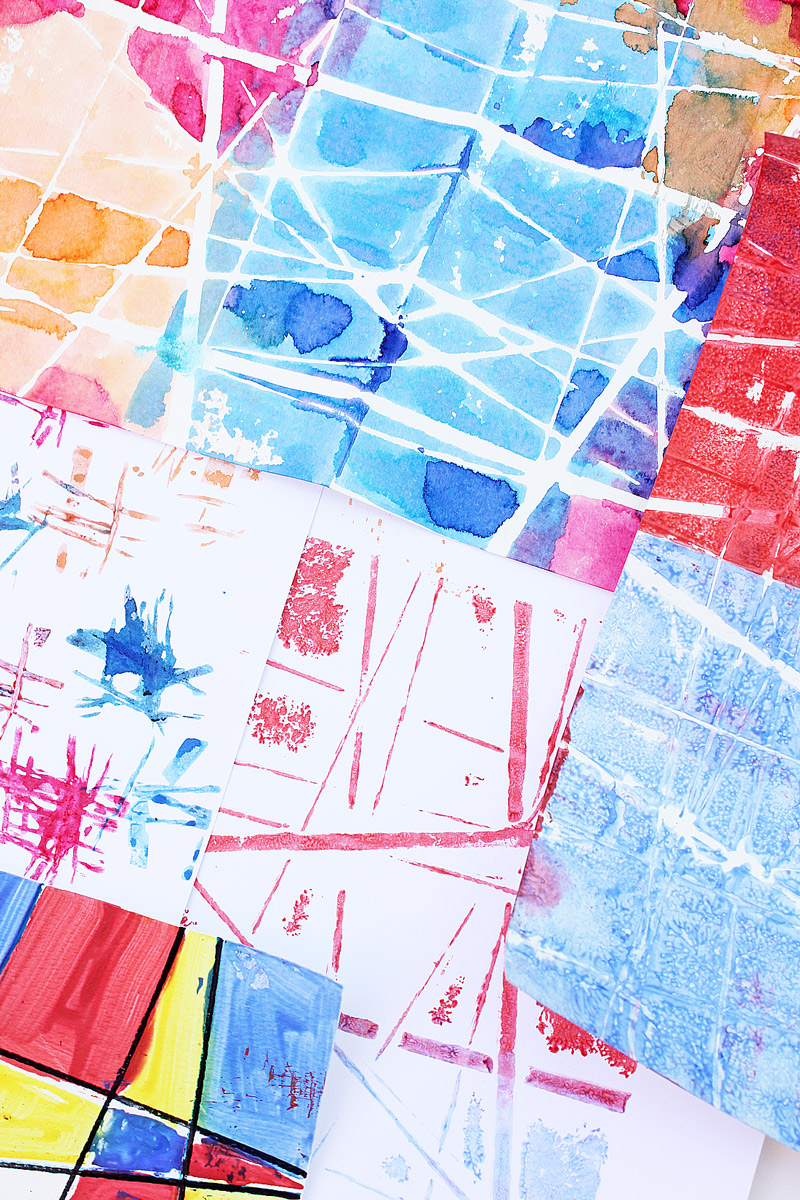
Let’s make some rubber band art! We’re back with the fourth installment of the easy art projects for kids series. This week my fellow bloggers and I are exploring string art!
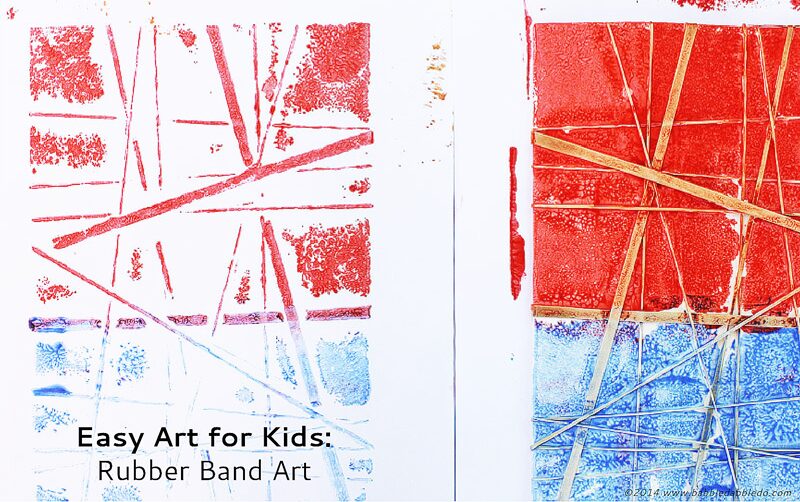
Because I’m sort of rubber band nut I decided to interpret the theme as rubber band art. And because I got a little carried away with this we have three, count ’em three, project variations for you to choose from. Or set-up a rubber band art station and go to town trying all of them! These are really easy art projects for kids that all can be thrown together using materials that should already by in you stash.
This post contains affiliate links.
3 Rubber Band Art Projects
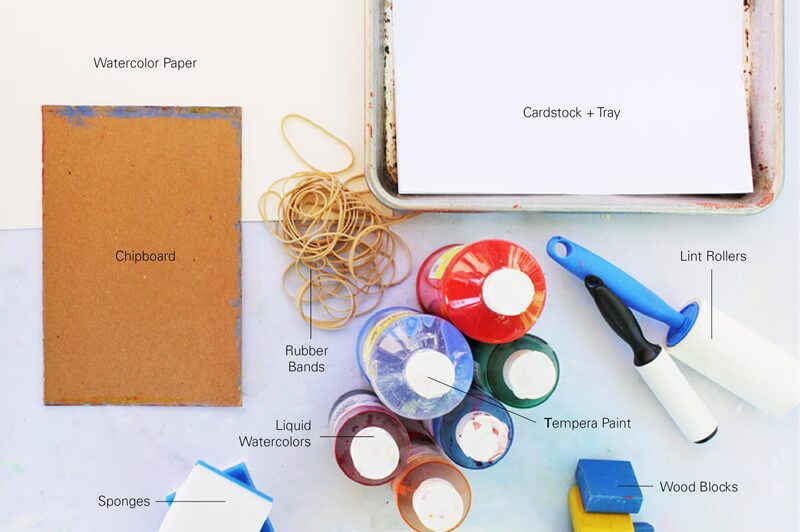
Materials
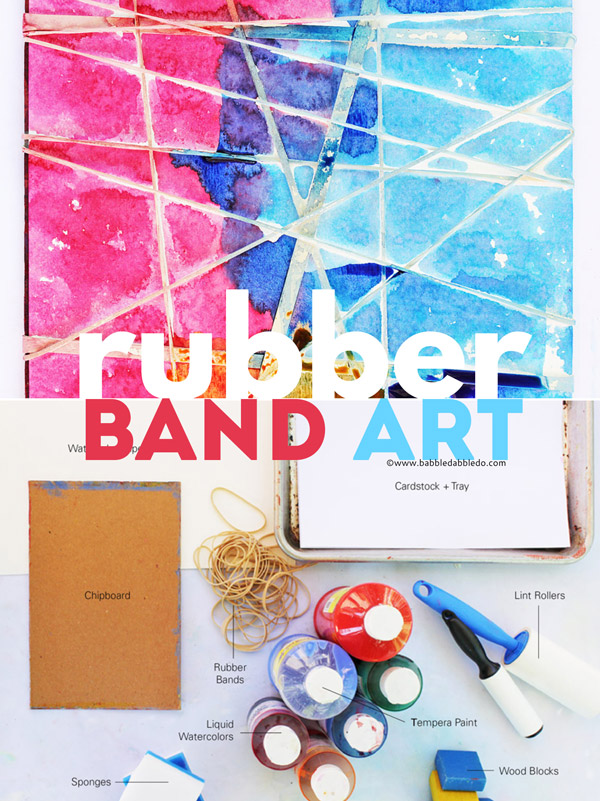
All Projects
- Rubber Bands
- Card stock or Watercolor Paper
Project #1: Rubber Band Resist
- Sponges
- Liquid Watercolors
BEST ART SUPPLY YOU CAN INVEST IN! HANDS DOWN!
- Chipboard or cardboard Cut into a piece half the size of the paper you will be using
- Containers for mixing
Project #2: Rubber Band Prints
- Sponges
- Chipboard or cardboard Cut into a piece half the size of the paper you will be using
- Tempera Paint
- Containers for mixing
Project #3: Rubber Band Stamps
- Wood blocks
- Stamp pads
Instructions
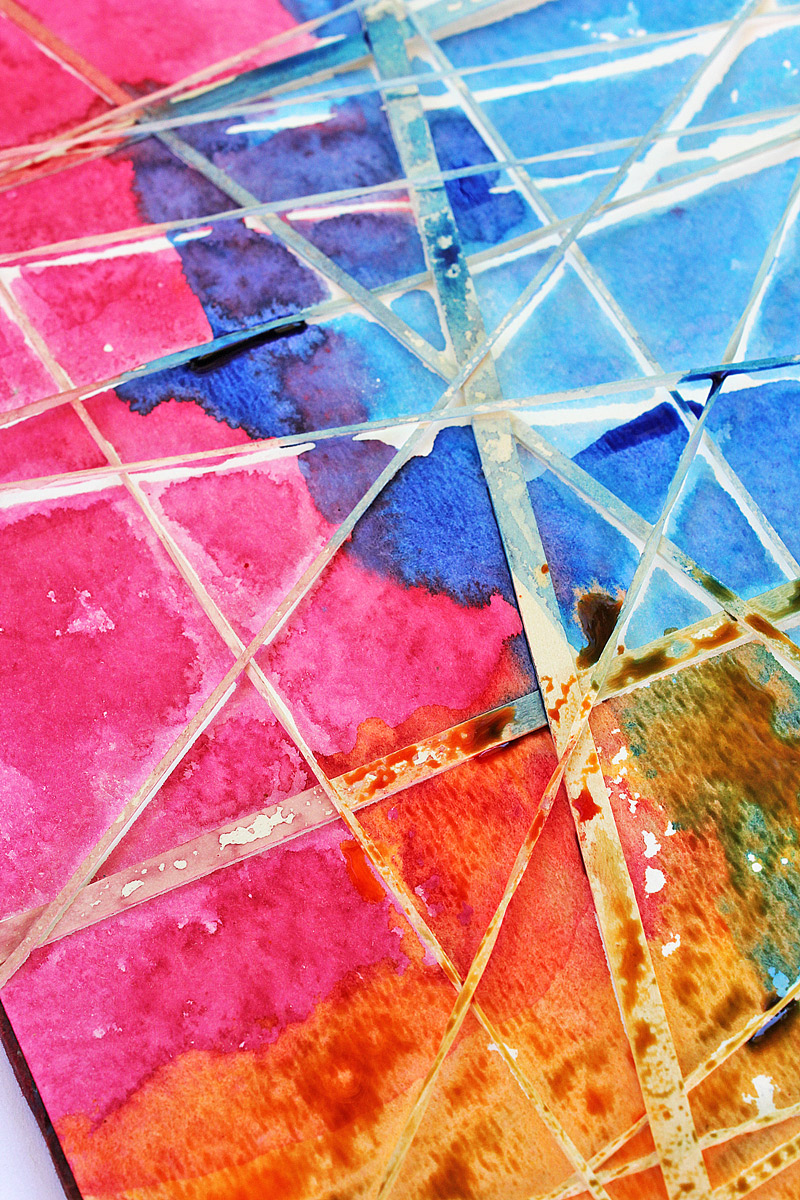
Project # 1: Rubber Band Resist
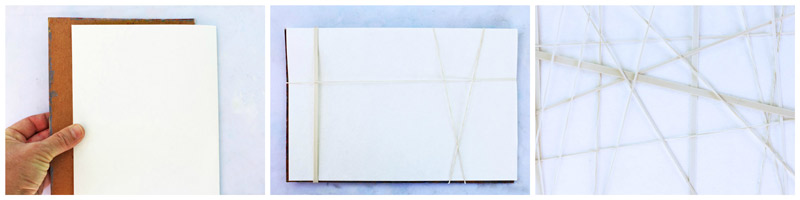
- Step One Fold one sheet of paper around your chipboard
- Step Two Start wrapping rubber bands around the paper/chipboard to create a pattern of lines. The more rubber bands the better!
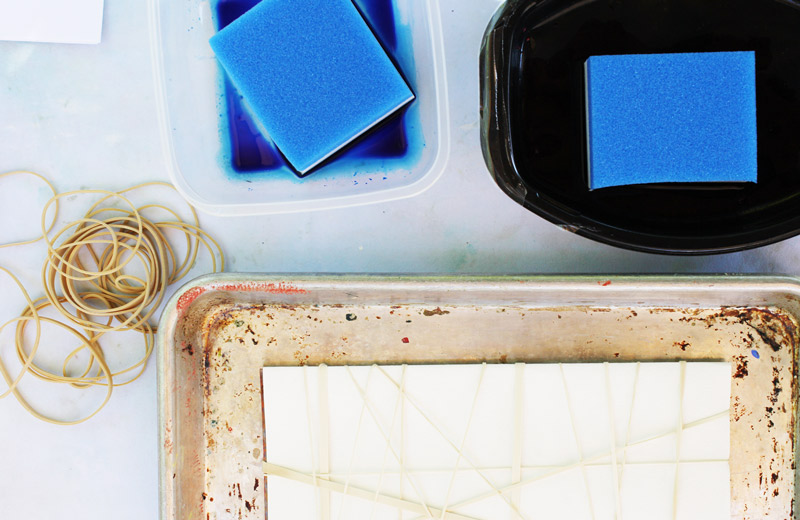
- Step Three Combine liquid watercolor with water in a shallow container. You want your color to be semi saturated so add a good squeeze of paint.
- Step Four Dab a sponge in the paint, squeeze out a little excess water but not all of it, then press the sponge on your rubber band art. You can use different colors or just one color. Be careful to press down rather than rub the surface of the paper. If you rub or move the sponge back and forth you’ll move paint under the rubber bands and lose the resist effect.
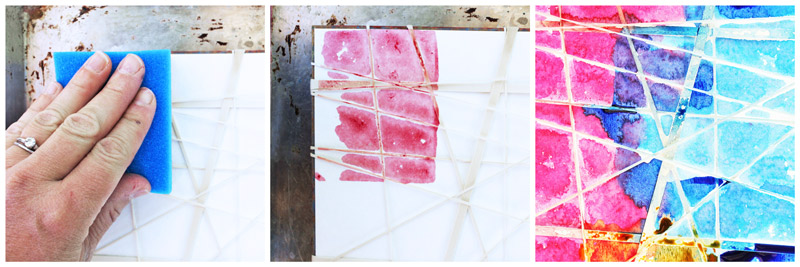
- Step Five Turn over and repeat the process on the backside.
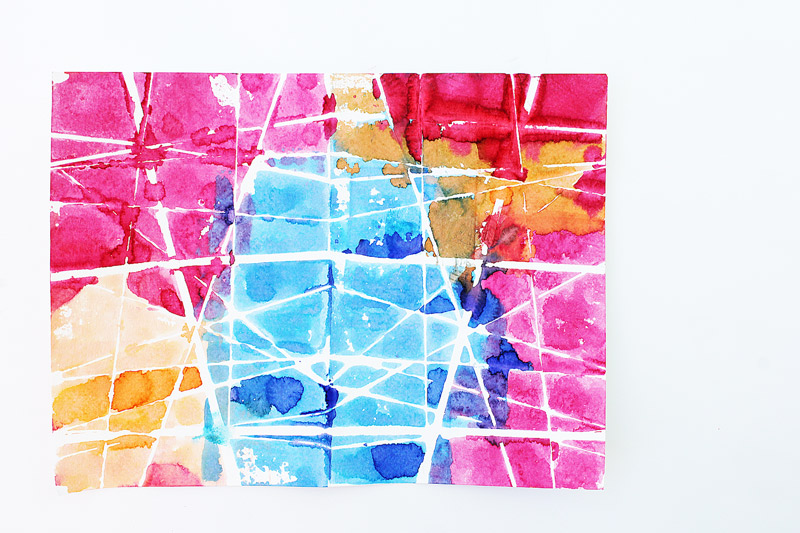
- Step Five Let your art dry. When dry, remove the rubber bands and open the artwork to see the resist effect.
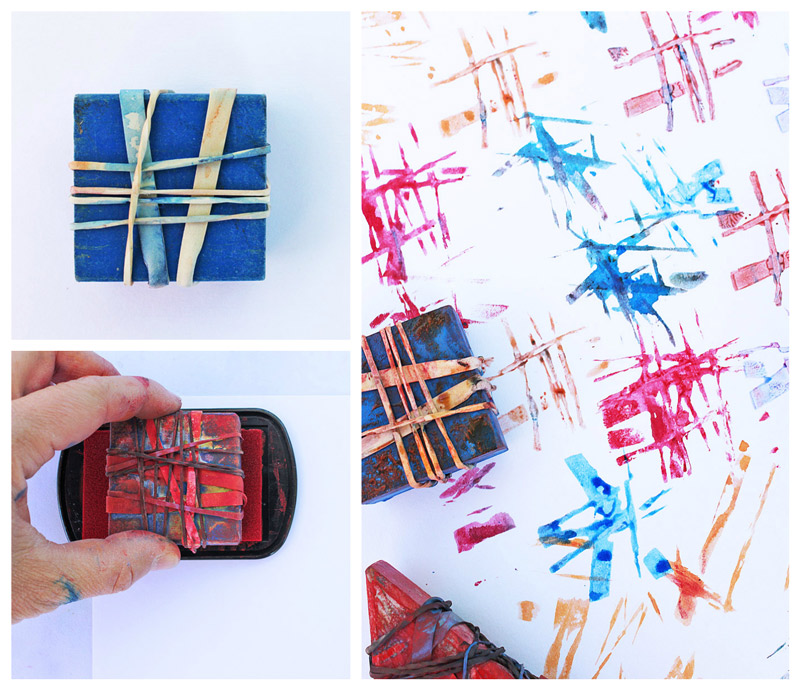
Project #2: Rubber Band Prints
- Step One Fold one sheet of paper around your chipboard.
- Step Two Start wrapping rubber bands around the paper/chipboard to create a pattern of lines.
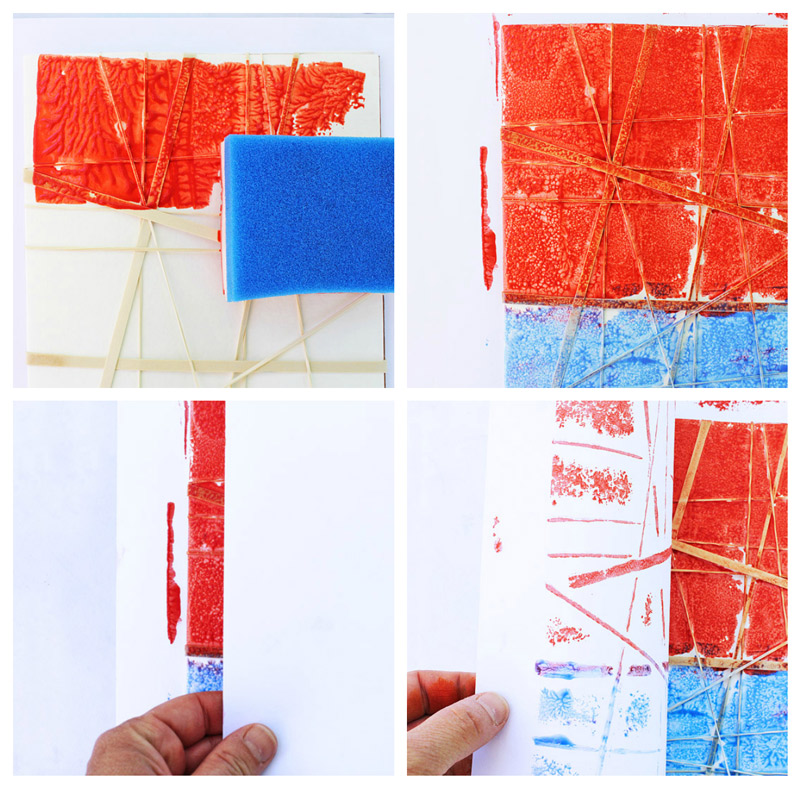
- Step Three Squeeze tempera paint into a shallow bottomed container.
- Step Four Dab a sponge in paint, press once on scrap paper to even out the layer of paint, then press the paint soaked sponge on your rubber band art. You can use different colors or just one color.
- Step Five When the entire surface is covered in paint, lay a sheet of white cardstock or paper on top of the painted rubber band art. Use a clean dry sponge to burnish the top of the paper and make an imprint of the rubber band art on the blank paper.
- Step Six Carefully lift the paper off and see your print! Let dry. Repeat process as desired. Let the rubber band painted sheet dry for a great resist piece of art!
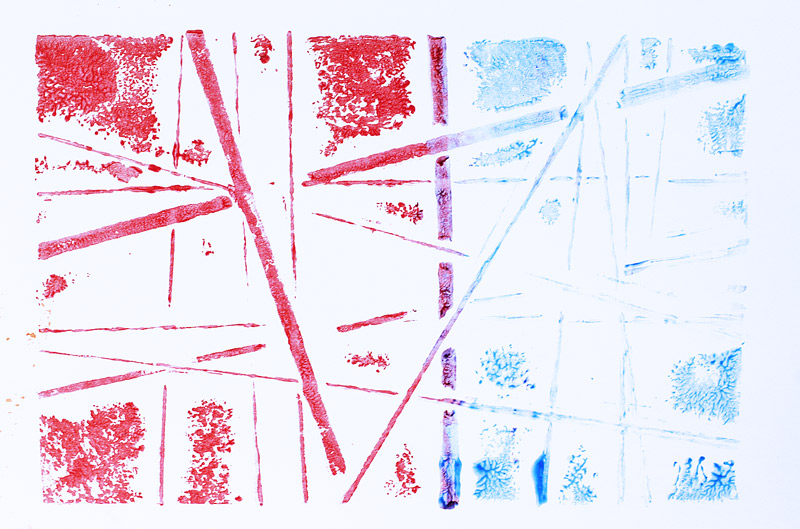
Project #3: Rubber Band Stamps
- Step One Wrap rubber bands around toy wood blocks.
- Step Two. Press the blocks into an ink pad using the rubber band wrapped wood blocks as stamps. You can also use paint soaked sponges in lieu of an ink pad but I had less luck getting detailed imprints from the paint/sponge combo.
Tips:
- Tempera paint is easier for young kids to use on a sponge. Sponges soak up watercolors and it’s hard for young ones to resist squeezing the liquid out all over their artwork.
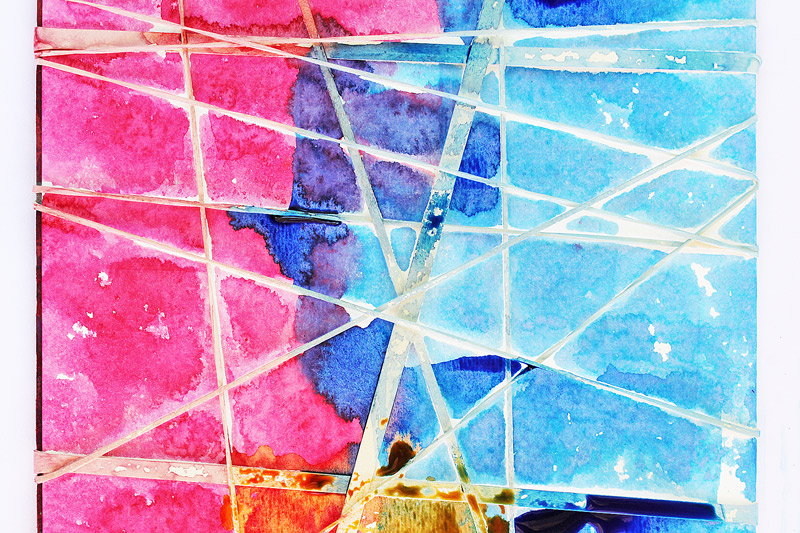
- Tempera dries sort of washed out. That’s why I love how the watercolor combo looked, the colors remained vibrant and pretty even when dry.
- The rubber band wrapped board may curl up as it gets soaked and the rubber bands pull on it. This may happen when the board is drying, though my daughter loaded her board up so much with rubber bands that her paper bent as she was painting. Remove a few rubber bands to relax the board. If the painting is in the drying stage go ahead and remove all the rubber bands.
- I recommend using sponges that are dense, such as the eraser type sponges. These get the best result when soaked with paint.
- You can find great inexpensive sponges for art in the dollar bin at the drugstore or at the dollar store.
- You can also try any of these projects using string. Simply wrap your board using a long string and tape to the back. I liked using the rubber bands, though, because they easily stay in place.
You’re done! Wouldn’t these make beautiful cards or stationary?
Looks Like
Wood block Printing. Wood block printing is a classic and ancient technique for making decorative prints. Wood is carved and then the surface is inked and used as a “stamp” to create a mirror image of the carved design. Today’s modern day stamps are based on this process. Our rubber band stamps and prints reminded me of the process of wood block prints and the wonderful designs you can get by layering and playing with different print colors.
Conclusion
Inspired to try some more string art? Here are more easy art projects for kids that all involve strings!
How To Do String Art With Kids (Scaled Up And Down)
How To Make String Art Stars With Coasters
String Art for Kids Using Styrofoam and Toothpicks from Buggy & Buddy
Rainbow Yarn Prints from Blog me Mom
Homemade Yarn Brushes from Learn Play Imagine
And don’t miss out on more easy art projects for kids here on Babble Dabble Do! Subscribe below or like us on FB
this is gorgeous! i love the mondrian-esque quality. also all the steps work those fine motor skills, etc. I work with threes and think they would love the challenge of getting the rubber bands onto their boards. Now I need to find some chipboard! thank you for sharing!
Thanks Jessica! For the chipboard I used the back cover of the pad of watercolor paper 🙂 Ha! I love upcycling .
Oooh, love this. Reminds me a little of stained glass. Great process. Love it!
Great ideas!
How could I turn this into a science lesson? Ideas?