Today’s easy art project for kids features a combination of resist art and motor skills development and children are sure to love squishing, pinching, and rolling the materials!
 What is Resist Art? Resist techniques use layers of different materials, the first of which “resists” subsequent layers to create collage and texture. The classic resist art project for kids uses crayons and watercolor. For more ideas on just what resist art can include, check out the ideas from other bloggers at the end of this post!
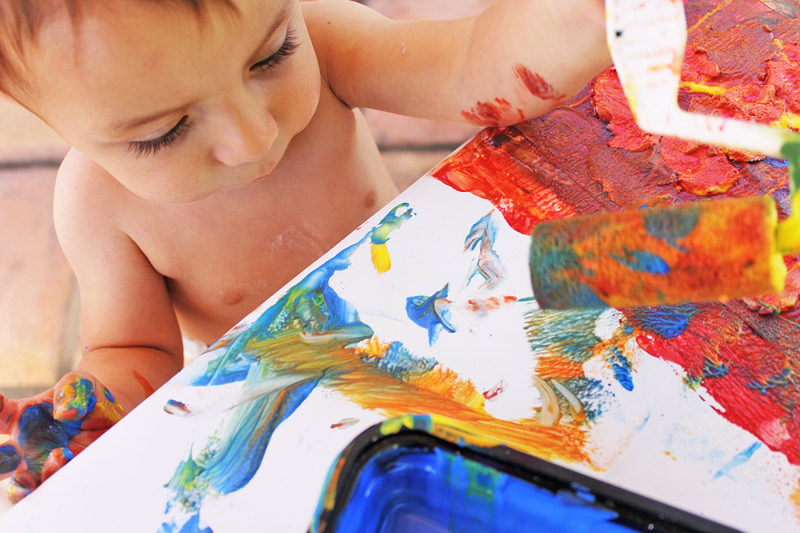
Motor Development Clay resist art is a wonderful process based art project for developing young children’s motor skills. It’s particularly good for preschool aged children who will enjoying squeezing the clay between their fingers, rolling it between their palms, and smushing it onto the paper. Painting with rollers on top of the clay will improve their grasp and is a gross motor bonus!
This post contains affiliate links.
Clay Resist Art
 Materials
Note: This is best done with a block of air dry clay which is more inexpensive in bulk. Since the clay wont be reused avoid using expensive modeling clays for this project.
- Air Dry Clay: Crayola Air Dry Clay
or AMACO Air Dry Clay
- Watercolor Paper
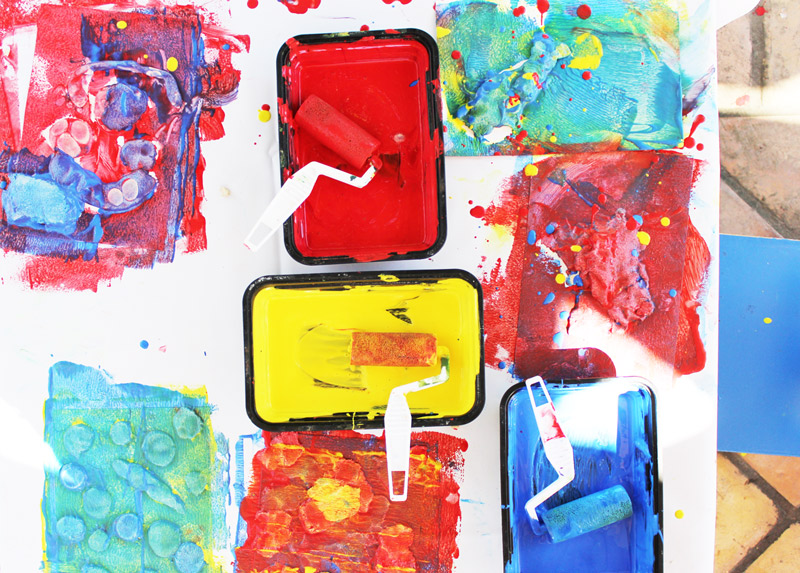
- Tempera Paint
- Roller Brushes
- Paint containers
Instructions
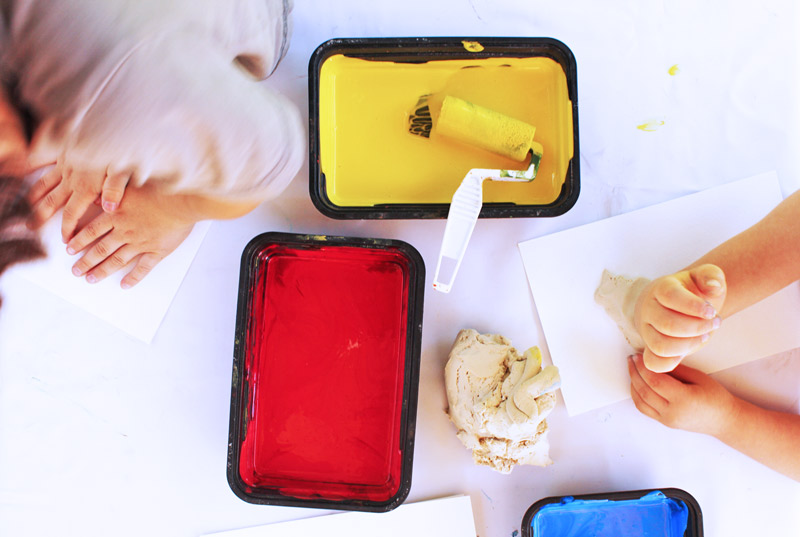
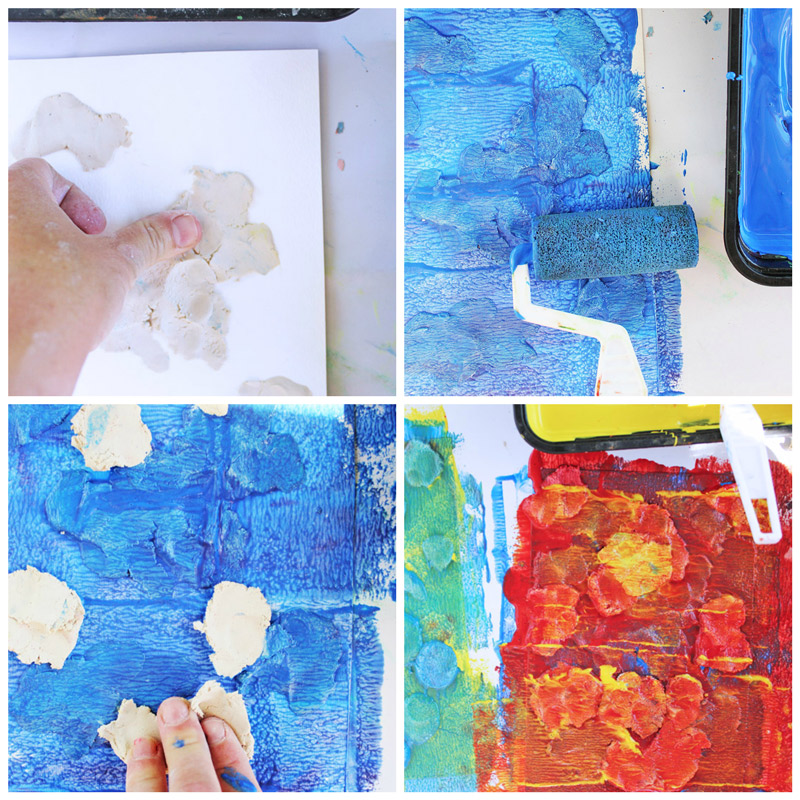
- Step One Pour your paint into containers and place clay in center of a table.
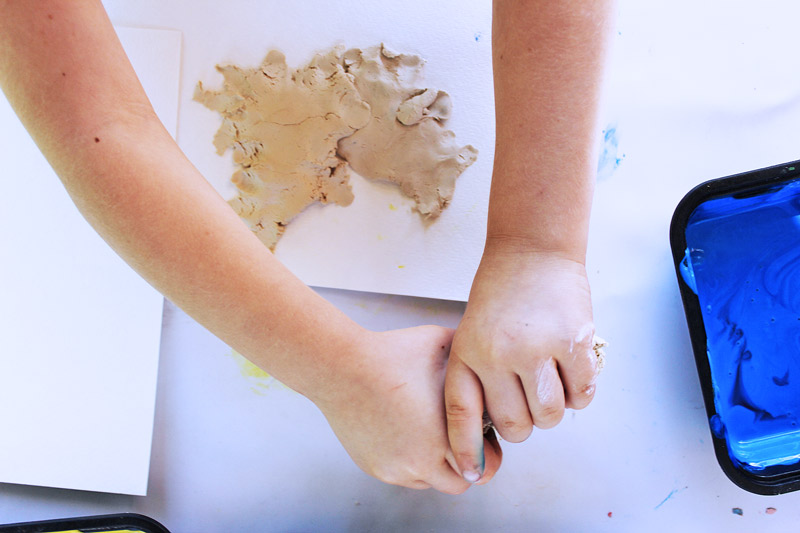
- Step Two Take small mounds of clay and begin pressing them onto the watercolor paper. They can be formed into shapes and pressed down or smooshed and spread around the paper.
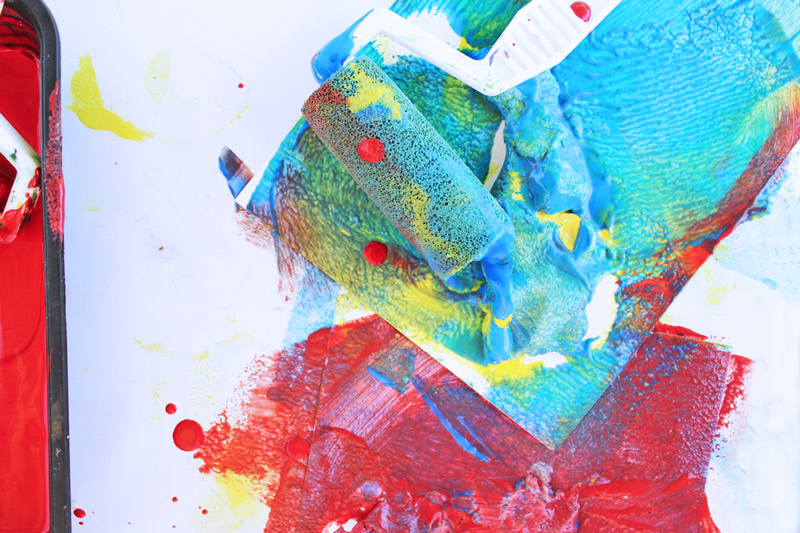
- Step Three Once the first layer of clay is down, add a layer of paint by rolling over the entire paper and clay.
- Step Four Add another layer of clay on top of the paint. For the best results add clay onto the painted paper rather than on top of the painted clay. The clay will eventually be flaked off, so for multicolor works you want to make sure you are covering the painted paper.
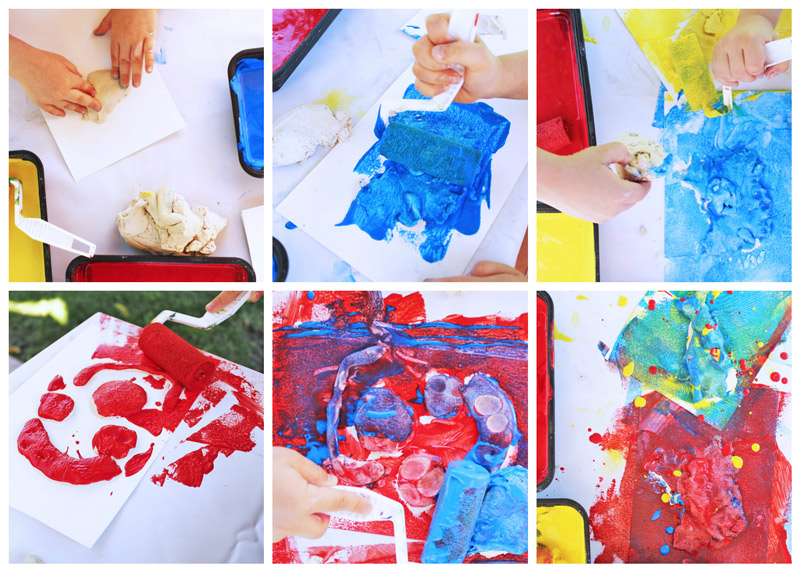
- Step Five Paint the clay and paper a second time with the next color
- Step Six Repeat the clay and paint process a third time if desired.
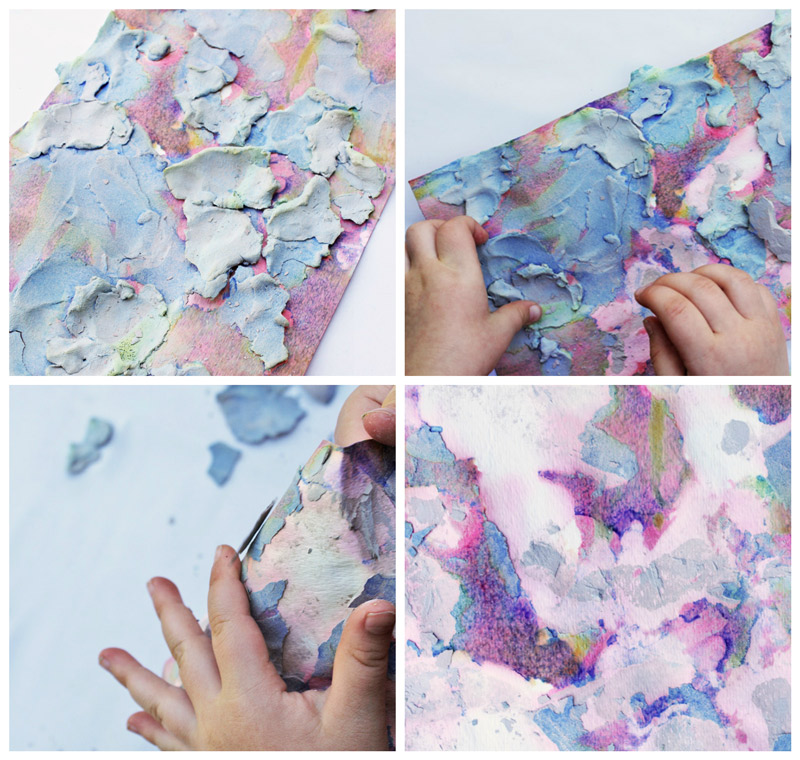
- Step Seven Let dry for several hours or overnight.
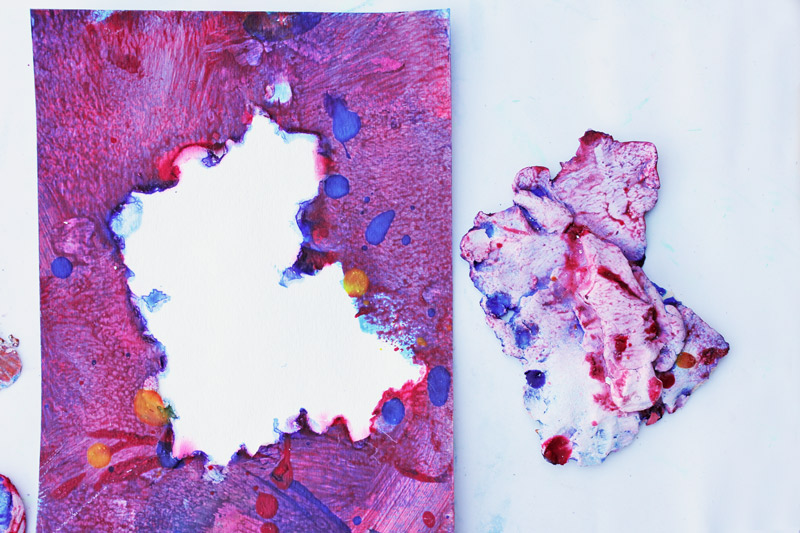
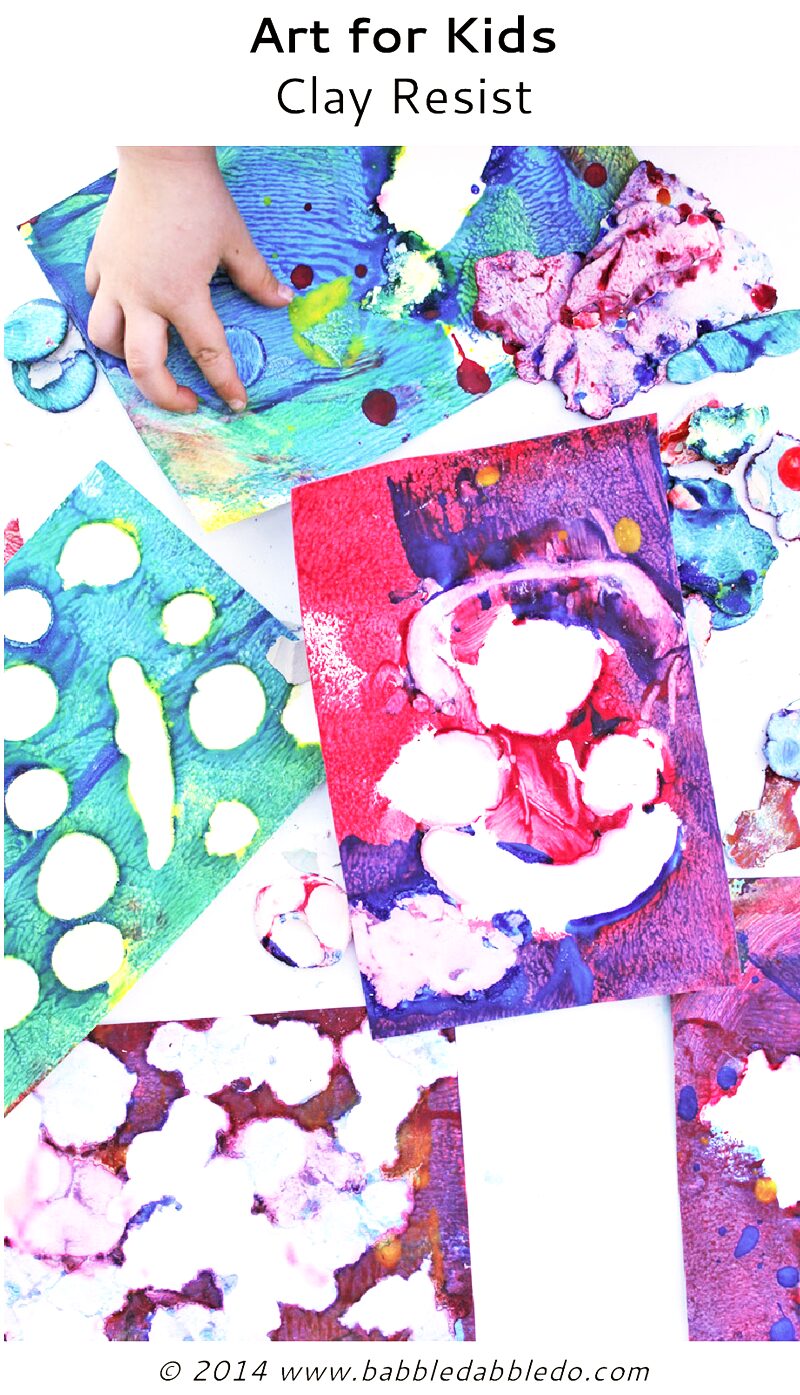
- Step Eight Once the clay is dry, it should easily flake off the paper. Very thin layers can be gently scraped off with a butter knife.
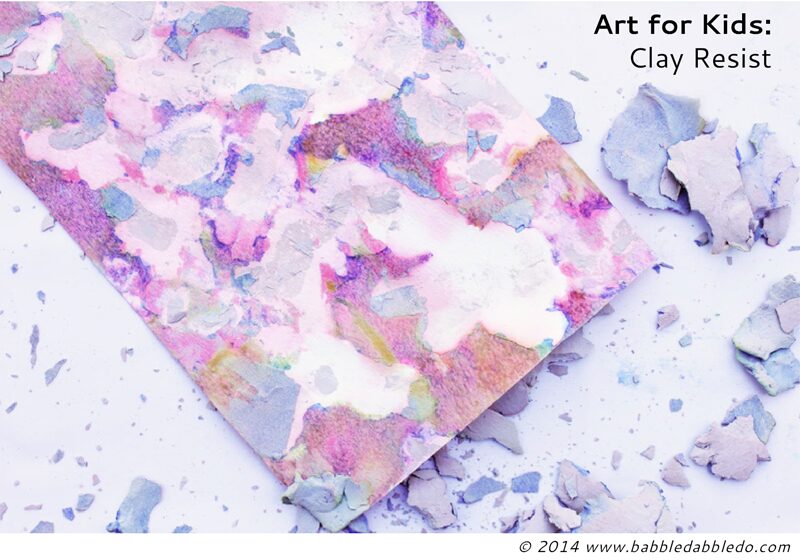
Here is the version we did using gray air dry clay:

Tips
- Depending on the clay we used and the amount of water in the rollers we got different results with our clay resist paintings. The more watery the rollers and paint, the more the paper absorbed the color even underneath the clay. This made for some nice looking faded effects. The versions we did with thick paint and dry rollers had a much more resistive effect.
- Use inexpensive clay! The clay will be removed and tossed afterwards so I suggest using inexpensive air-dry clay like this one from Crayola or this type, available online and at most fine art stiores for CHEAP!
- Use recycled food trays for paint containers. I save plastic containers and meat trays for projects just like this.
- Buy your rollers at the hardware store! I love using rollers for kid’s art because they lay down paint quickly and thickly and keep short attention spans in check.
Conclusion & More Projects!
I really loved clay resist because it was appealing as a sensory activity as well as an easy art project. My kids enjoyed smooshing the clay into the paper and then applying paint in layers. And removing the clay to find the picture underneath is a bonus part of the fun! Even my baby was intrigued…here he is sneaking in on the action.
Ready for more resist techniques? Check out these other easy art projects for kids by my fellow art series bloggers!
Tape Resist Art on Foil by Learn Play Imagine
Wax Paper Resist by Housing A Forest
Splatter Paint and Tape Resist By Buggy & Buddy
Watercolor Resist Easter Egg Garland by Fun At Home with Kids
Fabric Resist Art Pillows by Meri Cherry Blog
Cracked Wax Resist Art by Blog Me Mom
So cool Ana!! I was so curious how you were going to do this. I just love it. Looks like a great tactile experience my kids would love. Awesome!
It was a lot of fun Meri!
These are so gorgeous! I love all the layers. What a great idea!
Thanks Allison, I’m a huge fan of layered art 🙂
This looks fabulous too. Your blog is one of my faves. So artsy and fun and so creative!
Aw Melissa, you are super sweet! You know I love the Chocolate Muffin Tree! You are very inspiring!!!
Ana, this so fascinating! I can really imagine kids having so much fun with it! What a creative and original idea!
Glad you liked it Gina! I had fun with it too, shhh don’t tell anyone 😉
This is so AWESOME! Great job Ana! My kiddos would be all over this!
AMAZING! & now on tomorrows roster 🙂 No ones feeling well & i find a good sensory art experience for all of us together, really comforts the soul. Plus, its an easy set up cuz we have all necessities! Thanks again for soo much inspiration.
You are welcome Mama! Post a pic of some of your childrens’ finished pieces on our FB page!
Wow, I love the beautiful results and it’s such a unique idea! I’ll be sharing this on The Crafty Crow soon 🙂
So happy you liked it Cassi! I love being a part of the Crafty Crow! Thank you so much!!!!