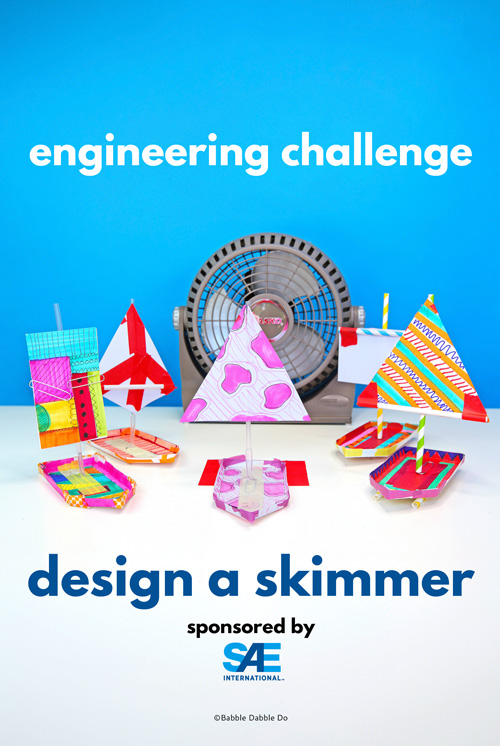
Some of the best engineering challenges for kids utilize the simplest of materials and today’s project does just that! We are going to make a paper skimmer.
This post is sponsored by SAE International. All opinions are my own.

What is a skimmer? A skimmer is an object that skims over a surface like a hovercraft. We will be building a skimmer out of paper and index cards and using a fan to make it move.
This project was created by today’s sponsor: SAE International’s A World In Motion® (AWIM) STEM program.
About AWIM
I’m excited to be partnering up with the SAE AWIM program for today’s challenge! AWIM has been providing hands-on STEM experiences in classrooms around the globe for over 30 years, enabling students to develop the 21st century skills needed to succeed in real-world work environments and connect classroom learning with real-life application. Supported by the generous donors of the SAE Foundation, they have reached more than 6 million students worldwide and engaged more than 30,000 STEM industry professionals as volunteers.

For Parents: This summer, SAE has created a resource page for parents who want to do STEM based activities at home, called SAE STEM@Home. The resources include digital storybooks that will inspire engineering projects, as well as a curated selection of engineering prompts. You can see all resources here.
The Explore section features the digital story books (the K-3 books have related engineering challenges at the end of each book), and the Build and Investigate section has interactive engineering challenges by topic: physical science, computer science & IT, and life & earth science.
For Educators: If you are interested in introducing engineering projects to your students but aren’t sure where to begin, SAE’s AWIM program is a wonderful resource. Their classroom kits have all the materials needed to conduct projects and contain a comprehensive curriculum, including extensive lesson plans and student handouts. You can learn more about their classroom based programs here.
Let’s Start Engineering!
Today’s project is in the form of an engineering/design challenge. I love challenges because they mimic the real-world design process. Challenges introduce a problem, establish criteria for gauging success, and explore the concept of iterative design, meaning taking initial solutions, testing them, and making improvements until you reach a final solution.
The Challenge:
This project is organized like a real life design problem. Introduce your kids to the skimmer challenge by reading them the letter in the printable template & worksheet. The premise is that kids are being asked to work on a partially developed toy design and improve on it as follows:
EarthToy Designs Inc. has been working on a new toy called a Skimmer that will glide across a surface in front of a fan. Their designer created the hull (body) of the skimmer but left the company before finishing the designs of the sail. EarthToy Designs Inc. would like YOU to design a sail for the Skimmer that will allow the toy to glide across a flat surface for 60 cm (approximately 2’-0”) in a straight line when placed in front of a fan.
Design considerations:
- Can you design interesting sailed shapes that children would like to play with?
- Can you design a sail that allows the skimmer to turn?
- Can you design a sail that allows for adjustments to be made to give the skimmer different paths?
Design a Skimmer Toy
Age Appropriateness: 8+
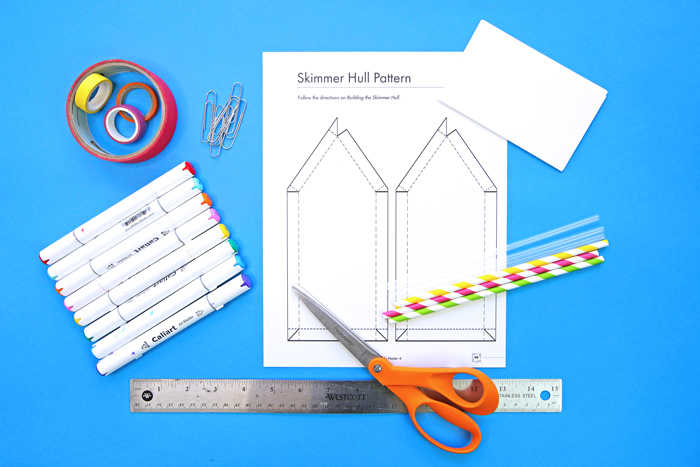

Materials
- Template & Worksheet Print the template on cardstock
- Straws
- Paper Clips
- Index Cards
- Masking Tape
- Scissors
- Ruler
- Markers/Pen
- Fan
Instructions
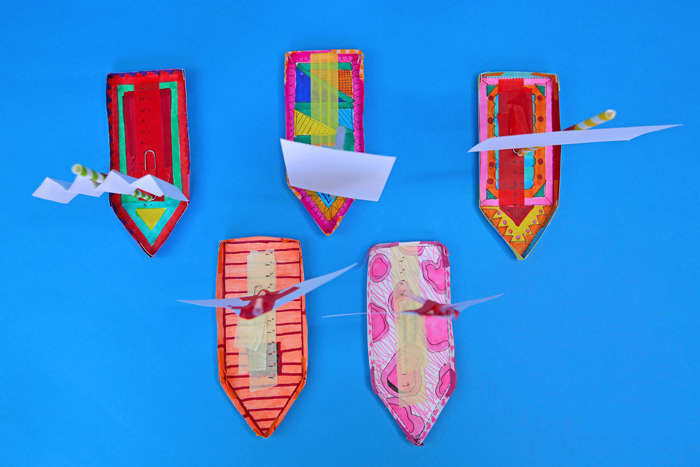
Create the Skimmer Hull
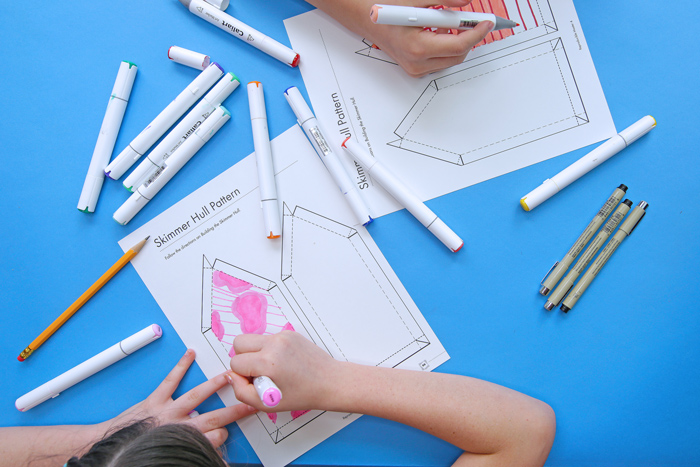
- Color the template base as desired.
- Cut along the solid lines.
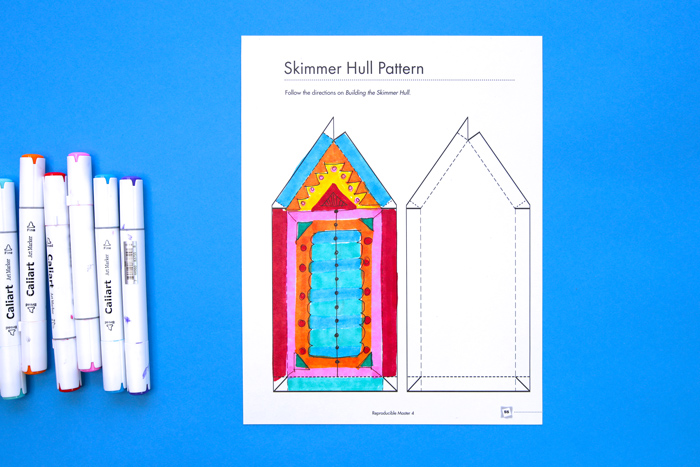
- Place a ruler or straightedge along the dotted lines and fold up. The ruler will help you get a crisp fold when using heavy paper. You may need to temporarily unfold edges down again as you work your way around the template. Lastly, fold the triangular tab edges.
- Fold all edges up again and tape in place. Make sure that no tape sticks to the bottom of the skimmer.
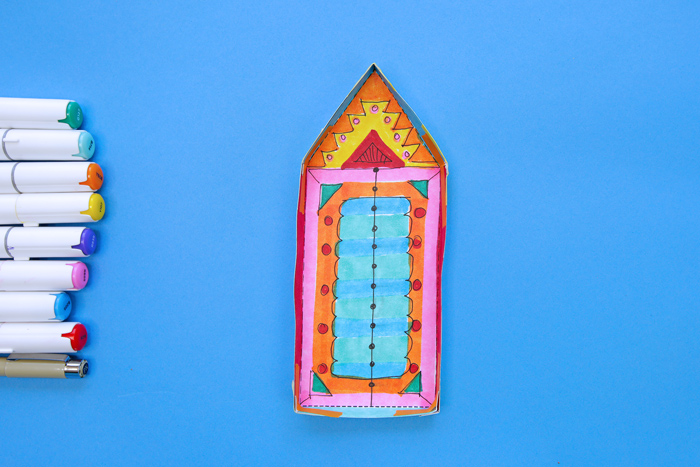
- Place a piece of masking tape down the middle of the skimmer and make marks every centimeter. This will help you measure the distance of your mast from the front of the skimmer hull.
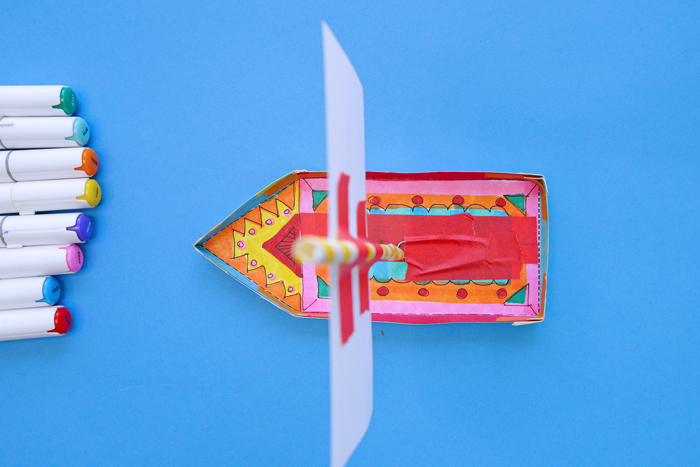
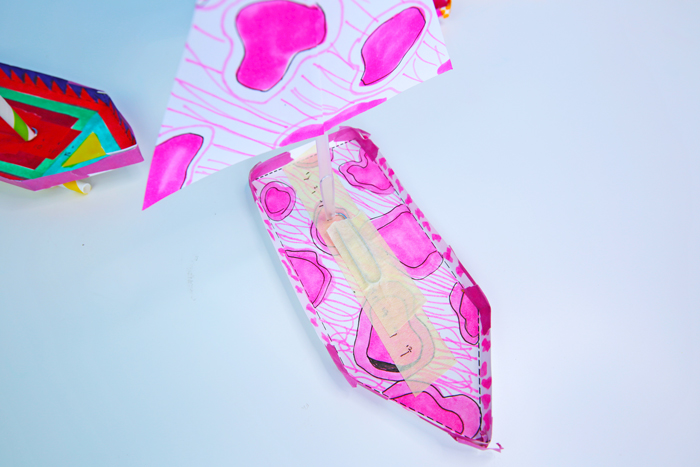
Make the Skimmer Mast
- Bend a paper clip into an “L” shape.
- Place a straw on top of the paper clip to make a “mast.”
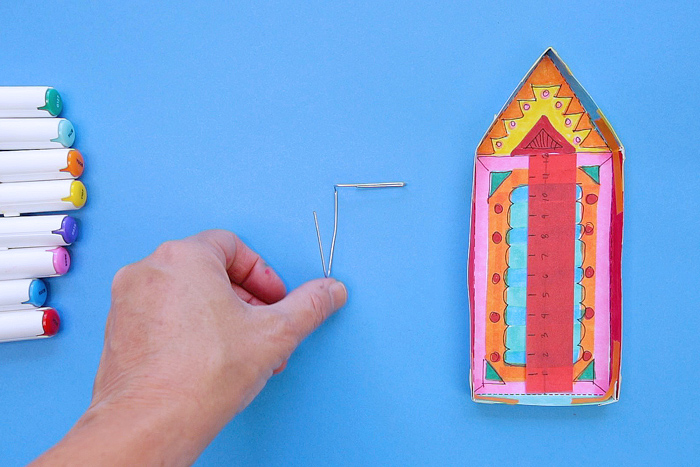
- Securely tape the paper clip/straw mast to the hull. Be sure to tape over the taped area you created above. This will allow you to adjust the location of the mast without damaging the skimmer hull
Design the Sails
- Use the index cards to make a variety of sails. Cut and shape the index cards in a variety of configurations. Try cutting the cards and taping them into new shapes.
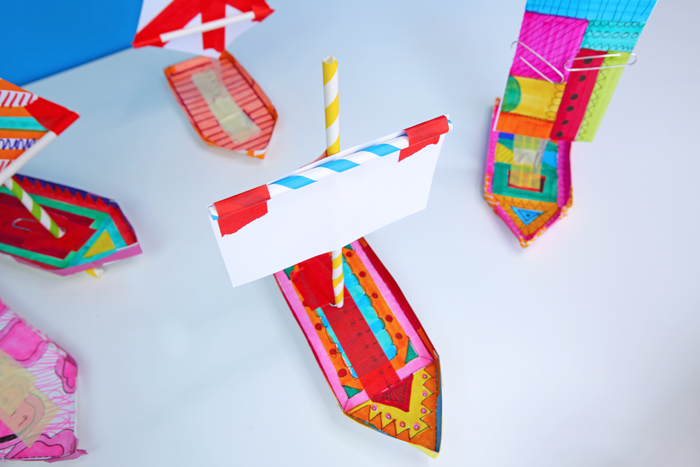
- Tape one of the sails to the mast. Make sure it is oriented perpendicular to the skimmer. A suggestion is to make the first sail you test the most basic sail design possible: Tape an uncut index to the center to the mast with the long edge perpendicular to the hull. Designers often start with the most obvious design choice and use it as a starting point for further exploration.
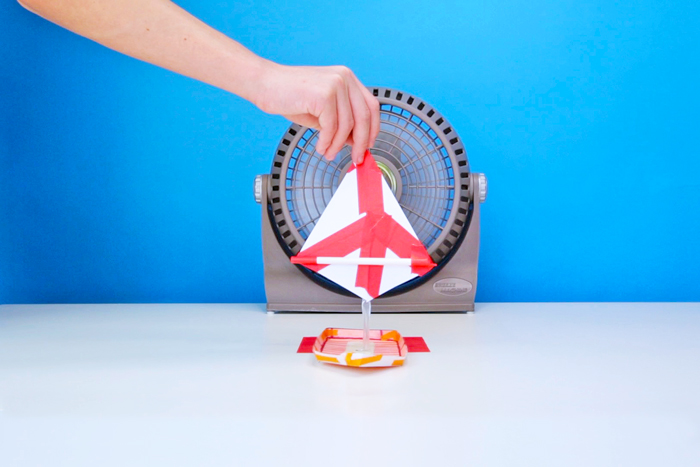
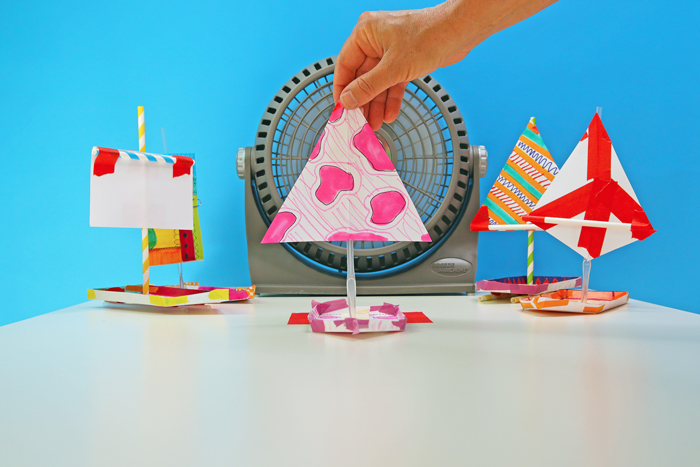
Test the Skimmer
- Place a fan on the floor or a large table. A small fan with medium to high speeds is preferred OR a large fan with a low setting. If possible also use a fan that does not blow outward and leave a “hole” of air at the center. Test this with your hand and feel the direction of the air flow. Don’t have a fan? Use your breath to blow the skimmer across a surface or use a hair-dryer*, paper fan, or a magazine to gently fan the skimmer. *Adult supervision required when using a hair dryer.
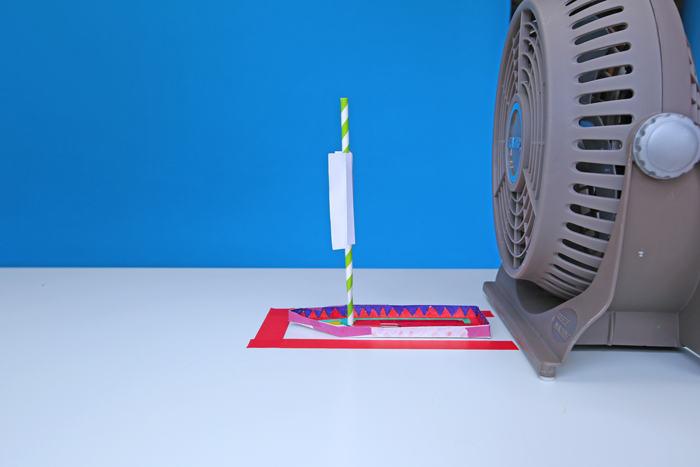
- Create a “dock” in front of the fan using masking tape. The AWIM lesson plan recommends a dock distance of 30cm in front of the fan. We conducted our experiments on a large table area and placed the dock at two distances in two different sets of experiments: One dock was located directly in front of the fan and the second dock at 20 cm in front of the fan. In our experiments setting it up about 20 cm in front of the fan worked best. The skimmers were able to catch a nice starting gust of air without being pushed immediately over. No matter where you place the dock be sure to test each skimmer design using the same starting point.
- Turn the fan on to the highest speed If using a large fan set it to a lower speed.
- Place the skimmer in the dock Let it go and see how it travels.
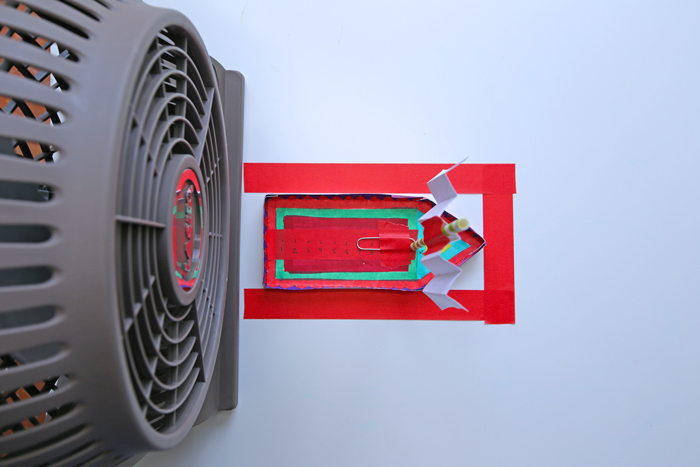
Modify the Skimmer
This is the point in which the design process really gets going! First observe how the skimmer worked. Did it glide across the surface? Did it rotate, fall over, move slowly, or quickly? Did it move in a straight line? Reread the “letter” from EarthToy Designs Inc. Did the skimmer’s sail design meet the design criteria? Most likely it didn’t and that’s okay! Now is the chance to make modifications to improve the skimmer’s performance
NOTE: To properly test the merit of each design modification, it is best to limit changes to ONE modification at a time. For instance, adding straws to reduce friction at the underside AND changing the location of the mast on the hull AND trying a new sail design will all change the performance. If these three changes are made at once it is impossible to distinguish how each element is improving or detracting from the performance. Instead, modify only one element at a time and test after each change to see if it improves performance. Once an improvement is made, move on to the next modification.
Consider these modifications:
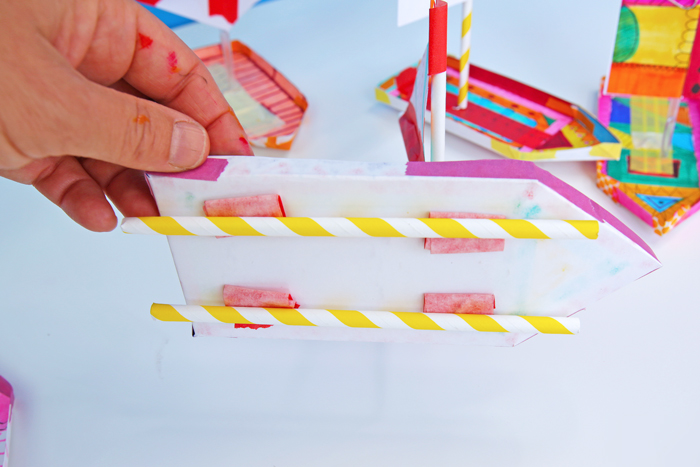
- Friction Can you reduce the friction between the hull and the table/floor surface? What happens if you add straws to the bottom of the hull to lift it up and create a smaller contact area?
- Weight What happens if you add weight at different locations on the hull? Pennies make a good weight. Test out how it changes the way the skimmer moves. Hint: This won’t make it move faster BUT it may allow you to control turning the skimmer.
- Sail area and shape When designing the sail consider the surface area of the sail itself. The sail can harness more wind energy if it is bigger, however if you make it too large, it becomes unwieldy and may cause the skimmer to tip over. Another idea is to limit your sail design to one single index card. Cut each index card and tape it back together in different configurations. Each sail will have the same overall surface area but you can test how the different sail shapes affect the skimmer’s performance.
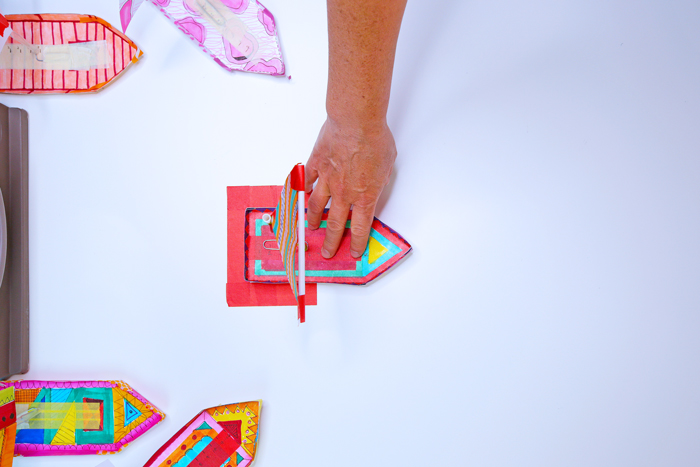
- Sail stiffness You may notice that wide sails bend in the wind and therefore lose effectiveness. What happens if you stiffen the sail by cutting a straw and taping it to part of the sail?
- Sail location on the mast Experiment with the placement of the sail on the mast itself. Does the skimmer perform better if the sail is placed near the top, middle, or bottom of the mast?
- Mast location on the hull Use the measurements you drew on the hull to test the location of the mast itself. This will allow you to test the location of the mast and how it affects performance. Try moving the mast to the front, middle, and back of the hull. Where does it work best?
Finalize your design
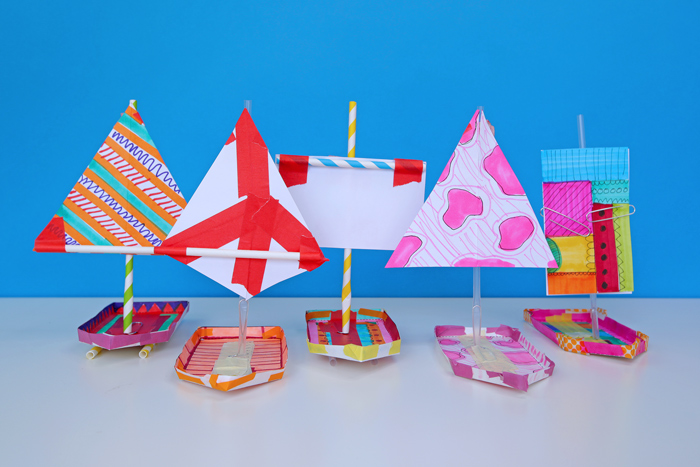
When you have found the sail design that satisfies the design criteria, you may want to make a second version with colorful designs on it to make it playful and inviting! Alternatively take the final prototype and decorate it.
How we did this project at home
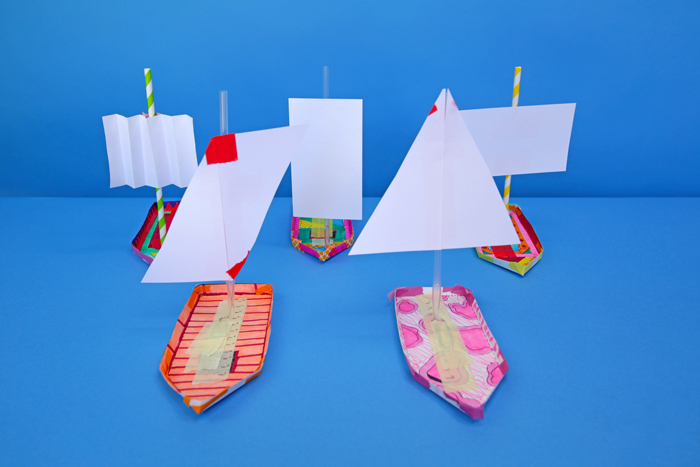
My two older children and I did the project together. Each of them decorated the skimmer hull template and then created sail designs. My daughter’s design worked really well from the start. She made a few versions of the sail but quickly determined that a triangular design worked really well.
My son started with an asymmetrical sail design. Upon testing he discovered that it caused his skimmer to rotate almost immediately when placed in front of a fan. He tried several other designs before deciding to go with a diamond shaped sail. His sail was a bit floppy so he added a straw to stiffen the sail. In the end his design did not sail as straight or fast as my daughter’s triangular sail but he liked its design and it still satisfied the 60 cm challenge.
Let’s Talk STEAM
Science
- Forward Motion Force In this project you are using air/wind from the fan to push against the sail and cause it to move. The force is best harnessed at a perpendicular angle, meaning the sail should be placed perpendicular to the flow of air for the best results.
- Friction Friction is defined as the rubbing force between two surfaces that causes a loss of energy. In this project there is friction between the bottom surface of the skimmer and the table or floor surface on which it is gliding. When the force of air is less than the friction force the skimmer will stop.
- Torque Torque is a twisting force. When the air blows on the back of the sail it may cause the skimmer to tip over depending on the location of the sail on the mast. The higher the sail is placed on the mast the more likely it is to tip the entire skimmer forward. Imagine a refrigerator. If you need to move it you want to push on the middle of the refrigerator. If you push it near the top you may end up tipping it over.
Engineering
This project is a great introduction to the design process that engineers and designers use. The steps in the design process are as follows:
- Define the problem What is the problem you are trying to solve? What criteria should be considered? What are the limitations? Usually criteria and limitations take into account the materials that can be used and the list of benchmarks that you will use to decide if a solution is successful or not.
- Research Research your materials. Research the science behind what you are trying to do and how you will best utilize natural phenomenon in your solution.
- Design and Prototyping Draw out your solution and build a mock up. The mock up is called a prototype. Test it.
- Evaluation Does your initial solution work? Does it meet the design criteria? If not make a list of what is working well and what needs improvement. Tip: Most initial designs fail and that’s okay! That is an important part of the design process as it will teach you what variables are affecting performance.
- Refinement Now that you have a list/idea of what isn’t working, make changes! Test them out. Most likely you will repeat the Prototyping-Evaluation-Refinement loop a few times before heading to a final solution.
- Final Solution Once you find a design that works, make a final model OR decorate your final prototype to make it stand out! In the design world we often make a working model and an aesthetic (visually pleasing) model. Eventually these need to be combined to achieve the final product.
Art
One of the criteria outlined in the challenge letter is “Can you design some interesting sail shapes that children would like to play with?” Art plays a big role in making a product or toy interesting to kids (and adults). Think about the toys and products you are drawn to and how their design makes you want to pick them up and play with them. A visually engaging product usually employs color and patterns to make it more attractive and exciting. Decorating your skimmer hull and sail to personalize it and make it visually striking is an important element in this project.
Math
- Symmetry Symmetry is defined as creating equal arrangements of a design on either side of an axis. In this project symmetry is critical in the design of the sail. You’ll notice that if you design an asymmetrical sail (meaning not symmetrical), the skimmer will quickly twist.
- Area Area is defined as the size of a surface. The area of the sail is the most critical factor in creating a successful skimmer. The forward motion force is proportional to the area of the sail, meaning a larger sail can harness more of the wind force than a smaller sail. There is a point though that the sail can get too big and cause the skimmer to tip over due to torque.
- Perpendicular Perpendicular means positioning two objects at a 90 degree angle to one another. In this project the sails must always be placed perpendicular to the forward motion force of the wind.
Conclusion
This engineering project packs in so many STEAM concepts and the best part is that it utilizes materials you probably have right now. See more and grab the template here!
Of all the aspects it covers I particularly love how well it introduces kids to the iterative process of design/engineering. If you enjoyed this engineering challenge for kids be sure to head over to AWIM’s SAE STEM@Home page to find more activities. Two of my favorite challenges they have are the Straw Rocket and Paper Helicopters. Be sure to check those out!
I love this idea!