Spring is here and that means that flowers are everywhere, including in today’s freak-out awesome flower puzzle project!
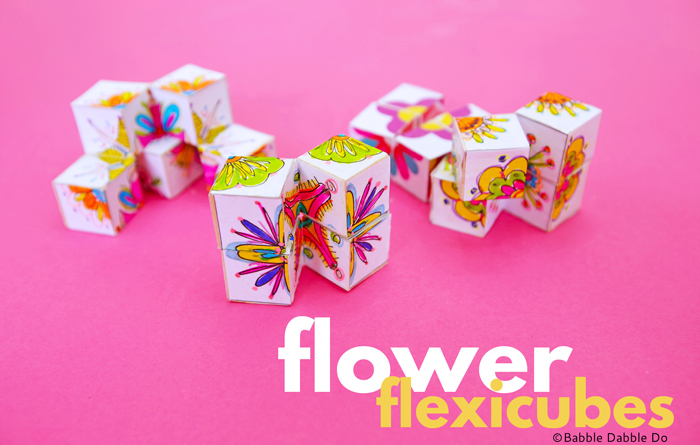
This DIY Flower puzzle is a variation of Flexicubes. We originally made them using colorful duct tape but today we are decorating our own set to make this incredible kaleidoscopic flower toy!
This post contains affiliate links to products.
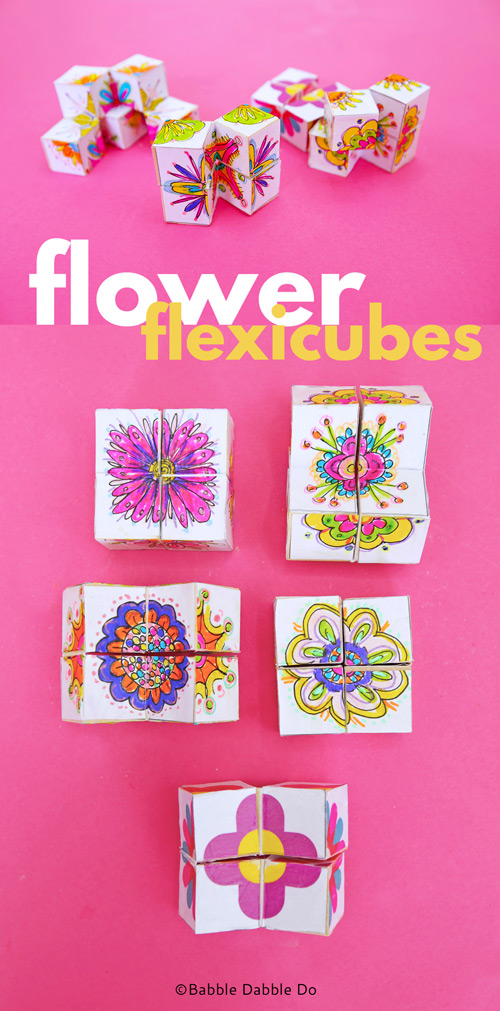
DIY Flower Puzzle: Flower Flexicubes

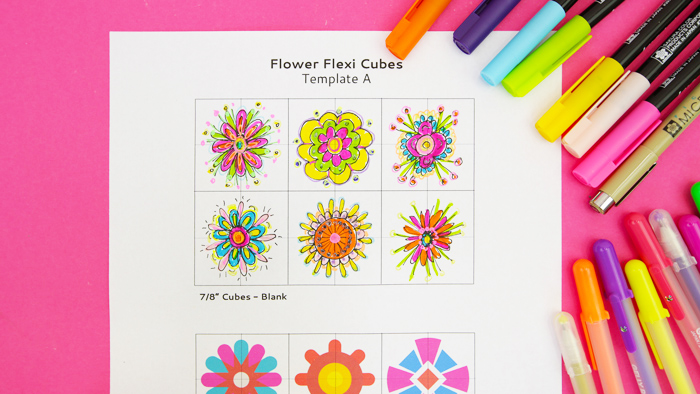
PRINT THE TEMPLATE HERE
Materials
If you are ordering a bunch of wood parts here’s a great place to get them online: Woodpecker Crafts.
- Wood Blocks (4 per puzzle) Use ⅞” square or larger blocks. Our printable includes templates for ⅞”, 1” cubes and 1 ½” square wood cubes
- Template
- Duct Tape
- Markers and Pens These gel pens add a beautiful shimmery layer to your design.
- Scissors/X-ACTO Knife (Adults only)
- Old Credit Card
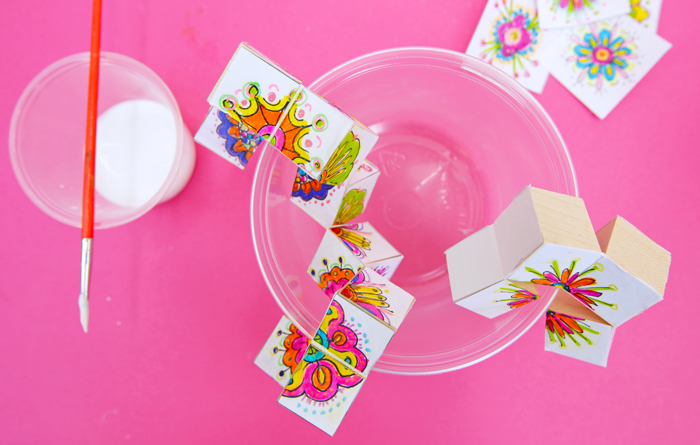
- Mod Podge
- Paintbrush
NOTE: Don’t skip placing the credit card spacer between blocks. It allows room for the blocks to comfortably rotate once they have their flower faces glued in place.
Instructions
Decorate the Template
Note: If you wish to skip the decorating step use the set of pre-printed flowers in the template.
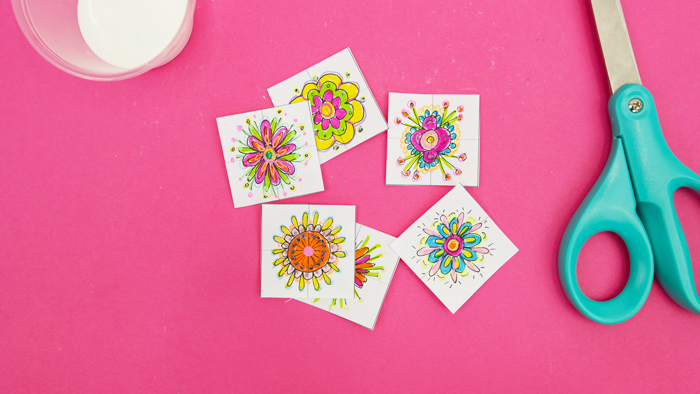
- Step One Using a pen, draw flowers or other design in each of the (6) faces on the template that matches your block size.
- Step Two Color in the flowers or designs with markers. If desired add details in glitter gel pens. They really add a pop to your designs!
- Step Three Cut out the individual flowers and set aside. I do not recommend cutting the flowers faces until you are ready to assemble the puzzle.
Make the Puzzle
- Step One Arrange your blocks into a square shape.
- Step Two Make hinge 1 as follows: Insert a credit card between two cubes. Tape two faces together keeping the card in place. Once the faces are taped remove the card and trim the duct tape.
- Step Three Repeat Step 2 with a second set of blocks to make hinge 2.
- Step Four Place your (2) sets of hinged blocks on a work surface with the hinges on opposite ends. See diagram below.
 Place a credit card between the set of cubes and tape hinge 3. Trim tape. The basic puzzle is complete.
 Place a credit card between the set of cubes and tape hinge 3. Trim tape. The basic puzzle is complete.
Add the Flower Faces
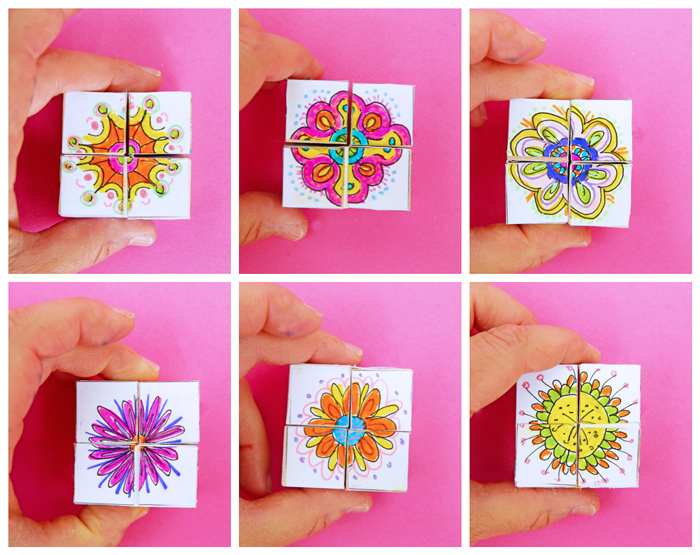
- Step One Choose one flower and cut it into (4) individual faces following the template lines.
- Step Two Paint a layer of mod podge on one set of wood block faces.
- Step Three Add a paper flower face to each block, making sure the puzzle is correctly aligned.
- Step Four Paint a layer of Mod Podge over the flowers faces. Flex the cube to remove any glue between faces that may cause the cubes to stick together.
- Step Five Repeat step 4 with the faces on the opposite side of your puzzle. Let dry.
- Step Six Repeat step 4 with remaining faces, letting dry as necessary.
Tip: Once the puzzle is dry you may need to trim the edges of paper faces to align with the wood blocks edges.
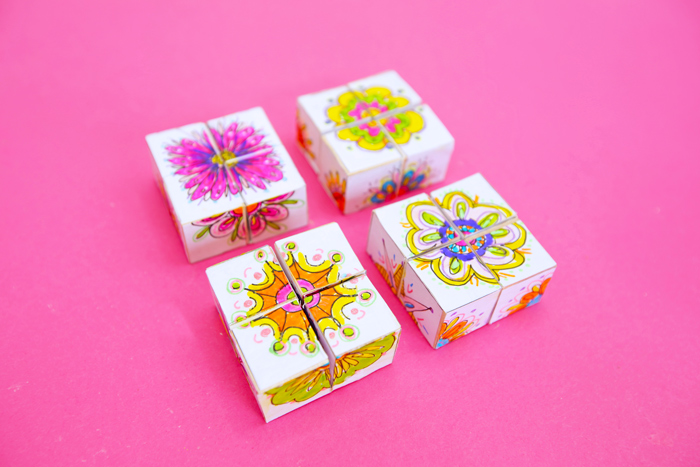
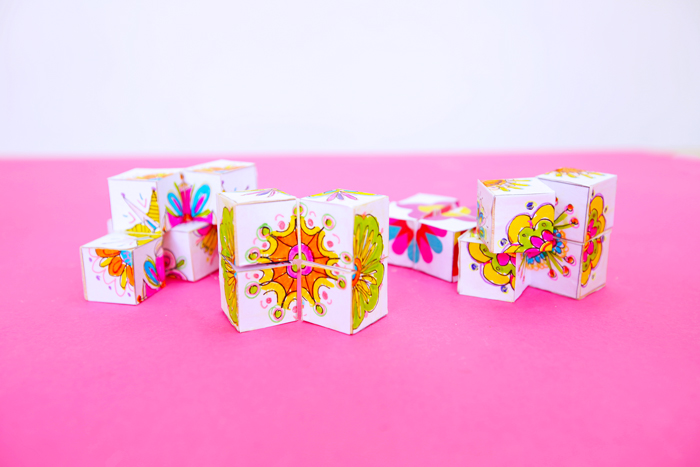
You’re done! When your flexicube is fully dry gently rotate it to reveal the different faces! If you want to make square cube go here to see how to combine two puzzles together.
Let’s Talk STEAM
The Art
As we talked about in this project, flowers have a long history in art and many famous artists and art pieces use flowers as their subject matter, some of the most famous being Vincent Van Gogh’s sunflowers and Georgia O’Keeffe’s orchid watercolors. When working on flowers fleixcubes add different layers to your designs. We used three layers:
- A flower outline created in black pen.
- Color added with markers.
- Details added in gel pens.
Paintings, illustrations, animations are usually made up of different layers. Artists use the layers to add color, detail and depth to their work.
The Math
 The Math
 Our Flower Flexicubes are made from 4 different cubes. Cubes are 3 dimensional squares that have have 6 faces. When we connect the cubes together in this project we end up with 6 faces to the puzzle, each face being divided into 4 sections. See what happens when you join 2 of these puzzles together here.
The Engineering
Hinges are a way to connect two moving components with their movement restricted to one direction. The most common hinges are on doors, which attach to the door edge and the door frame and allow a door to open and close. But hinges are everywhere! Think book edges, packaging that opens and closes, even your elbows and knees! When you connect the cubes in this project using hinges that align with different faces you end up with additional 3 dimensional movement.
Conclusion
If you loved making tis flower puzzle hop over her and check out Flextangles, they are another mind blowing hidden faces style art project!
Leave a Reply