Homemade Christmas Ornaments are one of the best holiday crafts out there. The possibilities are endless and it’s a simple and fun way to spend and afternoon with the kids “making cool stuff!” You also probably are aware of my family’s slight obsession with clay….my daughter could spend hours just making little things out of clay, so I decided that we would make some fancy ornaments using polymer clay this year. And I’ve teamed up with on of my favorite websites to do it: Create for Less.
So of course I couldn’t just make one ornament to share with you guys. I mean once a girl gets rolling it’s a little hard to stop….so I made three mini tutorials. Two are perfect for all ages and one is more suited for older kids and adults.
Disclosure: Create for Less was kind enough to supply me with the materials for this project. All opinions are my own.

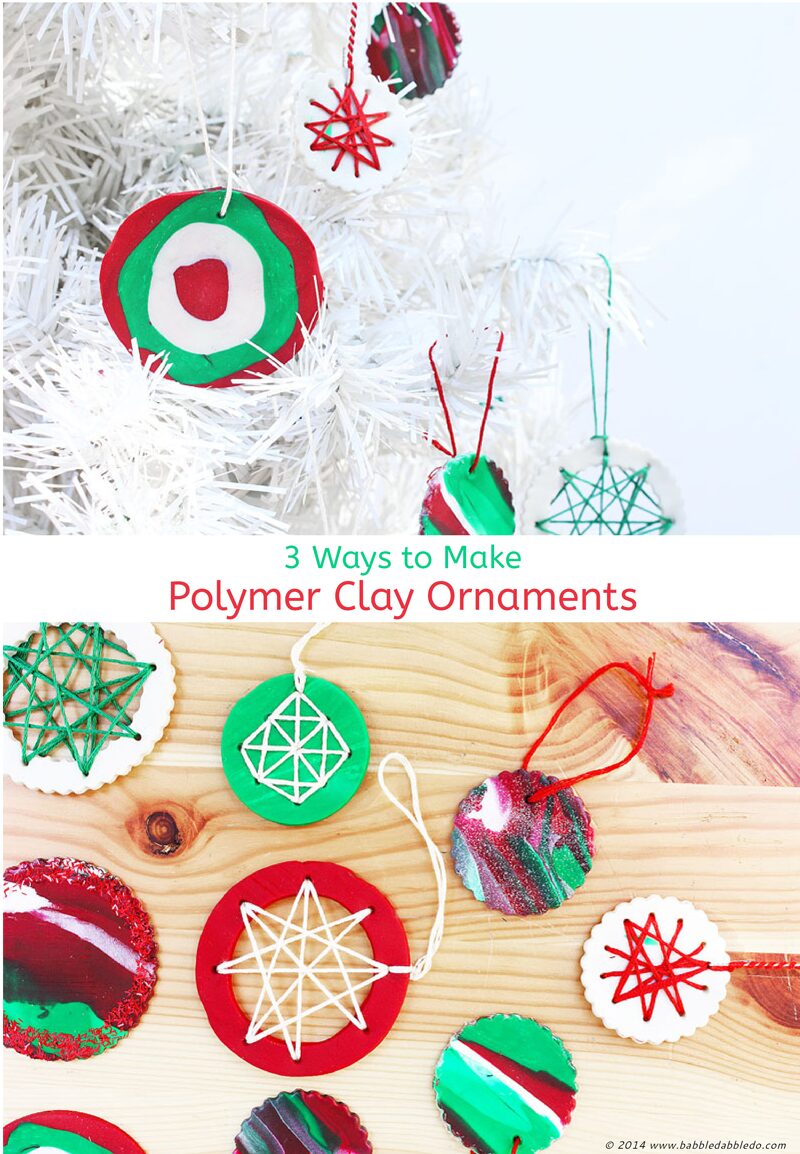
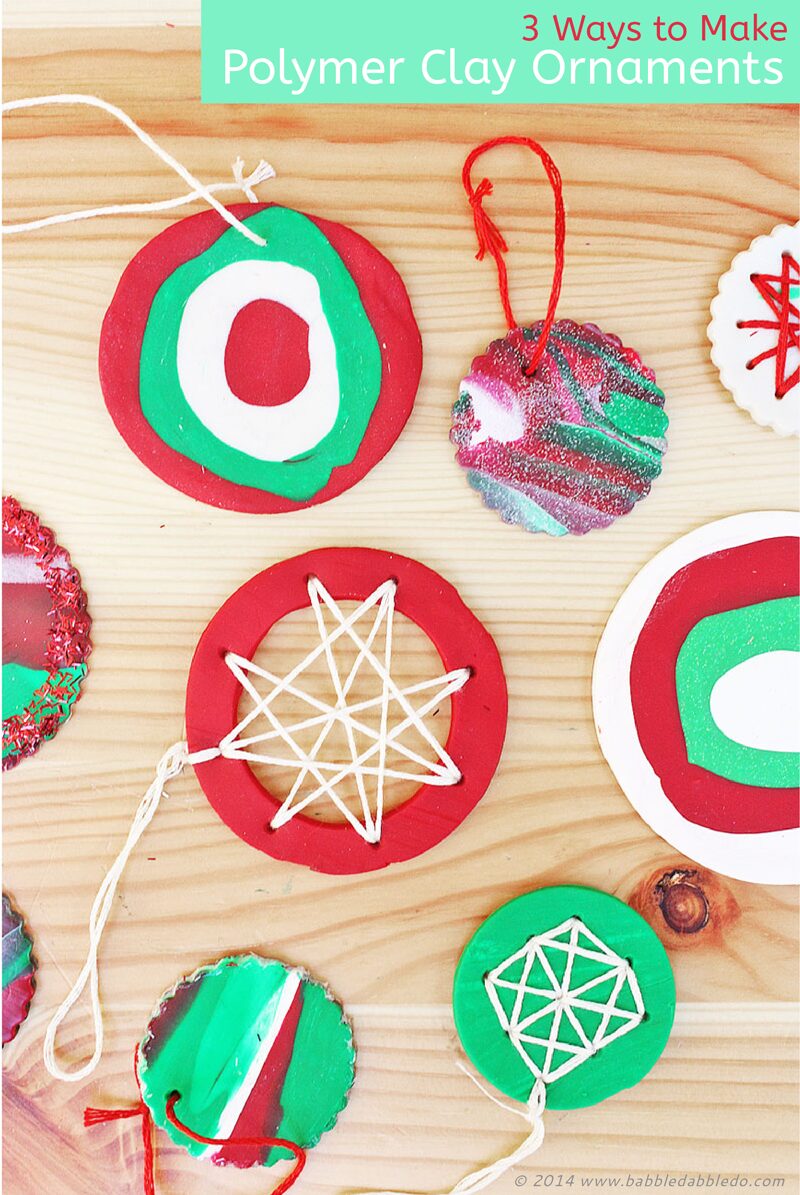
3 Ways to Make Homemade Christmas Ornaments with Polymer Clay
#1 The Classic: Marbled Cookie Cutter Ornaments (perfect for kids of all ages)
Materials
- Polymer Clay
- Clay Machine (Optional but oh so amazing) or rolling pin
- Cookie cutters
- Toothpick or skewer
- Cookie Sheet
- Oven
- Fun Glitter like this or this
- Foam paintbrush
- Mod Podge
- Embroidery Thread/Ribbon/Scissors
Instructions
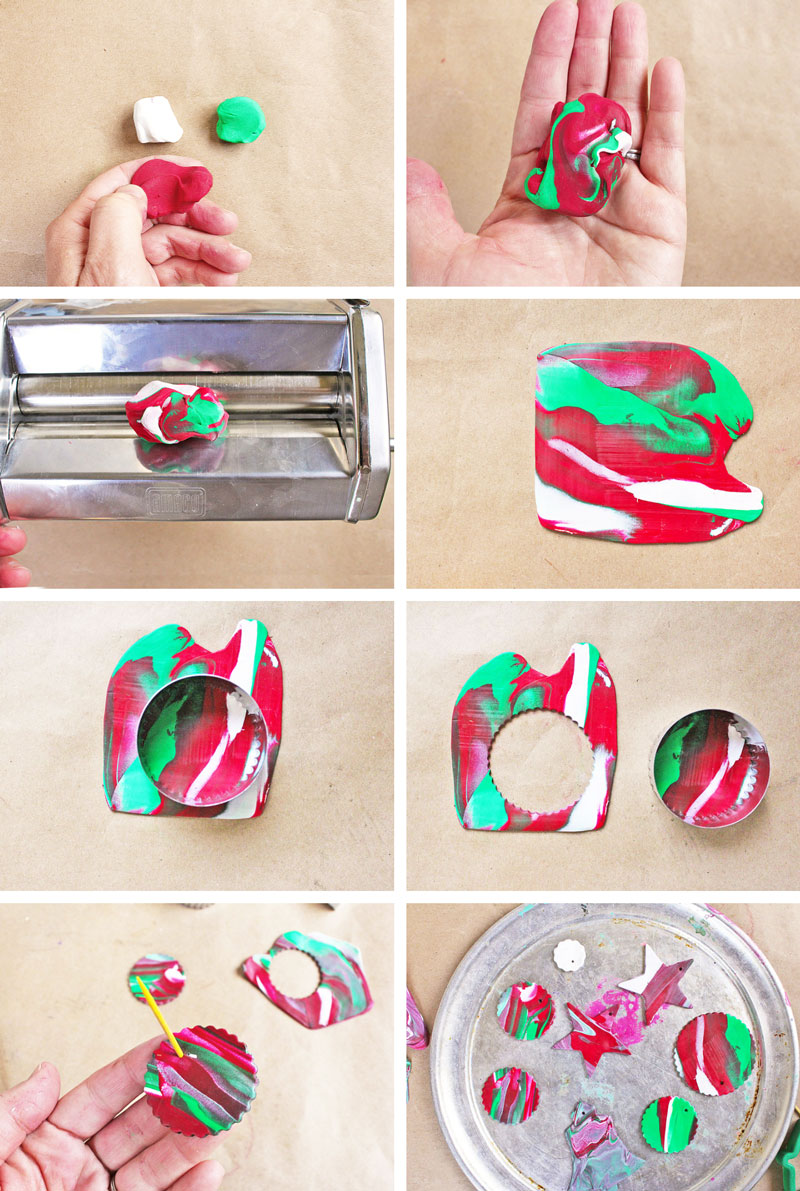
- Step One Break off a few chunks of three different clay colors. Knead them slightly.
- Step Two Squish the different colors together and knead slightly. DO NOT OVERMIX!
- Step Three Place the clay ball into your clay/pasta machine and run it through at the maximum thickness setting (we used 9). Alternatively roll out the clay using a rolling pin. You want it to be about 1/8” thick.
- Step Four Use your cookie cutters to cut out different shapes. Poke a hole in the top of each ornament using a toothpick or skewer.
- Step Five Bake the clay according to the package directions. Since our ornaments were thin we baked them for about 10 minutes
- Step Six Remove from oven and let cool
- Step Seven Add glitter! Everything looks more festive with glitter! Brush a light layer of Mod Podge on your ornaments and dust with glitter. Don’t add too much!
- Step Eight Add a length of ribbon and hang it


This project is a lot of fun for kids!

#2 For Art Geeks: Op Art Ornaments (perfect for kids of all ages)
Materials
- Polymer Clay
- Rolling pin
- Circular cookie cutter or drinking glass
- Toothpick or skewer
- Cookie Sheet
- Oven
- Embroidery Thread/Ribbon/Scissors
Instructions
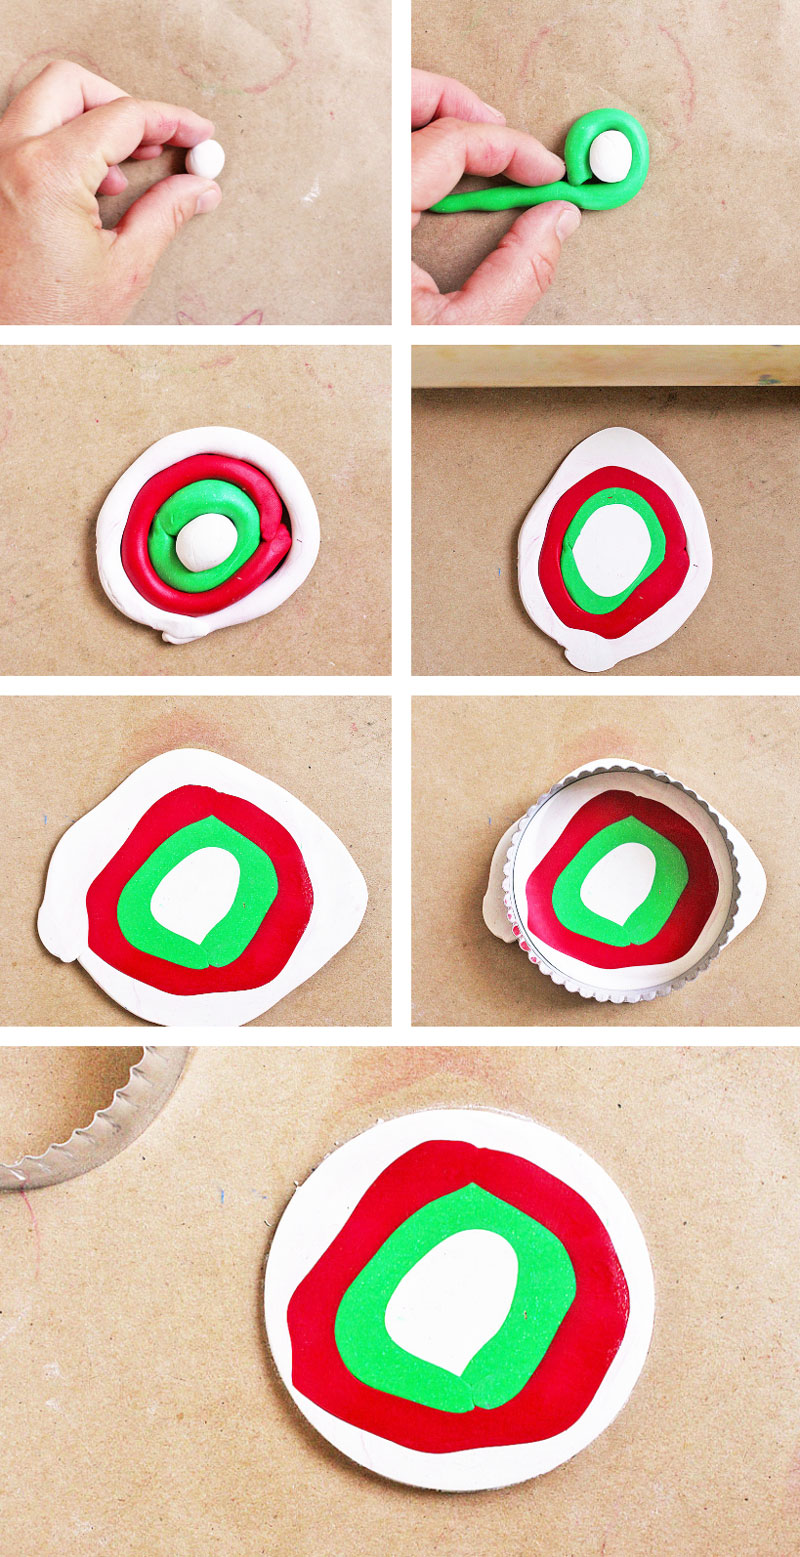
- Step One Break off a few chunks of four different clay colors. Knead them slightly and roll each one into a long thick strand.
- Step Two Roll one of the colors into a small dime sized ball.
- Step Three Wrap a second strand around the ball, trim the end so that it fits neatly around the center ball and then press the ends together
- Step Four Repeat until you have 3-5 concentric circles.
- Step Five Flatten the circle gently using a rolling pin. Carefully peel it off the work surface, turn it over and flatten again. You want it to be between 1/8” and ¼” thick.
- Step Six Using a circular cookie cutter trim the clay to make a clean round edge.
- Step Seven Poke a hole in the top of each ornament using a toothpick or skewer.
- Step Eight Bake the clay according to the package directions. Since our ornaments were thin we baked them for about 10 minutes.
- Step Nine Remove from oven and let cool.
- Step Ten Add a length of ribbon or embroidery thread and hang it.
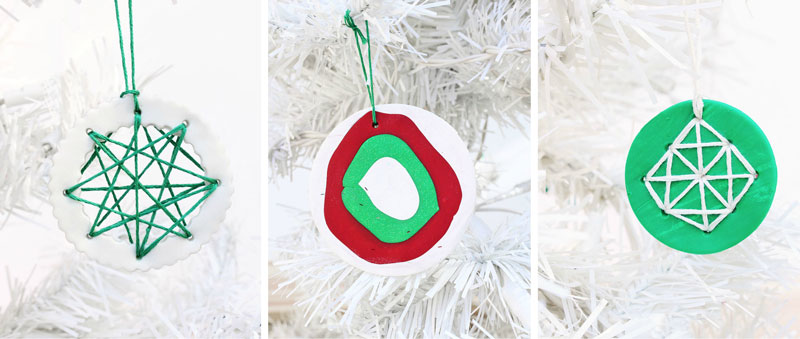
#3 For Sewists: Embroidered Ornaments (perfect for older kids and adults)
Materials
- Polymer Clay
- Clay Machine (Optional but oh so amazing) or rolling pin
- Cookie cutters
- Toothpick or skewer
- Cookie Sheet
- Oven
- Embroidery Thread/Scissors
- Embroidery needle
- Glue
Instructions
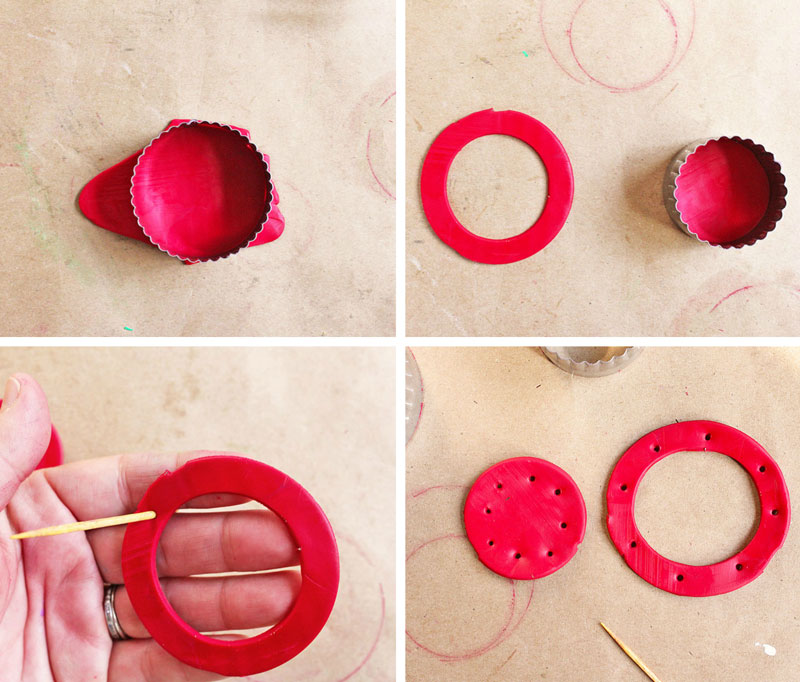
- Step One Break off a large chunk of one clay color. Knead it slightly.
- Step Two Place the clay ball into your clay/pasta machine and run it through at the maximum thickness setting (we used 9). Alternatively roll out the clay using a rolling pin. You want it to be at a minimum 1/8” thick.
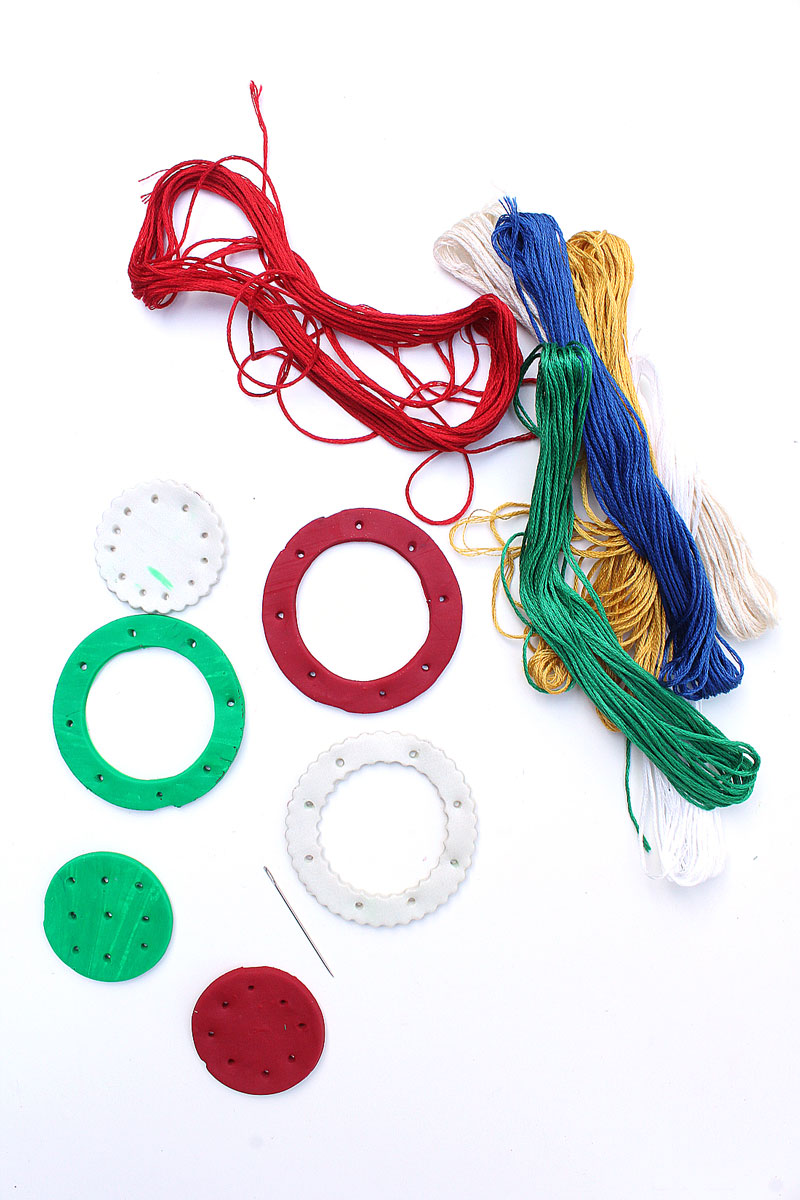
- Step Three Use a round cookie cutters to cut out a large circle, then use a smaller circular cutter to cut out the center of that circle. You want to have two pieces of clay left, one ring that is about 1/4” wide and the leftover center circle.
- Step Four Poke holes around the ring and in the center circle using a toothpick or skewer.
- Step Five Bake the clay according to the package directions. Since our ornaments were thin we baked them for about 10 minutes.
- Step Six Remove from oven and let cool.
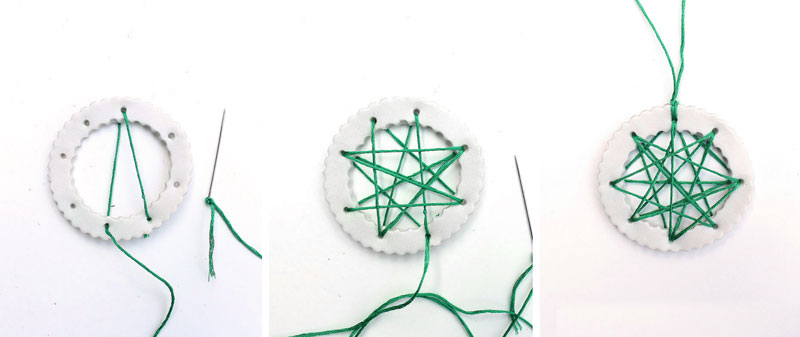
- Step Seven Thread your needle with embroidery thread. Tie a knot at the end.
- Step Eight From the back of the ornament start sewing with embroidery thread. Thread across s the ornament to create patterns as you wish.
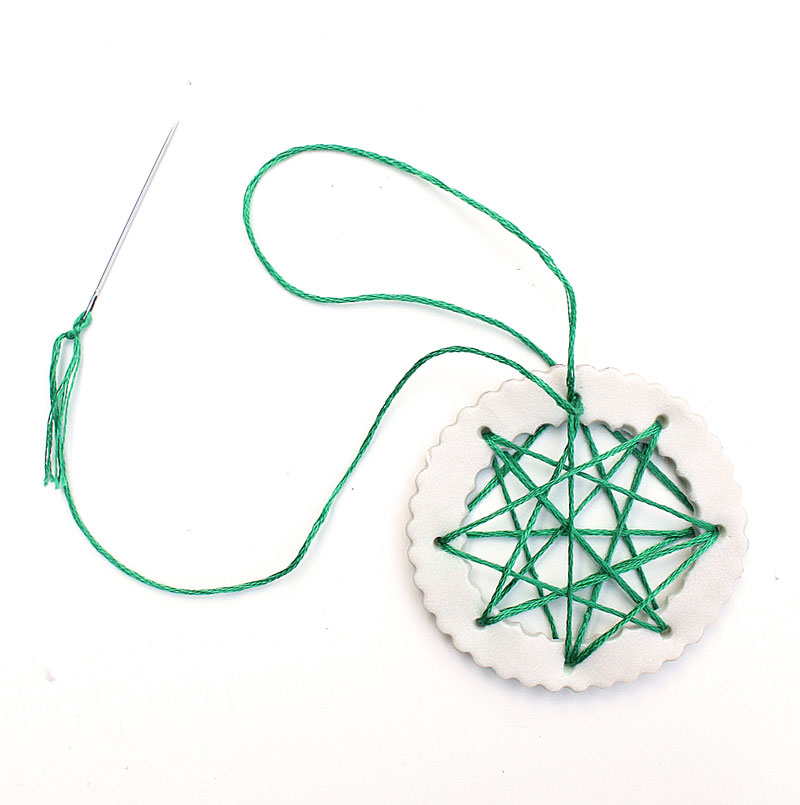
- Step Nine When you are satisfied with your pattern leave a length of thread at the end, loop it back through one of the holes and tie it off to make a hanger. Add a dollop of glue on the knotted ends, embroidery thread is slippery.
Note: Polymer clay is brittle after baking! Embroider the ornament delicately so you don’t crack the clay. I only had one out of 10 break on me.
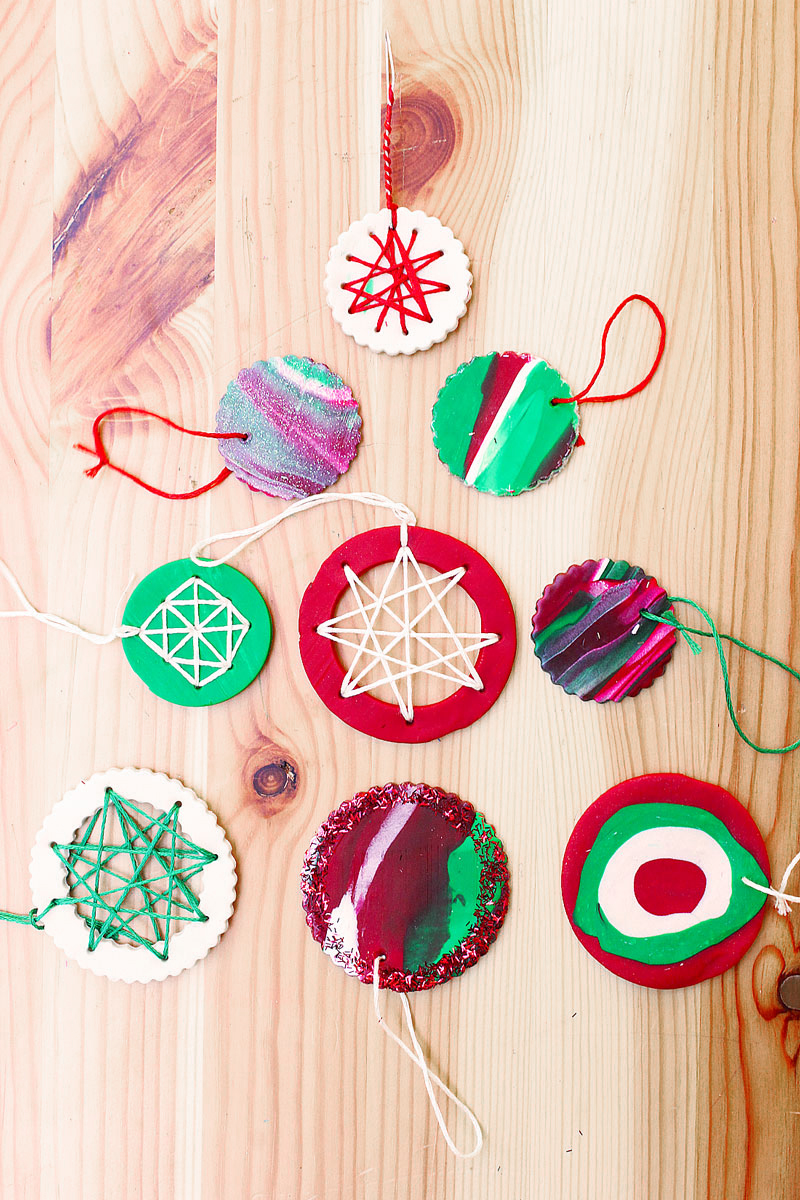
Conclusion
Don’t these all make a fun collection? And they really are very simple. If you fire up the oven you can make a few, bake them and continue making ornaments while each batch is curing in the oven.
Thank you to Create for Less for sponsoring this post.
These are awesome MATH ART ornaments!!! I’m not working on a craft, yet, but I’m planning on making Scandinavian woven paper hearts with the kids.
I didn’t think of them as having a math twist but you are right! And I love Scandinavian holiday decor!
We are working on making some ornaments for our literacy tree this year!
Can’t wait to see them and the tree!
We just finished a Thanksgiving Thankful Jar and are starting to gear up toward Hanukah Crafts! 🙂
I love Thankful Jars! Such a great way to get kids to reflect.
These days we are making lots of christmas snacks 🙂
Yum! I need some of those to go along with the crafting 🙂
We are starting ornaments too! Love this idea!
Thanks! Ornaments are so much fun!
I have plans and materials for a couple nativity sets – I need to get started on them!
That’s on my list too! Can’t wait to see yours!
We’re working on some gingerbread men ornaments!
Fun! I love classic ornaments!
We love making homemade ornaments! I love that my parents’ tree to still filled with the ones I made as a child. I’m getting all my materials ready for a fun ornament making session with family. Definitely adding these to the list! Thanks so much for the giveaway opportunity!
Yay! I would love to see some of you suncatcher ornaments in person!
We’re making Christmas ornaments too!
It’s a no-fail activity!
I LOOOOVE this post Ana! It’s really great. And you know I love that secret weapon craft machine. Awesome!
I learned about it from you!
Love these!
Fun! I would love to win!
Yay!
We are working on our first ornaments of the year!
Yay! I hope you’ll be sharing them online!
I love this, you have great ideas for all ages! I have never worked with polymer clay before, I think this is a must try project with the kids to decorate for Christmas.
It’s easy and the results are always pretty!
OHH Ana! These are too beautiful! Honestly, I am so envious of your ability to select great color combos! 😀 I have been TRYING to convince my 5 yr old to try this, something, anyting with polymer but shes more of a pencil artist. I keep telling her playing with clay will assist her at growing her drawing abilities! but shes 5 LOL! I wonder if there is any advice you could share to “get the kids to the table” when its a medium theyre not so excited over??? Thanks and Happy Holidays!