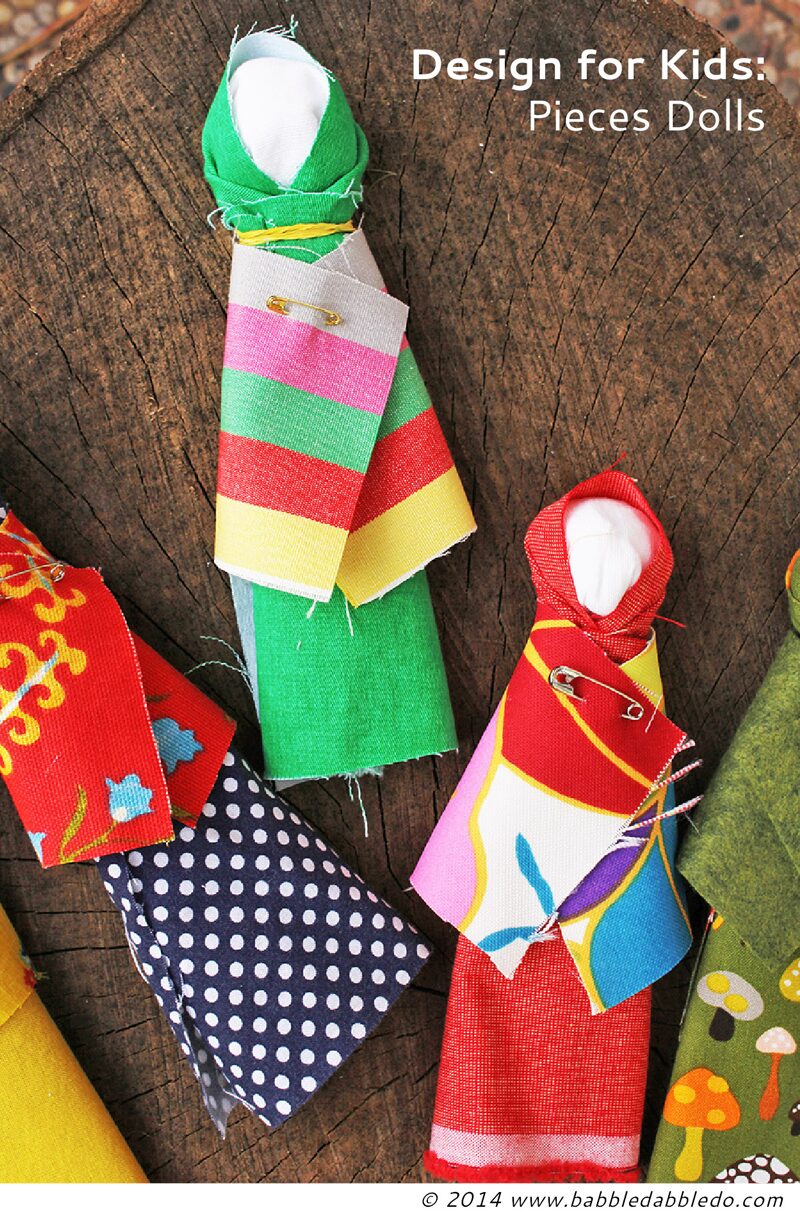
Learning how to make a doll out of fabric scraps is a nice contrast to the zillions of store bought doll toys out there. And I really enjoyed making a few of these simple, no-sew dolls based on a Native American craft.
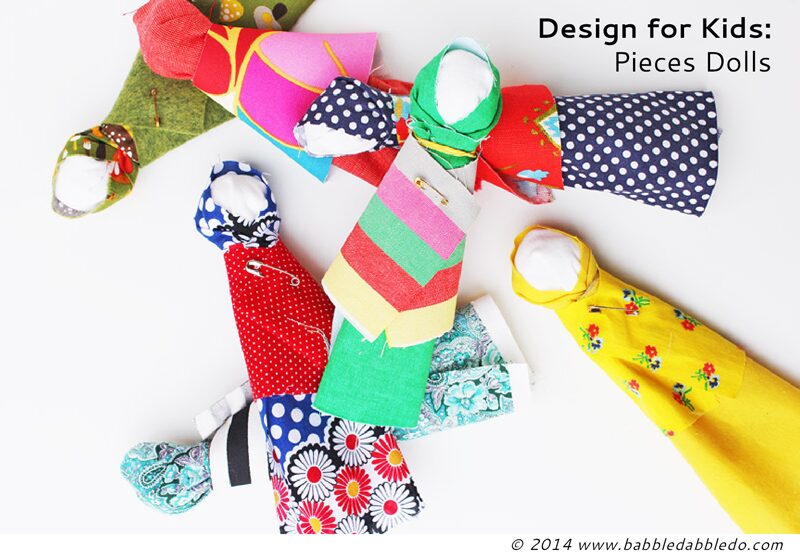
I admit that we have too many toys in our house and I sometimes wax nostalgic about the days when kids had fewer toys at their disposal. It seems like the fewer the toys kids have the more cherished they become. So I invite you to step back in time, make a few of these “Pieces Dolls” with your kids and encourage them to imagine the types of toys kids had hundreds of years ago….
Note: I adapted this craft from the amazing 1970’s book series The Family Creative Workshop. It’s a 24-volume set of some of the wildest crafts you will ever see. It’s beyond comprehensive and amazing fodder for creative types. I highly recommend buying a set on eBay if you can find it.
This post contains affiliate links.
Design for Kids: How to Make a Doll
Materials
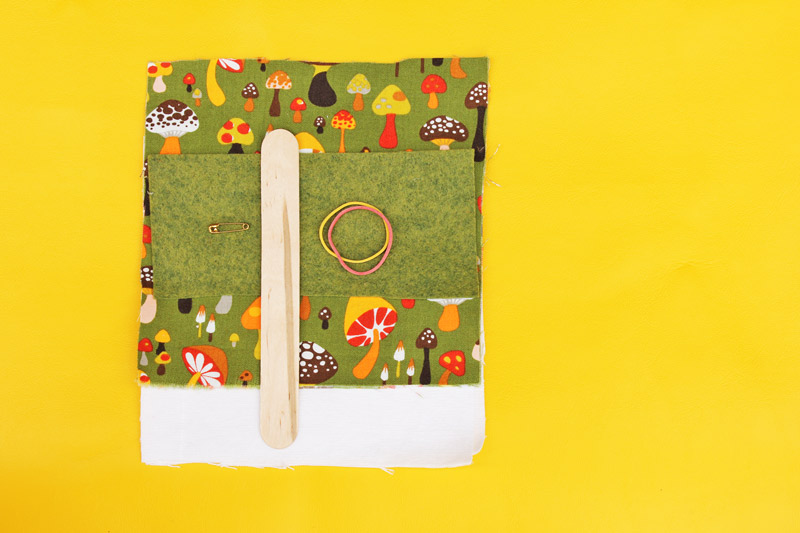
- Larger Fabric Scraps select white and 2 contrasting colors/patterns per doll
- Cutting Template OR cut the following sizes out of your fabric: (2) 6″x6″ white pieces, (2) 6″x 6″ colored pieces, and (1) 3″ x 6″ colored piece
- Large Craft Stick (optional for stiffening the doll)
- Rubber Bands
- Small Safety Pins
Instructions
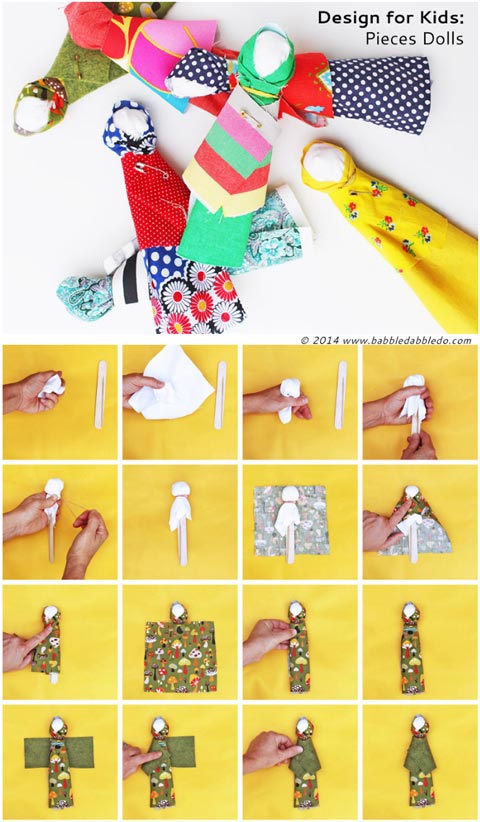
Each doll will take less than 5 minutes to make. I promise!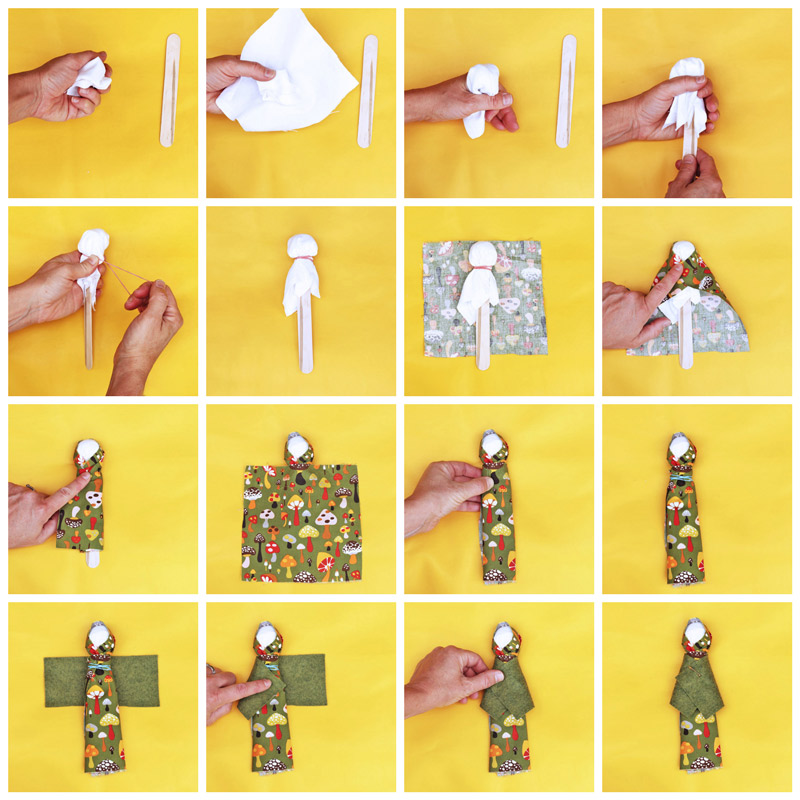
- Step One Print out your template and cut out the pattern pieces.
- Step Two Lay out the pattern on your fabric scraps and cut out the number of pieces listed on the template. Don’t worry about being too exact.
- Step Three Roll up one of the white pieces of fabric into a ball and then cover it with the other piece of white fabric. If you are using a craft stick to stiffen the doll insert it into the open end of the white fabric cover piece.
- Ste Four Place a rubber band around the neck of the doll to secure the head and craft stick in place.
- Step Five Take one of the colored 6” x 6” squares and drape it over the head of the doll to form a scarf. Add a rubber band around the neck to secure the scarf in place.
- Step Six Take the second 6” x 6” dark fabric piece and wrap it around the bottom section of the doll and craft stick to form the body. The open end of the fabric should be at the back of the doll. Secure it with a rubber band at the neck.
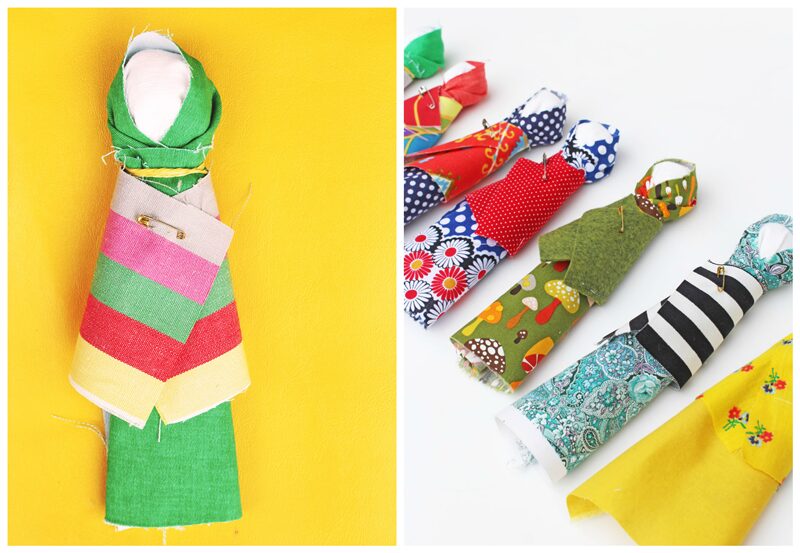
- Step Seven Take your 3” x 6” piece of fabric and wrap it around the shoulders of the doll to create a shawl. Place a safety pin where the ends meet.
You’re done! You can draw in a face with markers if you want; I recommend using a fine point Sharpie since water based markers bleed when used on fabric. Personally I preferred the blank face, it adds an extra level of imagination to the toy.
Looks Like
Alexander Girard. I’ll probably reference this design genius many times here on Babble Dabble Do and for good reason, his work is so bright, brilliant, and broad in scope. He designed everything from graphics to textiles to the wood dolls I immediately thought of when selecting a designer to highlight in this post. If you aren’t familiar with his wood dolls stop reading this post and go here: Alexander Girard on Vitra. That’s right I just directed you to you stop reading this post and look at the dolls, that’s how much I love them! But please do come back after….
Alexander Girard was a top designer in the 1950s-60s but less of a household name than his contemporaries Charles and Ray Eames. His work was often influenced by folk art and infused with vibrant colors. And he is also well known for designing one of the first “conversation pits.” If I ever have a big enough house you can be sure I will be bringing back THAT idea! Click here to see a picture of his famous conversation pit in the Miller House, designed in conjunction with Eero Saarinen.
Conclusion
After learning how to make a doll with fabric scraps, my daughter and I incorporated these beauties into her pretend play. Clara is currently obsessed with the movie Frozen (I mean really, what girl isn’t?) so two of the fabric dolls stepped in to play a part in her reenactment of the movie. It was sweet. It also reminded me that kids don’t need toys that provide everything for them, simple dolls like these can play parts in pretend play just as well as Barbie in her fanciest dress. Give a simple doll a try!
More
- If you liked making a handmade doll you might also want to check out the clothespin dolls we made for Valentine’s Day last year.
- If you have heaps of fabric scraps and need another project for them visit our fabric beads project. It’s no-sew!
- For you doll nuts out there do yourself a favor and stop by Molly Moo. She has loads of great doll crafts on her site! Two of my favorites are these craft stick dolls and these wine cork dolls.
- And another great resource for DIY dolls is Red Ted Art. I’m loving these Rainbow Fairy Peg Dolls. And just in case you think dolls are for girls be sure to check out this surprise doll made from a surprise material….
- If you are interested in exploring more folk art with kids here is a book to get you started. It’s on our order list now! American Folk Art for Kids: With 21 Activities.
- And lastly this craft brought to mind on of my favorite children’s books: Mama, Do You Love Me?
It’s a beautifully illustrated book based on the Inuit. I tear up every time I read it because it perfectly captures the relationship between parents and children no matter what culture you are from.
Don’t miss out on more design for kids here on Babble Dabble Do! Your child’s inner Alexander Girard thanks you! Subscribe below or like us on FB.
Spread creativity like wildfire: Pin This!
Oh I LOVE these… so simple and so gorgeous! My kids will love making these!
Thanks Kate! I was floored by your recent playdough mat project. Absolutely amazing!
This is a beautiful project. Thank you! Where do you get such lovely fabric?
I would love to make these with my kindergarten class at school. But I would use various shades of brown fabric in place of the white to make the skin colour more representative of the students I teach (and the citizens of the world). Thanks for the idea!
Great idea Megan!
Adorei seu site, aprendi muito e compartilhei com minhas amigas educadoras.
Convido a conhecer meu blog (http://ivonigamadolls.blogspot.com.br/) onde fiz menção a técnica da boneca de pano feito a mão. Parabéns!
Look easy going to give it a go with grandaughters in. Next few days
Great!
This would be an excellent project for kids! thanks so much for the really great idea. I want to try teach the kids at my preschool to make there own dolls and this method is simple and the finished product is awesome looking.
Thanks so much! I’d love to see pics if you make them! Post them here: https://www.facebook.com/babbledabbledo
Mmmmm
Cute