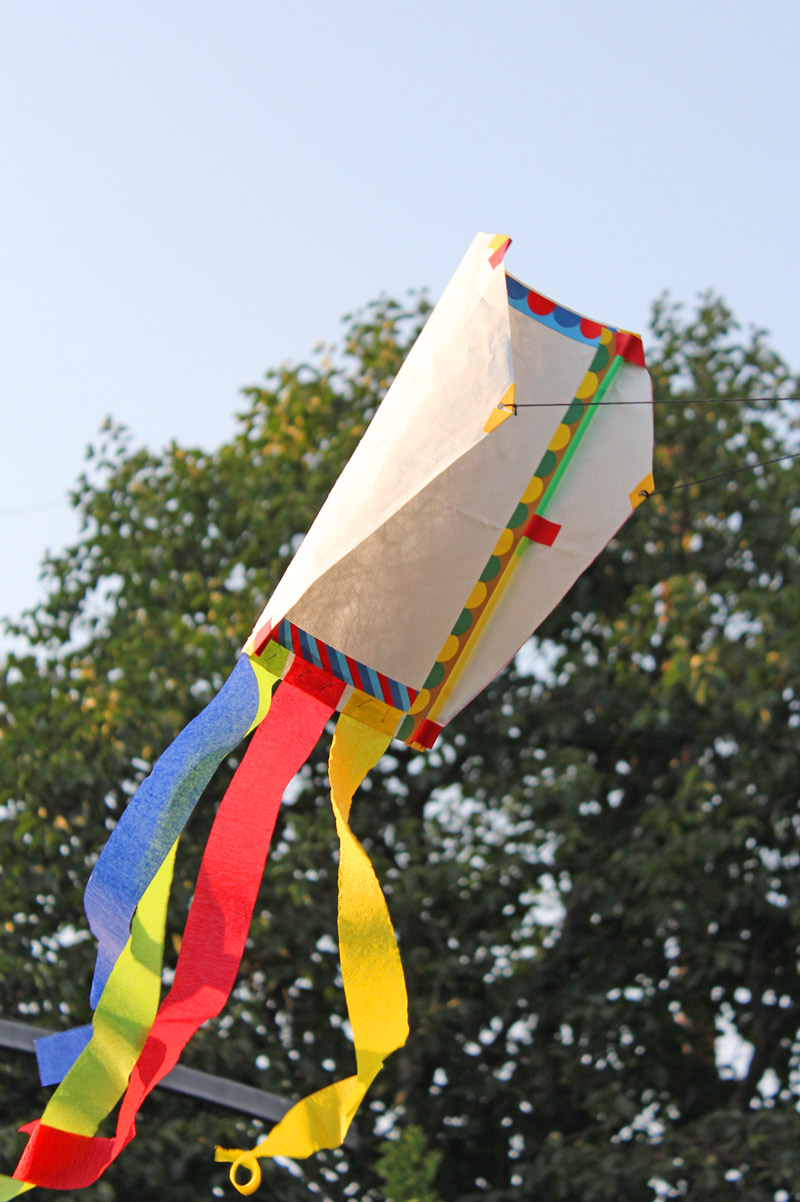
Summer is here and it’s the perfect time to learn how to make a kite! Last summer we spent a week in Cambria, CA where the wind blows like crazy, and the kids I had a great time flying kites on the beach. Ever since then I’ve been itching to make our own kites since they really are not much more than paper, wood, and string. This is a perfect craft for school age kids and a nice way to teach them about plans/patterns and measuring, which as an architect I can’t help but geek out on!
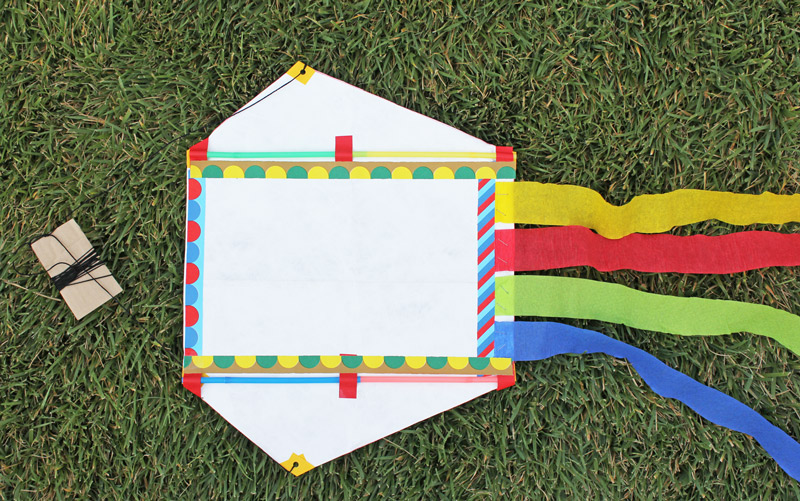
Materials Note: We made our kite out of a piece of Tyvek I had purchased for another project. Tyvek is perfect for kites because it’s lightweight, water resistant, hard to tear, and you can draw on it. If you don’t want to go to the trouble of purchasing Tyvek, many mailers are made out of it, next time you get one in the mail, save it and up-cycle it into a kite!
This post contains affiliate links.
How to Make a Kite
Materials
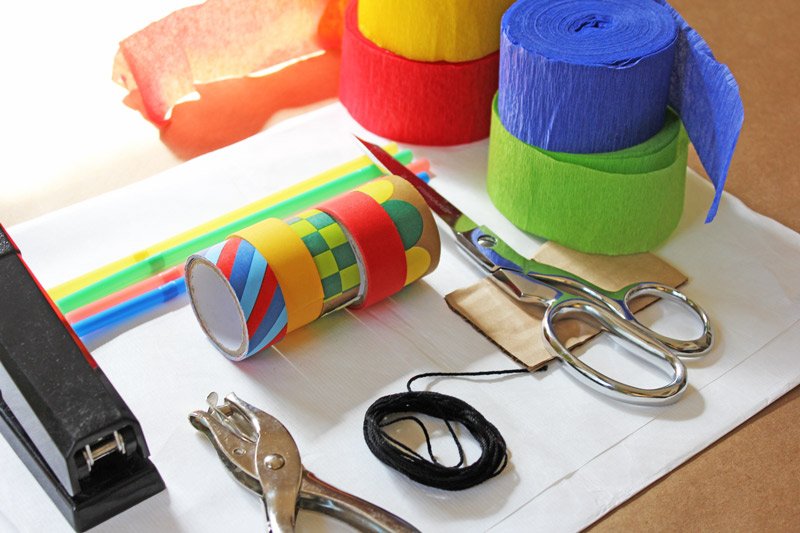
- Tyvek or Large Used Tyvek Mailer
- String
- Tape
- Drinking Straws OR Dowels
- Cardboard
- Pencil
- Scissors
- Ruler
- Hole Punch
- Stapler
- Crepe paper strips for the tail
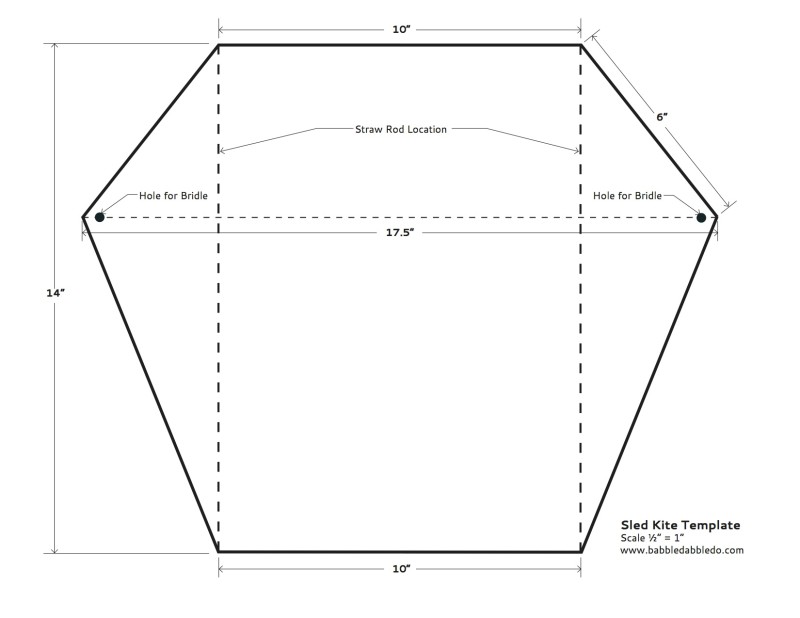
- Tyvek Sled Kite Template- Download it here
Instructions

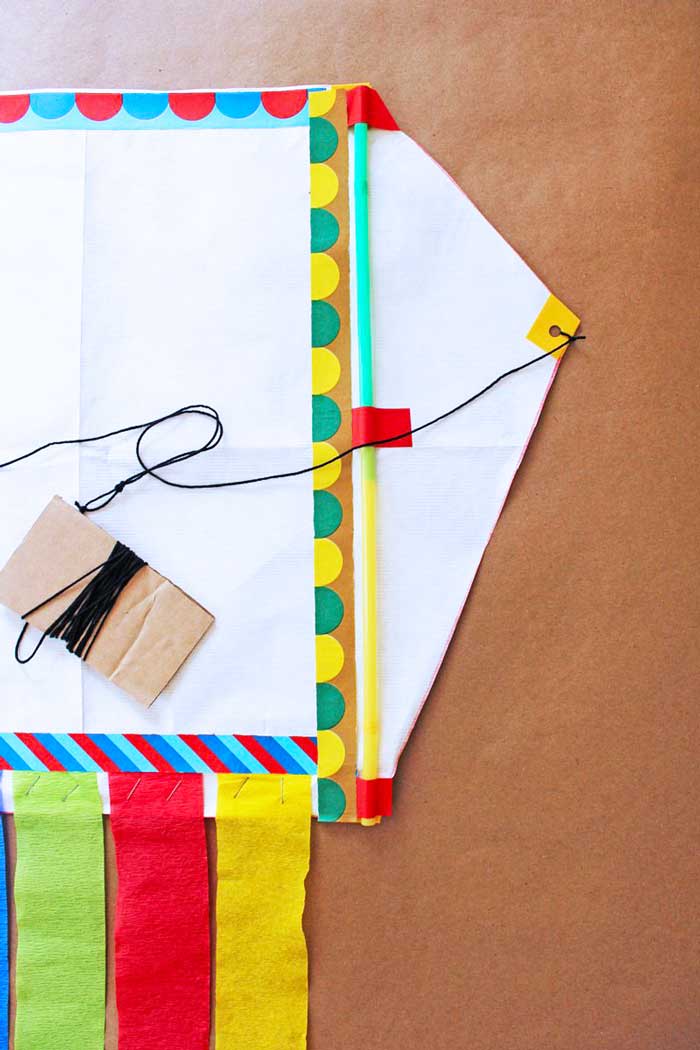
- Step One Using the proportions shown in the template below, draw out the pattern for your kite on the Tyvek using pencil and a ruler. You can proportionally adjust the template to fit the size of paper you are using.

- Step Two Cut out the kite shape.
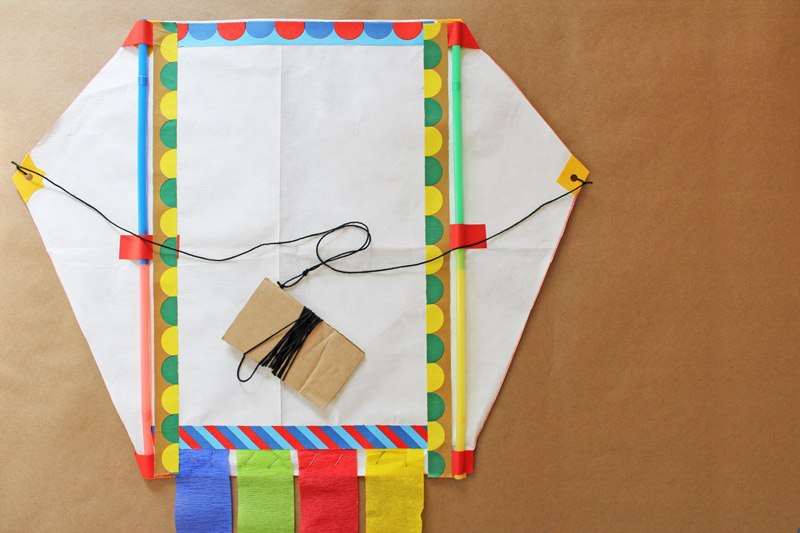
- Step Three Reinforce the comers of your kite with tape.
- Step Four Using a hole punch, make a hole for the bridle string in the two furthest points of the kite as shown on the template.
- Step Five Insert the end of one drinking straw into another straw. Push it in about an inch for a tight fit. Your combined drinking straw length needs to match the length of the kite. Repeat this process so that you have two straw “rods.” Alternatively, cut two rods from a dowel.
- Step Six Tape the straw rods or dowels along the length of the kite as per the template.
- Step Seven Add the tails! Cut pieces of crepe paper or lightweight fabric for the tail. Tape or staple them to the bottom of the kite
- Step Eight For the bridle you will need to cut one piece of string that is twice the width of the kite. If you are using the measurements as per the attached template your bridle string will be 35 ” long.
- Step Nine Thread one end of the bridle string through one of the kite corner holes and tie a tight knot. Repeat on the other side.
- Step Ten Cut the flying string as long as you want it. Depending on where you will be flying your kite consider the length desired. Notch your cardboard scrap. Tie one end of your flying string around the cardboard and knot it at the notch to secure it. Wrap the excess string around the cardboard, leaving about 18 inches free.
- Step Eleven Make a loop in the center of the bridle string. Now tie the flying string to the loop and knot.
You’re done! If you want, you can decorate your kite using markers, decorative tape, or paint.
This kite can be flown outside by just running around and letting it go behind you. If you have windy weather you’ll be in even better luck and can skip the running around part, unless you need the exercise! We’ll be taking these to the beach next week; I’ll let you know how they do…….
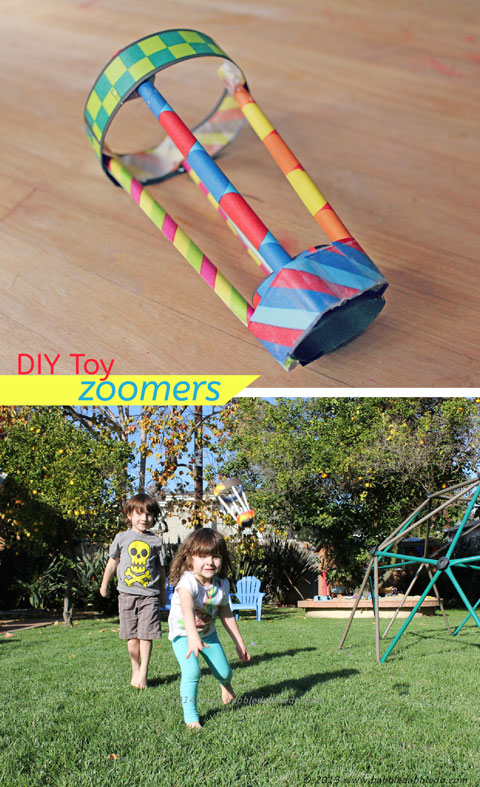
More Flying Toys
If you enjoyed learning how to make a kite, we have two more DIY flying toys + loads of other homemade toy ideas here:
40+ more DIY Toys
Are you passionate about raising creative kids?
Join over 22,179 parents and educators who want connect with kids and nurture their creative process through magical, easy projects you can do TOGETHER.
Subscribe to our email list to receive project ideas as well as offers for some our creative products.
If you want to read our privacy policy before subscribing, hop over here.
Hi there! Thanks so much for stopping over and commenting on my blog. I’m glad you and your family will be making some natural paint brushes- they are really fun! =)
Anyway, this DIY kite is really awesome! My daughter is obsessed with her kites and they are store-bought cheapies. We will have to try this out!
Thanks Kimberly! Your site is an amazing resource for activities!
Oooh what a funky looking kite! I am loving that tape… will have to keep an eye out and see if I can get something similar here in Australia.
Hi Kate,
I love, love, love Picklebums! The tape is by Kid Made Modern, Target carries it here in the US. Glad you stopped by!
Ana
and I thought it was difficult to make a kite. You show me otherwise. thank you
yay!