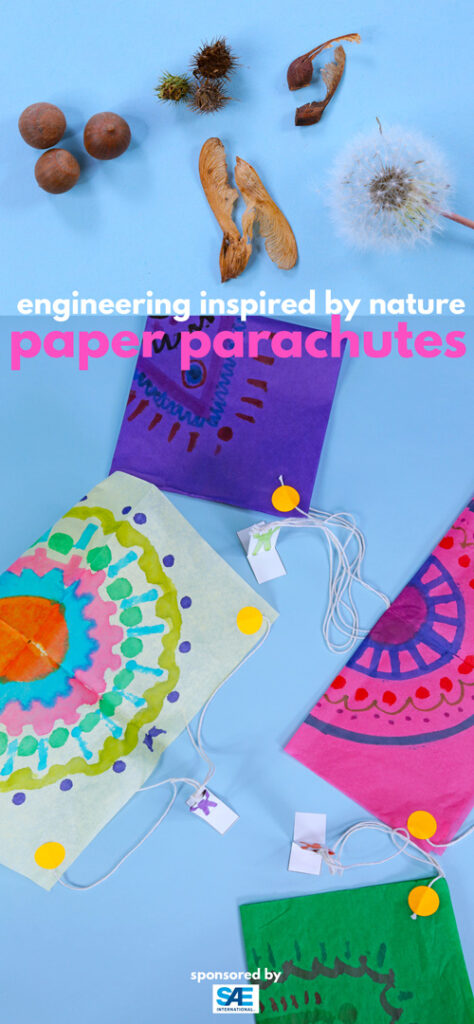
Today we are going to use nature as inspiration to make a paper parachute; this is a floating engineering project kids will love!
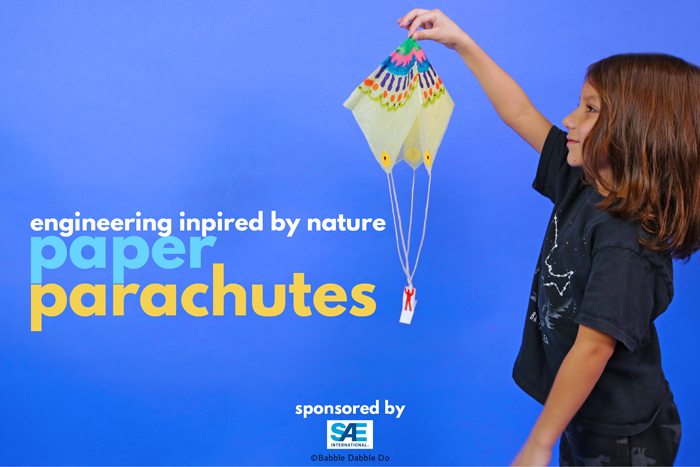
This post is sponsored by SAE International. All opinions are my own.
As an architect and industrial designer one of the first things I did when starting a new project was to get inspired. That might have meant looking at another designer’s work I admired, playing around with a material I wanted to incorporate, or going for a walk in nature to observe the world around me. While this part of the design process is not always highlighted, finding inspiration is an important motivating factor affecting a project from start to finish. In this project we are going to use nature as the inspiration for a floating toy.
This project was created by today’s sponsor: SAE International’s A World In Motion® (AWIM) STEM program.
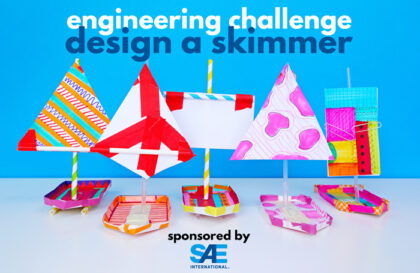
I am very excited to be partnering up again with the SAE AWIM program for today’s challenge! Over the summer I worked with SAE on the Skimmer Engineering Challenge and told you about their online STEM@Home resources. SAE is continuing to develop these online resources for parents and educators since so many of us have moved to a distance learning model this school year. I am partnering with them on three engineering projects over the next two months that your kids will love!
About AWIM
AWIM has been providing hands-on STEM experiences in classrooms around the globe for over 30 years, enabling students to develop the 21st century skills needed to succeed in real-world work environments and connect classroom learning with real-life application. Supported by the generous donors of the SAE Foundation, they have reached more than 6 million students worldwide and engaged more than 30,000 STEM industry professionals as volunteers.

For Parents: Since the start of distance learning, SAE has been generously sharing many of their educational resources online for families who want to do STEM based activities at home. The program is called SAE STEM@Home and the resources include digital storybooks to inspire engineering projects, a curated selection of projects, and learning modules for families that want to go further in their explorations. You can see all resources here.
For Educators: With distance and hybrid learning models in place this school year it’s a challenge to incorporate enrichment curriculum into the online school day. But that doesn’t mean it can’t be done! Consider using a challenge like today’s parachute project as an optional engineering activity students can try at home. Your students will welcome the chance to do a hands on project that uses materials everyone usually has on hand.
The Challenge
Like the summer Skimmer, today’s project is presented as an engineering problem. School age children enjoy planning, building, and problem solving, and engineering projects like this give them the opportunity to do this though play. In particular today’s project gives kids the opportunity to find inspiration in an unlikely place: We are going to use seed dispersal as the basis for engineering a floating toy!
To start this project your kids will read a letter (included in the activity guide above) from a fictitious toy company as follows:
Dear Student Designers:
We need your help! The mission of EarthToy Designs, Inc., is to develop and promote toys that are fun and exciting. EarthToy Designs is introducing a line of toys inspired by nature. Our first toy will be based on seeds that fly in the wind and will come with a book about seeds. We want to develop a toy that will travel as far as possible on a windy day.
Our EarthToy engineers are seeking fresh ideas from young people like you. That’s why we need your help! We need you to investigate some seeds that move away from their parent plant (are dispersed) on the wind.
We suggest that your teams take the following steps to help us:
- Closely examine some seeds and think about how they might fly.
- Conduct experiments to figure out what keeps a seed in the air the longest.
- Design a toy that will stay in the air a long time when dropped or thrown
This project is presented in 2 parts. First we will explore seeds to understand how they travel in nature. Then we will use that knowledge to design a parachute toy based on what we learned from seeds.
To go directly to the Paper Parachute instructions click here
PART 1: Explore Seed Travel
To help us design a parachute we are going to explore how seeds travel and use what we learn to inform our parachute design.
Most plants reproduce via seeds which are contained in their flowers or fruit. In order to reproduce, a plant needs its seeds to travel. Think about what would happen if a plant dropped its seeds and they started growing underneath the parent plant or tree. The baby plants would have a hard time growing because they would be in the shadow of the parent plant and competing for resources like light and water. For that reason many seeds are designed to travel away from the parent plant. Now let’s collect some seeds and see if we can figure out how they travel.
Materials
- A variety of seeds including a dandelion
- Magnifying glass
- Baggies or containers for your seeds
- Fan
Instructions
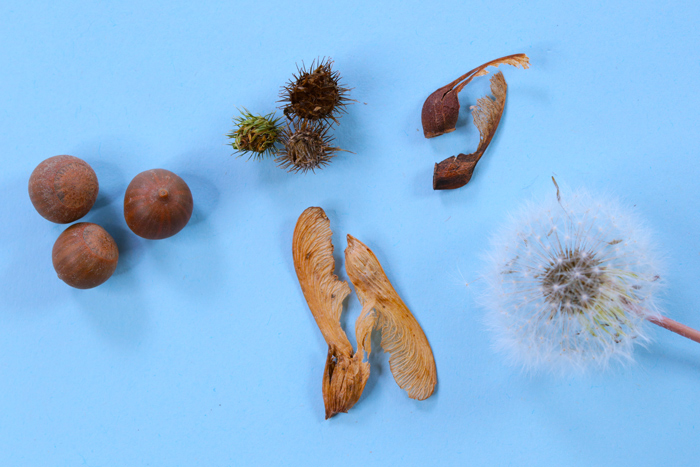
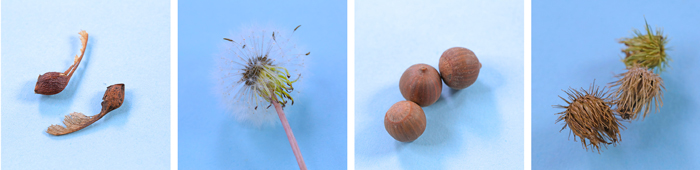
- Go on a nature walk around your yard or neighborhood to collect seeds. Look for a variety of seeds like acorns, dandelions, or maple seeds. Also see if you can find any seeds with spikes or burs.
- As you find seeds, put them in a small bag to store them. Where possible, note the parent plant of each seed type you collect.
- When you are done, place your seeds on a table or tray. Use a magnifying glass to look closely at each seed and try to determine how each seed might travel away from its parent tree or plant. Look for clues in the seed’s shape. Is it round? Does it have an element that would help it float? Is it prickly? How might this help it travel?
- Make a list of each seed and it’s probable method of travel.
- (Optional) Set up a fan facing UP and drop seeds that look like they travel through the air above the fan. Watch them float on the gust of wind from the fan and travel across the room.
- Discuss your findings with an adult and then review the list below to see if any of your seeds travel as described.

Here are some of the ways that seeds travel:
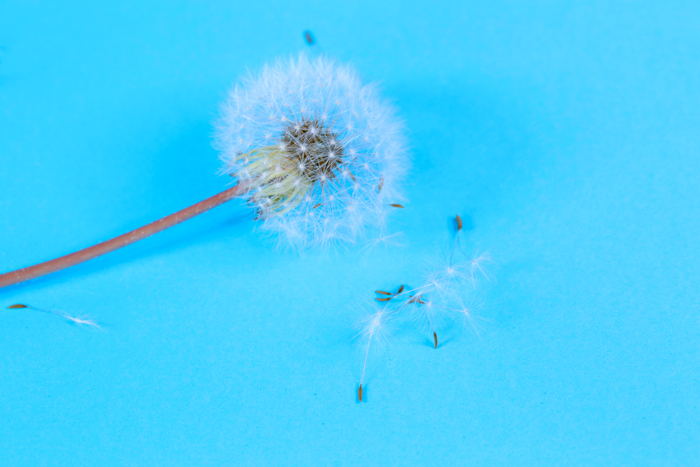
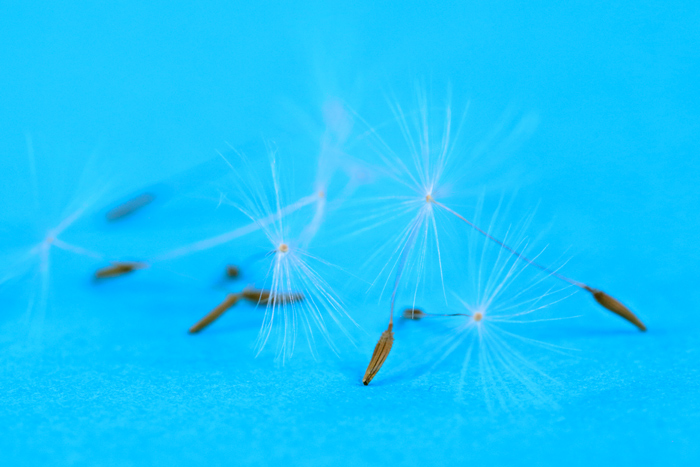
- Carried by the wind. Examples: Dandelion seeds and maple seeds. Notice that dandelion seeds have a fuzzy canopy that allows them to float in a gentle breeze. Maple seeds have a thin “wing” that causes them to rotate and travel sideways when they encounter a breeze.
- Rolling Example: Acorns
- Being eaten by animals and distributed through droppings Example: Fruit pits
- Be taken as food and stored by animals Example: Acorns
- Being carried on animal fur. Examples: Cocklebur Seeds
Once you have examined your seeds and determined how they travel, you are ready to use that knowledge to design a floating toy. For this part of the project we are going to focus on how dandelion seeds travel as the basis for a toy parachute.
A dandelion seed has three distinct parts: A hairy top called a pappus that acts like a “parachute”, a stem, and the seed at the bottom. As a dandelion seed blows in the wind, the pappus catches the air and allows it to float. The weight of the seed “fruit” counterbalances the pappus, keeping it in position with the pappus at the top.
PART 2: Design a Paper Parachute Toy
We are now going to design a parachute that uses the same design idea: A wide and light top that can harness air and a weighted bottom that will keep the parachute from tipping over. We will be prototyping our design and conducting some tests to determine the best design. Some of the STEAM that effect the design are listed after the project’s instructions. You may wish to review those first.
Age Appropriateness: 6+


Note: The activity guide does not contain the figure. You can print the figure separately via the button above
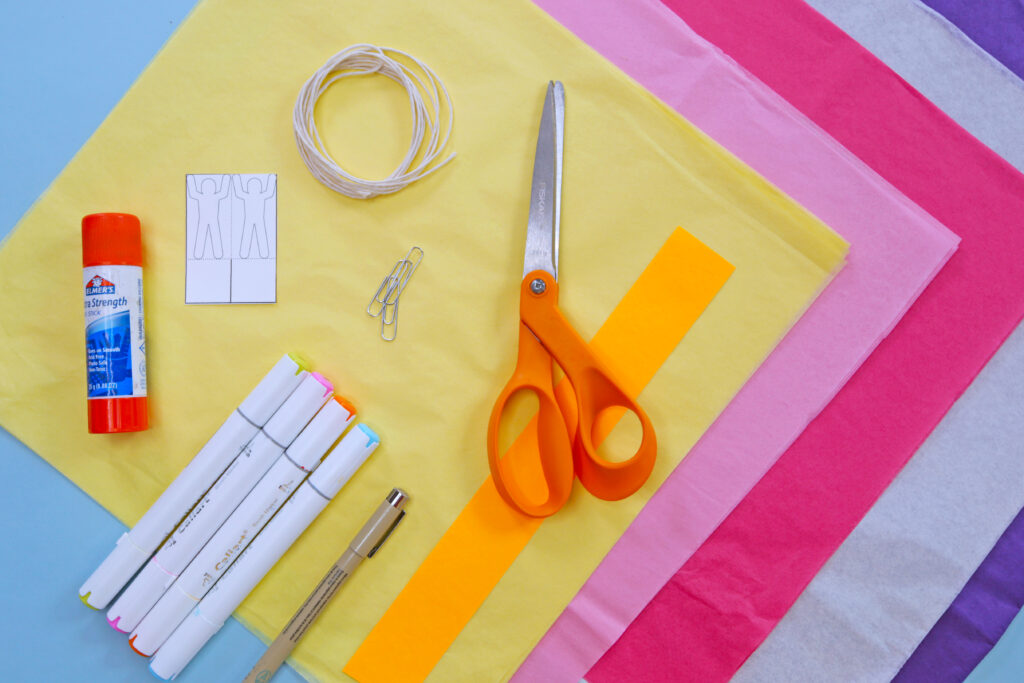
Materials
- Parachute Figure Template Print here
- Tissue Paper
- Paper Clip
- String
- Tape or sticky dots
- Scissors
- Glue Stick
- Ruler
- Markers (optional)
- Fan (optional)
Paper Parachute Instructions
Time needed: 15 minutes.
Make a paper parachute from tissue paper
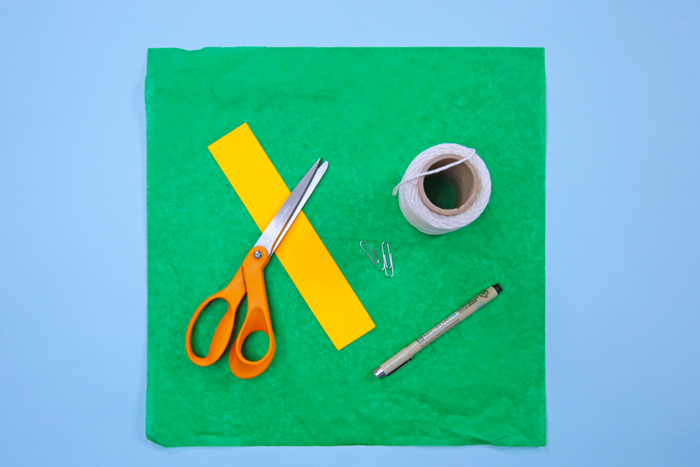
- Cut tissue paper
Cut a 25 cm X 25 cm (10” x 10”) square piece of tissue paper. You can also try other lightweight materials for this such as a plastic kitchen trash bag.

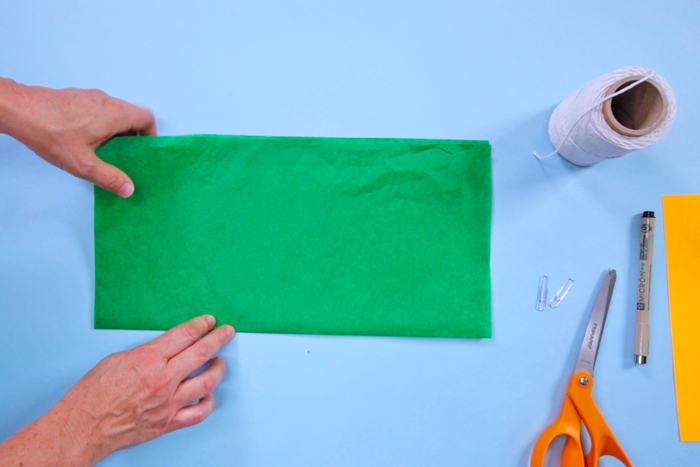
- Fold in half
Fold the tissue paper in half.
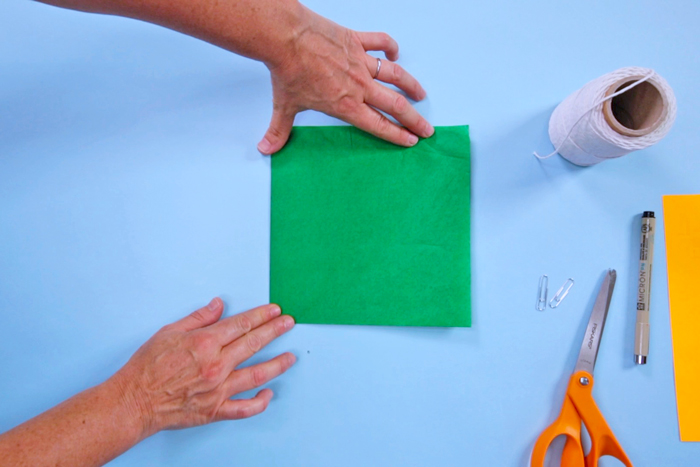
- Fold again
Fold it in half again.
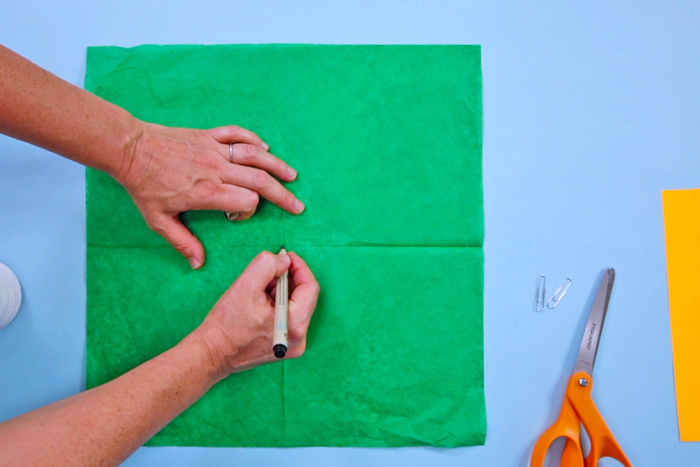
- Mark the center
Open the tissue paper up. Mark the center with a marker. Set aside.
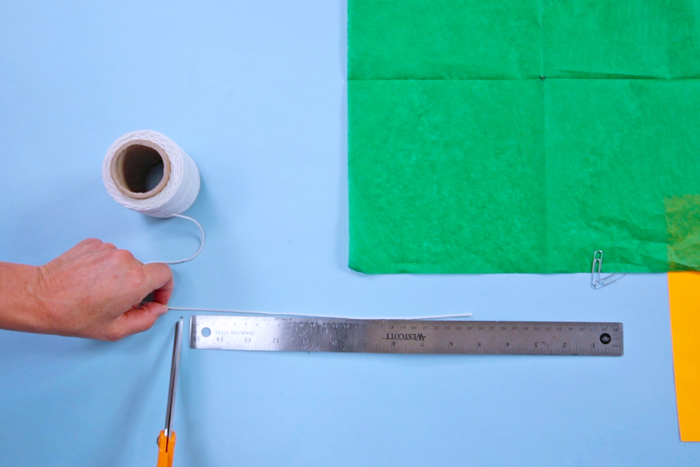
- Cut string
Cut (4) 30cm long (12”) equal lengths of string.
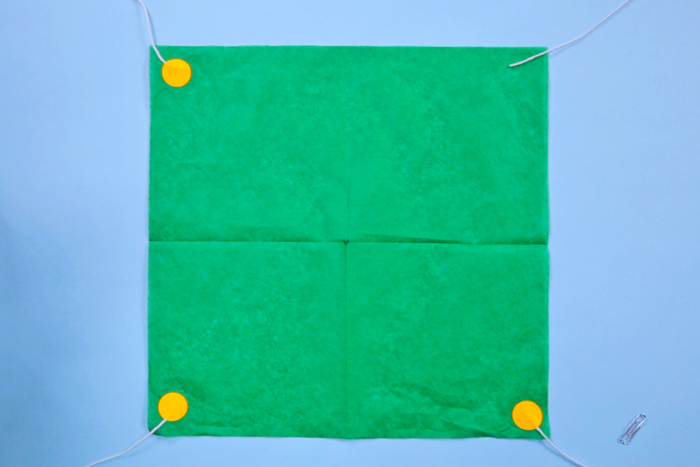
- Tape string to tissue paper
Tape one piece of string in each corner of the tissue paper.
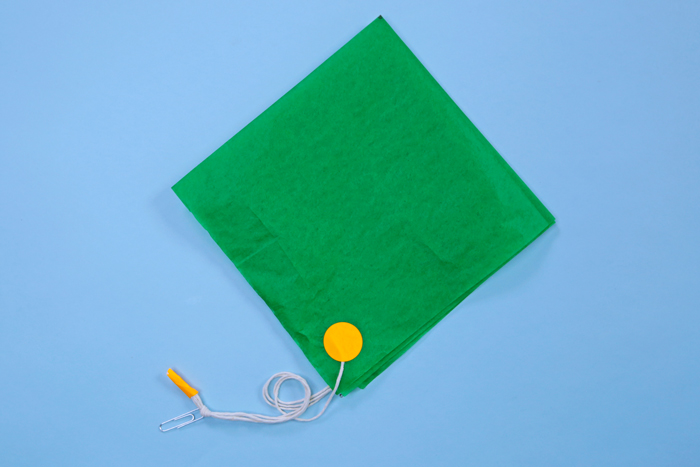
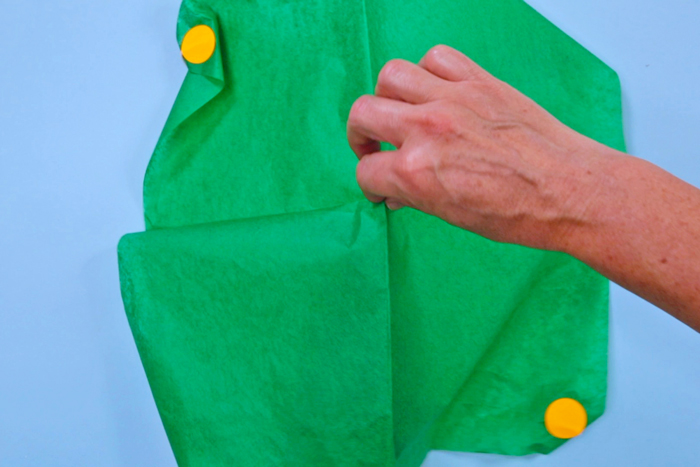
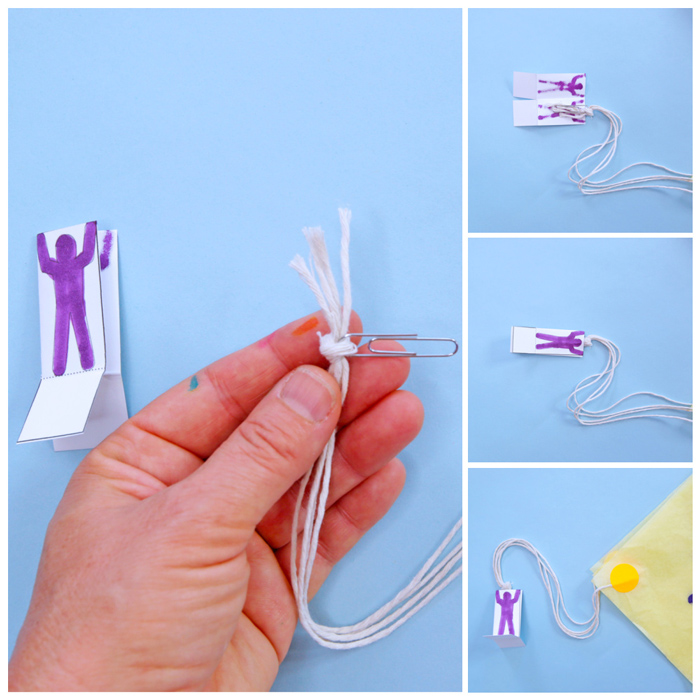
- Tie strings to paper clip
Fold the parachute back in fourths and gather the strings. You may want to wrap a piece of tape or sticky dot around them to make them easier to thread through the paper clip. Tie the four strings through a paper clip and knot.
- Make other sizes
Make two additional parachutes with larger pieces of tissue paper. One should be 30 cm x 30 cm and the other 35 cm x 35cm. Repeat Steps 2-8 with each of the larger sizes of tissue paper. At the end you should have (3) parachutes: small, medium, and large. Now it’s time to test!
Test your design
In this project we will be testing two design criteria and how they effect the parachute’s performance: Parachute Weight and Parachute Surface Area.
Testing Procedure:
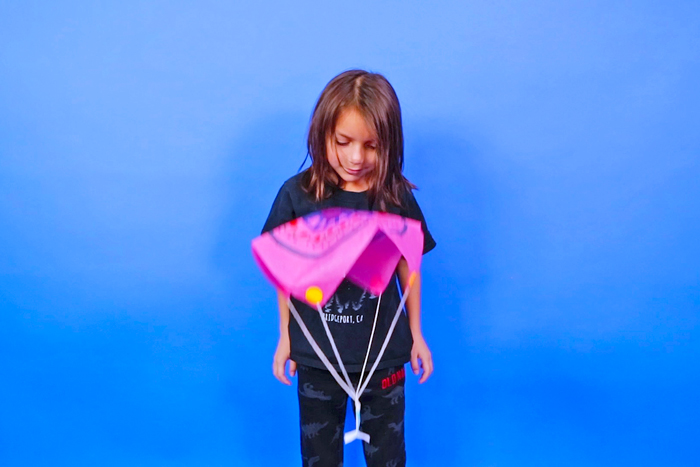
- Open up one of your parachutes and grasp it by the center point. Make sure the canopy can easily open up. Raise your am as high as you can and drop the parachute. Watch it float to the ground!
- Let’s test how weight affects the way the parachute falls. Add more paper clips and test how the addition of each paper clip affects the way the parachute falls. Does more weight improve or worsen the way the parachute falls? What happens if you add too much weight?
- Let’s test how surface area changes the performance. Gather your S,M, and L parachutes and make sure each has the same number of paper clips on the end. Select your small and medium parachutes and grasp each by the center point. Drop them and see if you notice any difference in the way they fall. You may need to repeat this several times. Next test your large parachute alongside the small parachute. Again see if you can tell if the size makes a difference in the parachute performance.
- As you test how weight and surface area affect performance, it’s a good idea to write the results of a piece of paper to keep track.
Finalize your design
After your tests are complete, assess the criteria and determine the parachute weight and size that performed best. One you have decided the final size and weight that performed best, use this to make a final toy.
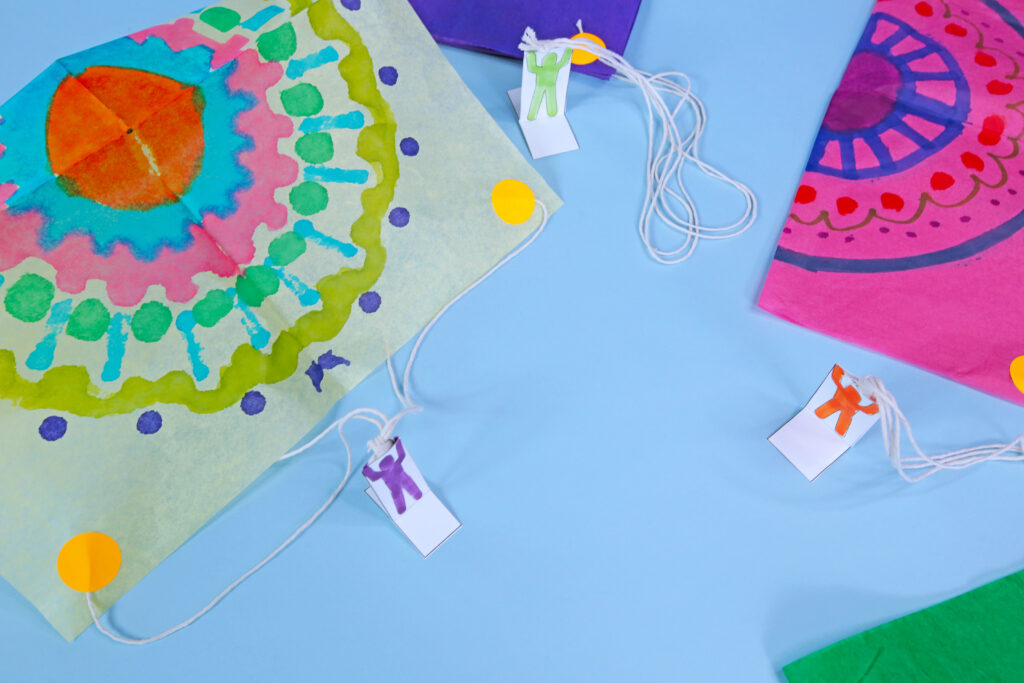
To make your final toy you may either use one of your prototypes or make an entirely new parachute. Older children may want to make a new parachute but younger children can use one of their prototypes. For the final design, encourage children to decorate their toy in a playful way!
To make your final toy you will need to add the following steps to the previous project instructions:
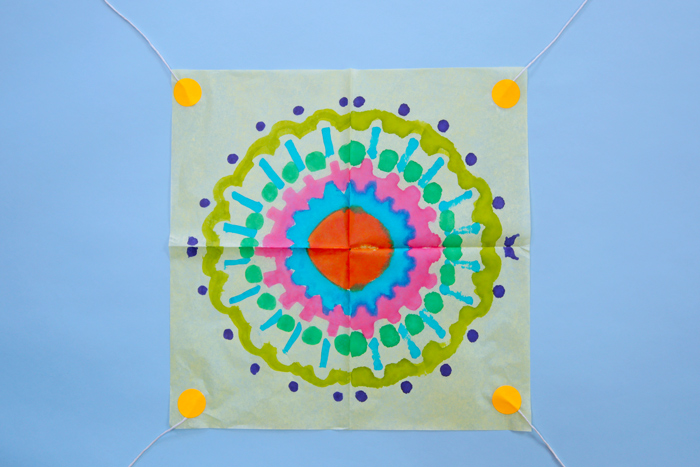
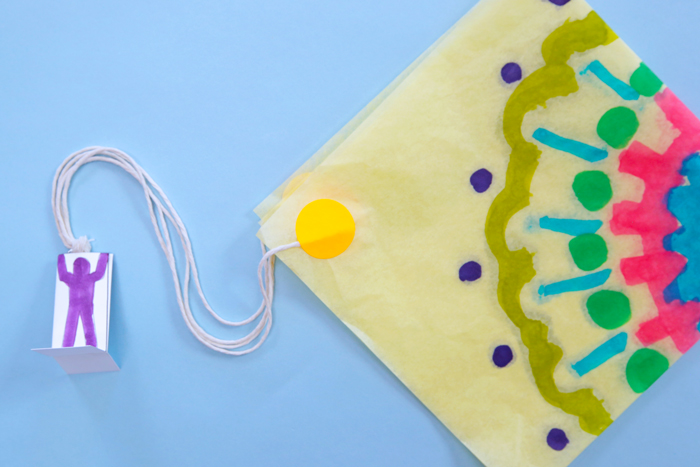
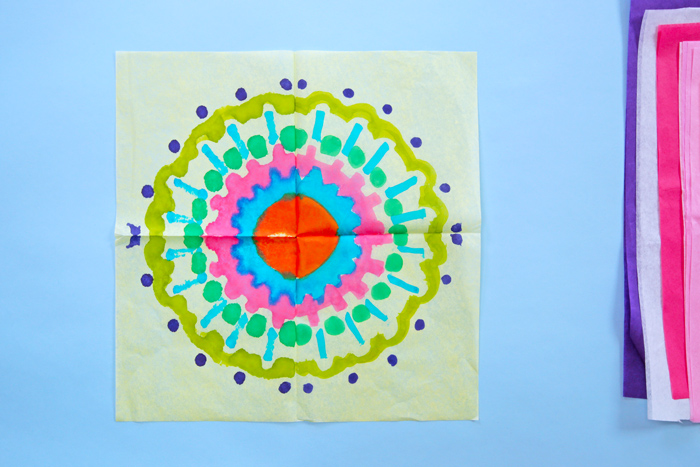
- Decorate it Before adding the strings, decorate the tissue paper while it is folded in fourths. If you use permanent markers like Sharpies the color will bleed through the tissue paper and create symmetrical designs. You may need to turn it over and add color to the opposite side.
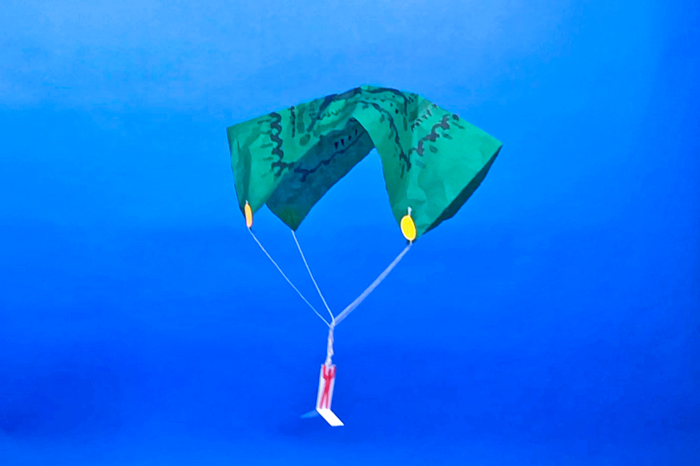
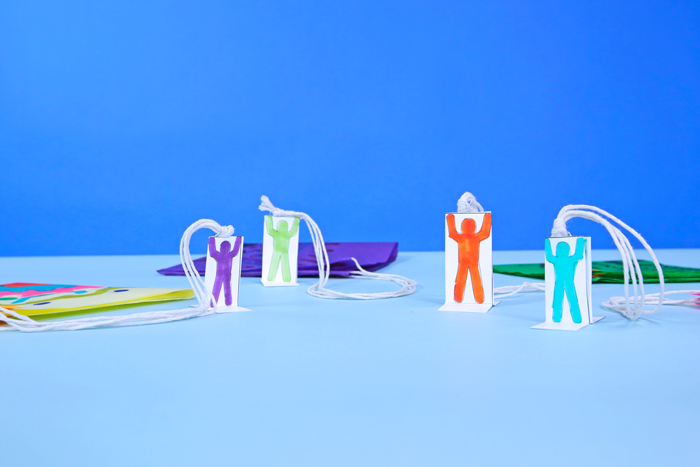
- Add a parachute figure Once your parachute is assembled, add your figure! Cut out the template along the solid outer lines. Then cut along the center solid line. Next fold along the center dotted line. Fold the two dotted lines at the feet OUT so that the figure can stand. Finally add glue to the back of the figures and sandwich a paper clip between the front and back. Press together and let dry.
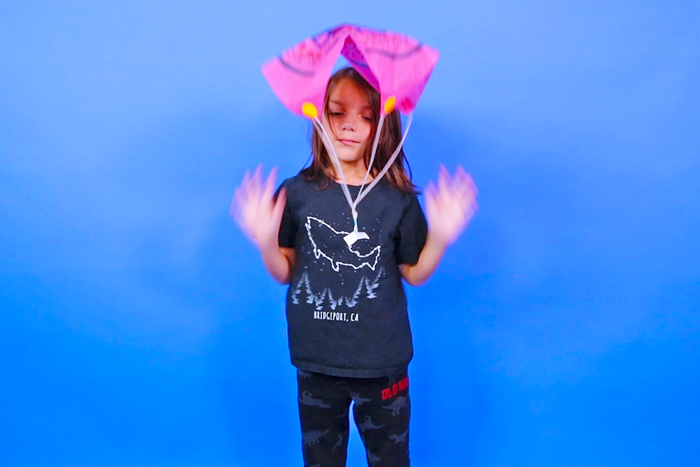
Go play with your parachute! Here are some more ways to play with it:
- Go outside and test it on a breezy or windy day.
- If you live in a two story house with a balcony, ask an adult or older sibling to drop the parachute from the balcony.
- If you have a fan that can rotate, position it on the floor facing up. Hold your parachute above the fan and watch it inflate. Let it go and watch it drift away.
Let’s Talk STEAM
Making a paper parachute covers so many STEAM topics. Let’s break it down:
Science
This project is full of science! We covered the science of seed dispersal at the start of the project and now we are going to look at the physics concepts involved in falling objects.
- Gravity: Gravity is the attractive force that exists between objects and is directly related to the objects’ mass and the distance between them. The Earth is so massive that it has a large gravitational pull that keeps us on the ground and is the reason why objects that are dropped fall down. Gravity is the force that is pulling our parachute towards the ground.
- Drag: Drag is the force that resists an object’s motion through fluids like gas and air. Drag that happens in the air is known as air resistance. Drag is affected by different variables including surface area and speed. As an object falls, we can increase its drag by creating something like a parachute which increases surface area and slows down a fall. To see drag in action, compare dropping a paper clip without a parachute and a paper clip attached to a parachute. The paper clip with the parachute drops much more slowly due to drag. Thinking back to our dandelion seed, the pappus creates a large surface area, slows down falls of the seed it is attached to, and assists in catching a breeze to carry it further.
- Friction: Friction is another force that is causing our parachutes to slow down. Friction is a rubbing force between two objects. There is friction between air and objects that move through it.
Engineering
- Prototyping: Prototyping is the process by which engineers build a variety of models or samples to test design variables. They use prototypes to compare factors that affect a design and analyze the data they collect during testing to find the best solution. In this project you are prototyping several sizes and weights of the parachute toy to find the combination that works best. From the prototypes you will determine the best size and weight of your parachute and use that to build your final toy design. Engineers often call prototypes working models or mockups.
Math
- Area: Area is the size of a surface. Area = Length X Width. The total area of our tissue paper square is the length of its sides multiplied together. Try calculating the surface area of the small, medium, and large parachutes. As we discussed in the science section above, the surface area of the parachute directly affects the drag on the parachute.
- Symmetry: Symmetry is the equal arrangement of a design on either side of an axis. In this project we are using symmetry as we fold our tissue paper. Each time we fold it we are creating an axis. The first time we fold it we are creating an axis that divides the paper in half. The second time we fold the square we are creating another axis that divides the shape in fourths. When you open the sheet back up you’ll notice that the two axes intersect at the center forming what is known as an intersection point. This is the point at which you will hold your parachute before dropping it.
- Perpendicular: Perpendicular means positioning two objects at a 90 degree angle to one another. In this project the two axes we created are perpendicular to each other.
Take it further
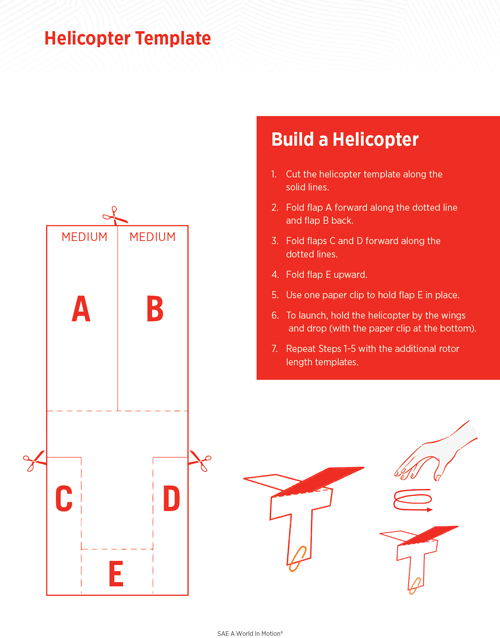
If you would like to make another toy based on your observations of seed dispersal SAE has a template and worksheet for paper helicopters here. The movement of a paper helicopter mimics the way maples seeds fall and rotate. Download the Paper Helicopter Template in the activity guide below:
Conclusion
Making a paper parachute is a terrific way to engage kids in the process of observation, prototyping, and design. I am very grateful to SAE STEM@Home for providing this playful engineering activity and the accompanying resources for you to try at home. Be sure to take a look at the other resources they have created for families to bring the wonderful world of engineering into your home at AWIM’s SAE STEM@Home. I also encourage you to try the Skimmer challenge here.
Are you passionate about raising creative kids?
Join thousands of parents and educators who want connect with kids and nurture their creative process through magical, easy projects you can do TOGETHER.
Subscribe to our email list to receive project ideas as well as offers for some our creative products.
If you want to read our privacy policy before subscribing, hop over here.
Leave a Reply