A lot of adults confess to me that they are intimated by clay and do not regularly try clay projects with their children. If you have ever seen a child experiment and play with clay you will realize what a wonderful sensory art material it is; perhaps it is the texture or malleability but clay is innately appealing to children and I want you to feel comfortable and excited to introduce it to your them!
This post contains affiliate links.
Types of Clay
There are many type of clay which may be the first reason peole are intimidated by it, so let’s get started with a quick clay overview. For home based projects and those that do not require the use of a kiln, here are the three types of clay I recommend:
- Air Dry Clay Air Dry Clay is moist and malleable when kept sealed but hardens after a few days of air drying. It dries to a light pale gray color and can be painted afterwards. Crayola makes version of it that can be found in toy and craft stores but our favorite is the potter’s clay which you can find in art supply stores and online here. It is also very inespnxsve so you can have lots of it on hand at a low cost. Here are a couple of projects we have done with air-dry clay: Clay Resist, Seed Bomb Necklaces and Wood Block & Clay Structures.
- Modeling Clay This type of clay is colorful and soft but does not dry. It’s great for use with process art projects and for general play and exploration. We used it to make Skewer Structures and Clay Birdhouses.
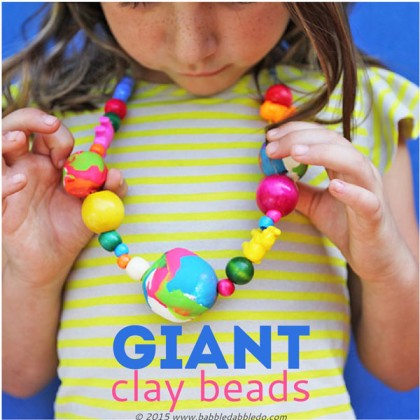
- Polymer Clay Polymer Clay AKA Scupley or FIMO is colorful clay that can be baked in a regular oven to cure. It is more expensive than air-dry clay and typically used for jewelry making or small sculptural projects. The fact that polymer clay can be baked in about 15 minutes and become solid is one the reasons I love using it for children’s clay projects. The fast turnaround time is a wonderful way to get kids excited about this material. We have used it to make Giant Clay Beads, Clay Bracelets, and Holiday Ornaments.
- Soft Clay This clay is an air dry clay but it is really light and soft. It’s a wonderful sensory clay and perfect for little ones. I use it mainly in Butter Slime but it’s great for modeling too!
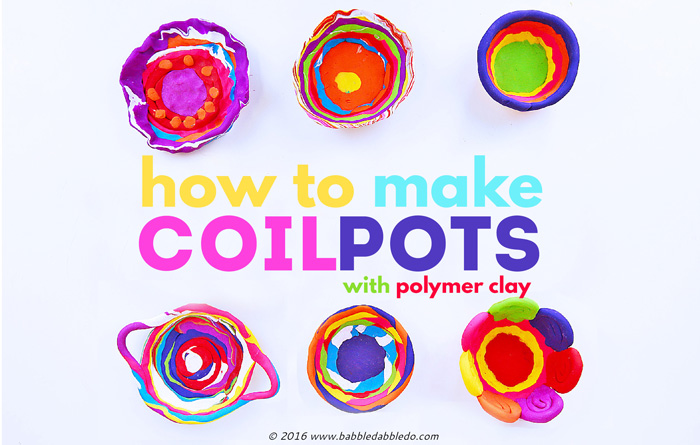
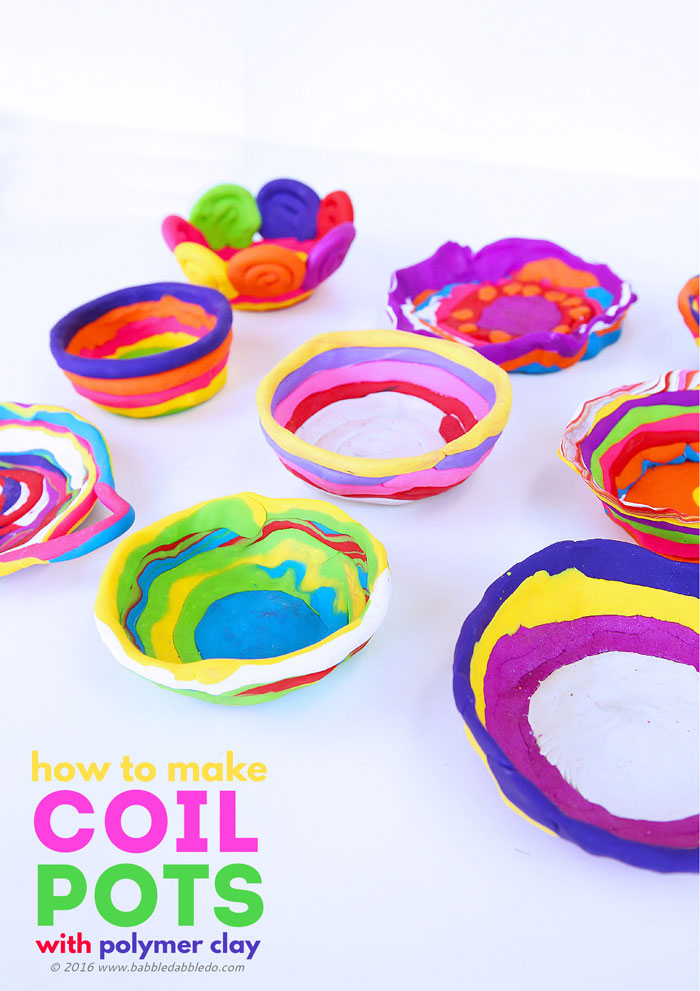
Today I’m going to show you a classic clay technique, Coil Pots, but made out of polymer clay in lieu of air or kiln dried clay. Using this technique you can have a colorful mini coil pot from modeling to dried in about 30 minutes!
Polymer Clay Coil Pots is part of our You Tube series Creative Basics: Classic art and science projects and basic play recipes that every parent, educator and caregiver should have in their toolkit. You can see the previous episodes in the series here.
How to Make Coil Pots with Polymer Clay
Materials
- Polymer Clay This is my favorite color pack
- Cutting tool or plastic knife
- Cookie Sheet/Foil
- Oven
Instructions
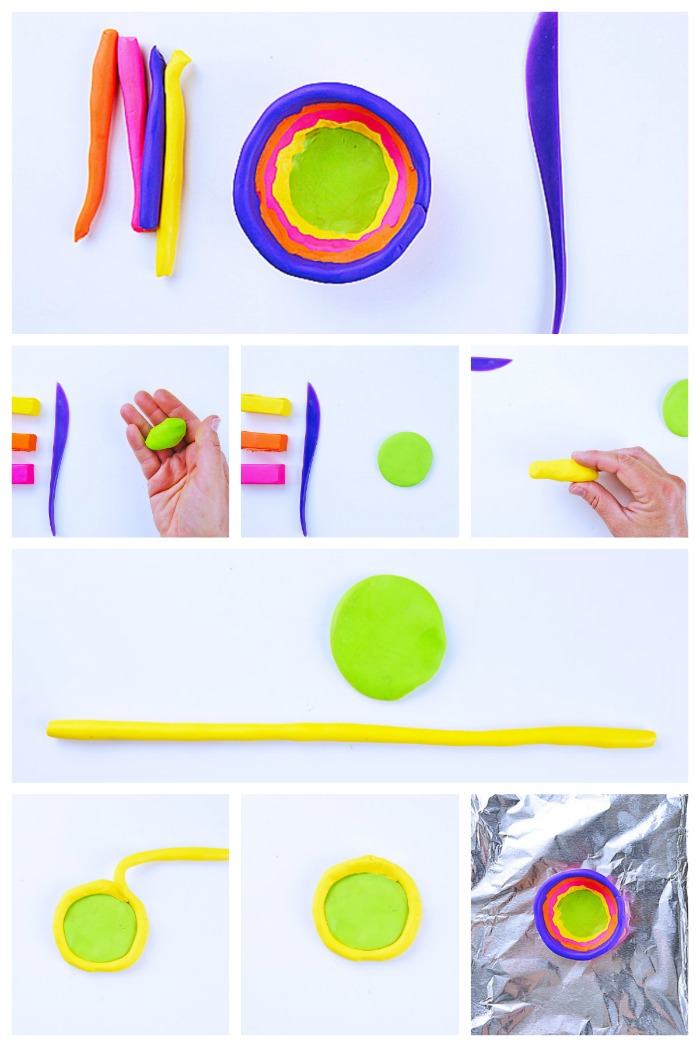
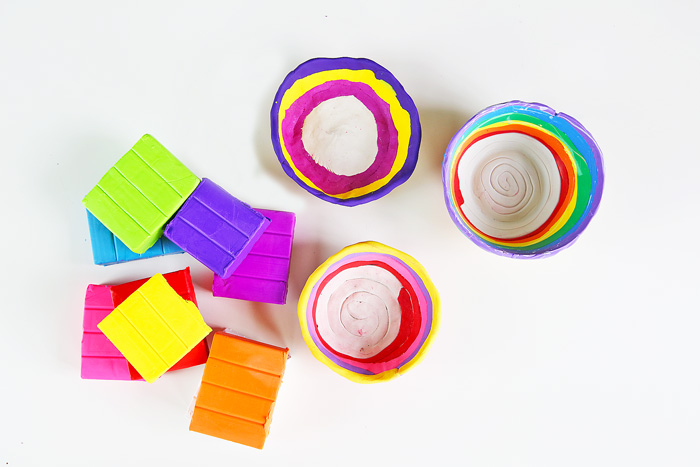
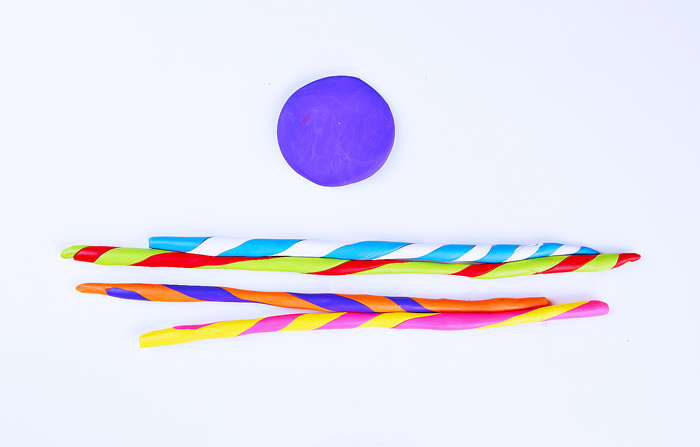
- Step One Knead the clay. Polymer clay softens as it warms up. Knead it between your hands for a minute or two before shaping it.
- Step Two Make the base. Roll a chunk of clay into a ball, place it on a work surface and then flatten it with your hand. It should be about ¼” thick.
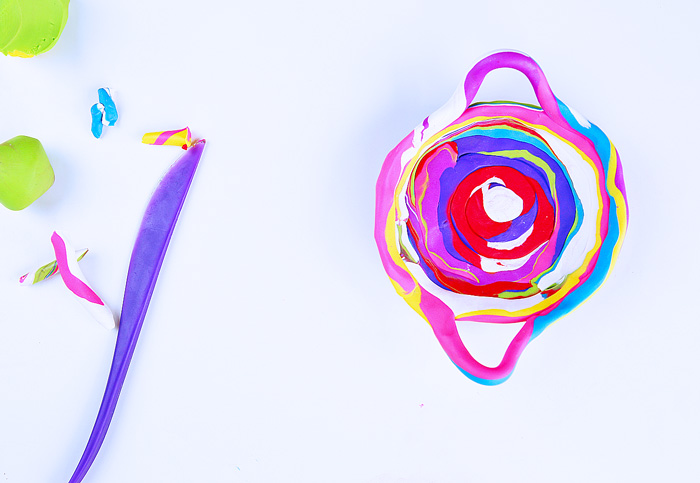
- Step Three Make your first coil. Start with a chunk of clay shaped like a thick sausage. With the tips of your fingers, gently roll the clay back and forth while at the same time slowly moving your hands outward. This is the secret to getting the most consistent coil thickness. Roll the coil until it is about ¼” thick.
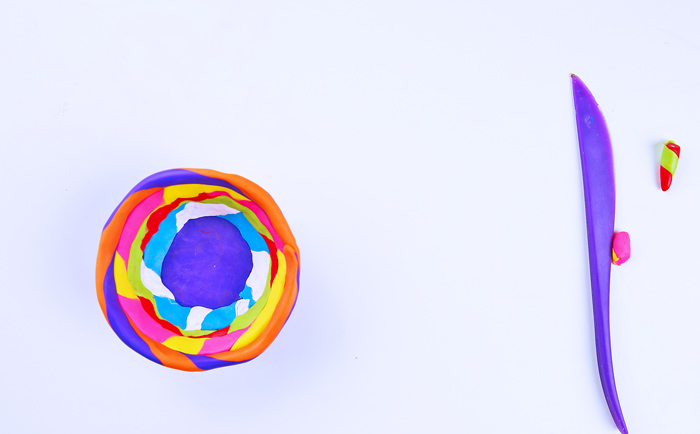
- Step Four Attach the coil to the base. Start by wrapping the coil around the base. When you reach the starting point of the coil you can either trim it to make one loop or continue wrapping the coil on top of the first layer.
- Step Five Use your fingertip to gently blend and smoosh the coil to the base. It is important to make sure the different coils are securely attached to each other or they will separate when dried.
- Step Six Continue adding more coils until you reach the height you desire.
- Step Seven Place the pot on a cookie sheet lined with aluminum foil and bake in a 275-degree oven for 15 minutes. If you have a thicker pot you may need to add a little more baking time in. Check the clay manufacturer’s recommendations on your clay packaging.
- Step Eight Remove from the oven and let cool.
You’re done!
You May Also Enjoy:
6 Polymer Clay Bracelet Tutorials
More Techniques
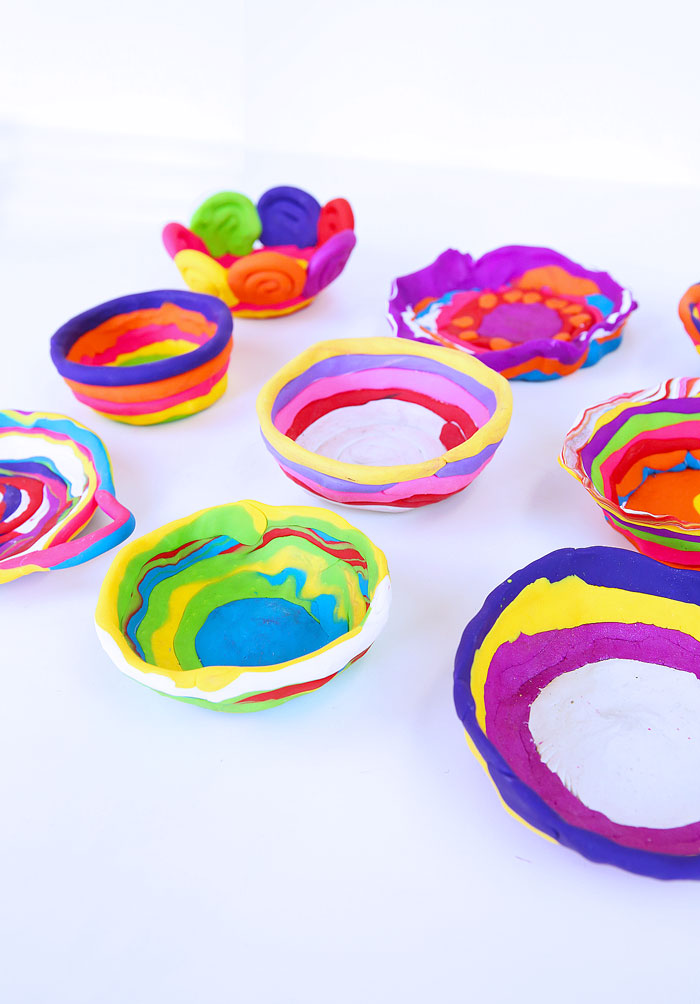
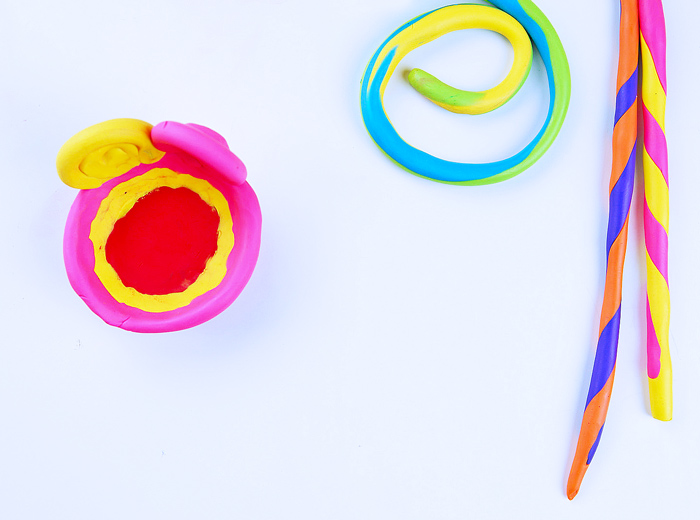
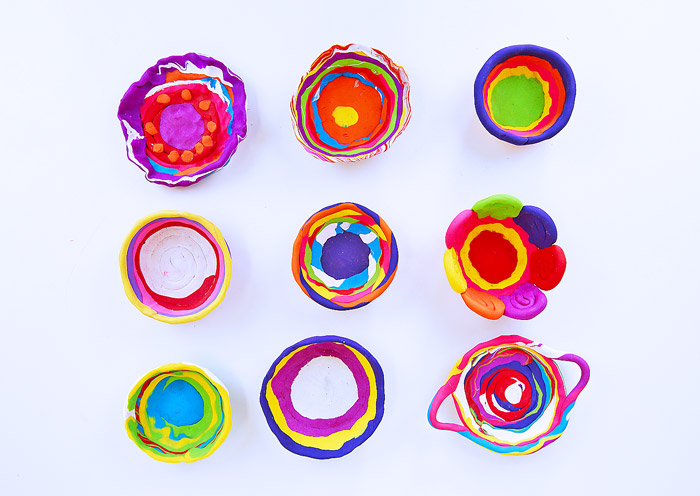
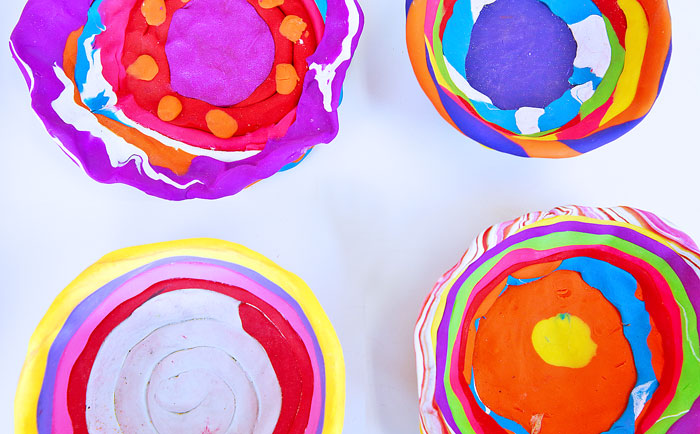
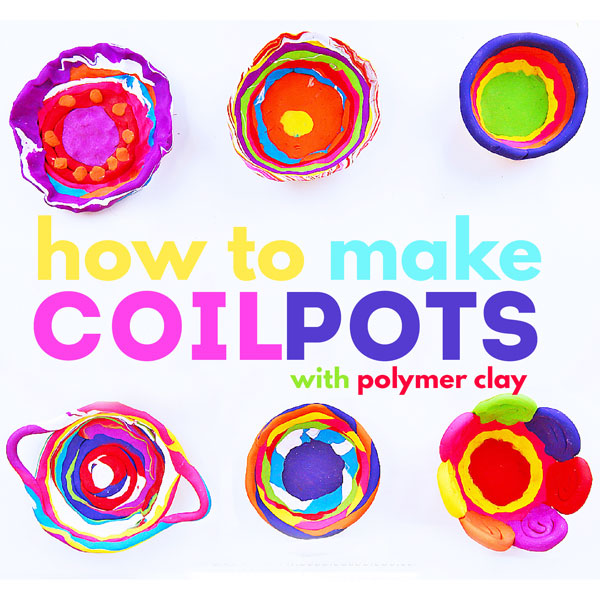
- Multicolored coils Take two colors of clay and roll them into coils. Twist the coils together then roll into a larger coil for a multicolored effect. You can also simply take a few colors of clay, smoosh them together then roll into a coil.
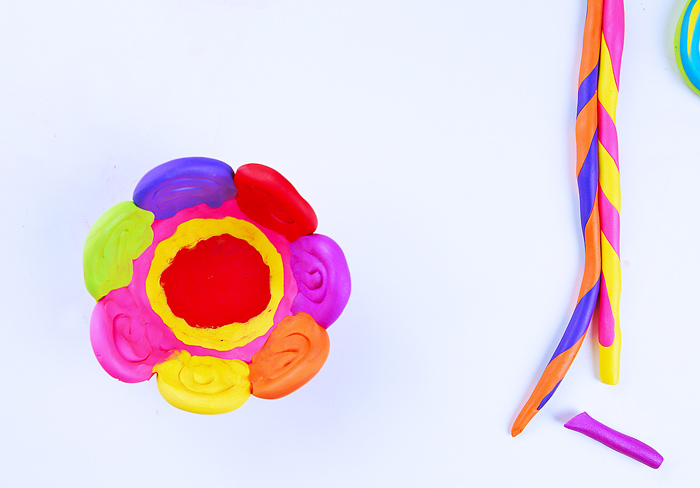
- Decorative coils This is a classic coil pot technique. Roll smaller coils into decorative shapes and affix to your pot. Be sure to thoroughly blend these decorative coils to the other coils and base to prevent them from falling off when dried.
- Handles Extend a coil outward to create a handle. I recommend doing this with a thick coil as the handles tend to be delicate. They are also heavy and may droop in the oven so keep them small and close to the side of the pot.
Looks Like
Hella Jongerius Hella Jongerius is one of my favorite industrial designers. She has a wonderful eclectic style that mashes unique colors, textures, and forms together. Look at this sofa to see exactly what I mean. She also ahs done amazing and unusual work with ceramics which is why I am profiling her today. I love her embroidered ceramics series , her glass taped to ceramics series, and her Chicle series which used natural latex to bond ceramics and more. If you love the fusion of art and materials exploration mixed with product design you are about to fall madly in love! See her complete works here.
 Are you feeling better about working with clay?
 Are you feeling better about working with clay?
 Polymer Clay is one of my favorite clays to try with kids because if the quick turnaround time from making to drying, plus the colors are almost impossible to resist! Try making classic coil pots from it for an easy and colorful art project with kids!
UP NEXT:
More fun with polymer clay: Learn How to Make GIANT Clay Beads!
Also check out these three other colorful polymer clay projects:
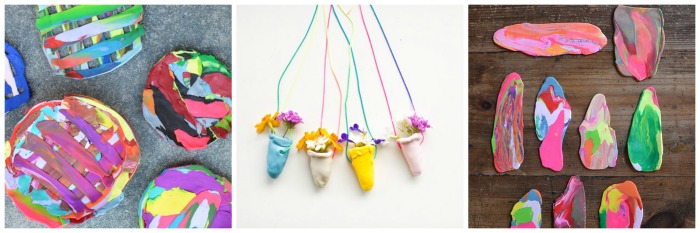
Kid-Made Catch-All Bowls from Meri Cherry
Flower Pot Necklaces from Hello, Wonderful
Polymer Clay Necklaces from Art Bar Blog
FB SHARE
Curious if anyone has tried this with a toaster oven? Would love to do this with my students after school but don’t have access to an oven. Any information is helpful, thanks!
Good question! I have not but I would imagine it would work just fine.
Love this post! All of these pieces are so cute and unique! They would make for some very interesting decor! Very nice work! Thanks so much for sharing with us!
Thank you so much Morgan!