Today I am going to show you how to make fabric beads (with a shortcut), and then use them to make lovely fabric bead necklaces.

Most tutorials for how to make fabric beads use a method similar to the one used to make paper beads, with each bead individually hand rolled. The result is stunning but with 3 kids in my life it’s completely impractical! So I came up with this shortcut method for how to make fabric beads.
You still have to roll them up but you will get many, many beads made in the span of minutes (excluding drying time). Adults and older children can make the beads themselves, younger kids can tackle the necklace making part of the project.
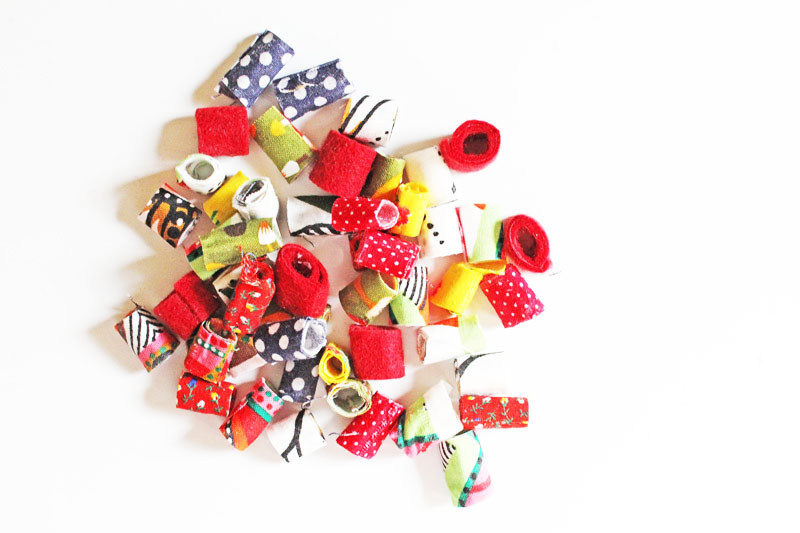
BONUS: Since the holes in the fabric beads are so large this is a great fine motor skills activity for children!
This post contains affiliate links.
How to Make Fabric Beads
 Materials
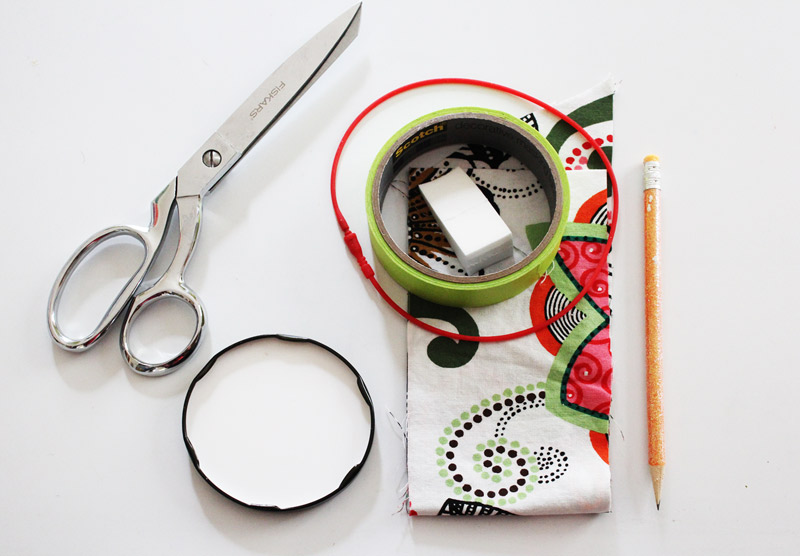
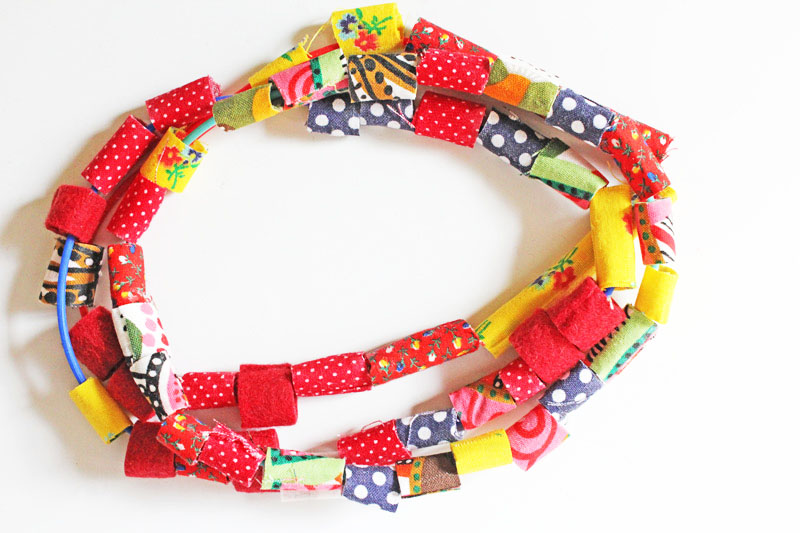
- Fabric Scraps Tiny or large prints work best. Felt is a great textural addition!
- Glue ALEENES All Purpose Glue
or Elmer’s Glue-All Multi-Purpose Glue At the rate I go through glue I decide to buy big!
- Pencil
- Masking Tape
- Scissors
- Cosmetic wedge or wide paintbrush
- Cord I used these awesome new stretchable cords I found called Silkies
Instructions
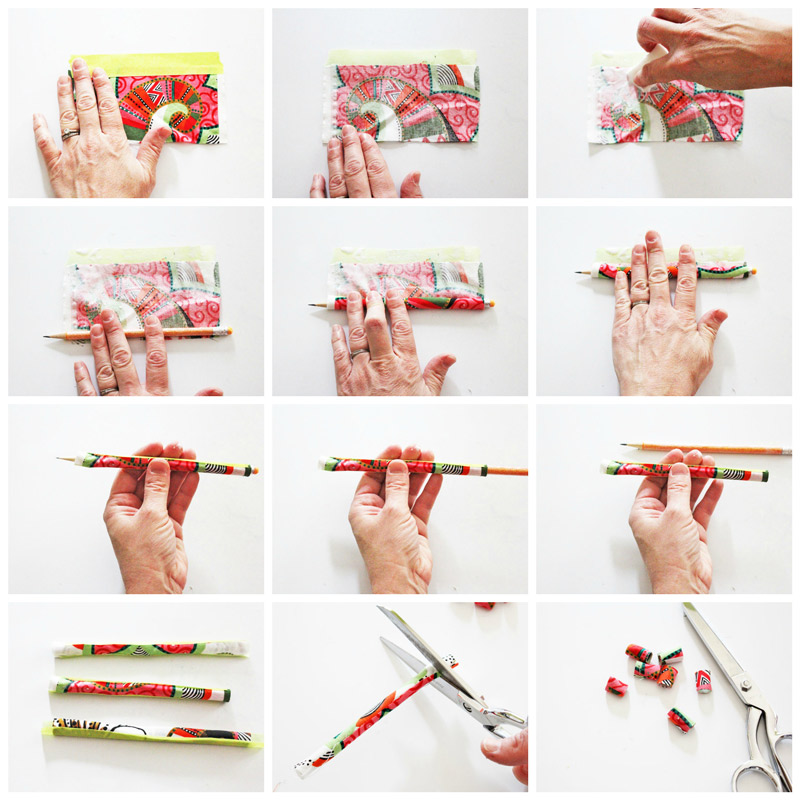
How to Make Fabric Beads
- Step One Cut your fabric to size: approximately 6” x 3 ½”. Cut about 10 pieces to this size.
- Step Two Cut a piece of tape the length of your fabric strip and tape it to the front side of the fabric along the edge. Leave about half of the tape exposed.
- Step Three Turn the strip over and dab glue along the taped edge. Apply glue about halfway down the fabric strip.
- Step Four Take your pencil and align it with the unglued edge. Roll the fabric around the pencil until you reach the glued edge.
- Step Five Seal the exposed tape edge along the fabric wrapped around the pencil. Remove the pencil.
- Step Six Let dry. This should take 2-3 hours.
- Step Seven When the glue is dry remove the masking tape.
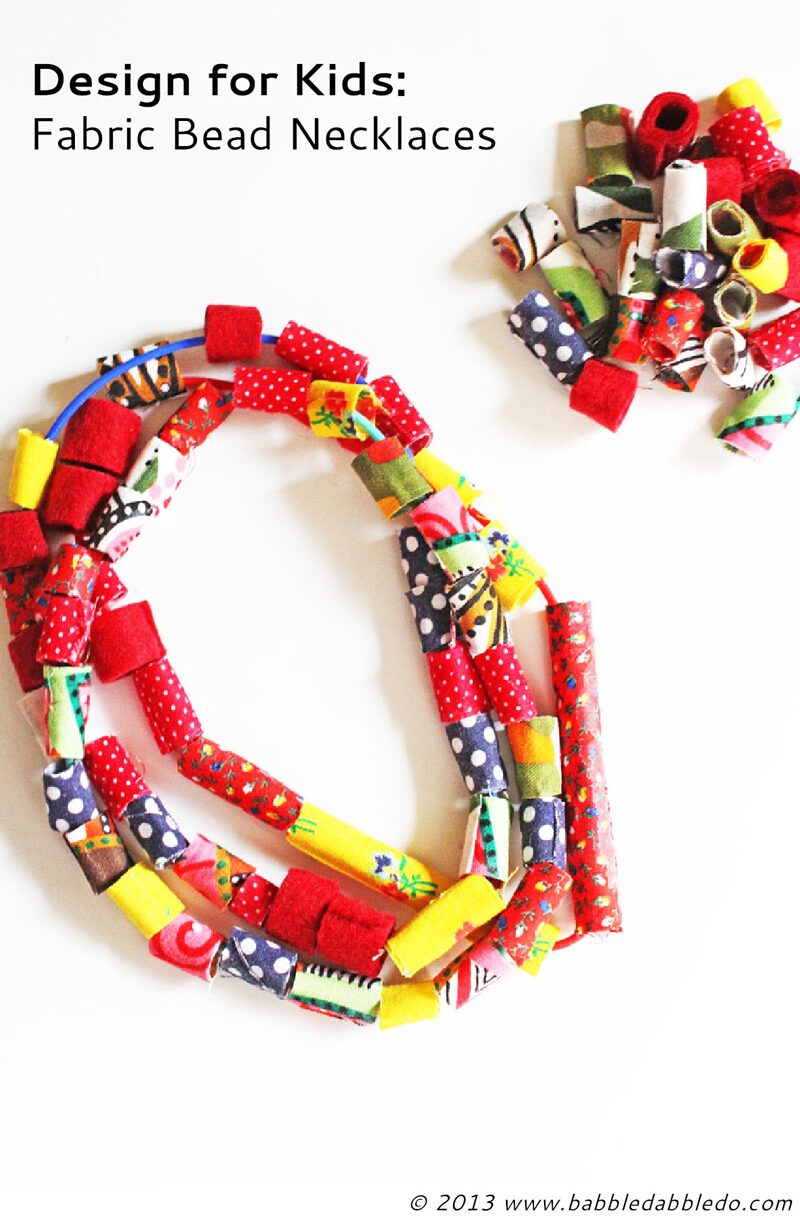
- Step Eight Cut the fabric roll into smaller section to create your beads.
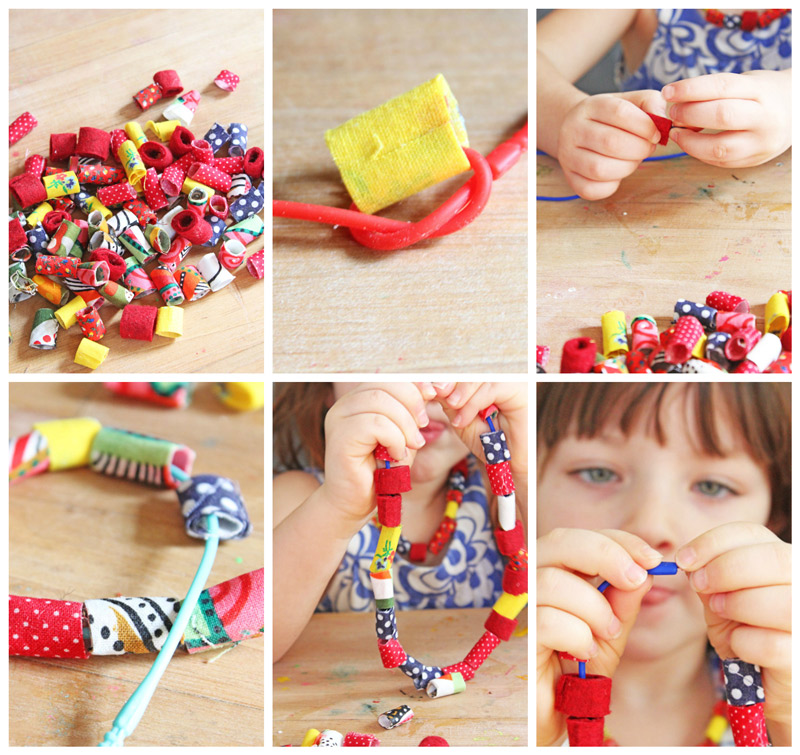
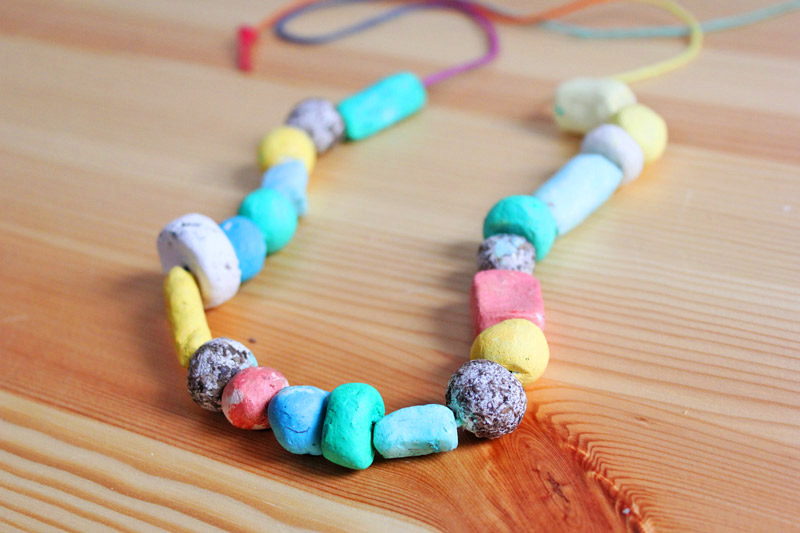
How to Make the Necklace
- Step One Thread one bead onto the cord and tie a loose knot around it.
- Step Two Thread more beads onto the necklace. When you are close to the end, remove the knot from the starting end and tie a knot to connect the loose ends. This is where the Silkies rock, you literally insert the one end into the slot on the other side. Easy peasy!
You’re done!
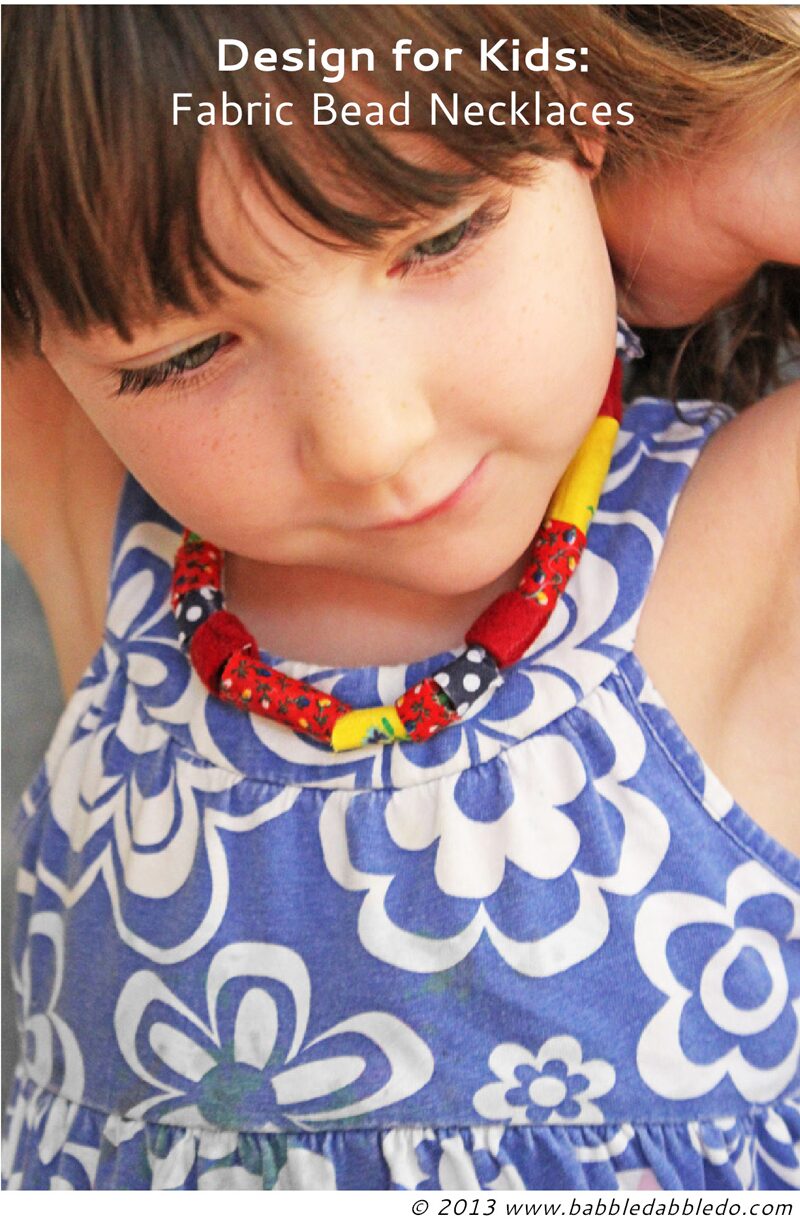
I really liked this project because it’s a collaboration of parent and child. My 4 year old was too young to make the beads but she enjoyed making necklaces for her friends. And since the beads have wide holes they are great for young children to work with since they are so easy to thread!
Looks Like
Maharam. Okay Maharam would probably argue this point since I didn’t use their fabric for this project, BUT any fabric project that relies on lovely print and color reminds me of Maharam. Maharam is a textile manufacturer that primarily caters to the interior design field so most of their products are intended for use in upholstery.
When I did a lot of product specification for architectural projects they were a company I often worked with. They promote green initiatives, have product lines based on artists, and regularly employ some of the most interesting designers to work on unique textile designs. Someday I will have a chair upholstered in this funky Alexander Girard print! Ha!
More
I’m going to dub this project a parent-child collaborative project! Learning how to make fabric beads was a great way to work with my daughter. She adores jewelry projects and despite her skepticism when I invited her to the crafting table (she really wanted to play with her new beloved Frozen dolls) she ended up making three necklaces for her friends in the span of a few minutes. And she’s been spotted wearing the one I made for her around the house for the past couple of days.
If you love jewelry projects for kids do not miss two of my favorites here on Babble Dabble Do: Glitter Tube Bracelets and Seed Bead Necklaces.
LOVE these beautiful beads!!! The photos are gorgeous.
Thanks Meri! You know I love color 😉
this looks really amazing! can’t wait to try it out. thanks for sharing.
Leslie, this comment is making me grin from ear to ear because I LOVE Pink Stripey Socks! Also LOVED your post on risking rejection and I share your crafting “Dream.” Honestly I think it’s a dream that can come true!
I love how you made these beads! My daughter and I need to do a lovely parent-child collaborative project as well 🙂 I can’t wait to dive into my sewing scraps for this!
Katie I’m so happy to hear it! If you make some post a pic on our FB page 🙂 I’d LOVE to see the final results!
Awesome and sweet fabric bead project. And thanks for the clear instructions!
Jeanette, I actually made a video for the tutorial too but am too confused on how to edit it to post it yet…thanks for stopping by!
Genius. We’re on it!
Do it! SO EASY! Love the photos on your beautiful blog!
Quick question,
Could I order (and pay for on Paypal) a custom made necklace? My thoughts are five or six strings, a combination of oblong, round and square beads, fabric covered and some small beading, multi colored, with a touch of hot pinks, but mostly multi pastels?
Hi Angela,
I’m so flattered you would like a custom made necklace 🙂 At this time I’m not really set-up to make orders but I will let you know if that changes in the future. Thanks for your support!
Ana
I absolutely LOVE tHESE!! Pinning and making!
I wondered if you have a problem with the fabric fraying ?