Okay so I’m using the term “instant” a bit loosely here, kind of like how instant rice takes 5 minutes to cook….but have you ever tried making your own scratch art paper? We have and it’s fun but like regular rice, it takes a bit of time. Then I discovered today’s method of making scratch art paper using only oil pastels and I was floored that you can go from making the paper to scratching within minutes!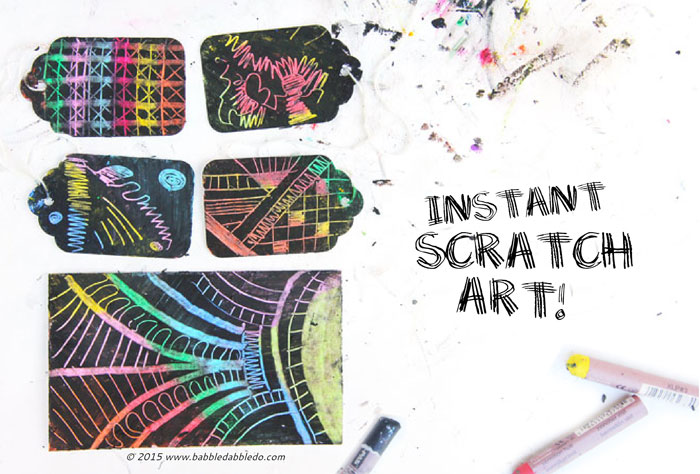
If you have tried making you own scratch art paper as we did here you know that it’s a process. It’s not hard but it takes a few hours from start to scratching and involves coloring paper with crayon and then painting over it with a couple coats of black paint mixed with soap. So when I saw this process from today’s sponsor Sakura of America using ONLY OIL PASTELS I was completely intrigued.

Sakura of America sponsored today’s post. They compensated me for my time and effort in creating this tutorial for you but all opinions are entirely my own. Ahem and all my opinions of them are head over heels amazing!
Now I didn’t invent this process. My lovely sponsor makes Cray-Pas Oil Pastels which I have been using since I was a kid, and this is one of the uses they suggest for their pastels: creating scratch art. But I’m guessing most of you have never tried this method, am I right? I had never heard of using it until I saw their suggestion and when I tried it I had one of these “Where have you been all my life” art moments. I mean it’s ridiculously EASY and FAST.
So let’s get to it!
This post contains affiliate links to products I love and recommend to my readers, plus it keeps this little blog o’mine afloat! Thank you!
Instant Scratch Art
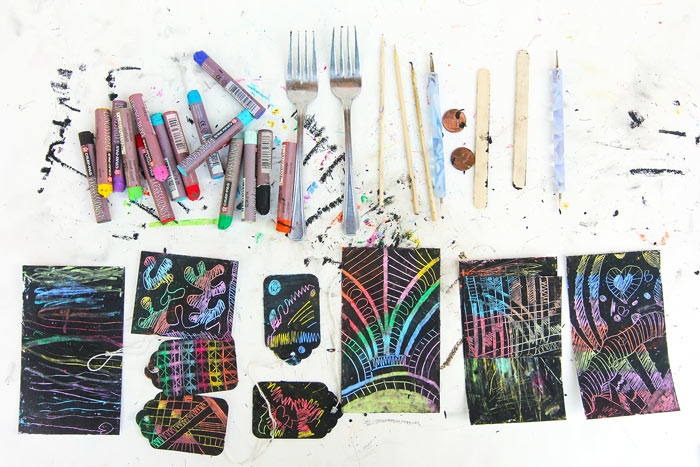
 Materials
 Materials
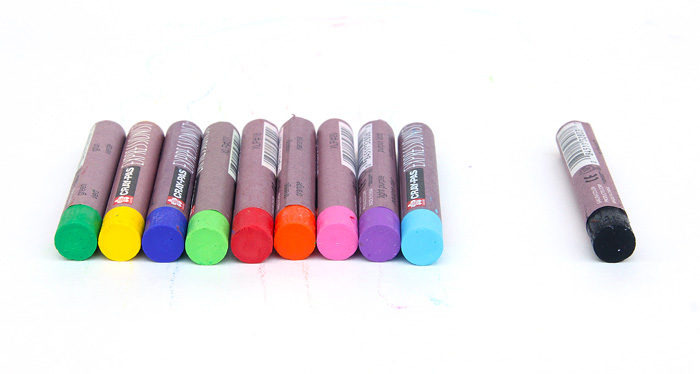
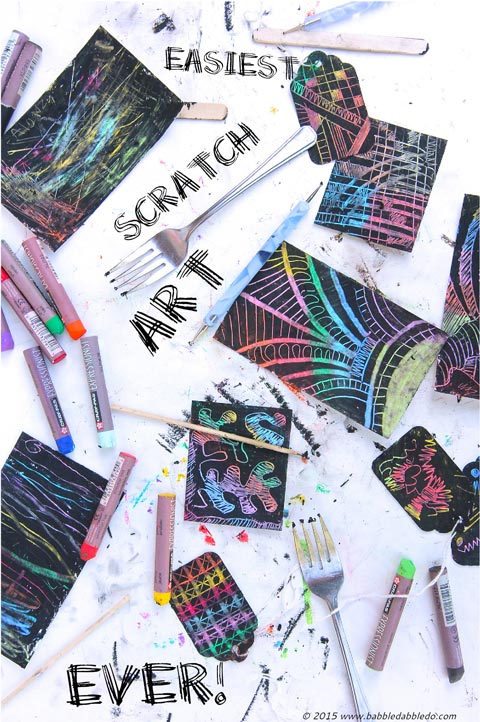
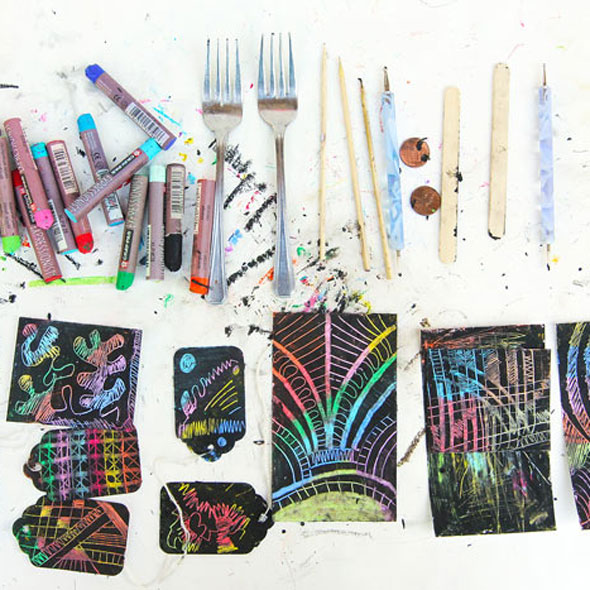
 - Oil Pastels– Cray Pas are the best! I love this set because they are wide and thick.
- Thick paper– index cards, paper tags, cardstock, old business cards
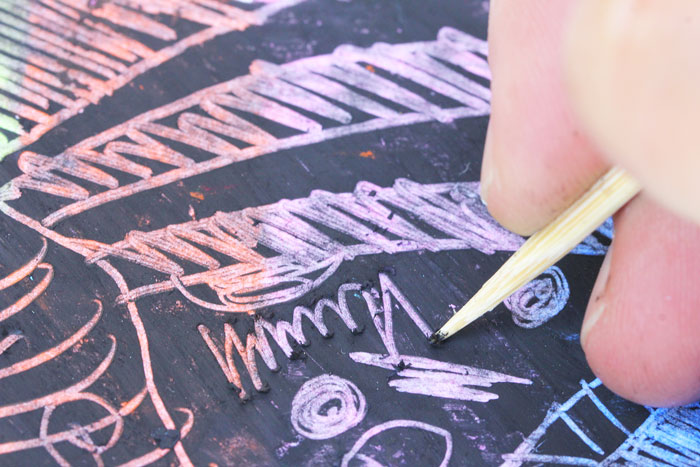
- Scratching tools- Bamboo skewers, toothpicks, craft sticks, forks, coins, and more….
Instructions
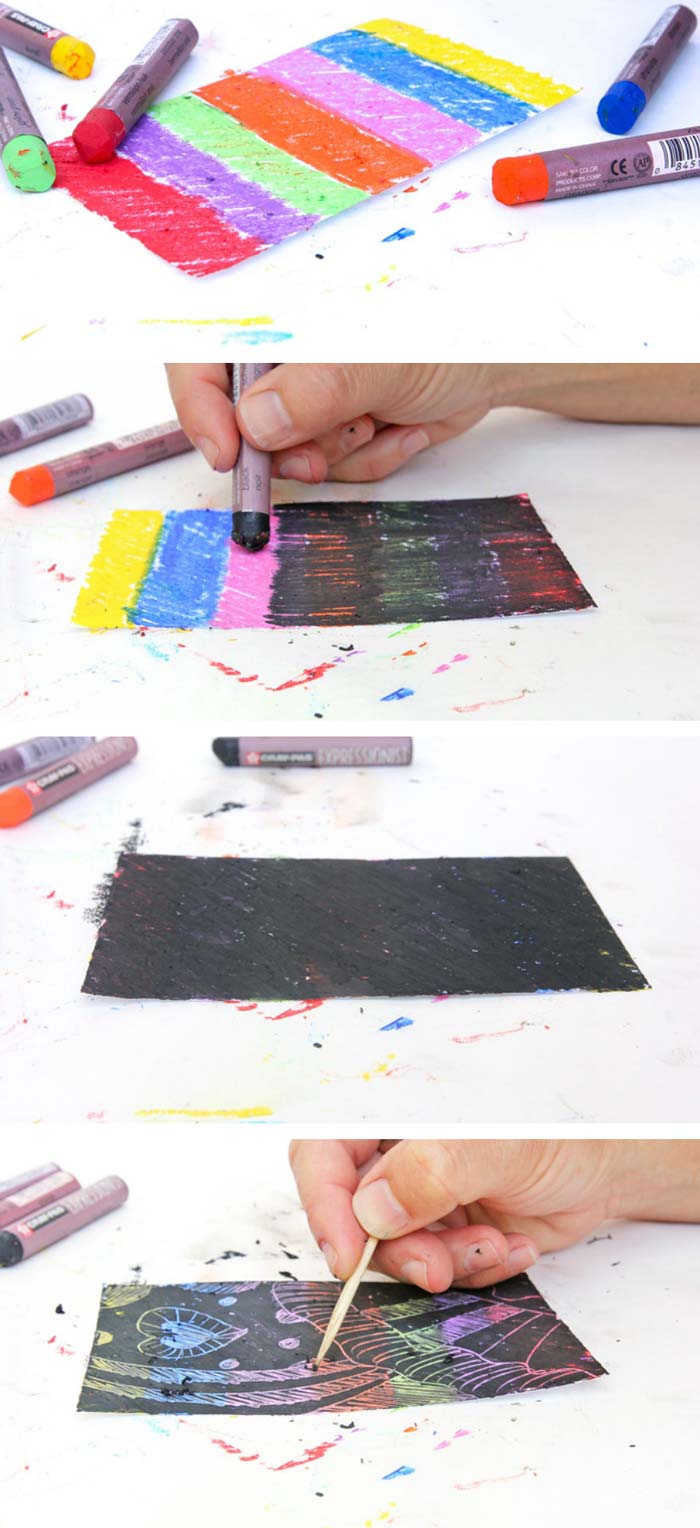
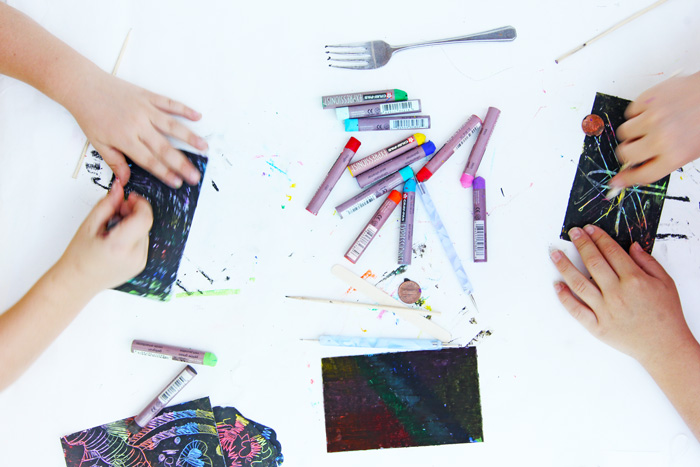
- Step One Cover a small piece of cardstock completely with colorful oil pastels.
- Step Two Cover the color completely with black oil pastel.
- Step Three Create designs by scratching the black off using the scratching tools listed above.
Tips
 Tips
Tips- Use thick paper. Cardstock thickness is perfect. Because you are scratching the paper, if it’s too thin it can be poked and torn by the scratching tools.
- Use smaller paper. Covering the paper in color takes some time and patience. For little ones I recommend using smaller cards so the process is faster and less daunting. Index cards are the perfect size.
- Use matte paper. Glossy paper will not absorb the base layer of colored pastels. If you use glossy paper try the mega easy method of making scratch art below.
- Use BLACK for the top layer. I tried other dark colors to see if I could make purple scratch art for instance, and it didn’t have the same effect.
- Try colored paper beneath. If you do want to make a colored top layer you can try this method: Start with colored cardstock as the base and simply color over it with one color of pastels, then scratch. Dark pastel over light paper or light pastel over dark paper works best for maximum contrast.
- Have fun with the tools! Rummage around your house for different scratching tools! Part of the fun is discovering what common items make great tools for scratching.
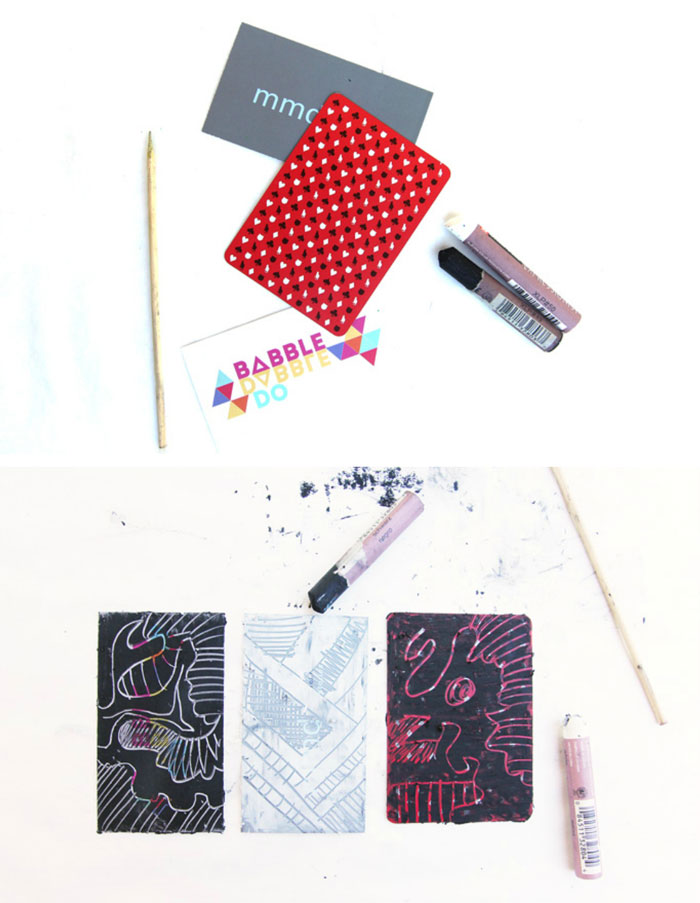
Make It Even Easier
SKIP THE COLORING- USE COLORED PAPER AS YOUR BASE
This method doesn’t quite yield the same results, but is a nice alternative method that is just about the easiest thing to do. It’s also great upcycling project! I recommend using a really colorful base, things like old business cards, playing cards, and postcards. Glossy cards work well if using this method.
Looks Like
Keith Haring. Scratch art reminds me of graffiti art and when I hear think graffiti art Keith Haring is the first person that comes to mind. Keith Haring created a unique path in the1980s art world, was he a graffiti, commercial or fine artist? I love the fact that he blurred these lines. He started making art in the subways of New York in the late 1970s, using chalk on blank ad space. Soon he was creating murals all over the world, though most of his public work no longer exists. He was also one of the first artists to open a retail shop selling products based on his art. According to this New York Times article Haring said this about accusations of being too commercial,”I could earn more money if I just painted a few things and jacked up the price. My shop is an extension of what I was doing in the subway stations, breaking down the barriers between high and low art.” Haring was also a social activist and his work is peppered with political messages. If you’d like to introduce your kids to his work check out these animated “flipbooks” on http://www.haringkids.com/master_art_flip.htm And for all you art buffs I enjoyed watching this 1979 video of Haring when he was a student at the School of Visual arts, it’s entitled Painting Myself into a Corner.
Conclusion
 Put those oil pastels
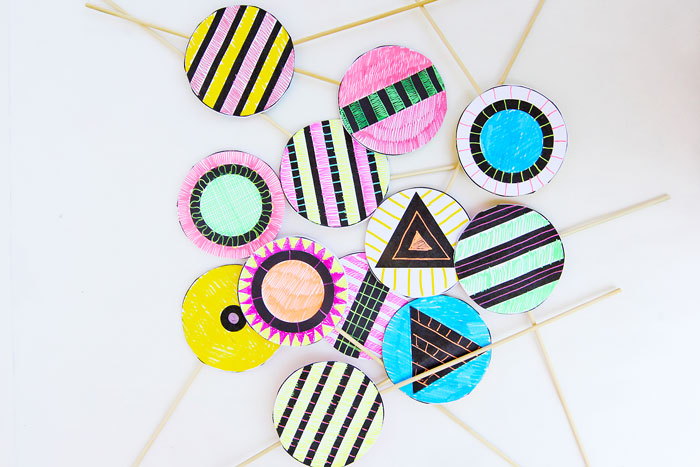
 to work! Once you start toying around with this method of making scratch art you’ll be hooked on the possibilities. We used it to decorate gift tags, wood blocks, even frames. And I love the instant nature of this method because not only do kids get to make art they get to make their own art material. It’s a wonderful process that gets them engaged from start to finish.
If you enjoyed this post hop, over and see another fun project we did using Sakura of America’s Gelly Roll pens: Decotropes.
And Sakura of America has their own amazing website with loads of project ideas for kids. You can see more of them here.
![]()
Fill your child’s life with more art, design, and science:
Subscribe via email and check out our FB page where I share tons more creative ideas and resources from around the web.
Spread Creativity Like Wildfire: Pin This!
FB Share
Oh how I LOVE oil pastels!
This is just so much fun!!
Oil pastels were my favorite art supply as a kid. Love the way they slide over paper!
This is AWESOME! I’ve never tried oil pastels, but this looks like a much better way to make scratch art than crayons!
It’s a lot easier on the elbows too :)!
My art classes have just gone through the process of making homemade scratch bookmarks for Father’s Day (its this Sunday in Australia). Yet it was a process waiting for the paint to dry. I love this idea – so much easier. It also means I can do this in art club where everything needs to be done in a short time. I laminated the scratch art to preserve it, assuming this would work with this method too. Thanks so much for sharing.
Oh so happy to hear this Fiona!!!!!
Love the idea of not having to mix up that soapy-painty goo. And Sakura is the best- I guess I don’t need much of an excuse to buy some new art supplies. 🙂
Ha! I know you have tried the traditional method too. And yes to new art supplies….
It is funny you mention this idea as my nearly 4 year old daughter worked this out all by herself last week. Now I have a name for it. Love oil pastels.
Awesome to hear!!!!
I love this!! It’s so simple and fun! We love oil pastels and I’m going to have to try this with my daughter!
I wrote a blog post about preserving/protecting children’s oil pastels paintings with glue a while back. If you’d like to check it out:
http://tickledbug.blogspot.com/2015/06/easy-way-to-protect-childrens-oil.html
Thanks Stephanie! Off to check out your post!
What a great idea. Using colored paper makes it so simple, too!
Yes, as if it could get any simpler …;)
This was a favorite activity of mine when I was a kid. Thanks for the reminder to do it with my kids again.
Life is funny! Yesterday I’ve been showing my 4year old how we used to make scratch art paper when I was in kindergarden (in Germany its from 3 to 6 and right before school).
Instead of oil pastels we used simple crayons but the rest was the same. Never heard of the gooey paint method until now.
Nevertheless it worked just fine, but i’ll give oil pastels a try too, promise!
Ha!!! A simple timeless activity, right ;)?