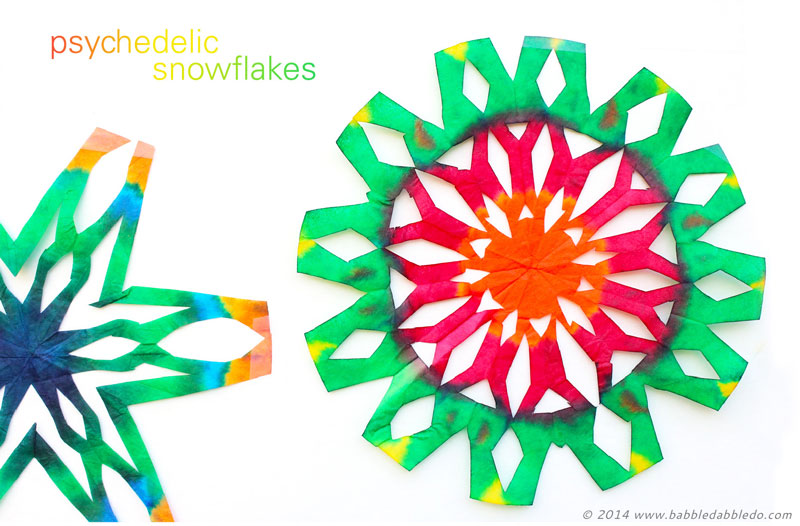
Today’s snowflake craft, Psychedelic Snowflakes, is not only a gorgeous way to decorate your home this winter, but there is a little STEAM twist to the project; I couldn’t help but turn it into a lesson on absorption, radial geometry and more….
 Winter is on its way and for many of you that means spending time with your family at home baking cookies, writing holiday cards, and maybe making a holiday craft or two…kind of a dreamy way to spend a snowy day inside with your kids right? Unless of course it doesn’t even snow where you live…like in sunny LA… but hey, a girl can dream!
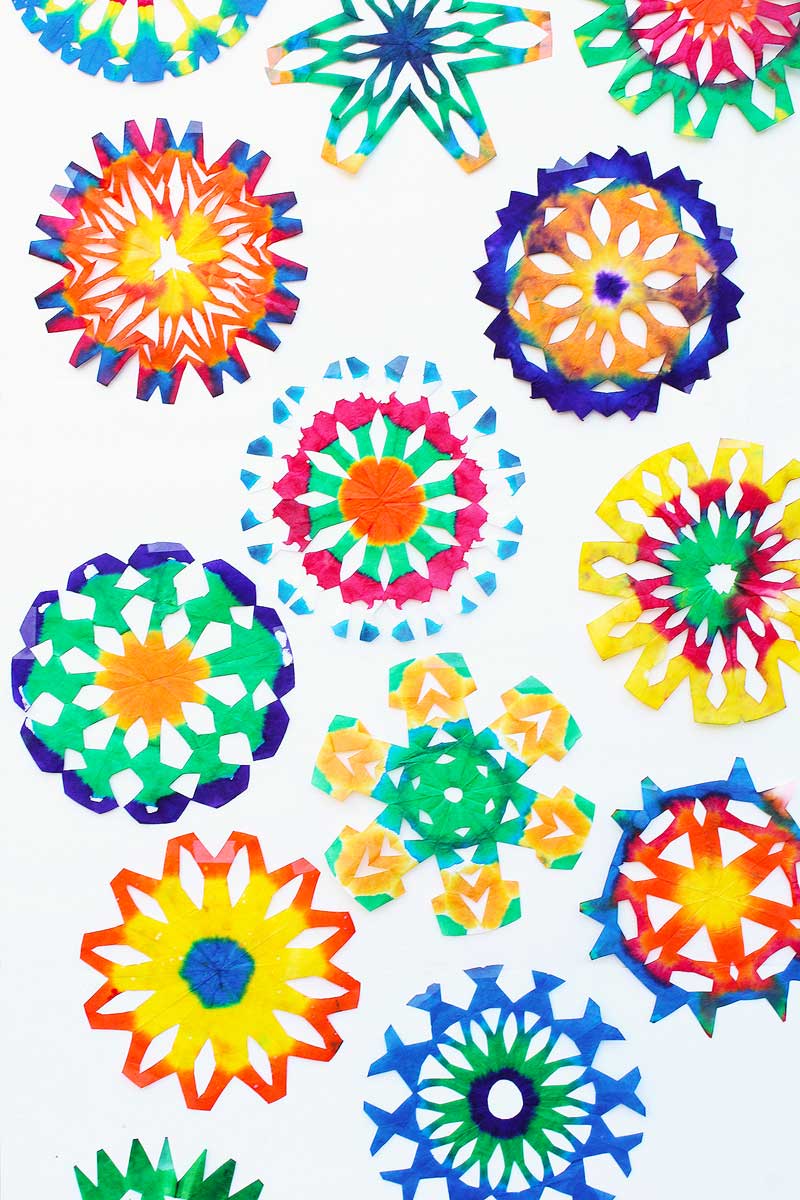 This snowflake craft project was borne out of a spur of the moment purchase of 1,000 large coffee filters. I knew they would eventually come in handy! Coffee filters are PERFECT for making paper snowflakes. The round shape and lightweight material make them easy to fold and cut.
Age Appropriateness
There are two ways to do this project:
Method #1 Fold and dye THEN cut
Method #2 Fold and cut THEN dye
For younger kids and when working with mixed ages I would use method #2. For older kids who can safely work with sharp scissors you may try method #1. Either one works.
This post contains affiliate links.
Psychedelic Snowflake Craft
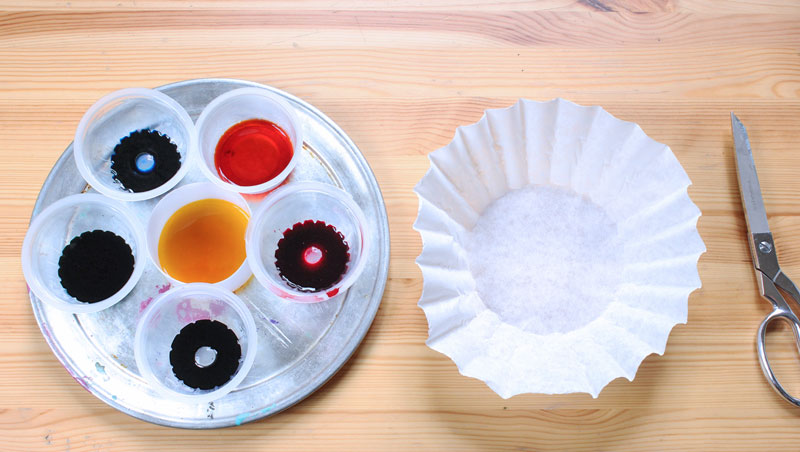
Snowflake Craft Materials
Download Snowflake Template Here
- Snowflake Template (Optional)
- Liquid Watercolors
– You may substitute food coloring but be sure to have a few bottles on hand because you will need a fair amount!
- Large White Coffee Filters
- Sharp Scissors– these are my favorite pair of scissors hands down but suitable for adults/teens only
- Shallow Plastic Cups
ABOUT LIQUID WATERCOLORS: Liquid Watercolors are one of our favorite art supplies. They yield vibrant, stunning color and can be used for many art projects. They are on the pricier side to purchase upfront but you will not be disappointed with the investment. You can start with smaller 1 oz. sets like this for under $20 but I recommend paying a little more and getting an 8 oz. set. Click here to see the set I recommend
It’s less than double the price and you get 8 times the amount of watercolor.
 Snowflake Craft Instructions
 Snowflake Craft Instructions
MESS ALERT! Be sure to layout pieces of tissue paper or newsprint down for the finished snowflakes to dry on. The watercolor can stain the surface below.
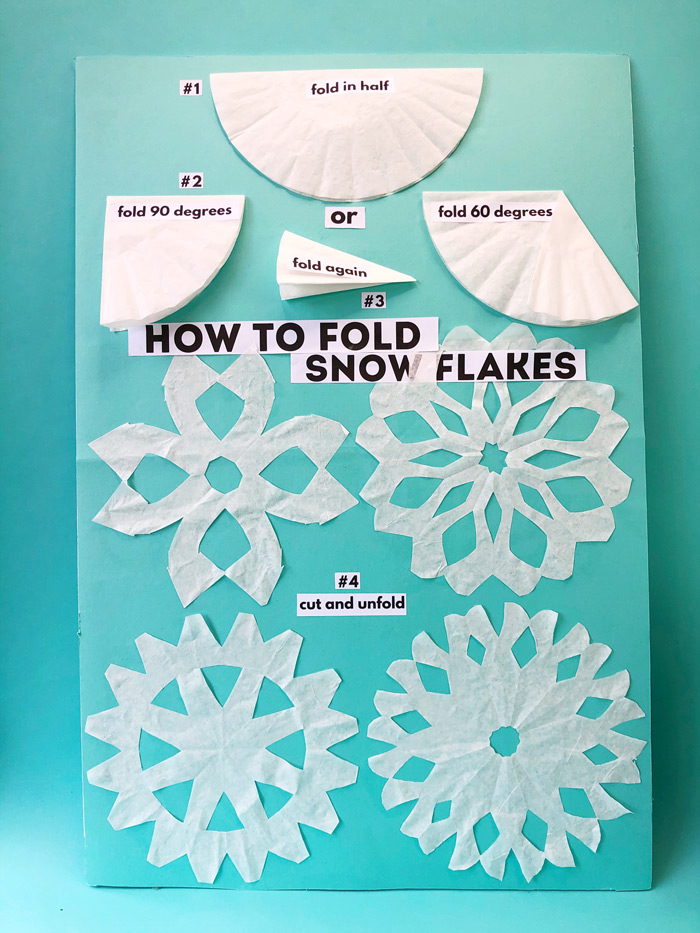
Basic Fold for a 6-sided snowflake
- Step 1 Fold your coffee filter in half.
- Step 2 Fold one side of the paper at a 60-degree angle from the center point of the circle
- Step 3 Repeat the 60-degree fold with other side of the paper.
- Step 4 Fold in half for a six sided snowflake. You can fold it in half AGAIN if you want a 12-sided snowflake.
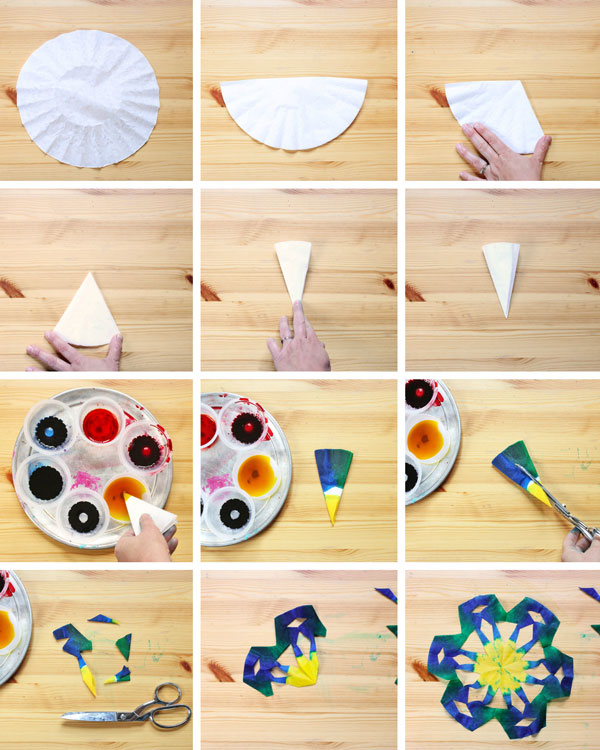
Dye & Cut the Snowflake
- Step One Squeeze a generous amount of each liquid watercolor
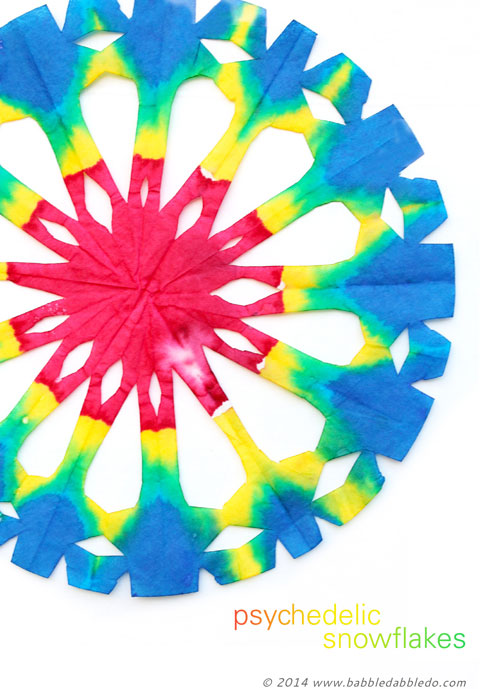
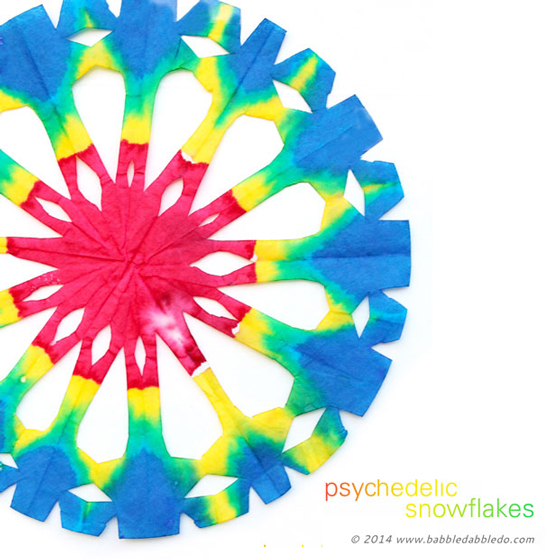
- Step Two Dip the folded coffee filter briefly into the colors of your choice until it begins to absorb the color. I recommend using 3-4 colors max. Leaving some white is also pretty. You can fold the filter in half gently to dip the center section.
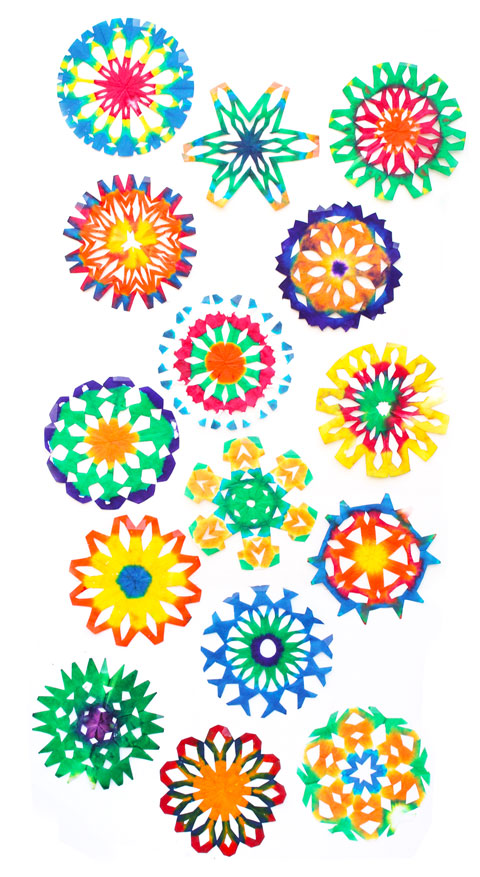
- Step Three When the filter is colored it’s time to cut! Cut these while they are wet! I free form cut shapes out to create our snowflakes. You can also use our snowflake template for ideas.
- Step Four Gently unfold the cut snowflake and lay flat to dry. These will dry fairly quickly once unfolded, around 30 minutes.
General Tips
- To flatten these out, have an adult iron them. We used a medium setting and ironed them as you would a piece of clothing, NO WATER or STEAM PLEASE!
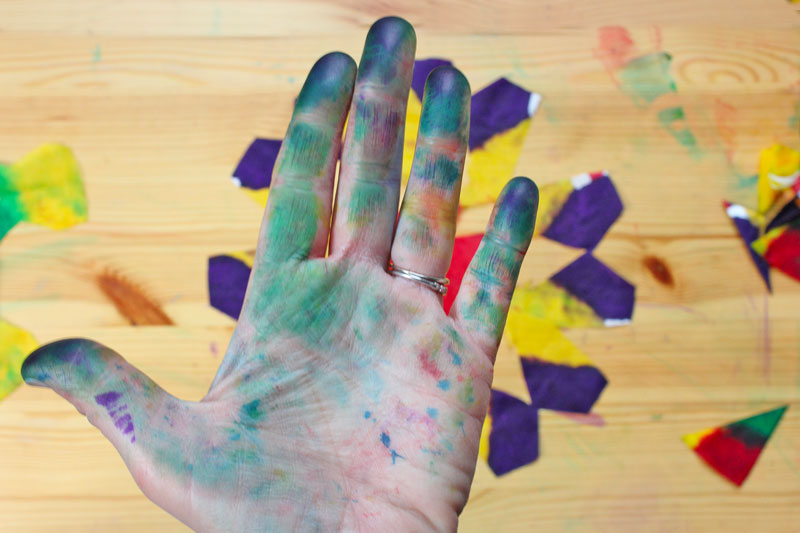
- Don’t worry when your hands end up looking like this; a few good hand washings will remove the paint.
Tips for Teachers
- In lieu of dying then cutting, it is easier to mange this snowflake craft with a group by having children fold and cut FIRST then having them dye the snowflakes.
- Separate the cutting and dying in two different locations. Kids can cut at a clean table, then bring their folded snowflakes over to a dying station.
- Set up trays lined with paper towels at the dying station. Either have kids dip and dye OR use eye droppers to add color.
- Once the snowflakes are colored, ask kids to bring their entire tray to use to a drying station. This will minimize dripping paint everywhere. At the drying station we unfolded the snowflakes.
- Place each snowflake on a piece of recycled paper to dry. Add the child’s name to the paper. The papers can be stacked.
- Once dry you can iron the snowflakes flat.
Tips for Families
This snowflake craft is a wonderful family activity for the whole family!
- Put younger children in charge of folding and dipping the filters in color.
- Have older kids and parents can be in charge of the cutting. Cutting through layers of the coffee filter can be challenge for young kids.
- Younger kids who want to cut these should cut before dying the snowflakes. It will be easier for them to cut through dry filters.
- Younger kids should use fewer folds so they are only cutting through a few layers of filter.
What’s the STEAM Behind It?
The Science
Absorption is the process by which a material soaks up a liquid. Liquids like water are clear and it’s difficult to watch them be absorbed by different materials. In the case of psychedelic snowflakes you can watch the coffee filters absorb the colorful liquid before your eyes and get a clear view of the process in action.
The Art
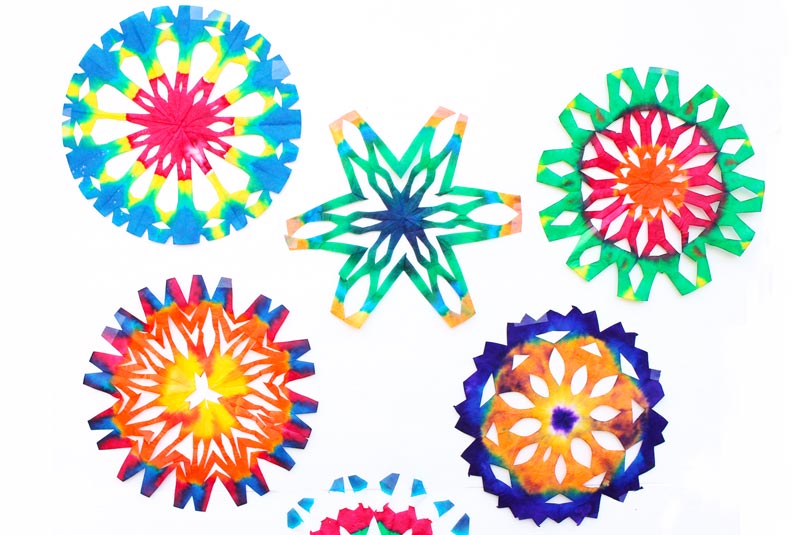
This is the perfect project to showcase color mixing. One way to start is by limiting the colors to red, blue, and yellow or cyan, magenta, and yellow. By the end of the process there will be a lot of green! When we’ve done this with our students I ask “Where did green come from?” I didn’t give you any green!” It’s also a way to illustrate how too many color mixed together develop into a brian muddy color.
Psychedelic art movement: I titled these psychedelic snowflakes because they resemble tie dying and artwork from the 1960’s. With kids I would skip chatting about how psychedelic art came into being and head straight to the color, morphing shapes, and vibrancy that are hallmarks of this art movement. You can also use this as a springboard to talk about Peter Max.
Peter Max is an artist and graphic designer synonymous with the 60’s psychedelia. His work is colorful and fluid and bursting with energy. He designed everything from a postage stamp to ads to marketing for the Olympics to fine art. Here is his famous ad for 7-UP circa 1968 for which his style became well known. I personally love artists that hover between fine art and design and I think Peter Max has had a very successful career doing this.
Math
Making snowflakes showcases radial geometry, repetition, and multiplication. The process of folding a circular piece of paper, making a few strategic cuts then opening up the snowflake to see your cuts repeated around a center point is a fantastic way to visualize multiplication and radial designs!
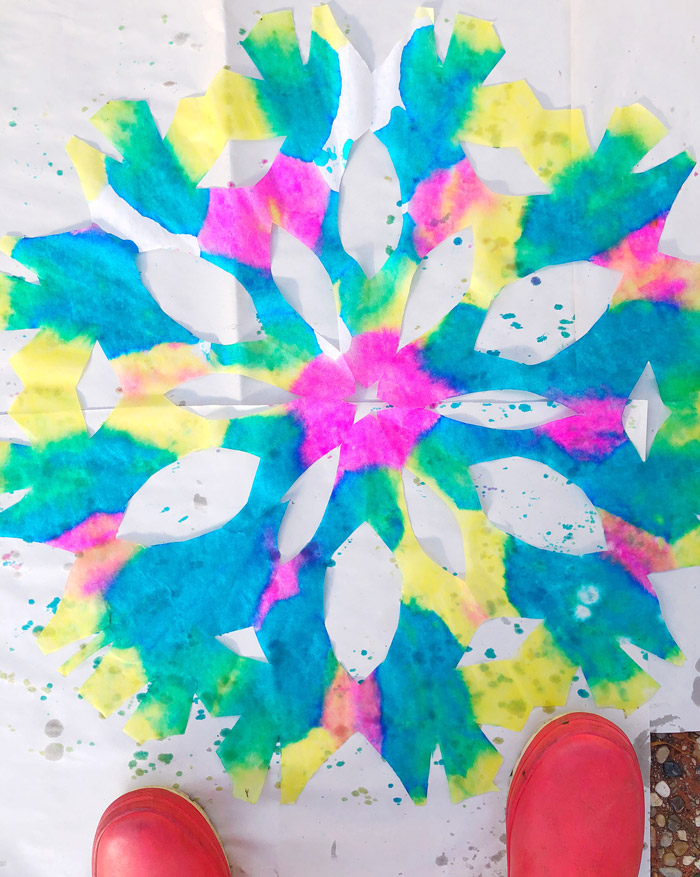
For a math bonus you can talk about scale by using different sizes of coffee filters. We tried this with our after school students using regular filters and these medium and large sized “Texas” coffee filters. The kids were clamoring to try the big ones first but we asked them to work their way up in scale from small to medium and finally to large. To see how big these are here is a picture of a Texas Snowflake in relation to my rain boots!
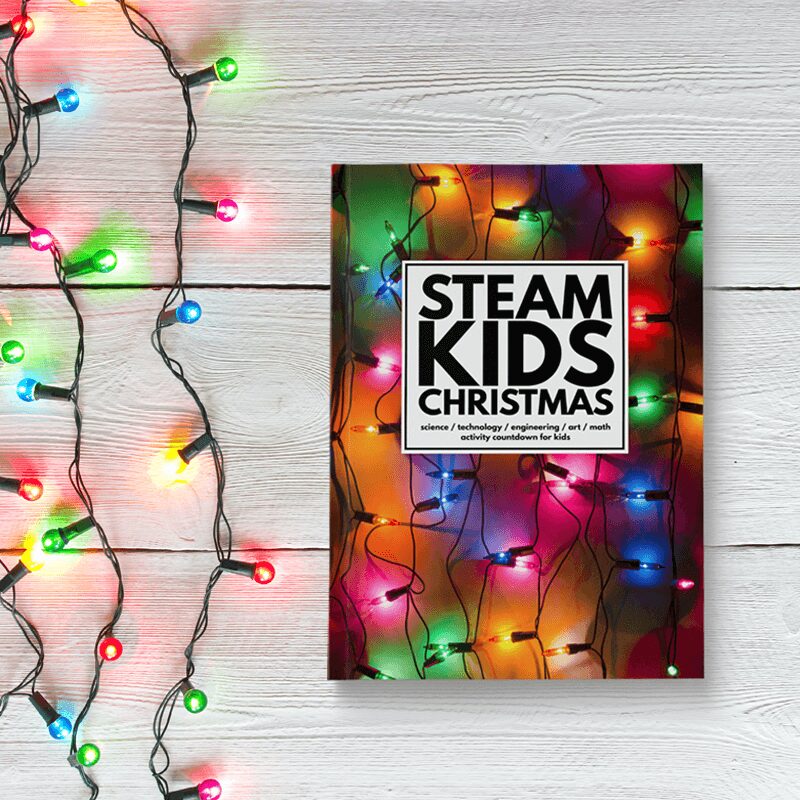
Psychadelic Snowflakes are part of the STEAM Kids Christmas eBook!
For more awesome ways to keep your kids creating and making during the long winter break go here to see the book.
So if the only snowflakes you see this winter are a homemade snowflake craft, make it these giant vibrant lovely Psychedelic Snowflakes! And using liquid watercolors to dye them makes for vibrant eye-popping color! Hint: These would also look good as party décor any time of the year; they have a festive look to them don’t you think?
Are you passionate about raising creative kids?
Join over 14,890 parents and educators who want connect with kids and nurture their creative process through magical, easy projects you can do TOGETHER.
Send me awesome creative project ideas!
This is lovely and not only for winter 🙂
I love this! It reminds me of Mexican “papel picado” used to decorate festivities.
Yes! My Dad lives in Mexico and said the exact same thing 🙂
You can also use markers and a spray bottle of water to create this effect, easier and not as messy as the dipping process.
Thanks for including the artist tie-in with Peter Max. It is great when you can tie in art history to any activity!
These look like so much fun. I can’t wait to try them with my art class.
woo hoo!
OMGSH i have been waiting for two years to finally make these! That’s it! It’s happening, & im not waiting for the large coffee filters. I’m sorry I just have to play with these bold colours asap!