There’s nothing like doing a melting ice experiment on a hot day. Ands if it’s not hot yet where you live I want you to save this idea for when the weather heats up because it is a SUREFIRE hit with kids!
I have done this melting ice experiment project with preschoolers on up to 10 year olds and it has always been a crowd pleaser. It’s also a wonderful multi-age project for families or camp. It’s a perfect summer STEAM project because it combines science and art. Read on to see how!
What Ice to Use
If you do this project you have two ice options:
- Option 1: If you live in a large enough town I HIGHLY recommend you find a local ice company and buy a 25 pound block of ice. It’ll cost you under $10 and everyone is memermerized buy a HUGE block of ice, that goes for adults too! Don’t forget to bring a large cooler when you pick it up!
- Option 2: If you don’t have access to an ice company, you can make the blocks yourself! The day before you do this project, freeze water in several recycled milk cartons. Add food coloring if desired. Make sure to clear out some space in your freezer to do this! When ready for the project, peel away and discard the cartons.
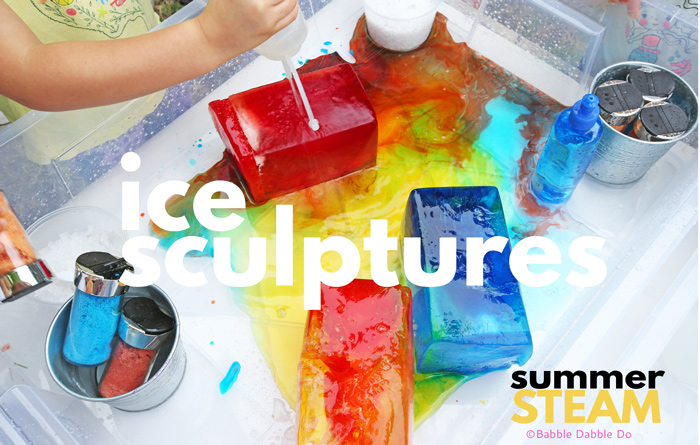
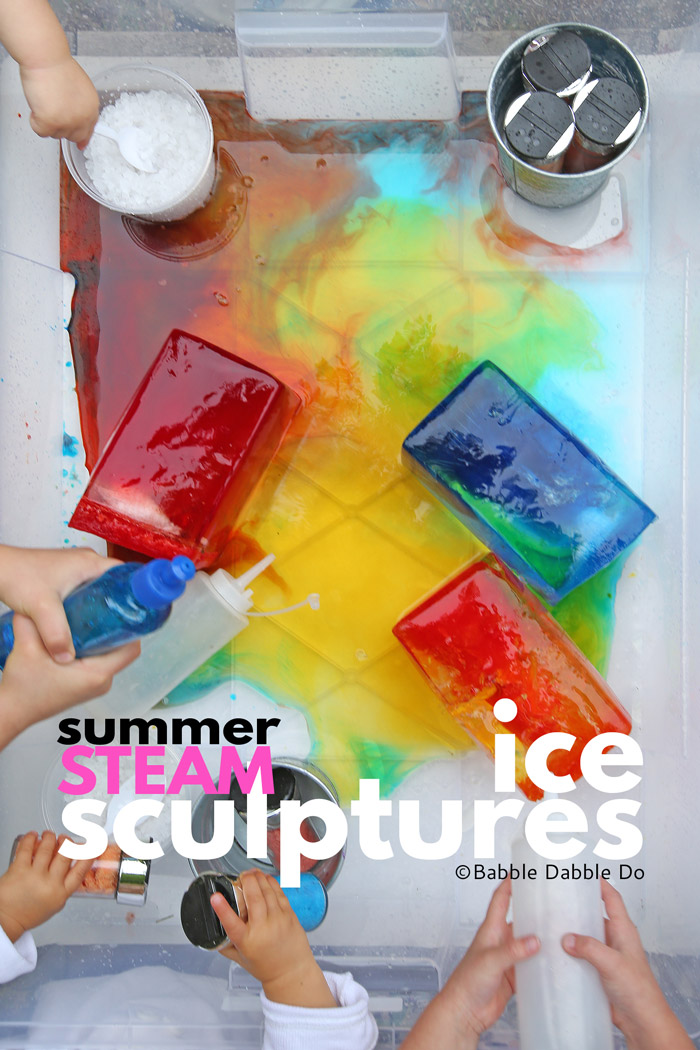
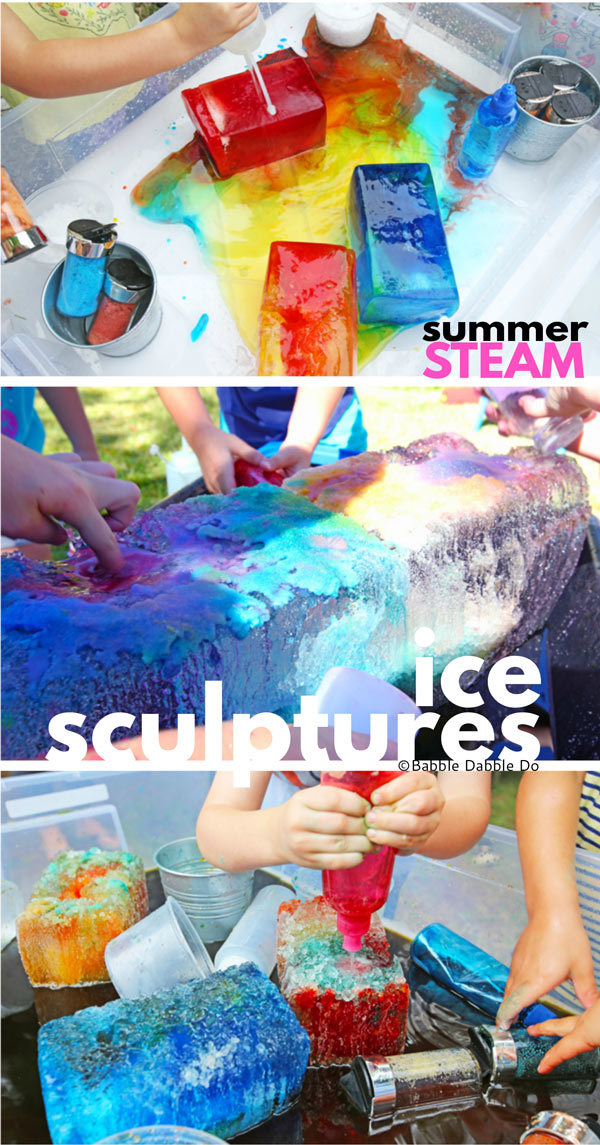
Melting Ice Experiment: Ice Sculptures
SAFETY NOTES
- Salty water can sting the eyes. Avoid splashing any of the salty water in the tub.
- Do not to let small children consume the salt. Excessive salt consumption is a health hazard.
- The icy salt water will be VERY COLD. As you’ll read below we are lowering the temperature of the ice and water to well below freezing. Monitor the project so small children don’t leave their hands in the water and get frostbite!
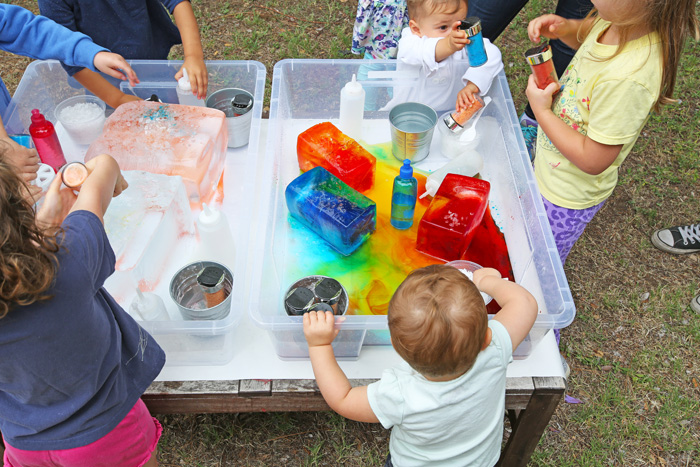
Materials
- Ice blocks (see recs above)
- Spray bottles
- Warm water
- Colored Salt Tip: Rock salt is also fun to use!
- Food coloring
- Salt shakers Save empty spice jars for this!
- Large Tub (Tip: Hardware stores and Home Depot sell concert mixing tubs that are very inexpensive)
Instructions
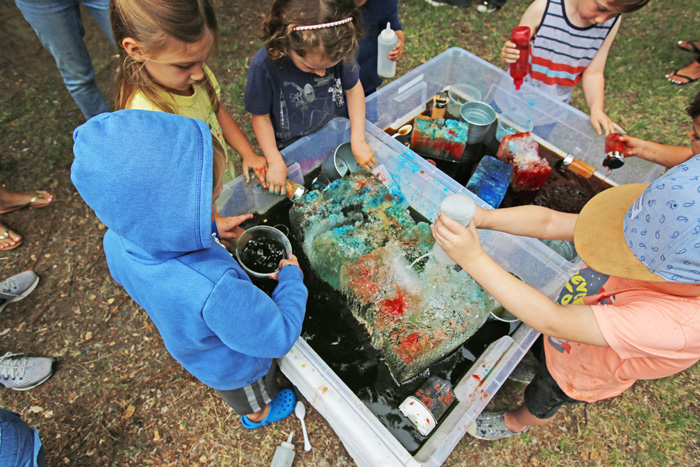
- Step One Place the blocks of ice in a water table or large tray outside.
- Step Two Fill the spray bottles with warm water, drop in some food coloring if desired.
- Step Three Fill your salt shakers with colored salt.
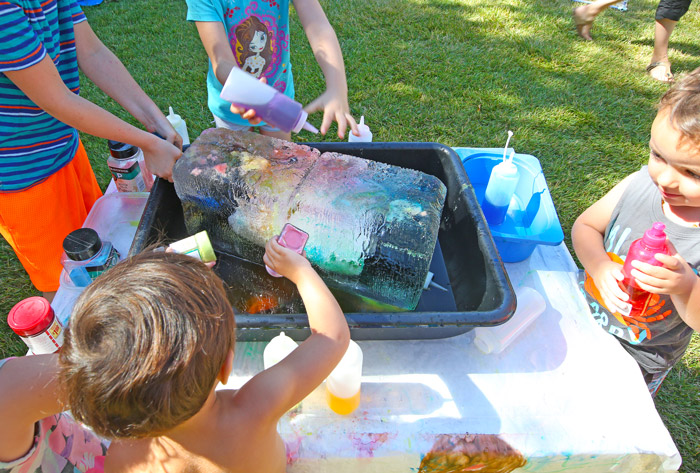
- Step Four Hand your child a spray bottle and/or salt shaker and tell them to spray and shake to their heart’s content.
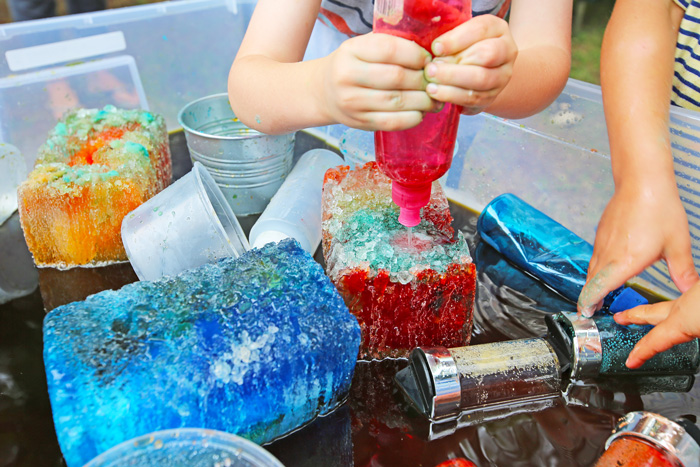
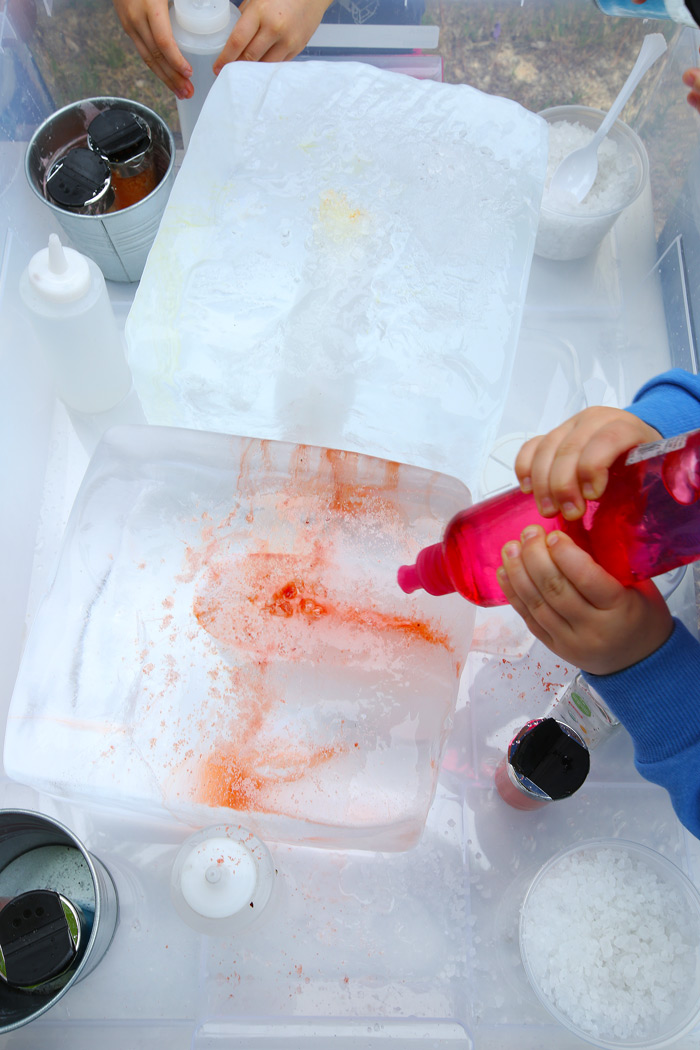
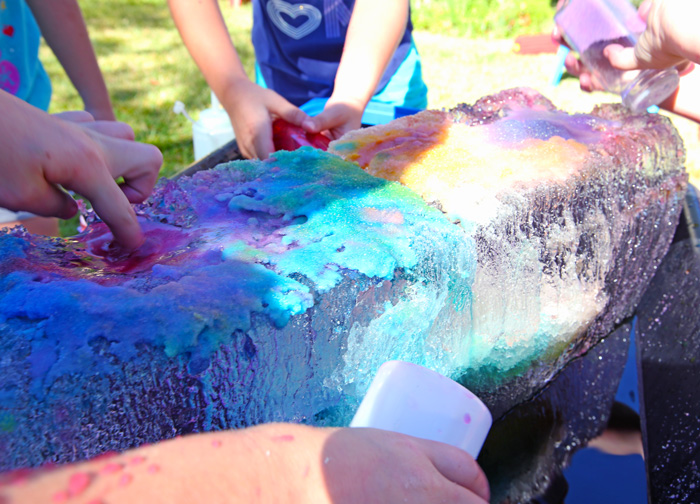
What will happen in the melting ice experiment
- The salt will begin to melt the ice and stipple the surface. If you spray the water at the same spot over and over again you can make holes in the ice.
- The salt will also crystallize to form a crust which you can peel off.
- At one point I ran out of salt and gave the kids the food coloring bottles. They dripped food coloring directly on the ice and it looked pretty cool, creating vivid colors that melted into streams.
A Note on Water Disposal: Once the project is complete you will have a large tub of VERY salty water. DO NOT pour the water on plants or grass, the salt content will harm them. I suggest pouring the water on an out of the way patch of dirt or down an outdoor area drain if available.
The STEAM behind our melting ice experiment
The Science
Freezing Point Depression Water freezes at 32 degrees Fahrenheit or 0 degrees Celsius. Salt lowers the freezing point of ice, allowing it to melt at colder temperatures. A 20% solution of salt and water can make ice melt at 2 degrees Fahrenheit. That’s a huge difference in temperature! This phenomenon is called “freezing point depression.” When salt is dissolved in water it breaks into sodium and chloride ions and those ions make it much harder for the water molecules to bond together at freezing temperatures. You can read more from Encyclopedia Brittanica here. Because salt takes some time to start melting the ice I like to add in the accompaniment of warm water to this project. It hastens the melting process and gives kids a chance to explore the next topic: erosion.
Erosion Erosion is the process by which land is worn away by wind, water or ice. In this case were are eroding the ice itself with salt and water. The project demonstrates how running water can create channels, crevices, and holes in the surface of an object over time.
The Art
Types of Sculpture Sculpture is work of 3 dimensional art created by shaping a material in either and additive or subtractive way. The two main types of sculpture categories are additive and subtractive. Additive sculptures are created by building up a material like clay to form a 3d piece. Subtractive sculpture is created by carving a block of material. In classical art, marble was a common medium used by artists to create large scale sculptures. In this project kids are creating a type of subtractive art piece by using the water and salt to melt and form their “sculpture”. Challenge them to plan out an area they’d like to shape and see if they can do it using the warm water. For more info on sculpture types this is a great slideshow.
Ephemeral Art There is a type of art that is meant only to last for short time or occurs only once. This is called ephemeral art. This project is a great opportunity to show that not all art forms are meant to be preserved for eternity but still have value. Performance art falls into this category as well as some forms of environmental art which fade away over time.
More Summer Fun
If your kids enjoyed the melting ice experiment, we’ve got lots more ideas for water activities and summer STEAM play! If you want your kids to stay cool and busy all summer long visit:
10 Irresistible Water Activities for Kids

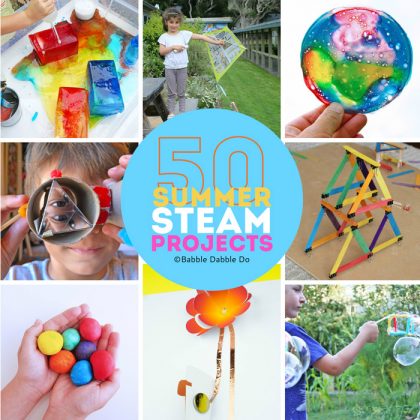
50 Summer STEAM Projects
Are you passionate about raising creative kids?
Join over 22,179 parents and educators who want connect with kids and nurture their creative process through magical, easy projects you can do TOGETHER.
Subscribe to our email list to receive project ideas as well as offers for some our creative products.
If you want to read our privacy policy before subscribing, hop over here.
this is a wonderful idea!