DIY Kaleidoscopes were one of those projects on my long standing must-make list for what seemed like forever….the reason it took me a long time to make one was because most of the existing online tutorials are pretty challenging. Finally in an effort to keep it simple I realized that omitting the colorful bottom of the kaleidoscope was the way to go. “Wait!” you scream, “isn’t that the entire point of a kaleidoscope?” Well, the answer is partly, yes; in fact, a kaleidoscope without an end is actually called a teleidoscope. In this post I do include some suggestions for ends but I also love how leaving them open-ended means you can go out and explore the world a little differently!
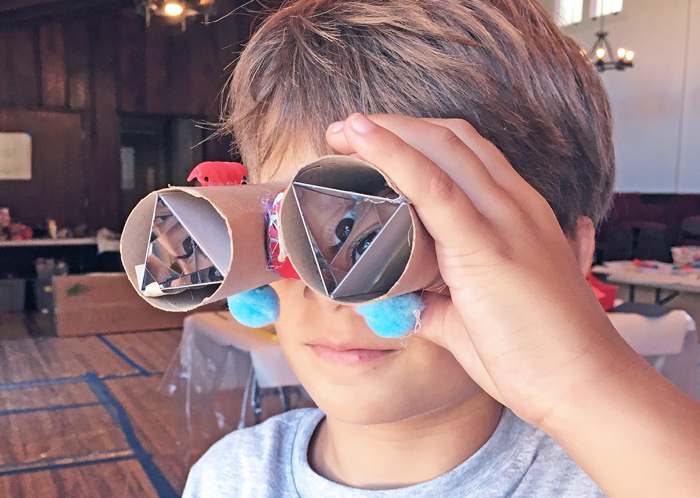
 This project was hit at Camp STEAM especially with one young man who decide to turn the teleidoscope into a pair of teleidoscopic binoculars, though I’m not sure that’s a real term…I thought his idea was brilliant and if you scroll down you can check out how to turn them into a pair.
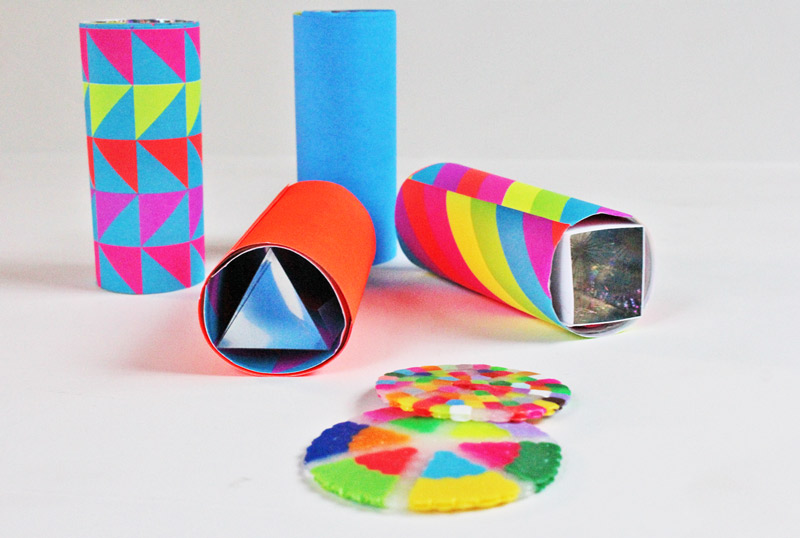
This post contains affiliate links to products.
DIY Kaleidoscopes/Teleidoscopes
Materials
For the Kaleidoscope
- Mirrored Plastic Sheets or Reflective paper
- Cardboard Tube
- Xacto knife/straightedge/cutting mat
- Double sided tape
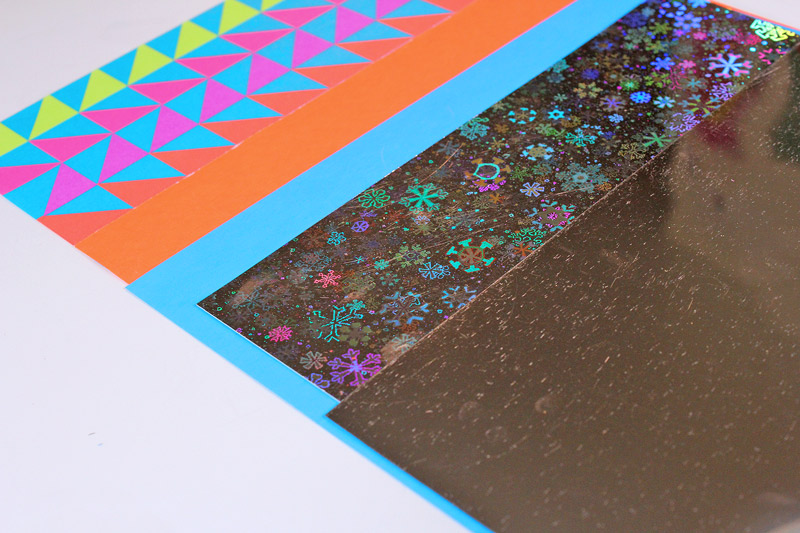
- Decorative Paper
For Viewing
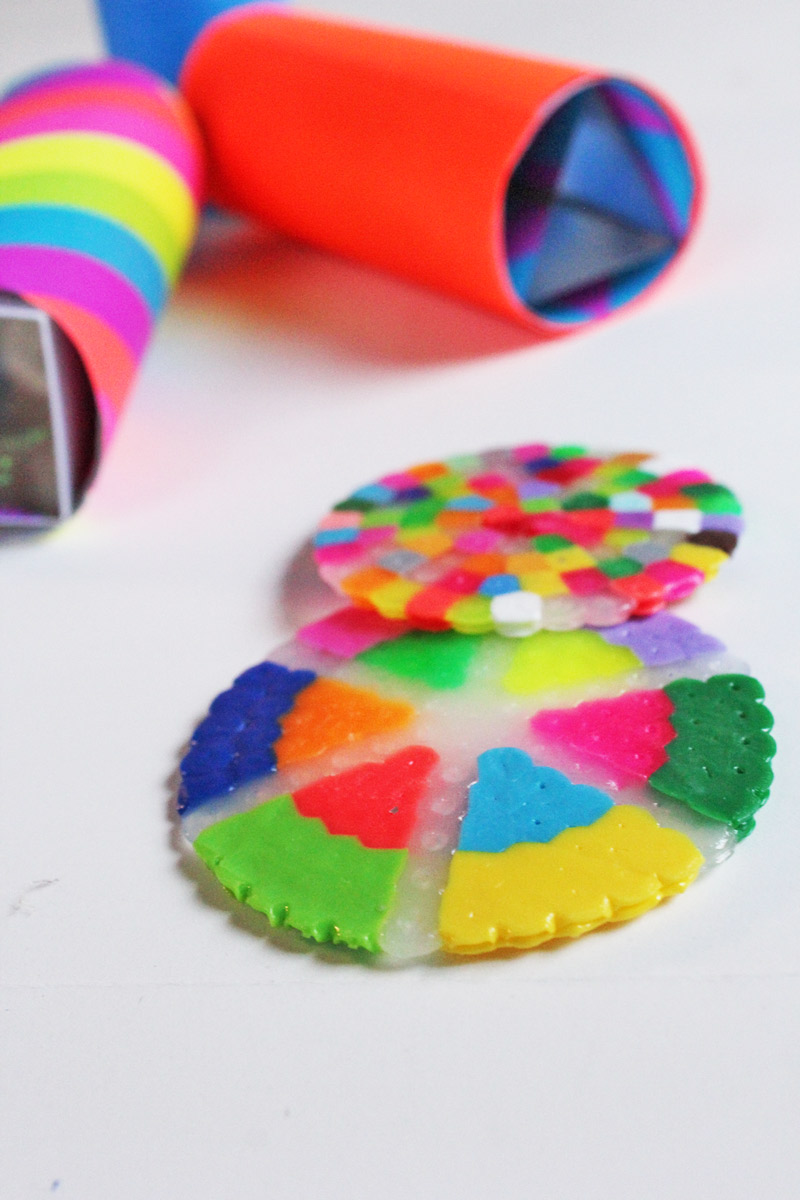
- Perler Beads
- Colorful paper
- Tape
- More suggestions below….
Instructions
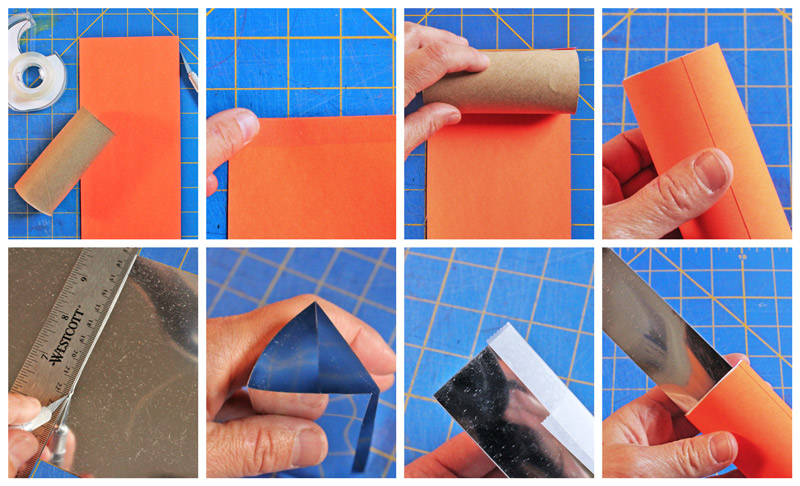
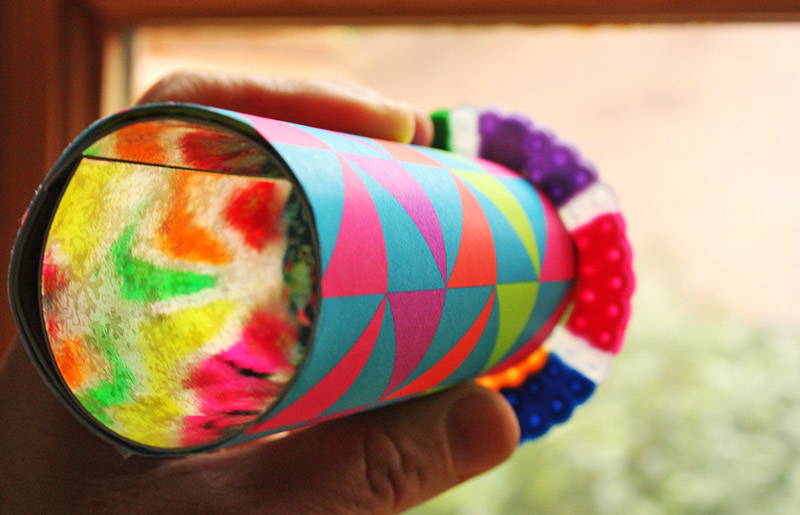
- Step One (optional) Trim paper for the outside of the tube. Using double stick tape, adhere the paper to the outside of the tube. This step can be omitted if you don’t care how the kaleidoscope looks on the outside. Design snob over here had to cover that tube, though!
- Step Two Cut your Mylar. First trim a piece it to match the length of the cardboard tube. I used tubes that were 4” in length.
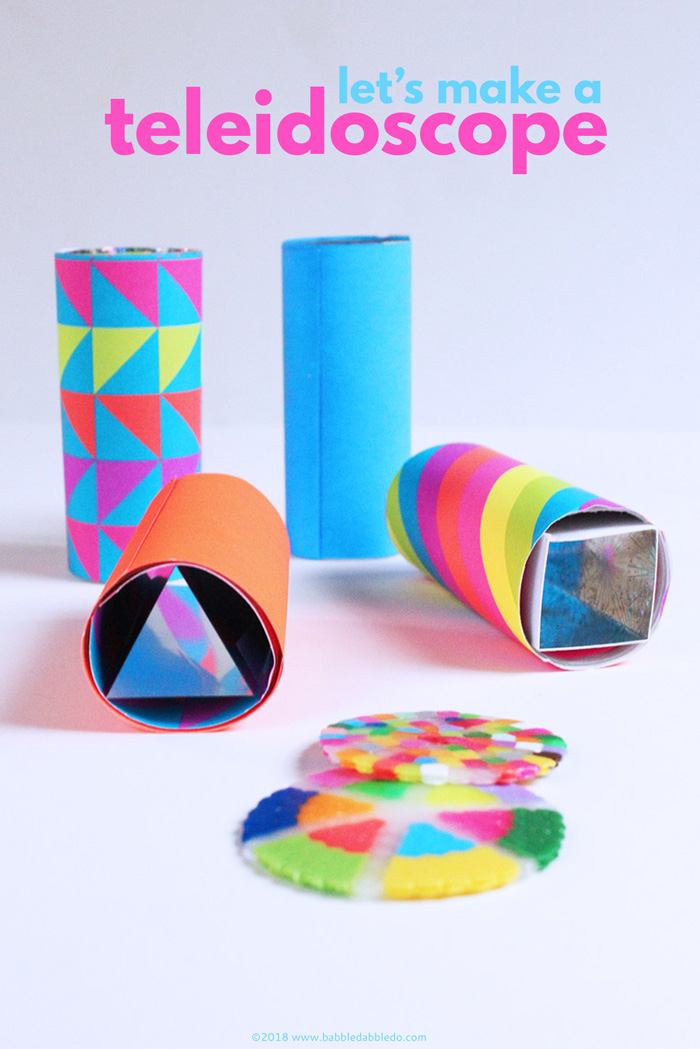
- Step Three Score and cut the Mylar as follows for the interior shape desired:
Circular kaleidoscope Cut your 4” wide piece of Mylar equal to the diameter of the tube. Curl the paper into a circle and slip it into the cardboard tube. Secure the ends of the Mylar to the tube using a piece of double stick tape.
Triangular kaleidoscope Cut and score your 4” wide piece of Mylar as follows: Make 3 marks approximately 1 7/16” apart. Score the middle two marks and trim at the third mark. Tape the triangle together. Slide the shape into the cardboard tube.
Square kaleidoscope Cut and score your 4” wide piece of Mylar as follows: Make 4 marks approximately 1 3/16” apart. Score the middle three marks and trim at the fourth mark. Fold along the scored lines and tape the ends together. Slide the shape into a cardboard tube.
How to turn it into a kaleidoscope:
Materials:
- Clear plastic lids
- Flat beads & cellophane pieces
- Masking tape
- Bamboo skewer
Instructions:
- Place flat beads and cellophane pieces on a plastic lid. Fit a second lid over the objects creating a sandwich. Make sure there is enough space for the objects between the lids to move a little bit.
- Add masking tape around the edges of the lids.
- Poke a hole through the center of the lids using a bamboo skewer.
- Cut the bamboo skewer to be about 6″ long.
- Feed the skewer through the lids and tape to the side of the teleidoscope. Make sure the skewer is not poking past the end of the teleidospe where children look though.
- Rotate the lids as you look through the kaleidoscope!
See it in action here:
View this post on Instagram
Tips
- If using plastic mirror make sure that no edges protrude past the tube! The corners are sharp!
- To test out the size of mylar needed to fit within the tube score and trim a piece of paper first. The dimensions I listed above worked for the tubes I had on hand but may not work for all cardboard tubes. You want a snug fit so that the mirrored shape does not fall out of the tube. If you make it too small, you can use tape to secure the shape to the interior of the tube.
- If you are using reflective paper you will want to score the BACKSIDE of the paper so that the reflective side faces the interior of the shape.
- Use as highly a reflective material as possible. Tinfoil does not work well. If you can’t find Mylar sheets use reflective papers usually found in the scrap booking section of a craft store. The paper can have some designs on it, just be sure to use silver colored sheets.
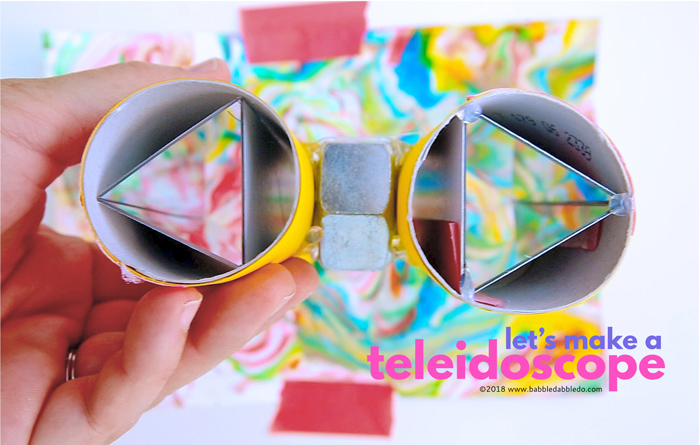
Make it a double!
To make a double teleidoscope glue a spacer between two teleidoscopes. We used a large nut but you can use another piece of cardboard tubing as well. It would be fun to experiment with the orientation of the two teleidoscopes and how that affects what you see. For instance you could try one triangular teleidoscope and one circular one, or two triangular ones with the point of the triangle facing opposite directions.
Viewing
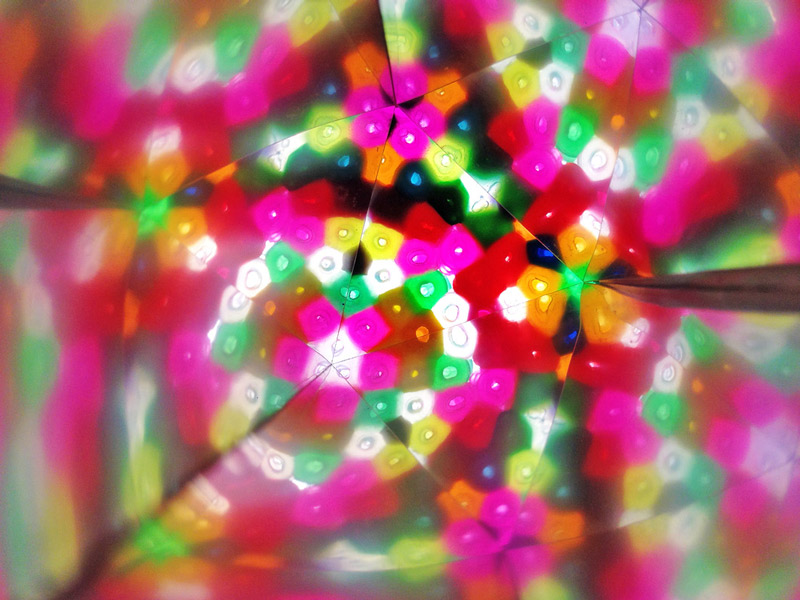
Since your teleidoscope is open ended here are some suggestions on what to look at to get started. These are things we had great luck with in creating cool effects:
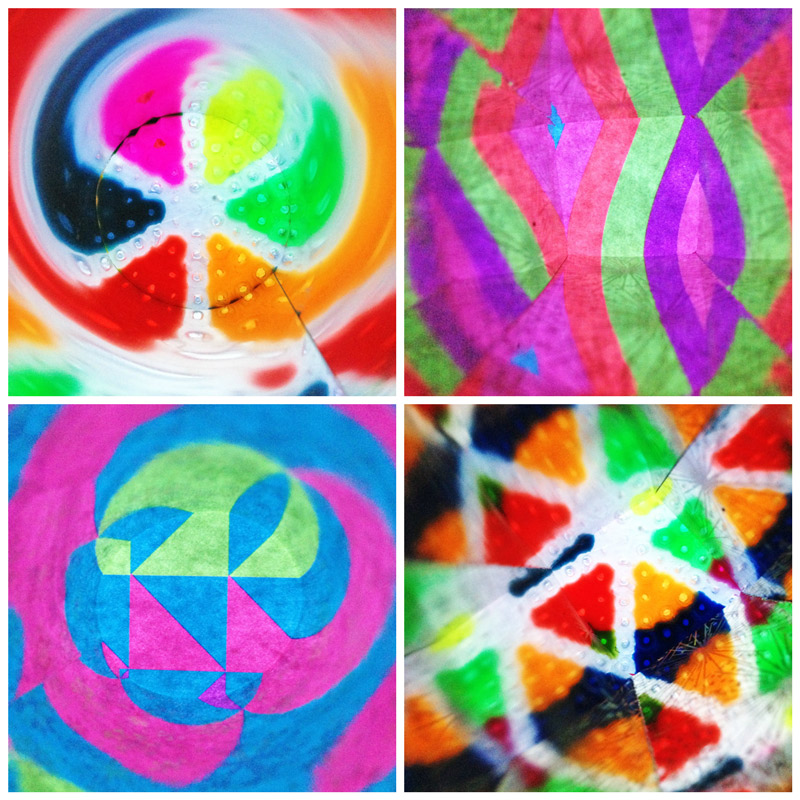
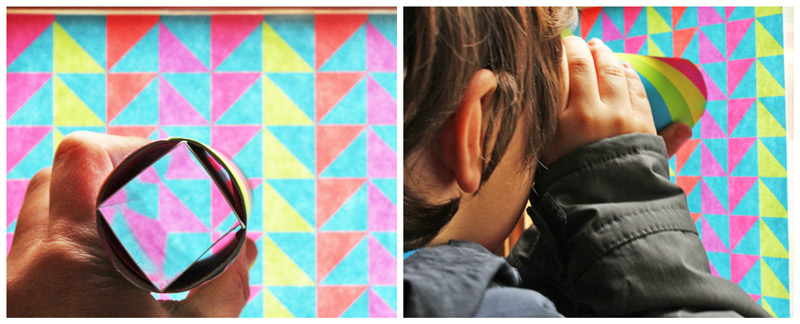
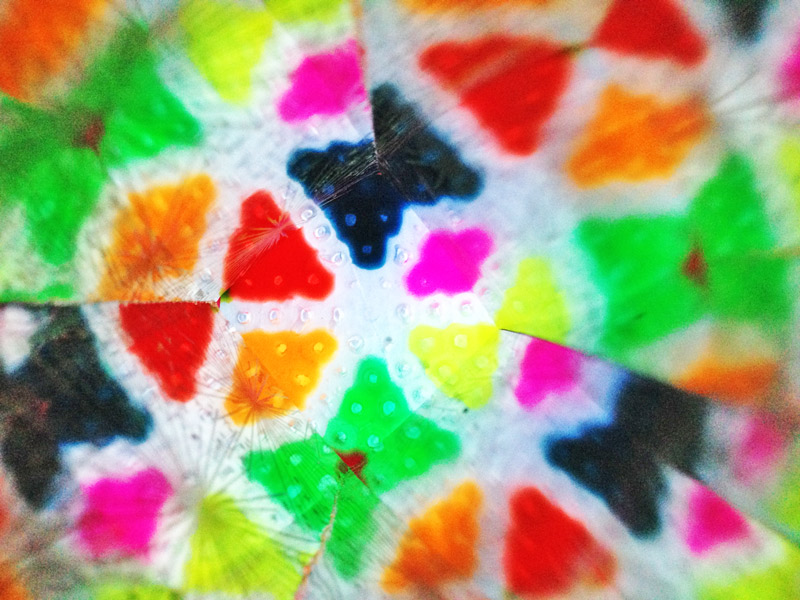
- Colorful Patterned Paper Tape several sheets of patterned paper to a window and look through the kaleidoscopes. Use the circular, traingular and square versions and see how each of them affects the optics.

- Perler Beads I made a couple of colorful Perler Bead discs for use with the kaleidoscopes. Simply hold the disc at the end of the kaleidoscope and rotate/move the disc around while looking through the scope. Not familiar with Perler beads? They can be found at any craft store or here: Perler Beads
. To make a simple disc for viewing with your kaleidoscope use the circular pegboard included with the beads and create a pattern. When finished with the design, place the sheet of ironing paper included in the set over the board and ask an adult to iron the beads to fuse them together. For this project you want to be sure to include a lot of translucent beads.
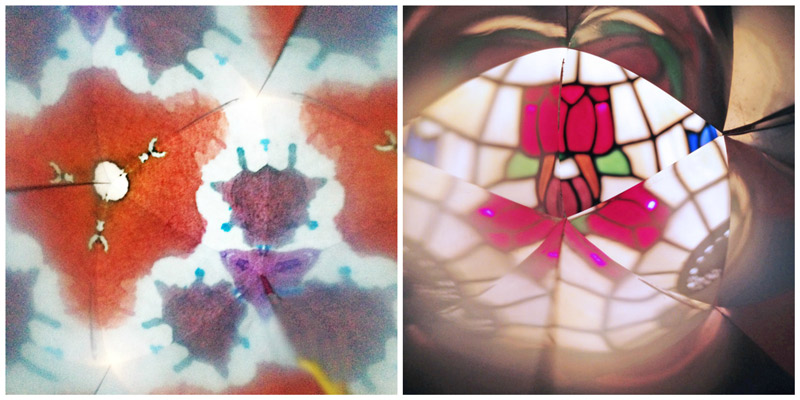
- More Ideas I taped our oil and watercolor art to the window and looked through that, you can also look at colorful lamps and more. Encourage your children to take these kaleidoscopes around the house and see what materials, patterns, or objects create the coolest effects when viewed through them.
Looks Like
David Brewster. David Brewster is known as the man who invented the kaleidoscope in 1816. He was a jack-of-all-trades scientist who focused much of his career studying optics. The Kaleidoscope was his most famous invention but he also spent years developing a stereoscope called the Brewster stereoscope (he did not invent the stereoscope). Don’t know what a stereoscope is? Familiar with Viewmasters? That’s a version of a stereoscope, where two images seen through the right and left eye are combined to form a 3d image. Brewster was the first to develop of a hand held version of the stereoscope.
Conclusion & More
I loved the idea of keeping our diy kaleidoscope open-ended because it allowed for more chances for discovery than your standard self-contained kaleidoscope. I also loved experimenting with the different shapes for the interior of the kaleidoscope. I think making them all allows kids a chance to experiment with the way optics change depending on the shape of the mirrored surface as well at the object/patterns being viewed. I also loved that keeping the kaleidoscope open ended meant it took about 5 minutes to throw together, perfect for a quick but entrancing project for kids!
- For more optical fun be sure to make a simple Camera Obscura. If you love unexpected color hit up Art in the Dark.
- Did you know there is a David Brewster Kaleidoscope Society? Neither did “eye!” If you can’t get enough of all things kaleidoscope be sure to pop over there and explore: The Brewster Society.
- Explore optics and light even more with a prism; we just purchased this inexpensive one from Tedco.
Are you passionate about raising creative kids?
Join over 22,179 parents and educators who want connect with kids and nurture their creative process through magical, easy projects you can do TOGETHER.
Subscribe to our email list to receive project ideas as well as offers for some our creative products.
If you want to read our privacy policy before subscribing, hop over here.
This is pure genius!! These are simply gorgeous and I cannot believe that you made them from toilet paper rolls (or cardboard tubes!). What an amazing idea! Can’t wait to try this 🙂
Katie,
So happy you noticed they are toilet paper rolls 🙂 I felt better using the term “cardboard tubes” but yes, that’s a TP roll right there! Glad you liked it!
Ana
probably my favorite thing ever. I have ALWAYS wanted to make a kaleidoscope and now I can do it with my kids. Thanks Ana
Thanks Stacy! These are as basic a kaleidoscope as you can make! Hope your kids enjoy it 🙂
do you think the reflective mylar on the inside of a cheetos or potato chip bag would work? That would be even more recycled material!
I don’t know but if you try it and it works please let me know! I would love to make it all recycled.
Awesome craft…I love kaleidoscopes!!
Merci pour toute ces belles _idées, je travaille parfois avec des groupes d’enfants je pense que cela va les intérsser, félicitations et merci de faire partager vos projets et réalisations
🙂
Made these at library craft time- the kids and parents LOVED them! Thank you 🙂
This is a fantastic activity, I love how most can be done by the kids and the fact that it is open ended.
Did you use tissue paper for the decorative paper so the light went through it?
Nope, we just held patterned paper up against a window 🙂 Glad you enjoyed the activity Laura!
hi, i tried this with sticky sparkle sheets, doing the round version, but its not working, i might try a triangle one with different paper? I mustve done it wrong. >(
The slightly stiff and non patterned mirrored sheets work the best. Try it again and I hope it works this time!
Hi 🙂 I may be a little late but just so you know, a kaleidoscope without the end is called a taleidoscope! Now you won’t have to feel so bad calling it the “wrong” name. Either way, a really neat project! I want to try this with my third graders!
Ha! Yup I’ve learned the right term now 🙂
I love your work! Wizards brew, is one of my favs! My kids won the science fair cause of you! Thanks!
What??? What project did they do :)?
Where did you find the mirror sheets?
Here are the ones we used 🙂 https://amzn.to/2N7Y89n