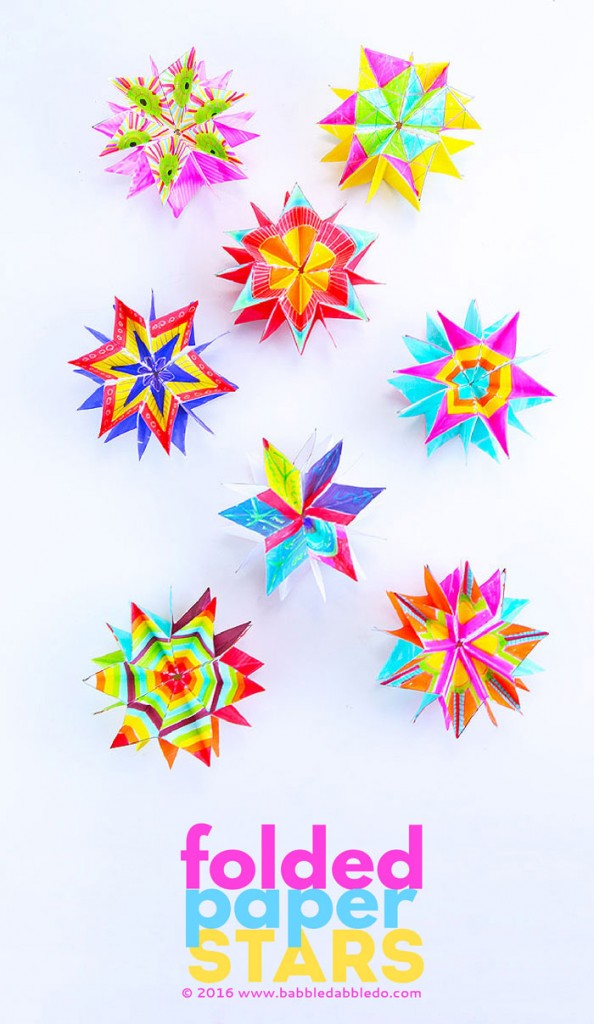
Who doesn’t love a project with a little magic? Today’s paper art activity, Mini Folded Paper Stars has a reveal that is definitely worth waiting for!
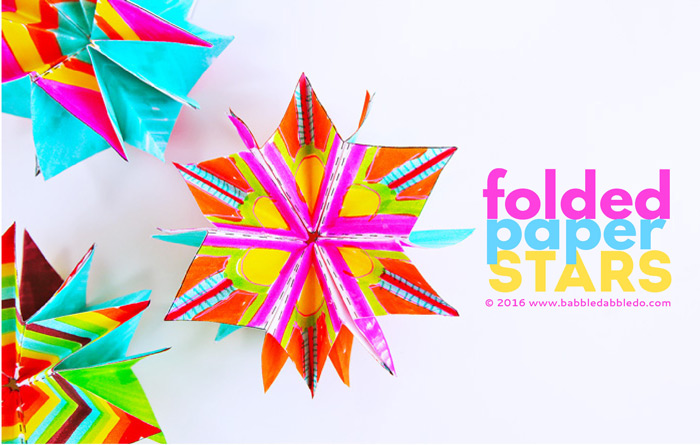
Mini Folded Paper Stars are perfect for a rainy afternoon stuck inside, they may add a little brightness to your family’s creative day! This project is great for children ages 7+ but younger children can definitely take part by decorating them and having an adult or older sibling assist them in the cutting and folding process.
Like most of the paper projects on Babble Dabble Do, Mini Folded Paper Stars use a minimum of materials. You can make them using regular copy paper but for a sturdier star I recommend printing the template on cardstock. If you plan on coloring the back of the template you should definitely use card stock or heavyweight paper.
This post contains affiliate links.
Today’s project is sponsored by the amazing Sakura of America. Please note that all opinions are mine. Sakura supplied me with the pens to make this project really shine; we used a combination of Sakura’s Koi Watercolor Brush Pens which have a brush tip and resemble a watercolor look and my fave their Gelly Roll pens which add a little pop and detail.
Sakura has a host of amazing projects ideas on their website. Here are their wonderful ideas for children’s art projects.
![]()
Note: I highly recommend you watch the video of the folding process. Watching it in action will probably save you a few moments of confusion as you go through the folding process.
Mini Folded Paper Stars
Materials
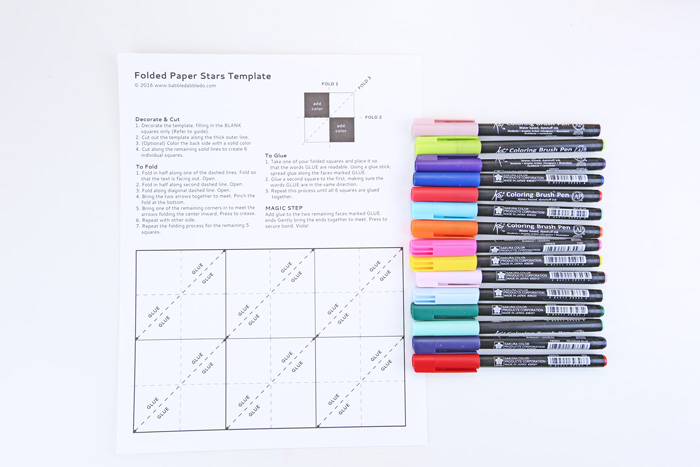
PRINT TEMPLATE HERE
- Template
- Cardstock or paper ( Use cardstock if you plan on coloring the back of the template)
- Pens/Markers We use the amazing Koi Watercolor Brush Pens with some Gelly Roll details
- Scissors
- Glue Stick
Instructions
Decorate & Cut
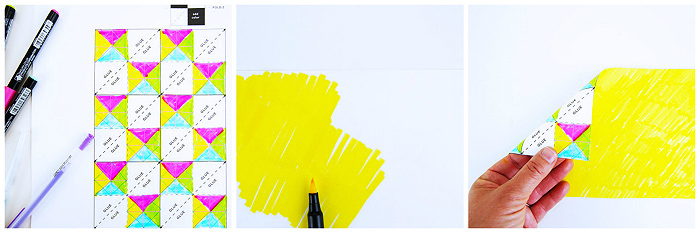
- Decorate the template, filling in the BLANK squares only (refer to guide on template).
- Cut out the template along the thick outer line.
- (Optional) Color the back side with a solid color.
- Cut along the remaining solid lines to create 6 individual squares.
To Fold
- Fold in half along one of the dashed lines. The text should face out. Open.
- Fold in half along second dashed line. Open.
- Fold along diagonal dashed line. Open.
- Bring the two arrows together to meet. Pinch the fold at the bottom.
- Bring one of the remaining corners in to meet the arrows, pressing the center inward. Crease.
- Repeat Step 5 with other corner.
- Repeat the folding process for the remaining 5 squares.
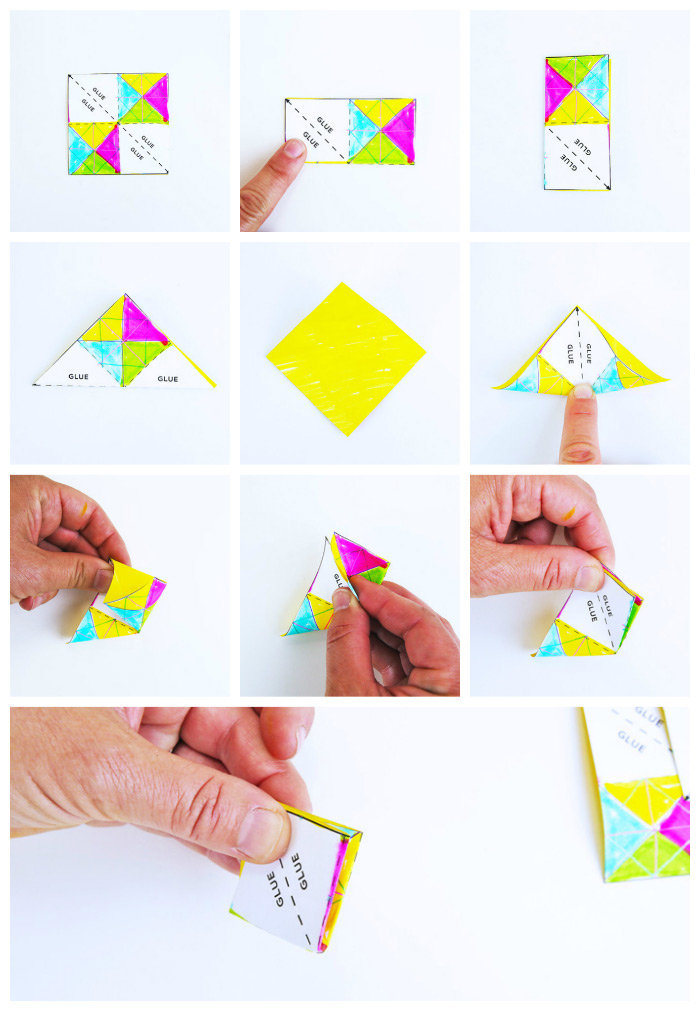
To Glue
- Take one of your folded squares and place it so that the word GLUE is readable. Using a glue stick, spread glue along the face marked GLUE.
- Glue a second square to the first, making sure the words GLUE are facing the same direction.
- Repeat this process until all 6 squares are glued together on top of one another.
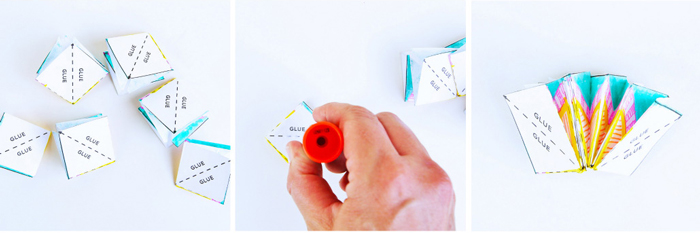
MAGIC STEP- Okay here it is, the moment you have been waiting for…..
Add glue to the two remaining faces marked GLUE. Gently bring the ends together to meet. Press to secure bond. Viola!
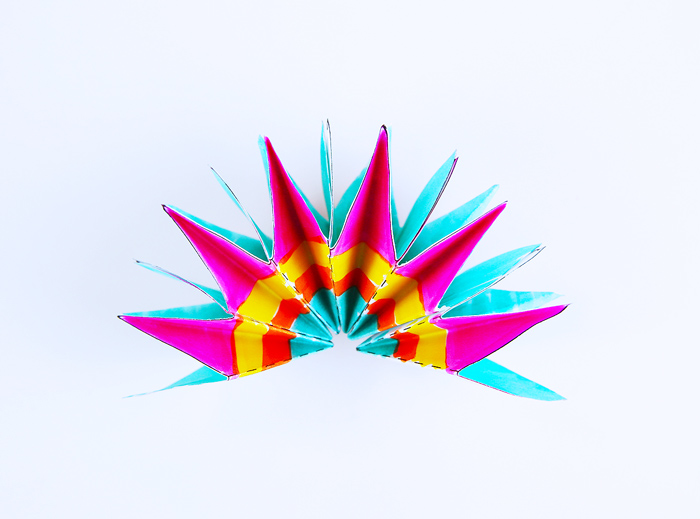
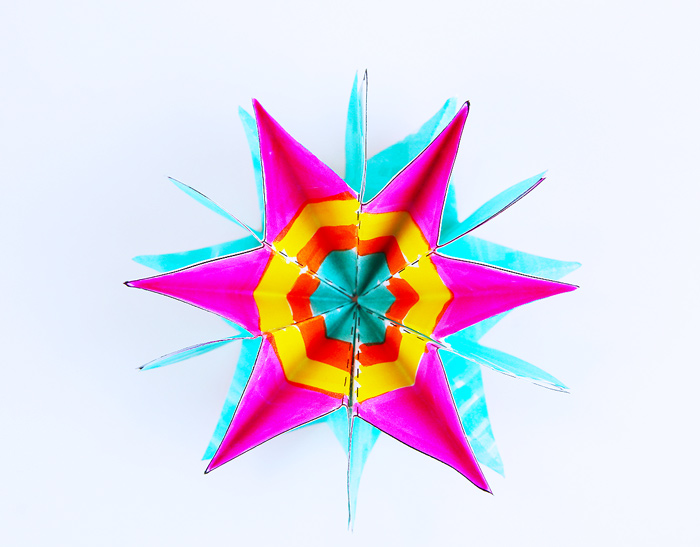
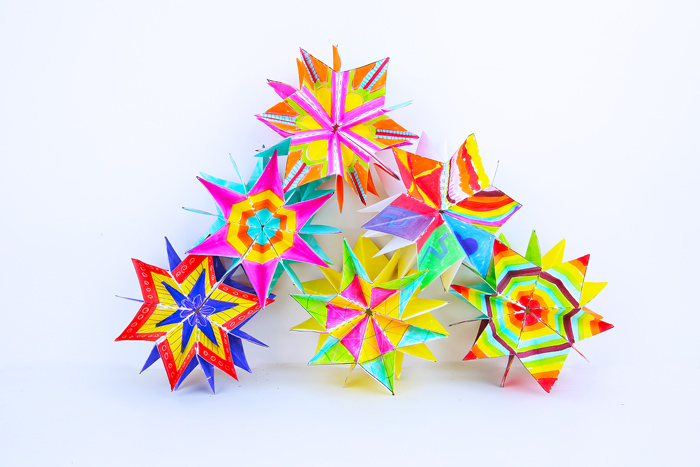
Looks Like
Matt Shlian Matt Shlian is a self described paper engineer who explores engineering concepts through massive folded paper sculptures. Not only doe he exhibit his work as an artist, he uses paper folding to teach engineering concepts to design and engineering students at two universities in Michigan. I recently viewed a wonderful video presentation illustrating how paper folding can be used to explore engineering ideas that eventually turn into scalable working products and Mr. Shlian clearly shares that view. His paper sculptures are stunning in the complexity and form. You can check out his work here.

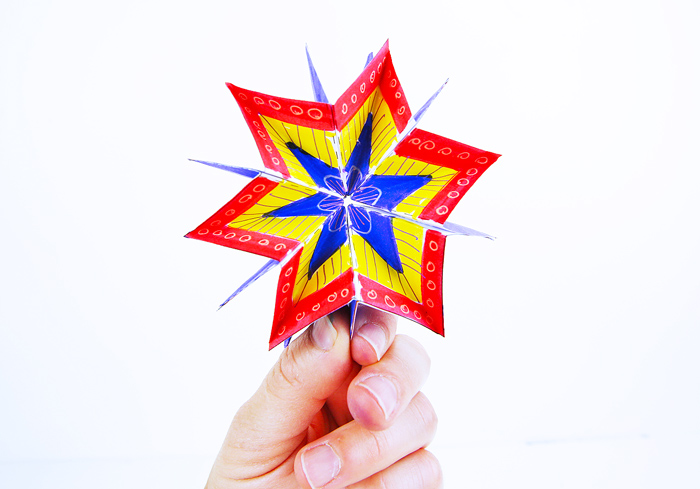
So what did you think about the big reveal?
I love the magic moment when you assemble your folded paper star and open it to see how your patterns translate into a radial design. It’s hard to resist not making 20 of these just to see what beautiful patterns emerge!
And be sure to visit Sakura of America’s website for more paper art inspiration!
Nurture curious kids and strong family bonds through creative projects!
Join the Babble Dabble Do community.
Can’t wait to explore stars with the tots at library story time this winter: one to take home and one to hang in the library!!!
Fantastic!
Hi,
Just downloaded your Folded Paper Stars template pdf (cool project btw).
I noticed you’ve put “viola” instead of “voila” at the end. 😉
Oh no! Thanks for letting me know 🙂 Apparently spell check missed it 🙂 I just fixed it!
Wow! This project is soooo amazing! briliantly colorful and all. Ms.Dziengel would u please please do a Harry Potter-related project sometime? That’d be great
Thanks for the idea! Will think on it for sure!