My kids actually stopped bickering about our weekly game night long enough to build something together this week, a DIY Marble Run. And it was the first time in awhile that I stepped back and just watched them work. Okay, I did help them get them some supplies and tape a few things that “wouldn’t stick,” but the engineering part? That was all THEM.
This post contains affiliate links.
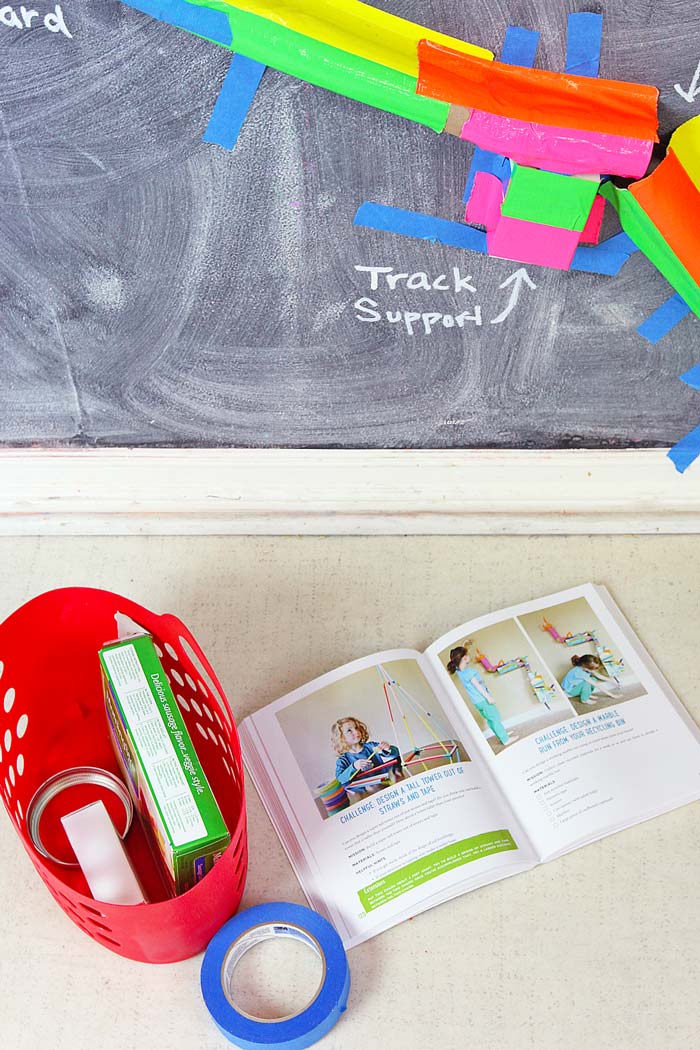
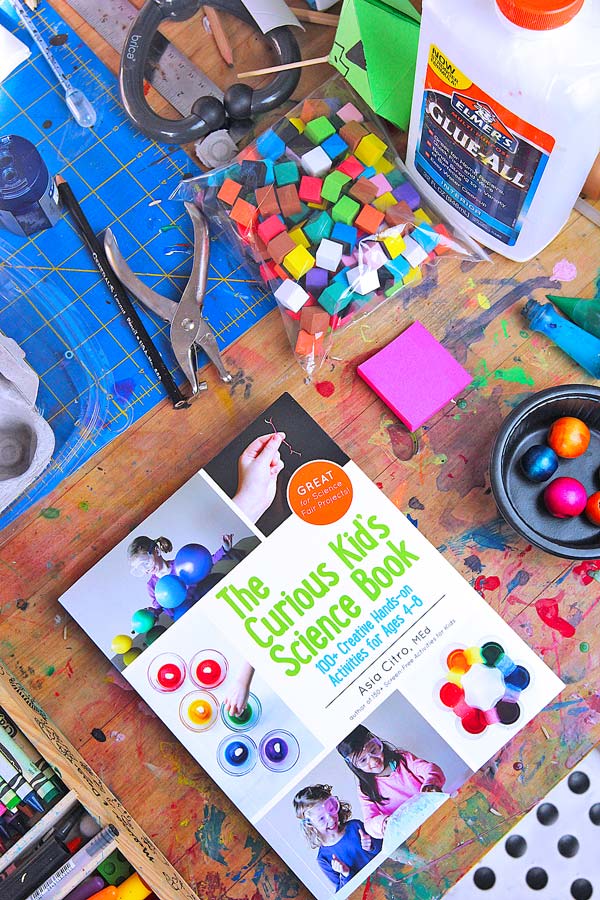
We have made marble runs before and it’s a challenge most children find hard to resist. We did a version when my kids were in preschool where each child took a turn placing one leg of the run on a large board. I’ve never seen preschoolers sit still like that. EVER. So when my friend Asia sent me a copy of her new book The Curious Kid’s Science Book: 100+ Creative Hands-On Activities for Ages 4-8 I leapt at the chance to try one of the challenges in the book: Design a marble run from your recycling bin.

I’m really excited about The Curious Kid’s Science Book. I truly haven’t seen any other book like it before. Instead of step-by step tutorials, this book is made up of challenges and experiments. The experiments aren’t written in the form of do this and watch what happens but rather, here is a question to explore, here are some ideas on getting started, now go make your own observations. It’s a really empowering way to engage kids in the scientific process, and as someone who values creative thinking and problem solving, I am thrilled to see this type of an approach in a book for kids.
Recycled DIY Marble Run
Materials
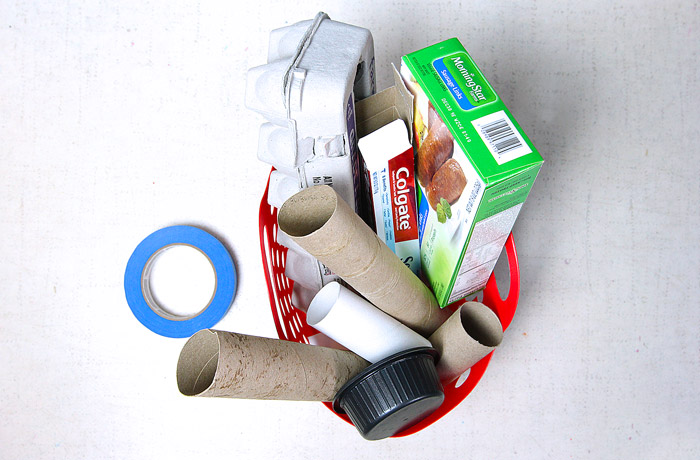
- Recyclables Think paper tubes, egg cartons, yogurt containers
- Painter’s tape
- Marbles or large beads
- Scissors
- Duct tape (optional)
Instructions
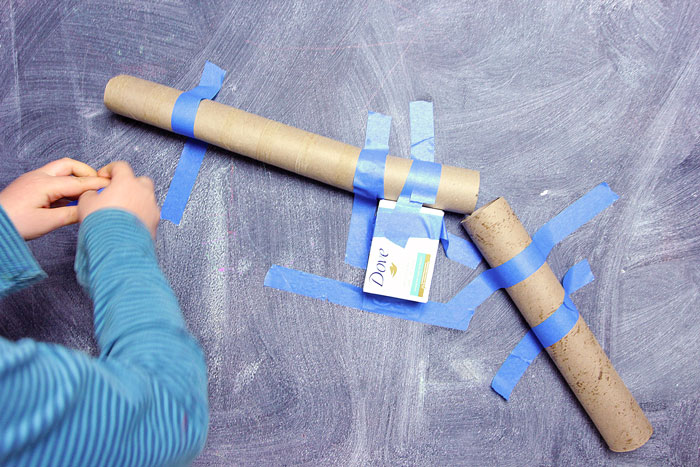
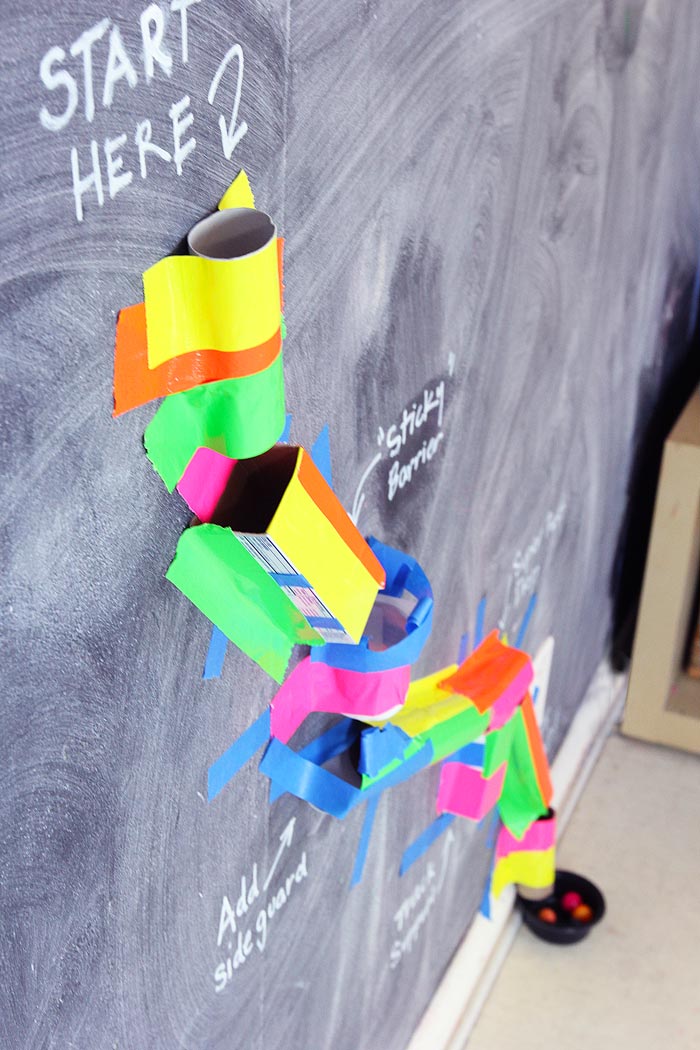
- Step One: Explore your materials. Place your recyclables out on the floor near a clean wall. Examine which ones would make a good section for your marble run. Cut any materials as needed, so they can be taped to the wall.
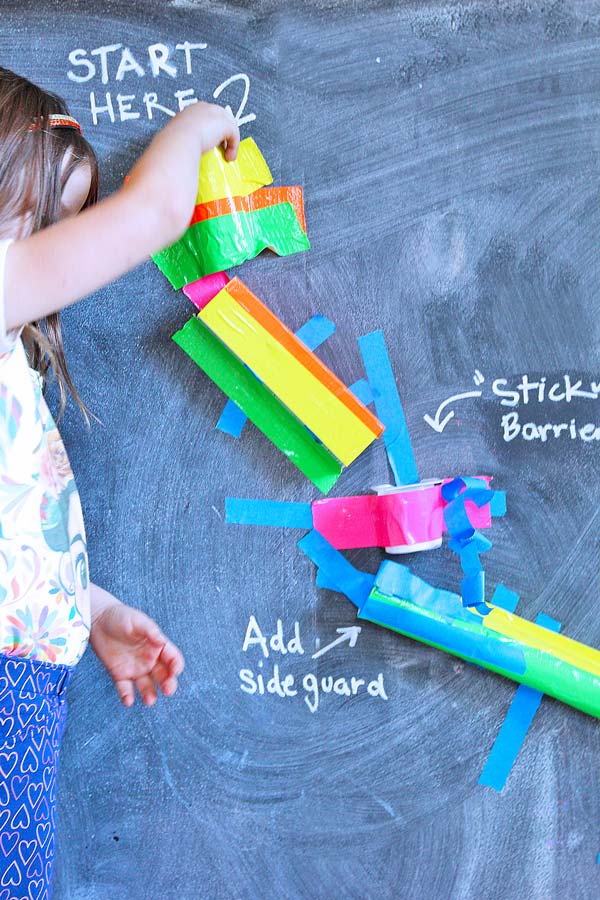
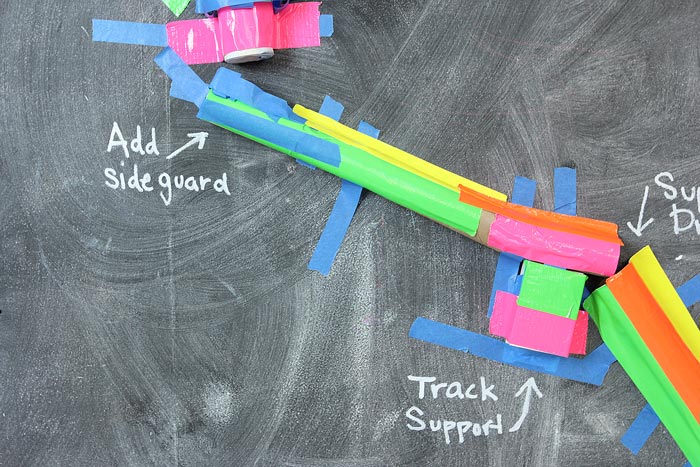
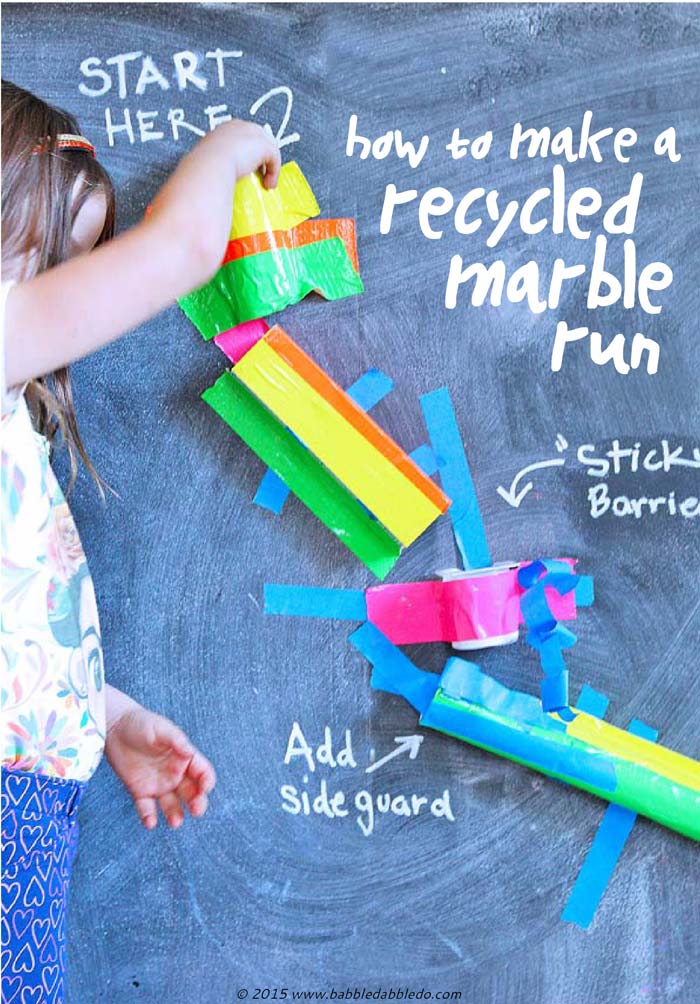
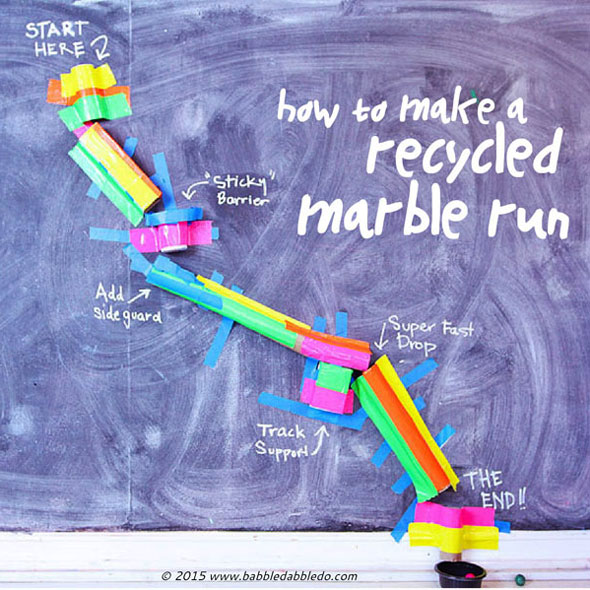
- Step Two: Start with one section. Tear off long strips of painter’s tape and stick it to the wall before you start. Begin by taping one item from your bin to the wall. Build up and down from it.
- Step Three: Test each section. Be sure to test each section as you add it to make sure a marble can run through it!
- Step Four: Continue adding sections. Add sections until you run out of room or materials. The more legs of the marble run the better!
- Step Five: Refine & test Part of the design process is testing and making adjustments as necessary. Building a marble run is a great lesson in analysis and refinement. If you don’t want to move a section how else can you keep the marble moving through the track? Can you add barriers or additional walls?
- Step Six: Test the final design. We put ours to the kid brother test, or rather my 2 year old couldn’t resist testing out the marble run!
 Tips
Tips

 Tips
Tips- Stay Close An adult should be on hand to assist with cutting holes in containers or cans as well as help tear tape strips. My kids were eager to build and I was tearing tape like crazy!
- Stand back! Give your children a chance to solve this themselves! I actually was so excited to try an idea that I wormed my way in to test out a leg of the run. Guess what? It didn’t work and my kids “kicked” me out!
- Finalize it Once your kids are done and happy with the final design you can go ahead and add duct tape to more securely adhere it to the wall.
What Marble Runs Teach
- Teamwork This is a wonderful group project. It’s a valuable lesson in working together to solve a problem.
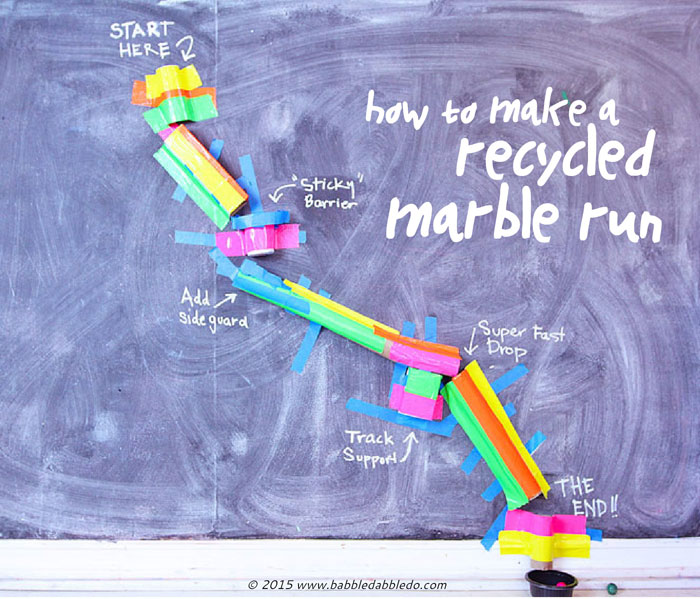
- Testing & Analysis No doubt there are many tweaks that will need to be made while constructing a marble run in order to get to work properly. Locating trouble spots and fixing them is one of the best lessons in this project. I encouraged my children to figure out a way to fix the areas that weren’t working. Initially I thought they would simply move the part of the track that was causing trouble but sometimes they opted to build little barriers to keep the ball on track. My son even invented his own “sticky barrier” to trap wayward marbles in tape in one precarious section of the run.
- Physics Oh yeah, this project is also an amazing physics demonstration in case you want a little science thrown in! My daughter started adding legs that were facing the wrong direction, it didn’t take long for her to realize that marbles can’t roll up! A marble run is a fun way to demonstrate gravity and motion. Some of the legs my kids tried to add were almost vertical and the marbles dropped too quickly and spilled out of the tubes. I encouraged them to think about how fast the marble was going and how that was related to the slope of each run. Changing the slope changes the speed of the object rolling down it.
Conclusion
Will you take the challenge? Make a Marble Run from your recycling bin! Even reluctant makers will find the fun in this project.
This is just one of over 100 science activities and challenges in The Curious Kid’s Science Book. I definitely encourage any of you that love the idea of introducing problem solving and the scientific method to your kids to check this book out!
You can look inside it here on Amazon .
.
Spread Creativity like wildfire: PIN THIS!
I love this, thanks. I am going to have my fourth grade class do it for our engineering challenge this week. They are ages 8-10. Do you think the book is appropriate for that age group?
Hi Rebecca,
I absolutely think your kids would enjoy this activity! There are more like it in the book and while it says 4-8 on the cover I do think many of the activities would work well for the age group you work with 🙂 Sounds like it will be a fun class challenge!
Ana
What a great idea! The marble runs we’ve made never last very long. I love that this one lets kids play around with the pieces and what will work where in such an easy way!
It’s such a great problem solving project!