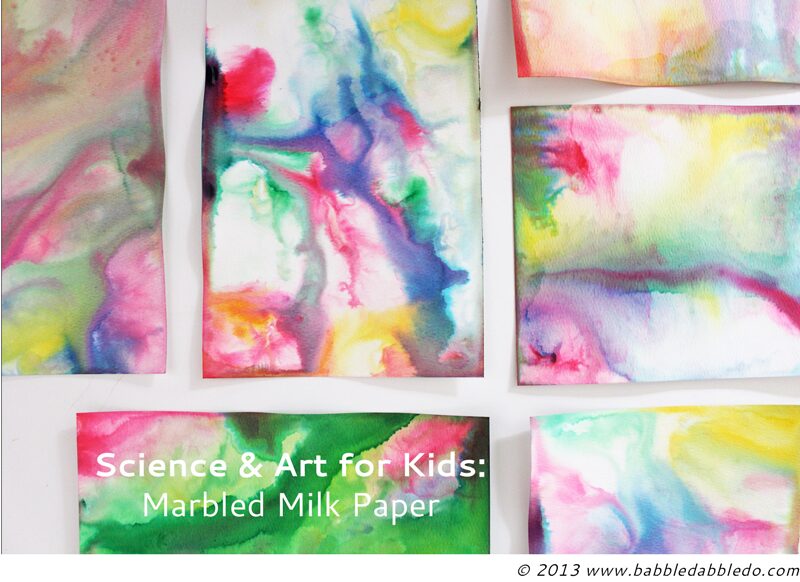
One of the most popular posts here on Babble Dabble Do has been Milk Painting and I can see why, the process makes really wild and beautiful designs. When I originally brought milk painting to school as a science project my friend Theresa suggested dipping paper in the milk to see if we could transfer the design and preserve it. We tried with a few sheets of paper and it worked to some degree. Fast forward a year and I decided to finally figure out how to make Marbled Milk Paper; I think the results are stunning!

The combination of science and art makes Marbled Milk Paper a fantastic hands-on STEAM activity. I experimented with a few techniques before deciding on the one that worked best for us and that I am sharing here. This technique is meant to complement or be used as an add-on activity to Milk Painting. Read about the chemistry behind this experiment here on chemistry.com.
[clickToTweet tweet=”Did you know you can marble paper with milk?” quote=”Did you know you can marble paper with milk?”]A word about using milk: A few folks have commented on their concern about using milk in what they deem a wasteful way. I look at this as an extension of the magic milk experiment and a way to get more out of the experiment than simply observing the chemical reaction and then throwing the milk out. I wouldn’t advocate this technique as a way to make a lot of marbled paper as it would be wasteful for that use alone.
If you want to read about the debate of the use of food in children’s’ art and sensory play this is great article with points of view from both sides. If you would like to try this and don’t feel comfortable using food for experiments save this project for the next time you have milk that is past it’s expression date. Instead of tossing it, make art with it!
This post contains affiliate links to products I love and recommend to my readers.
Marbled Milk Paper

Full Video Tutorial
Materials
- Almond Milk
- Watercolor Paper
- Dish soap
- Q-tips or toothpicks
- Food Coloring or Liquid Watercolors
- Eye Droppers (if using liquid watercolors)
- Tray/Shallow Dish
Instructions
Please see the instructions for Milk Painting here.
I recommend letting your kids try this experiment a number of times; they will love it, trust me.
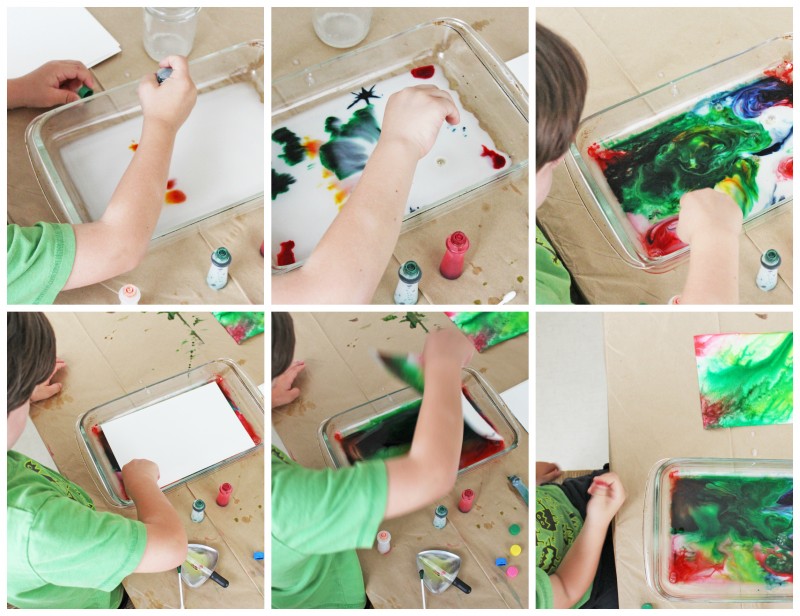
When you are ready to make paper prints from your milk paintings alter the experiment as follows:
- Step One: Cut your watercolor paper to a size that easily fits within your tray. Place the stack of paper near your tray; once your start swirling the colors you will have to work quickly to get the best effects.
- Step Two: Pour roughly 3-4 tablespoons of almond milk into a tray; basically enough for a thin layer of milk that covers the bottom of your tray.
- Step Three: Add in drops of food coloring around the milk.
- Step Four: Add a couple dollops of dish soap around the tray. The soap and food coloring will now start interacting.
- Step Five: Using a q-tip or toothpick, begin swirling the colors.
- Step Six: Before the colors get too mixed together take one sheet of paper and lay it on top of the milk mixture. Press down. Gently lift it, set aside to dry, and continue with additional sheets.
- Step Seven: Let everything dry completely.


Tips
- Watercolor paper is preferred for this project because it absorbs the color well.
- If you don’t have watercolor paper on hand, card stock works. Standard printer paper doesn’t absorb the colors very well.
- You will probably only get 3-4 prints out of each swirled mix before it gets too muddy to use. No worries, just dump out the mixture and begin again!
- As a variation, don’t swirl the soap and food coloring but dip the paper in immediately after dropping in the soap. The process of dipping the paper will swirl the colors.
- As a variation, you place a drop of dish soap in each of the food coloring drops. The soap will soak into the paper and punch out the marbleizing effect.
- If your paper is warped after drying, you may place it between two sheets of paper and iron it to flatten it out again.
- Eye droppers are not necessary but when my kids see them they immediately grab one; it was a great way to entice them into “playing.”
- In case you are wondering, after drying for several days the paper doesn’t smell.
Just so you know the lengths I go to to make sure we have great projects here on Babble Dabble Do, here is a stack of the many experiments I did testing out this process and which method worked best!

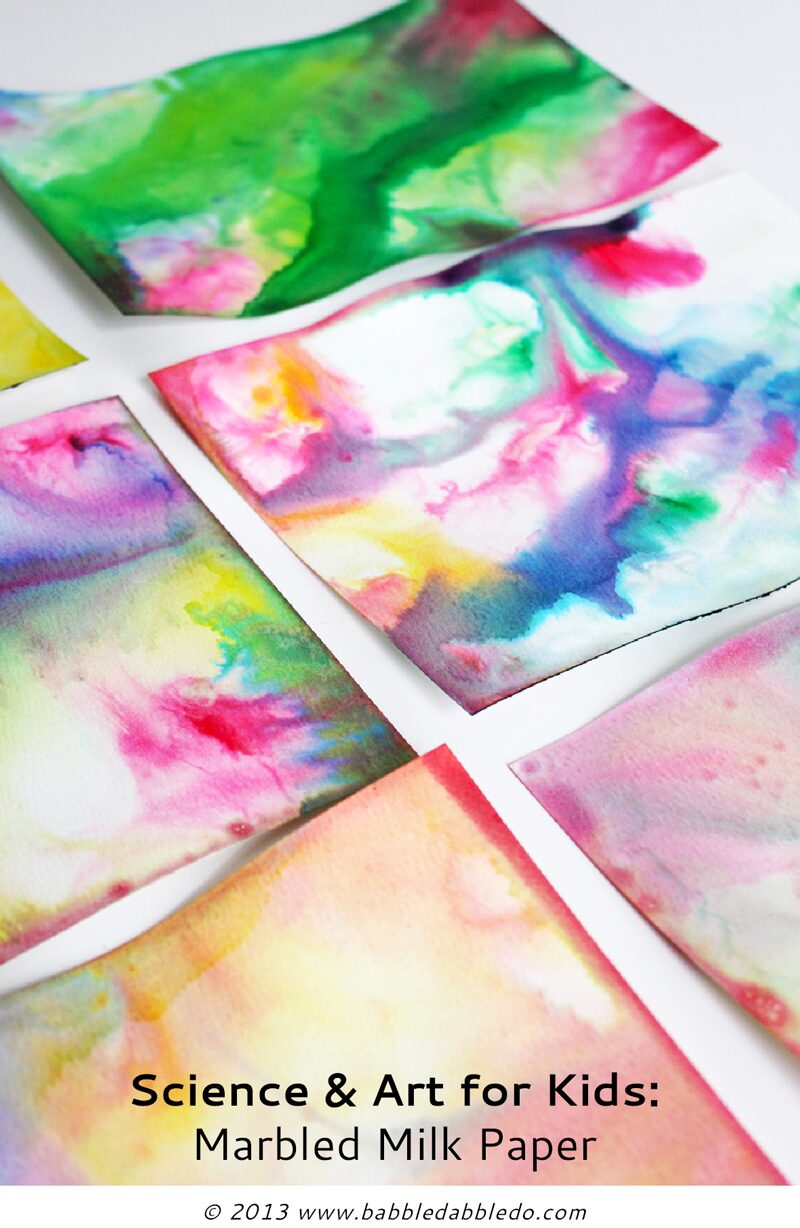
I think the prints are lovely, don’t you? Once these are flattened out they would make great cards or even framed artwork! I love kids art projects that yield aesthetically pleasing results with minimal effort; they are great boons to young artist’s confidence!

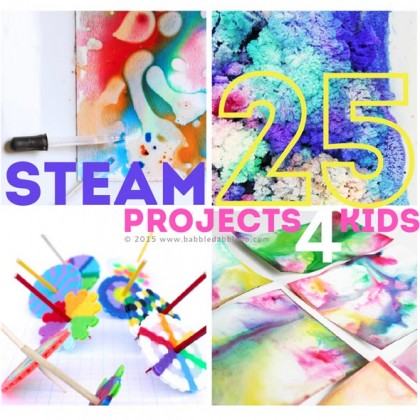
If you love the intersection of art, science, engineering and more hop over here for more project ideas:
Fill your child’s life with more art, design, and science:
Subscribe via email and get our projects delivered straight to your inbox.
Nice results. Never know we could do marbling with milk and food coloring. Thank you for the tutorial!
Glad you stopped by Onel! I love your blog; so glad you found me so I could find you!
You can do the same kind if thing with food coloring, shaving cream, and paper. This applies to science because the polarity of shaving cream keeps it from bonding with the food coloring leaving an interesting marbled effect. This might be a but too much fit little kids though. Same as putting food coloring and then oil in a bottle. Due to polarity and surface tension, the two won’t mix. If you add water, density will make the oil rise cruising the water and food coloring to mix.
Thanks TJ for your great ideas and thoughts! I’ve seen the shaving cream version and it looks really cool. I love your science spin on it!
Hi Ana,
Super tutorial, I’ve done the marbling using shaving foam with the kids in my craft camps. While it was loads of fun it was really REALLY messy. The kids all went home with stained hands from putting them into the mix. Great fun for the kids (though some did not like the hand staining at all) but I’ve been looking for another method, slightly easier to manage but still using an unusual material and I think this will be perfect.
One question when you say dish soap do you mean fairy liqguid (im not sure if you get that brand) but washing up liquid when washing dishes by hand OR do you mean the dish soap you put in the dishwasher?
Thanks
Vanessa
Hi Vanessa,
I’m glad to hear about marbling using shaving cream; I’ve wanted to try it so I’ll keep in mind that it stains! As far as the soap I mean the liquid soap you use to do dishes by hand 🙂
Thanks for stopping by!
Ana
You can also spray liquid watercolor onto the shaving cream.with a spray bottle and rake through it –a recycle trick for liquid watercolor is to take dried out markers , remove the insides and soak in water to use for liquid watercolor. Being an art teacher I’ve had to scrimp wherever I could.(:
I haven’t tried the shaving cream version of marbled paper but it looks amazing! Thanks for the reminder about that great process Judi!
you can make the sheets and then fold them, cut and get flowers or snowflakes out of them, they are gorgeous; don’t forget not to leave a thick layer of shaving cream on the paper, otherwise it will not dry well; another method is to pus shaving cream in a jar and then add the colour (even food coloring) drop by drop, on two sides of the jar, then put the lid on and let the kids mix well!
How did you get them to not smell like milk? We did this the last time we played with magic milk, but I threw them out because they still smelled once they were dry!
Hi Ashley,
Since we used almond milk for these I never had any issues with smell. Did you use almond or cow’s milk?
Ana
Oh my, these are just stunning. I love, love, love them!
Thanks Emma! They are fun to make too 🙂
Oh my gosh these are gorgeous!!
Stacy, can I just say I LOVE your blog! Thanks for stopping by!
Hey, this looks wonderful, going to try this out on our daycare kids when they come to the library. Wish me luck.
Good luck Laura! Can’t wait to hear how they turn out!
esta técnica es maravillosa! Gracias por compartirla.
Thanks Stella!
Can liquid water colors be substituted for the food coloring?
How about cover stock for the paper, so less expensive than water color paper?
Hi Pam,
I haven’t tried liquid watercolors with this project but my guess is they would work well as a substitute. As far as paper I found watercolor paper to be the most absorbent and yield the best results. You can use cardstock too but it doesn’t capture the water and color as well. Have fun!
Ana
I haven’t read all your comments, so I apologize if I’m repeating something someone said. I have never done this project as an art project; however, I have done it as a science activity with me children several times. I find that if you use cows milk, it works really well if you use warm milk. Cold milk doesn’t react as quickly because the molecules are moving slowly. Warmer molecules move faster. Anyhow, Thank you for the art project idea. I love it!
Oh great idea Camille! I’ll try that next time we do the experiment!
Have you tried this with other milk alternatives? By that, I mean rice, soy, oat, hemp, coconut, etc.? I have children in our class with severe nut allergies–they have epi pens and a few with cows milk. (and I’m allergic to peanuts and soy and have received a rash from soy milk spliied on my hand…) Hmm. I’ve added color to gak (cornstarch and water) and had a short-term marbelized effect–didn’t think about transferring it to paper, though. And I have made prints from liquid watercolor added to shaving cream–Cool. But, some parents dislike the dried foam.
Hi Lissy,
We actually did this with almond milk but that wouldn’t help kids with nut allergies. I haven’t tried it with coconut or soy milk so I can’t answer for certain. If you do try it with one of those alternatives and it works please come back and let me know and I’ll update the project!
Ana
Oops– I meant a few with cows milk allergies. (They might still be able to do this, but only with parent permission.)
Great tutorial Ana, thanks for taking the time out to post it.
FYI, I used it as a reference on a recent paper marbling tutorial I did myself a week or two ago, figured it might be a a good resource for some of your readers… http://www.ibookbinding.com/blog/marbled-paper-bookbinding-tutorial-and-photo-gallery/
Keep up the good work and again, many thanks!
~ Paul
Thanks Paul! Great site too!
Another good kid-marbling method is with drawing chalks and MILK. (The chalk brand I usually get recommends doing it with water, which works, but when it dries, it smears like… chalk.)
HOW TO: Scrape the chalk with a plastic knife, dropping the powder onto a 1/2″ layer of milk; I use 1% from our cafeteria. I usually use 3 or 4 colors per design, using chalk colors that were little- or un-used in earlier projects, so I don’t care if the kids use up a lot. You can blow across the surface to make swirls, or stir VERY gently, but be fairly quick to put the paper on it – the chalk powder sinks in a minute or so! You can often get 2 or sometimes 3 dips from one batch of chalk before it gets too thin. (Color intensity studies!) Then you just scrape more onto the top and make a new pattern. Since the older chalk sinks, you can e-use the milk several times until it’s just too gritty. Just have plenty of papers ready, cut to size. My kids like to use colored paper, which works beautifully because the chalks are opaque. (Light and bright colored chalk swirls on purple or black paper – magical!)
The casein in the milk acts as an automatic fixative, so when the marbled papers dry, THEY DON’T SMEAR!
I suggest you fold a corner up to hold the paper when dipping (this will make really messy hands if you get it on you.) If you are doing it with multiple kids, make them put their names on the back FIRST, because you can’t write on it once the paper is wet. I use the lid from a plastic storage bin to put the milk in, because it’s a good size for quarters of 12×18″ construction papers, but the size is of course up to you.
When dry, these are fabulous for collages, drawing silhouettes on, paper jewelry, making holiday cards, as backgrounds for space or “magic” pictures, making paper quilts, covering 3D shapes with…. or just enjoying the ADDICTIVE process. (It’s bedtime already, GO HOME!)
I’ve never tried this but it sounds magical!
These are all AWESOME ideas! Thursday, when I have my next class, my kiddos are gonna have a blast! 🙂
Thanks Linda!
Do the finished paintings eventually get moldy?
These look really beautiful. I can see myself using them to make collage art, in the style of Eric Carl.
Has anyone ever tried this on t-shirts? Does it work with fabric dye?
Hmmmm….if you are going for marbling on fabric I’d try a different technique. This is not washable.
Has anyone tried any milk besides cow and almond? I would love to do this activity with children, but because of allergy risks, nut products are a no go where I work. I am worried about animal milk smelling sour after the kids take their paper home…or is this not an issue. Thanks for any feedback, internet friends! And thank you for the instructions, Ana. -Linda
PS Sorry if any if my wonderings have already been addressed and I missed the answers.
Linda, I have tried this with cow’s milk and never had an issue with it smelling and some of the sheets I’ve had for a couple years now! You could try coconut milk/beverages as well, though I have not experimented with them.
just wondering if anyone has tried any other paper besides water color paper, does it work with normal paper, or kitchen paper towels etc? anyone had any success with other paper?
I have tried it with regular paper and it wasn’t absorbent enough. Paper towels might work though if you can keep them from getting too soggy.
Did you experiment with both dampened and dry watercolor paper when doing these prints? Thanks!
I did not since the paper gets wet with the milk. Let me know if you do and if you see a difference!
I want to try this with my pre k class as an art/science project. Wondering if anyone has suggestions whether using almond milk or cow milk , if one works better then the other? Also worried about smell of paper. none
You can use either one. We used almond milk since we don’t have cow’s milk at home and it works well. I’ve had some of the milk paper now for a couple years and there is no smell 🙂
Great job… i have a science priject due in 2days so this will be perfect. Thanks. Can we use just any milk it has to be almond milk?
I’ve tried the milk experiment before, and had to try types of milk (ie 2%) and types of soap to work (seemed the cheaper the soap the better it worked!). I’d rather use regular milk than almond because of cost. What type of milk should I use? Everything I see just says “milk.”
Sorry to be late in responding but use milk with the highest fat content so whole milk.
Dear Ana,
I love your posts. I print them out and put them in a binder so that my grandchildren can go through the binder with me and decide what we want to do. I really appreciate the way that most of your projects use items that I have around the house.
I do have one problem, however. While I am a young grandmother, I have issues with my eyes. The very pale grey colour of these posts make it extremely difficult for me to see it. Is there any way that you could make your future posts darker?
Hi Dorren, I’m so sorry I missed this! I will look into darkening the gray color! I know on Chrome the font is darker as well so you could try viewing the blog on that browser. Thank you SO MUCH for reading!
OMGSH Ana, I have such exciting stuff to share about what we did with this activity and our results! It was so amazing! I am going to have to email you the video?
Oh I can’t wait to see!!!
hi! i want to share this activities, but i want to know that can i using on recycle bags?
This was a great activity for a group of 2 to 4 year olds. In order for all the kids to take their pieces of paper home at the end, I set them on baking sheets as soon as they came out of the milk, then put them in the oven at its lowest setting for about an hour.
The watercolor paper seems to make a big difference in being able to pick up the color pattern – we mostly just had color gradients, using generic art paper. Still beautiful , and the kids loved it.
Great tip on drying them in the oven! So happy the kids enjoyed it!