Sharpie Tie Dye projects have been very popular on the web in past years because they are a really easy and fast way to create tie dye effects on fabric, but have you ever considered using them for a color mixing science experiment? I love color experiments because no matter how many times we do them, my kids are always amazed when secondary colors “appear” up after mixing primary colors. It makes science look like magic to a preschooler!
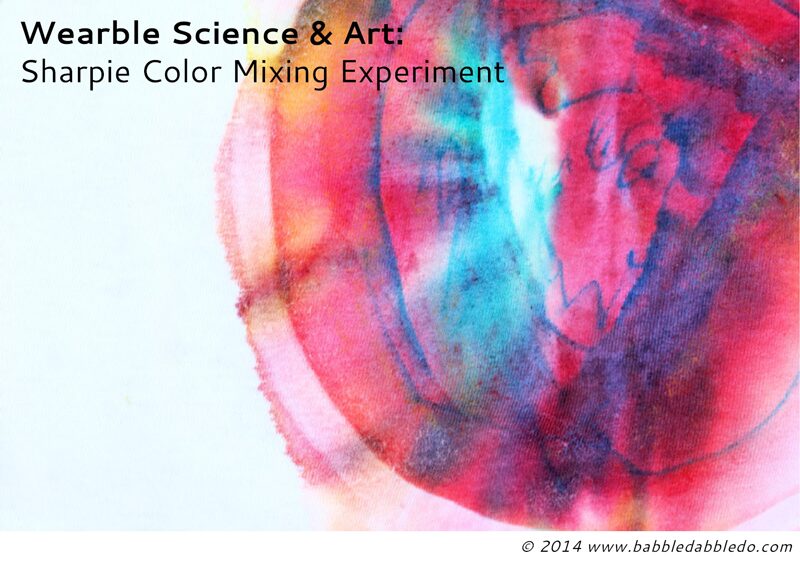
For a very basic color mixing experiment, use red, yellow, and blue food coloring to tint water, then combine two of the colors to form a new color in an empty bowl. Why not expand on that idea by doing some Sharpie Tie Dye? And you’ll have a cool shirt to wear after!This post contains affiliate links to products I love and recommend to my readers.
Wearable Science & Art: Sharpie Tie Dye
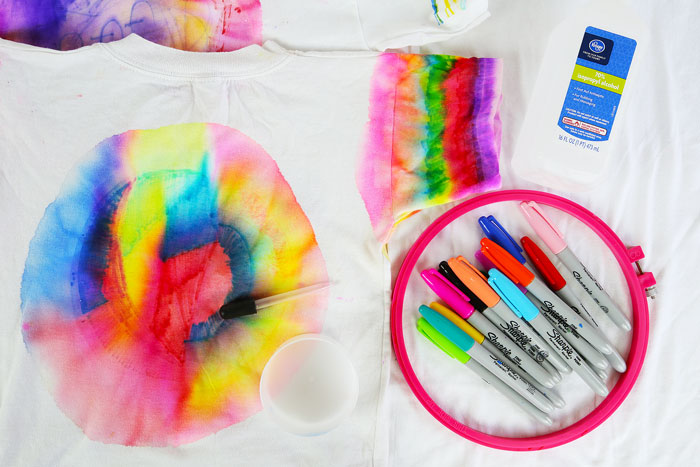
Materials

- Sharpie Markers in Blue, Red, And Yellow I recommend using a light blue! The dark blue doesn’t mix as well with other colors.
- Plain White T-shirts or T- shirt fabric
- Large Embroidery Hoop (10-Inch)
- Eye Droppers
- Plate
- Small Bowl
- 70% Isopropyl Rubbing Alcohol
- Retayne (optional for making it colorfast)
Instructions
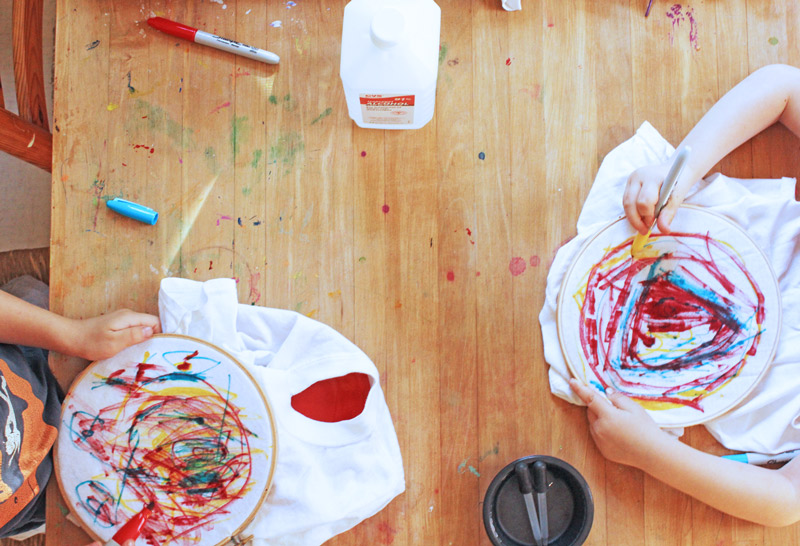
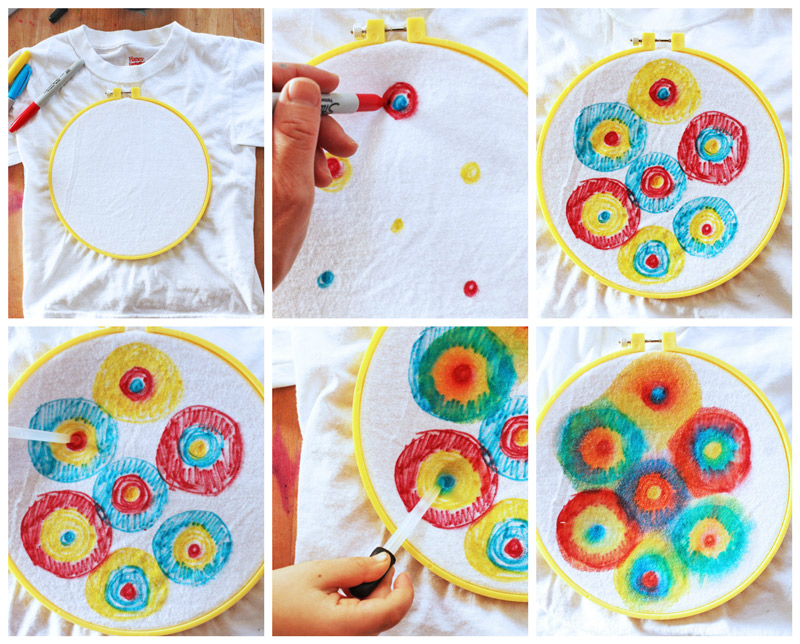
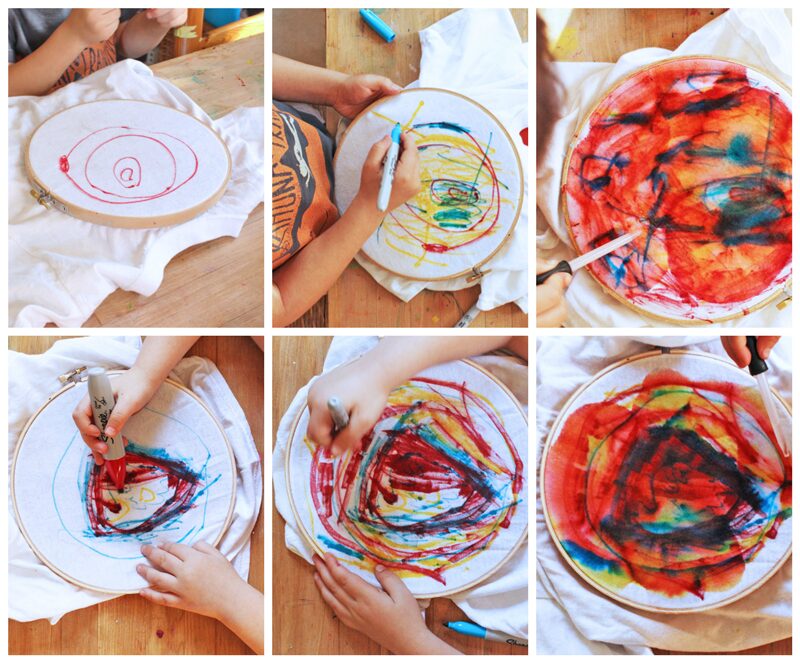
- Step One Use the embroidery hoop to tighten a section of fabric at the front of the shirt
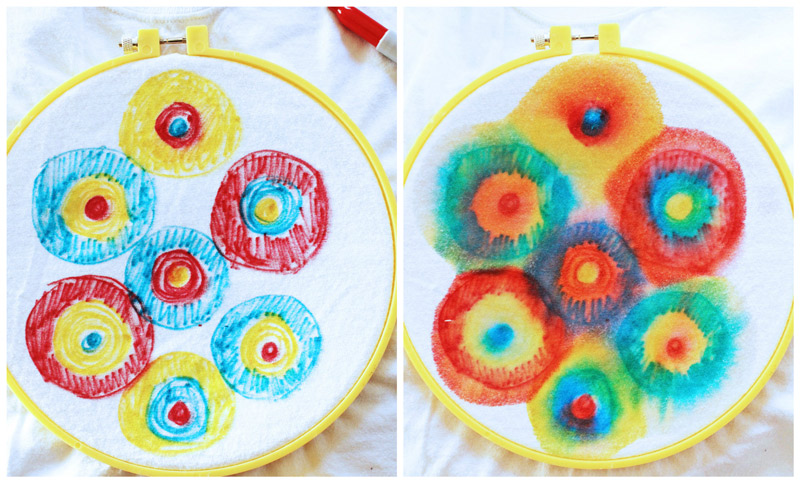
- Step Two Use your red, yellow, and blue Sharpies to draw all over the shirt. Add a good layer of color. For the best color mixing demonstration you can use bull’s-eye designs with alternating red, yellow, and blue circles.
- Step Three When the design is complete, slip a plate inside the shirt under the embroidery hoop to catch any rubbing alcohol that may seep through.
- Step Four Pour rubbing alcohol into a small bowl. Using an eye dropper begin dropping rubbing alcohol on the t-shirt. If you have bull’s-eye designs drop the alcohol in the center of each bull’s-eye. Within seconds you will see more colors appear! Green, orange and purple should be visible as the ink bleeds and mixes with the other colors.
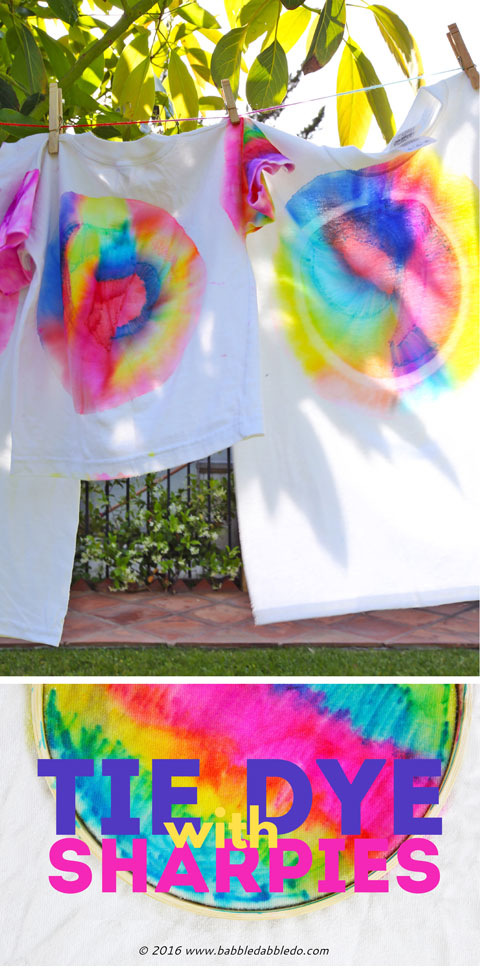
- Step Five Get that t-shirt really saturated! Alternatively use the rubbing alcohol in a controlled manner to bleed and blend only certain parts of the shirt. Now let dry.
- Step Six Once it’s dry remove the embroidery hoop and iron your shirt.
You’re done! Wear it!
Tips
- This will bleed and fade with washing if not treated! I recommend this product to help the dye fix to the shirt: Retayne
- For the science angle try and stick with just red, yellow, and blue colors, I know it’s so tempting to use other colors but the experiment is so clear when you limit your self to the three primary colors and wait to see the secondary colors magically appear!

- I recommend using knits (T-shirt fabric) for this experiment. We tried it with plain white fabric and it will still work but the colors tend to look faded. Knit fabric absorbs and holds the color well.
- If you don’t have blank T-shirts but want to try this, cut up an old plain white T-shirt and stretch it over a hoop.
- No embroidery hoop? You can always stretch the fabric over cups and/or Tupperware and secure it with rubber bands.
Looks Like
Victor Moscoso. Victor Moscoso is one of the most famous psychedelic poster artists from the 60’s-70’s. I have a special place in my heart for psychedelic art since when I was a teenager I went through a hippie phase and couldn’t get enough of all things 60s. The bright colors and warped designs of the popular posters are so unique. Check out a few of Moscoso’s most famous posters here.
You might not be able to fully explain Psychedelic Art to your kids without an explanation of the substances used to “inspire” it but you can show them images of these wonderful posters and talk about optics and optical illusions.
Conclusion
I’m a bit obsessed with color mixing experiments in general and Sharpie Tie Dying is another project I can happily add to the fun list of exploring color science. I can’t get over the before and after shots! Not mention they just create just vibrant and beautiful designs.
More

- Here is another color science experiment we did earlier this month, also using fabric: Chromatography Bags. And you will not want to miss out on Dip Dyed Craft Sticks for another psychedelic looking color mixing experiment!
- If you want to know more about the science behind color and color mixing the University of Maryland has this great article on it: Color Lesson
- And for another quirky cool color mixing science project head over to Science Sparks and check out their Color Mixing Water Wall
- To reinforce the concept of color mixing you might want to take a look at these Color Mixing Lenses by Learning Resources. Fun!
Spread Creativity like wildfire: PIN THIS!
Your results are beautiful and great tutorial! I have the materials for this…I don’t know why we’ve never tried this. Today will be the day. Thanks for the inspiration.
Melissa,
It’s so easy! Post a pic of the results on our FB page 🙂 And can I say the celery roses are brilliant?
Ana
This is soooo coool! My kids (and I) will LOVE this! I love how the colours are mixed up also, it’s a great science experiment!
Thanks Angalata! The results are surefire beautiful!
I LOVE these, do you know if you wash them does the color fade?
Hi Brynn,
Yes the color does fade with washing. Perhaps hand washing will help it last?
Before washing, put them in the dryer on HIGH HEAT for at least 1 hour. (Make sure the alcohol has completely dried before doing this, as you don’t want your house to explode.)
This will help SET the dye and will make the colors last longer.
Thanks for the tip Maybelle!!!
Awesomeness! We love doing our t-shirts in the summer! Quick question: What % was your rubbing alcohol?
Thanks in advance for your help 🙂
Val
I’m so late to this but I think I used 70% 🙂
This looks like our craft project of the week! Try washing in cold water with a cup,of salt, that helps set the color too.
Thanks for letting me know!
Salt (a good handful in the washing machine) helps to set the dye in blue jeans. I wonder if it would work for cotton T-shirts?
I’ll try that. Do you know how much to use?
Pretty I can make that