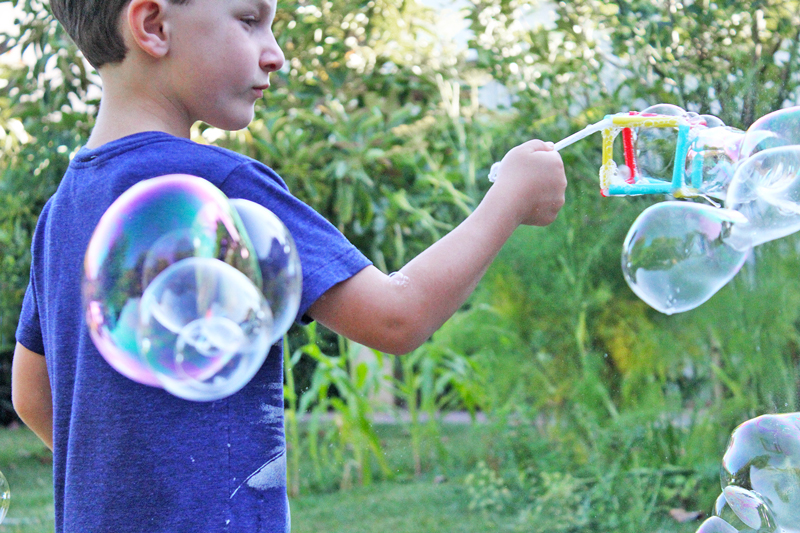
Did you know you know you can make a square bubble? I’m always on the lookout for any STEM project with a WOW factor and today’s engineering project for kids probably tops that list. I mean just look at the bubble below- yes, THAT IS A BUBBLE! 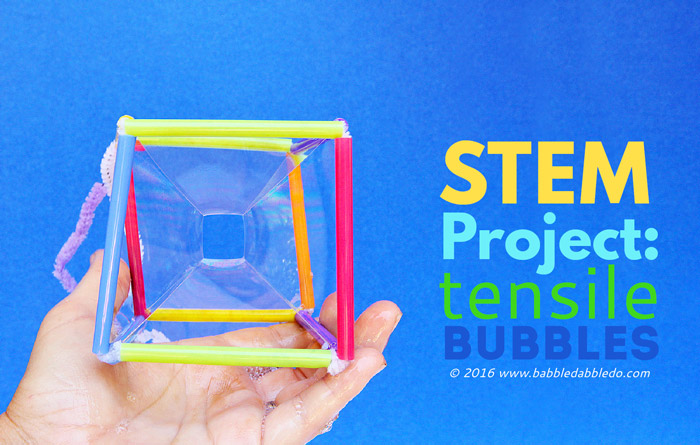
I am a big believer of hands-on education; I think kids and adults learn best with life experiences to back up a subject. In the case of today’s project you and your kids can learn structural engineering by building 3-dimensional bubble wands and making an inverted bubble cube that mimics a tensile structure. This simple demonstration will introduce a complex engineering concept to kids visually.
This post contains affiliate links to products I love and recommend to my readers.
How to Make the Amazing Square Bubble!
Materials
- Straight Straws like these
- Chenille Stems AKA Pipe Cleaners
- Bubble Solution- Homemade or Store Bought
- Tall Tupperware container
Instructions
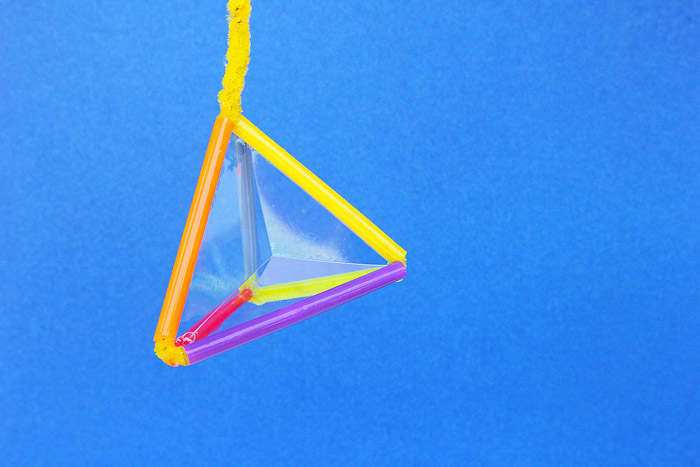
I recommend starting with a pyramid shape for your first geometric bubble wand.
Pyramid (Tetrahedron) Bubble Wand
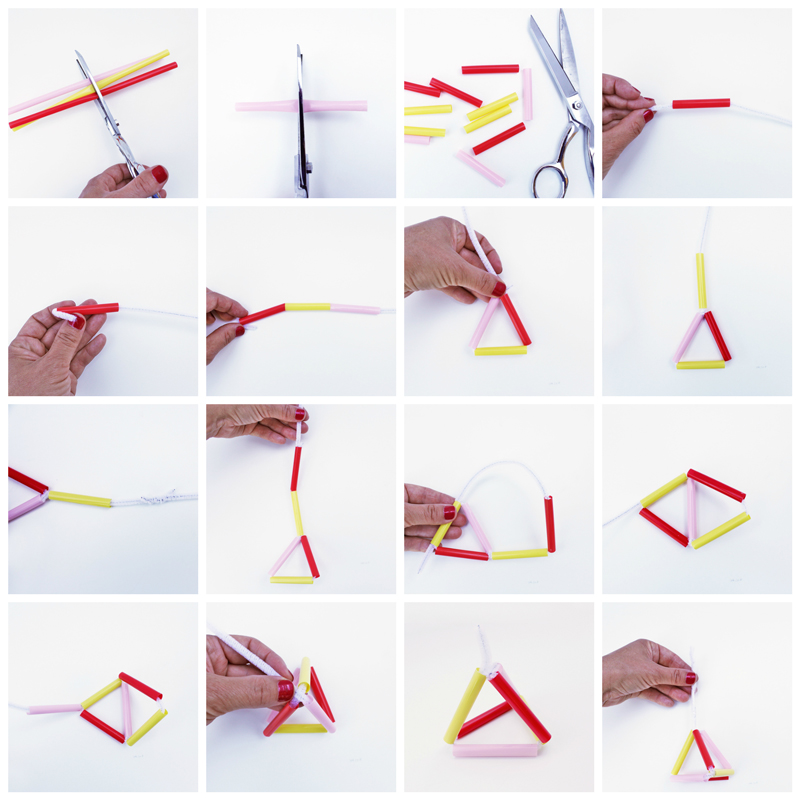
- Step One Cut your straws. First cut each straw in half, then cut in half again. You will get 4 straw sections from each straw.
- Step Two Thread a pipe cleaner through one straw and bend the end of the pipe cleaner to secure it at the end.
- Step Three Thread two more straws onto the pipe cleaner.
- Step Four Bend the long end of the pipe cleaner back to meet the starting point and twist the two ends around each other.
- Step Five Add two more straw sections onto the end of the pipe cleaner.*
- Step Six Thread the pipe cleaner through one of the adjacent straw sections.
- Step Seven Add one more straw section and bend it back to one of the straw joints to form a pyramid.
- Step Eight Thread the pipe cleaner through an adjacent straw section to secure everything in place. If desired, add a straight section of straw onto the end of the pipe cleaner to form a handle.
*Add additional pipe cleaners as necessary and twist the ends together to secure.
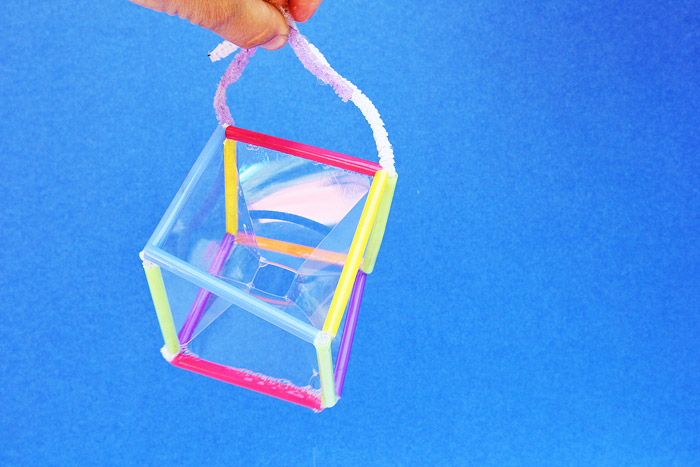
Bubble Cube Wand
- Step One Cut your straws. First cut each straw in half, then cut in half again. You will get 4 straw sections from each straw.
- Step Two Thread a pipe cleaner through one straw and bend the end of the pipe cleaner to secure it at the end.
- Step Three Thread three more straws onto the pipe cleaner.
- Step Four Bend the long end of the pipe cleaner back to meet the starting point and twist the two ends of the pipe cleaner around each other. You will now have a square shape.
- Step Five Add three more straw sections onto the end of the long pipe cleaner.*
- Step Six Thread the pipe cleaner through one of the adjacent straw sections.
- Step Seven Add two more straw sections.
- Step Eight Bend the shape to form two sides of a cube and thread the end of the pipe cleaner through one of the straw sections on the edge of the cube.
- Step Nine Repeat Step Eight to form another side to the cube.
- Step Ten Add one final straw section to complete the cube. Thread the pipe cleaner through an adjacent straw section to secure the final shape. If desired, add a straight section of straw onto the end of the pipe cleaner to form a handle.
* Add additional pipe cleaners as necessary and twist the ends together to secure.
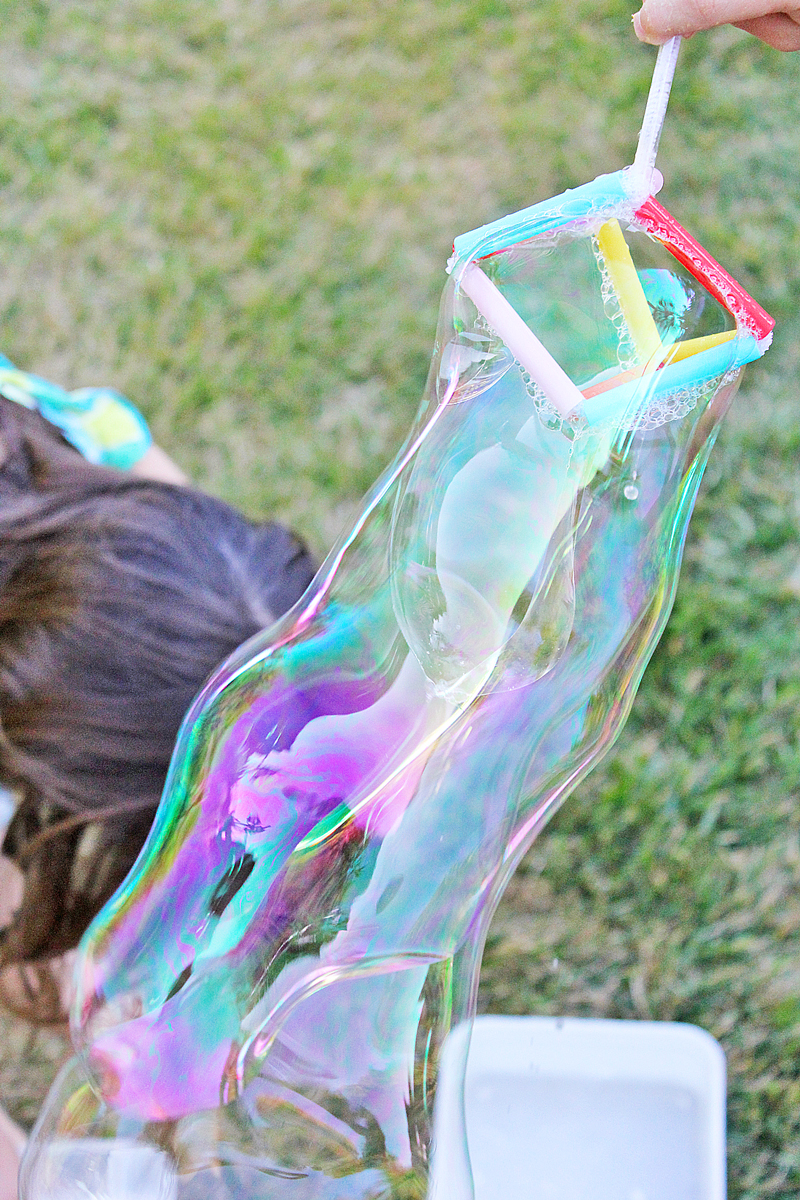
You’re done! Now it’s time to make a square bubble!
Make the Square Bubble
To make your square bubble have a tall container full of bubble solution. You can use homemade solution or store bought, we tried both and each worked well. Carefully dip your wand into the solution; some frothy bubbles will form on the top of the solution as the straws are submerged. You can scoop them away with a spoon. Now lift the wand out of the solution SLOWLY. You should see a bubble cube with multiple faces! If you don’t, dip the wand into the solution again until you get an inverted bubble cube.

Tips & Troubleshooting
- The bubble cube can be tricky to make at times. I found that depending on the condition of the bubble solution and breeze we were sometimes able to make cubic bubble after cubic bubble every time and sometimes it took many attempts of dipping the wand in the solution to make one. Don’t give up if you don’t get a cubic bubble right away! Try it again when the bubble solution has had time to settle. Also sometimes gently tapping the sides of the wand causes the solution to move and change and cubic bubble to form.
- For the best bubbles you will want to avoid too much froth on the surface of the solution. Scoop away the bubbly froth that forms with a spoon as necessary.
- This project can also be done without straws by simply bending pipe cleaners into 3D shapes. This will help avoid the bubbles that form on the surface of the solution when the wand is submerged. I liked using the straws to help give rigidity to the shapes, however.
- When making 3D shapes that have more than 4 sides try and make your wand as an extruded shape. We tried making a wand in the shape of a dodecahedron and it got complex quickly and was too large to dip into the bubble solution.
- Make your own shapes! Explore what happens to your bubbles when you add more straw section onto your wand at the joints. Expand your wands with additional sections and check out the cool bubbles that form as a result.
- Do this project outside or over a watertight surface. Plenty of bubble solution will drip off the wands.
- Wind and even a slight breeze will blow these bubbles apart so do the project in a place with still air.
3D Bubble Wands
The great thing about this project is that you get two bubble activities in one. Once you and your kids are done making the bubble cube, these wands can be used like a standard bubble wand, only you won’t get standard bubbles….These wands make fantastic bubbles with long trails and lots of connected spherical shapes. My kids arguably had more fun with this part of the project. See the wands in action below!
Looks Like
Tensile Structures. Today I wanted to introduce you to the concept of tensile structures. Tensile structures are formed when a material or cable is stretched and held in tension between two or more anchors. Think suspension bridges or shade sails. They are often used to make roofs or tents. Tensile structures themselves are not always suitable for carrying large loads but they are perfect for covering large areas with a minimal amount of material and are extremely light.
Our square bubble has similarities to tensile structures because they are formed as the soapy solution is stretched both between the rigid edges of the wand and the joints that form in the bubble solution itself. For more examples of what can be done with tensile structures be sure to check out the work of Felix Candela, Antonio Gaudi, Santiago Calatrava, and Frei Otto to name a few of the great designers and engineers who have used them in their projects.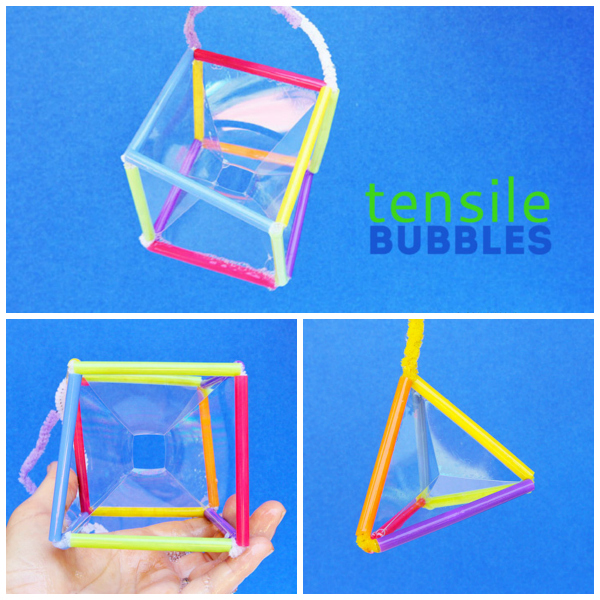
More STEM Project Ideas
If making a square bubble and other geometric shapes out of bubble solution piqued your child’s interest in STEAM projects I’ve got more ideas for hands-on learning fun here:
25 STEAM PROJECT FOR KIDS
Fill your child’s life with more art, design, science, and engineering!
Subscribe and get our projects delivered straight to your inbox.
I believe that’s how you say BAM!
or RAM? Thanks Meri!!!!!!!!
Ditto!
Thanks Jeanine!
You have so many great art making projects, but this one begins with informing readers of STEM.
Haven’t you heard of STEM to STEAM? The “A” in the middle is for Art and Design – without which, you are not going very far. Pioneered at RISD by graduate students, this initiative is increasing awareness of the importance of art and design, creativity and visual intelligence. STEAM-based curriculum puts art-making in elementary through high school right in the center of the core curriculum – where it belongs in the 21st Century.
check it out:
http://stemtosteam.org/about/
Hi Diana, Thanks so much for the link! I agree that art needs to be a part of all educational models and I look forward to reviewing the info you passed along.
I love all the great opportunities to learn with this activity and any activity that results in bubbles is always a winner with my kiddos!
Thank you Katie!
Great post! I do a similar activity with my 2nd graders in science class. Bubbles are a big hit for pretty much any age, and there are lots of science and math concepts in there! Thanks for sharing and helping others understand that STEM (and STEAM) activities are not difficult and are very important in hands-on learning for our kids!
Science is fun, right?
Love this idea! My daughter was asking is bubbles could be squares – I’ll have to show her this one!
These look like an excellent project! We just discovered STEM a few years ago but ever since these projects have had the most success in our homeschool! My son is also a hands on learner and STEM projects deliver on that! Thanks for such a creative idea!
Yay! So glad you found our blog and I hope we can deliver more STEM activities your son will enjoy!
This is so cool! Kids would love this! And best of all! You can make it yourself!