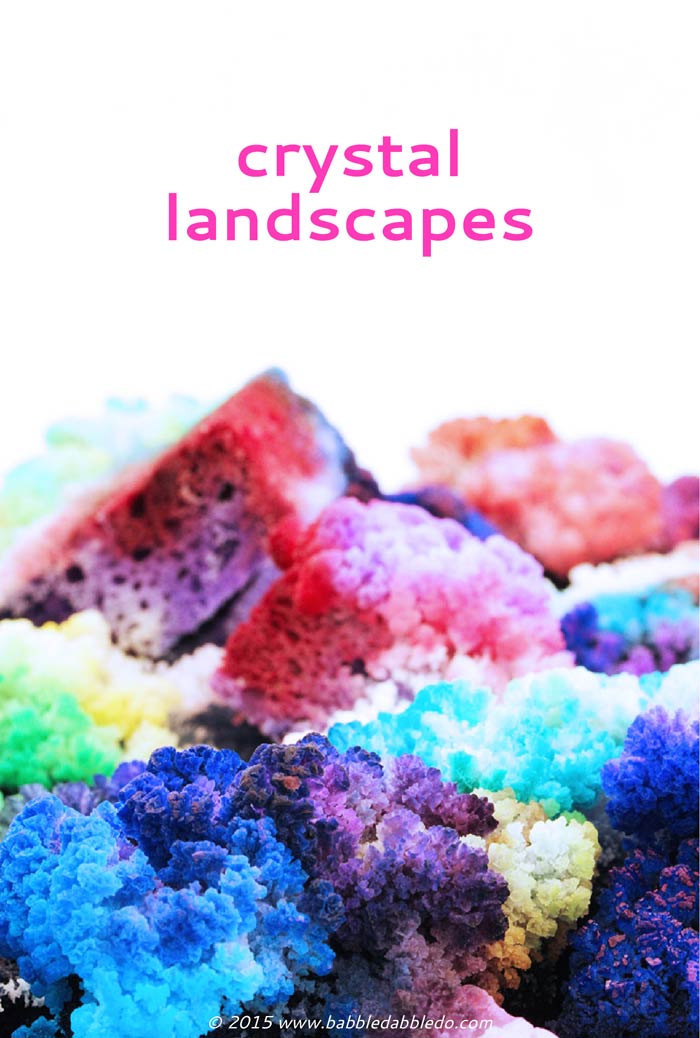
Learn how to grow colorful salt and bluing crystals! This is a great science fair project for exploring crystal growth.
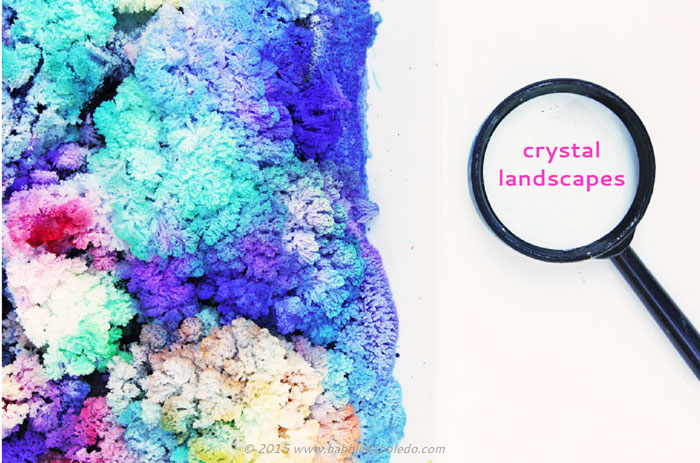
DIY Crystal Landscapes is the fifth and final project in our collaborative series STEAM POWER: Empowering Kids to Explore The World Through Creative Projects. Today’s topic is GROW and I couldn’t help but want to revisit growing crystals. I’ve been kind of hooked on crystals ever since we did this project well over a year ago.STEAM POWER: Empowering kids to explore the world through creative projects.
DIY Crystal Landscapes are a relatively involved project so all you short attention span crystal enthusiasts might want to start with Overnight Crystal Gardens…But of you have a few days patience, salt and bluing crystals are pretty dazzling to watch! We have done this experiment many times before and the one thing I love about it is that it’s a very forgiving process. I have seen many many variations to growing bluing and salt crystals online and tried different methods myself and they always yielded a result, some better than others but definitely you will see some crystal grow!
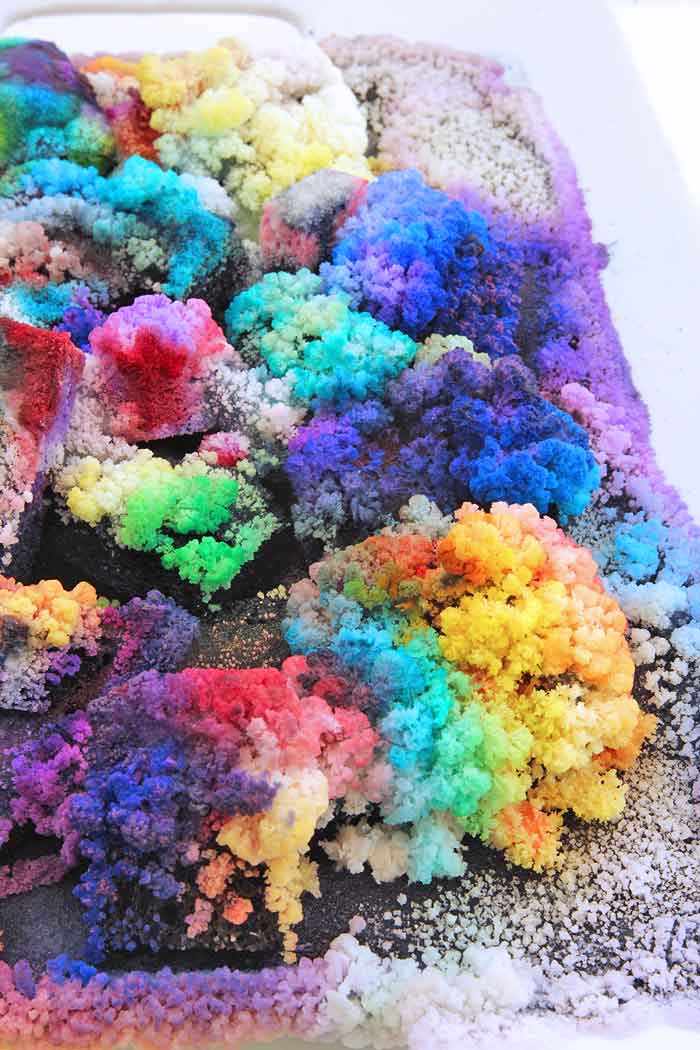
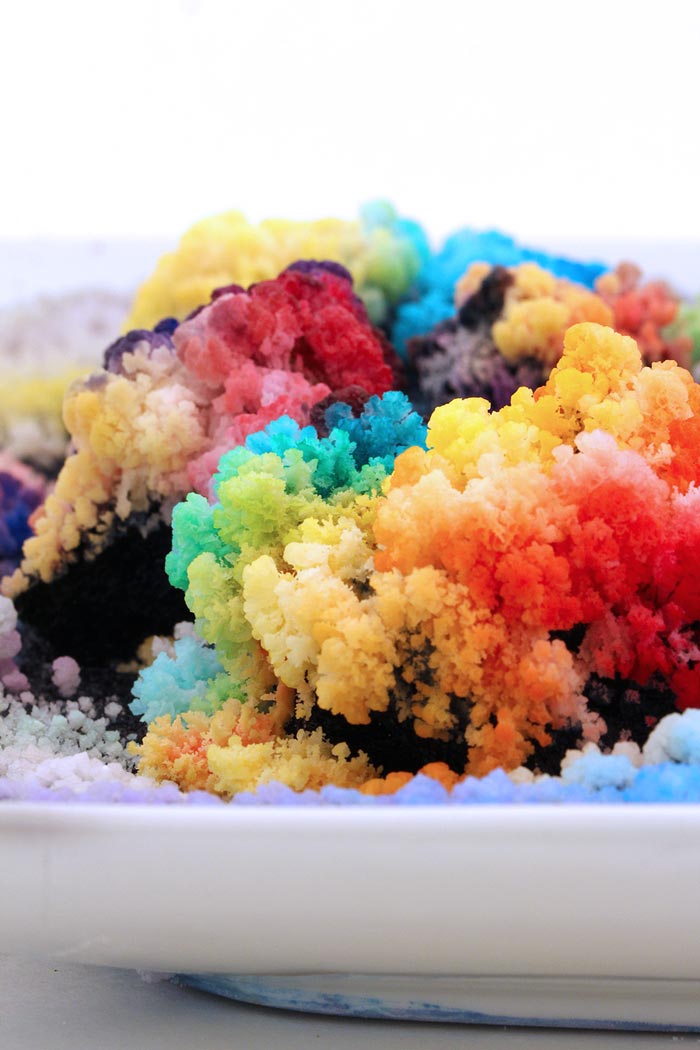
Our crystal landscapes are a modified version of the classic project found on Mrs. Stewart’s Bluing website. We “supersized” the project to create a large “landscape” and used liquid watercolors in lieu of food coloring, which made the crystals particularly colorful!
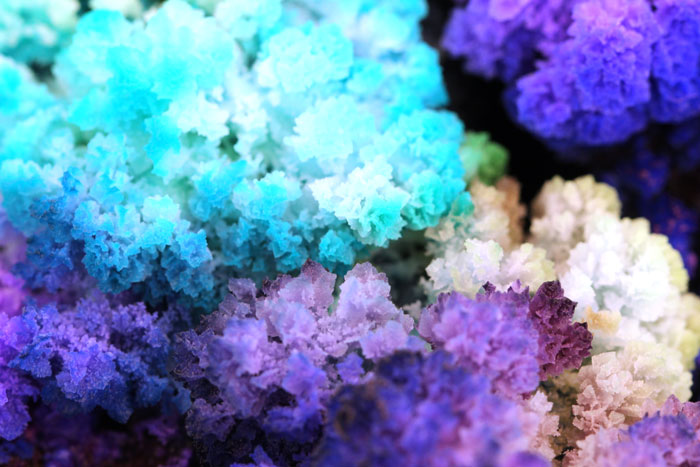
NOTE: These are probably the most delicate crystals you can grow. They look like cauliflower and are so soft that the slightest touch can crumble them. I recommend picking a suitable spot in your home to grow them where they can be observed but not disturbed much by movement.
This post contains affiliate links to products I love and recommend to my readers, plus it keeps this little blog o’mine afloat! Thank you!
How to Grow Salt & Bluing Crystals
Materials
- (2) Bottles of Bluing
- Salt
- Water
- Ammonia
- Large tray or cookie sheet with sides
- Sponges
- Scissors
- Measuring cup
- Liquid Watercolors
- Eye Droppers
Instructions
Before you start: The great thing about the recipe is that you add all main ingredients (salt, water, bluing, and ammonia) in equal amounts. If you want to make a smaller version of the project simply downsize using a 1:1 ratio. Be sure to watch our video to see the process in action.
Note: This is how we did the project and in what order but is by no means the only way to go about this project. You can look up bluing crystals for a host of variations on the basic recipe.
First Day
- Step One Cut your sponges into chucks and spread them around your tray.
- Step Two Measure out 1 cup of each of the following: Salt, Water, Bluing
- Step Three Sprinkle each of the ingredients over the sponges. We did item this order: ½ salt, ½ water, all the bluing, ½ salt, ½ water. Some recipes like this call for mixing the ingredients first before pouring over the substrate.
Second Day
- Step Four Add 1 cup of ammonia. Sprinkle an additional cup of salt on the sponges.
Third Day
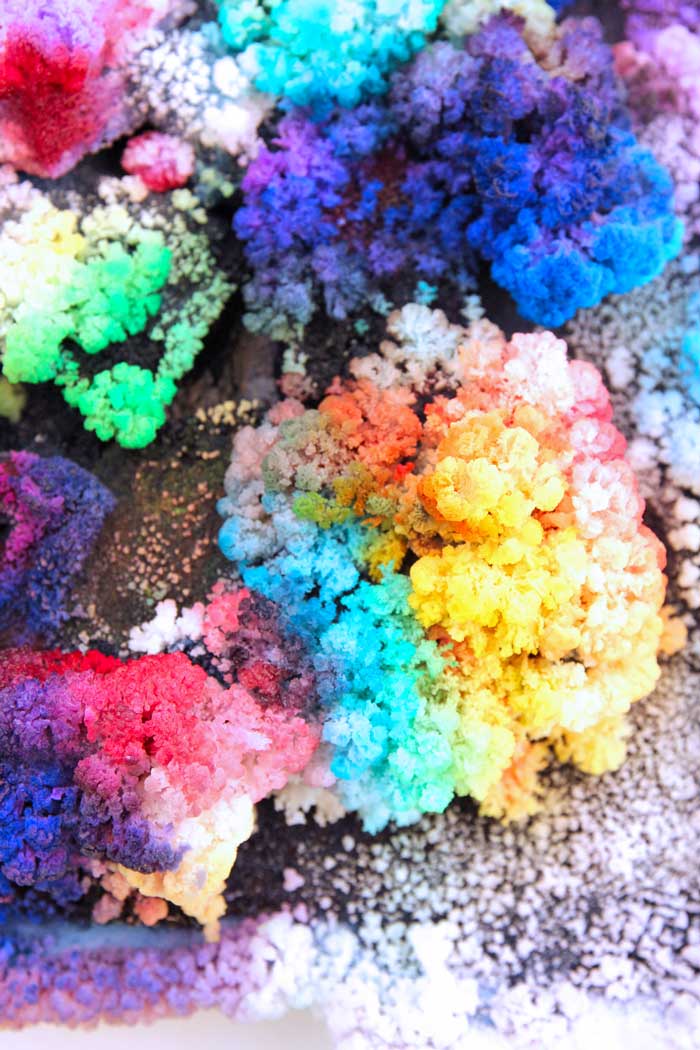
You should see some salt and bluing crystals growing! The next steps will crumble some of the crystals but it’s okay, more will grow in their place!
- Step Five Sprinkle 1 cup of each of the following onto your garden: salt, bluing, water. When possible, pour the next batch of ingredients into the pan rather than directly on top of the crystals. With the landscape set-up however we ended up pouring a fair amount of liquid on our sponges/crystals in order to saturate everything.
- Step Six Using an eyedropper drop a tablespoon of each color of undiluted liquid watercolors on the sponges/crystals.
Fourth Day
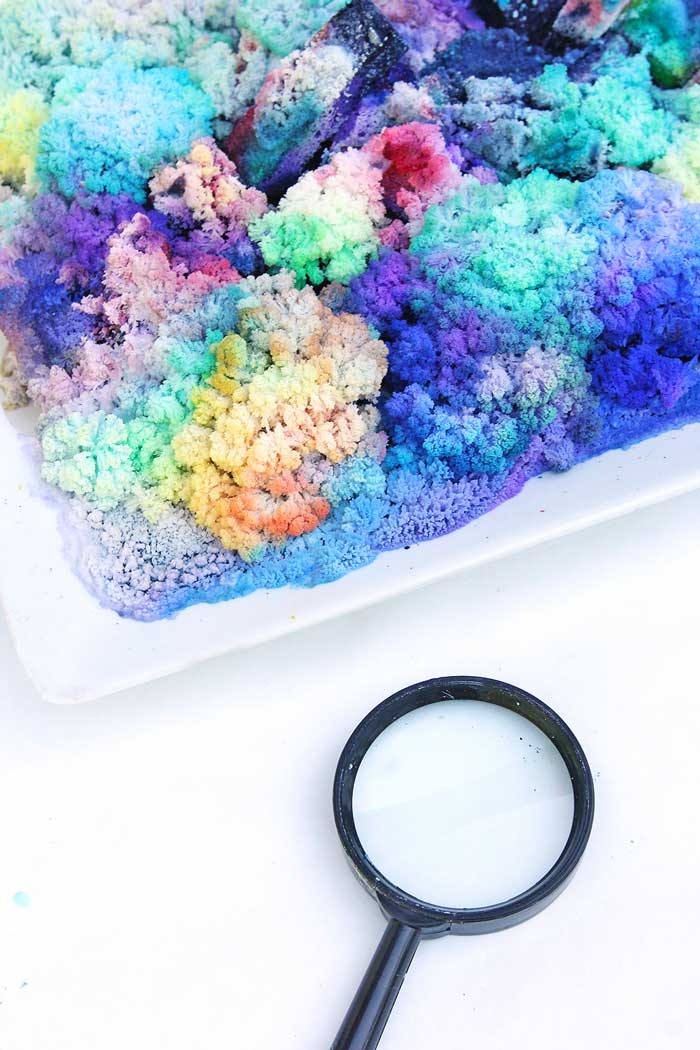
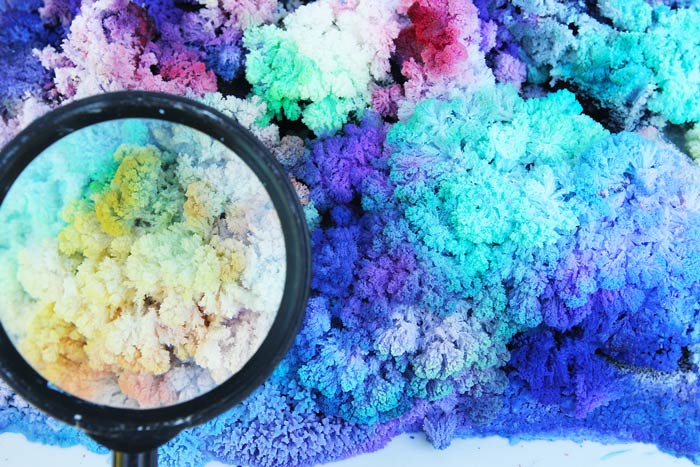
Observe!
Fifth Day
Observe again, the salt and bluing crystals should be larger and less vibrant as the watercolors dissipate. If you want to keep your landscape growing add small amount of water, bluing and salt.
Tips
- Allow for plenty of air circulation to foster the bluing crystals growth.
- Don’t do this outside unless you have unusually warm nights. We tried growing them outside but the cool nighttime air took a toll on the crystals. I recommend a nice warm spot in your home.
- Ammonia is not necessary but speeds up the evaporation and crystal growth. You can purchase it at your local hardware store with the cleaning supplies. It smells awful just so you know, but the smell quickly dissipates! I have to say it brought memories of blueprints back to me….If you choose to add ammonia an adult should supervise.
- Make sure the sides of your tray are high enough to contain the liquid! We learned the hard way when our bluing started overflowing onto the table!
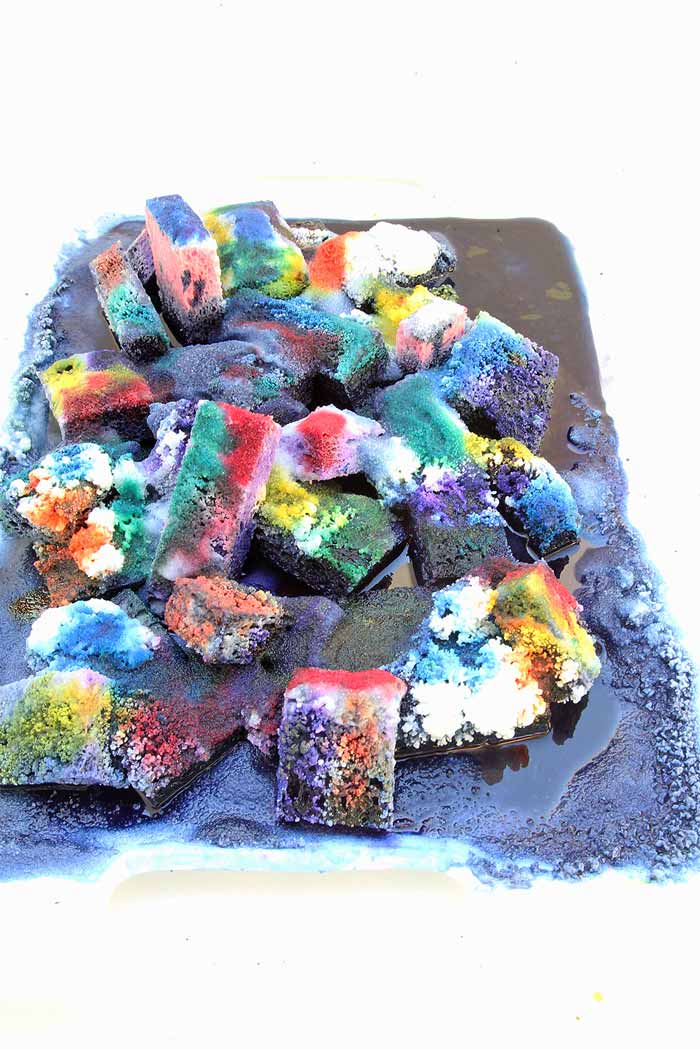
Looks Like
Al Stewart. All Stewart was traveling salesman who in the late 1800s carried around a bottle of his homemade bluing; it had an image of his mother-in-law on it which is why it’s named Mrs. Stewarts. Bluing is used to make white fabrics whiter. In 1883 Mr. Stewart sold his recipe for bluing and the buyer, Luther Ford, began manufacturing it. It was widely used in doing household laundry before modern laundry products contained additives to accomplish the same thing. The amazing thing about bluing is that it is non-toxic.
Conclusion
Ready for more projects that explore growth with kids?
Hop over and see these posts:
The Biology of Yogurt – Left Brain Craft Brain
How To Grow Aragonite Crystals – Tinkerlab
Transforming Ninja Stars – What Do We Do All Day
14 Activities with Balloons – All for the Boys
Engineering with Jelly Beans – Lemon Lime Adventures
Crystal Landscapes is featured in the new STEAM Kids Book.
For more awesome STEAM ideas to try with your family check it out HERE!
do you of what i could use instead of bluing here in the uk?
Many thanks
Lisa
Unfortunately I don’t know that there is an alternate product.
Could you tell us the Ingredient list and we could see if there is another brand outside U.S ?
Check the materials list for the complete ingredients list. Bluing is the only ingredient that may be hard to find outside of the US. I don’t know of an alternative. You can try making Epsom Salt crystals if you can’t find bluing: https://babbledabbledo.com/science-for-kids-crystal-garden/
this is the coolest thing EVER!
Thanks Kate! This is one of my fave experiments!
Hi Ana,
The kids and I have been busy trying to make all different kinds of crystals gearing up for a homeschoolers science fair. We’d love to try making this project but we don’t get bluing in NZ. I’ve contacted Mrs. Stewart and they’ll send it over, but I’m not real keen to spend $100 shipping for a science project using $20 of materials:) I was wondering if you’d ever used something other than bluing? And if you think using prussian blue and baking soda would lead to anything other than a mess?:)
Have you tried making Epsom Salt crystals? They don’t require any special ingredients other than epsom salts which you can find at most drugstores. https://babbledabbledo.com/science-for-kids-crystal-garden/
do you sprinkle on ammonia or what?
Just gently pour it around the sponges 🙂
Wow! Your crystal landscape turned out beautifully. We have got to try this one.
It’s so much fun Jen!
Hi we can’t y Bluing in New Zealand I wonwhat we could use instead for this awesome experiment.
Unfortunately I don’t know of an alternative 🙁 You could try our epsom salt crystal experiment. It’s a bit different but still fun! https://babbledabbledo.com/science-for-kids-crystal-garden/
it didn’t grow any ccrystals on the third day
I’m sorry to hear it Bonnie. Dd you check our tips out?
Thanks for this site .
🙂
This is so neat! I can’t wait to try making this with my daughter:)
Can you bring this to school if you use it with the ammonia
The ammonia evaporates so I don;t think it would be an issue. Ammonia is also used for cleaning so I don’t think your school would have an issue with it. You can always ask first 🙂
How do the sponges transform into crystals?
The salt and bluing form crystal ON the sponges 🙂
I have done this project twice and am passing a week and crystals are still not growing (maybe five tiny crystals)??
Please help! We picked this project for my daughter and its due soon.
Oh no! Did you use ammonia? It definitely speeds the crystals growth up. If you need crystals in a pinch try these: https://babbledabbledo.com/science-for-kids-crystal-garden/
According to the inorganic chemistry book, Prussian blue is the same as Mrs. Stewarts blueing.