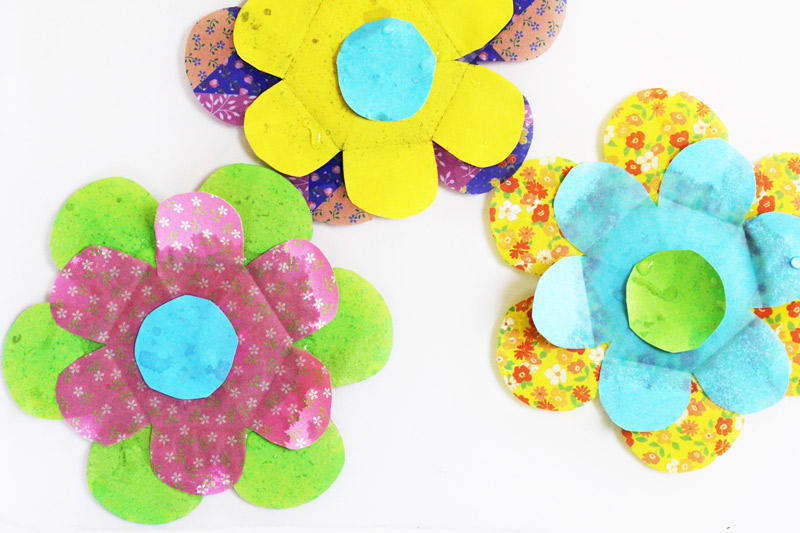
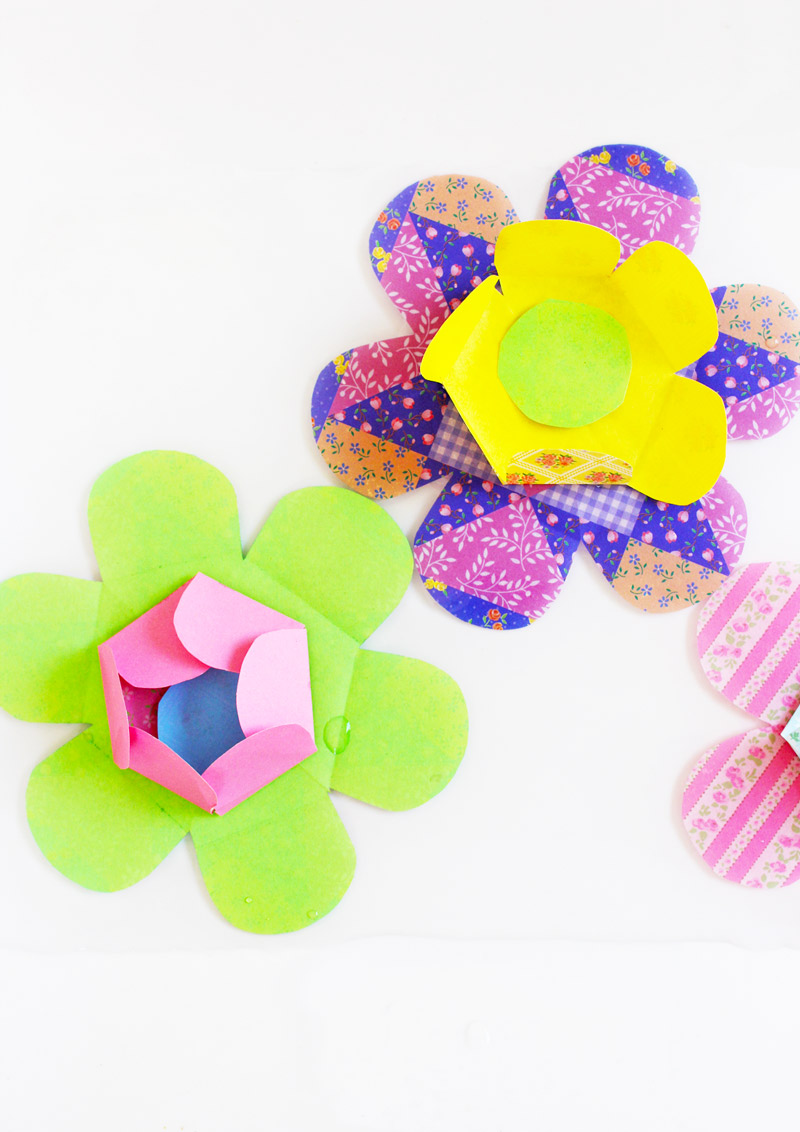
I love making unusual things out of paper, and a kirigami flower that “blossoms” before your eyes has to be one of my all time favorites. Not only is this paper craft lovely, it also includes a little science lesson, making our Kirigami Water Blossoms a project packed full of learning.
Learning Objectives
In this post you will learn:
- What is kirigami
- How to make a six sided base for a variety of kirigami projects
- How to make a kirigami flower
- What is absorption
- What is osmosis
What is Kirigami?
Kirigami is similar to origami but incorporates cutting and folding a piece of paper to create a design. If you have ever made a paper snowflake by cutting a folded piece of paper you have done kirigami!

Note: This post contains affiliate links.
Basic Six-Sided Kirigami Base
Before making our Kirigami Water Blossoms, let’s learn how to make a six-sided kirigami base that can be used to create a number of projects including paper snowflakes, flowers and spider webs. Here’s how:
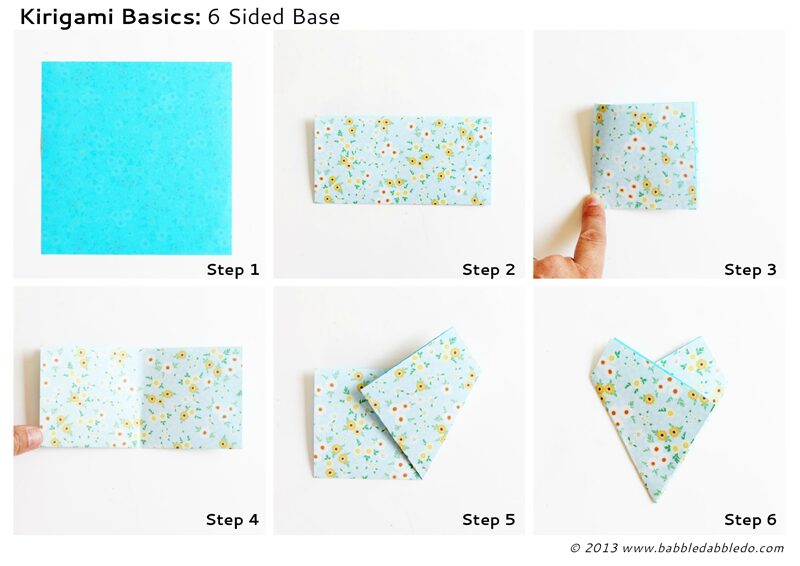
- Step 1 Start with a square piece of paper (origami paper is pre-cut in squares and is a great base)
- Step 2 Fold your paper in half
- Step 3 Now make a crease in your paper by folding it in half again and pressing down on the bottom edge
- Step 4 Open this fold back up
- Step 5 Using the crease as the starting point, fold your paper up at a roughly 60-degree angle on one side
- Step 6 Repeat with the other side
Your six-sided base is done! This base can be folded in half again for a 12-sided shape.
How to Make a Kirigami Flower
Materials
- Several sheets of 6” x 6” lightweight paper-I recommend this lovely paper
- Kirigami Water Blossoms Template
- Scissors
Instructions
I recommend making one kirigami flower using our Kirigami Water Blossoms Template first. Once you have some practice cutting and folding these you will not need to use the template.
Folding & Cutting
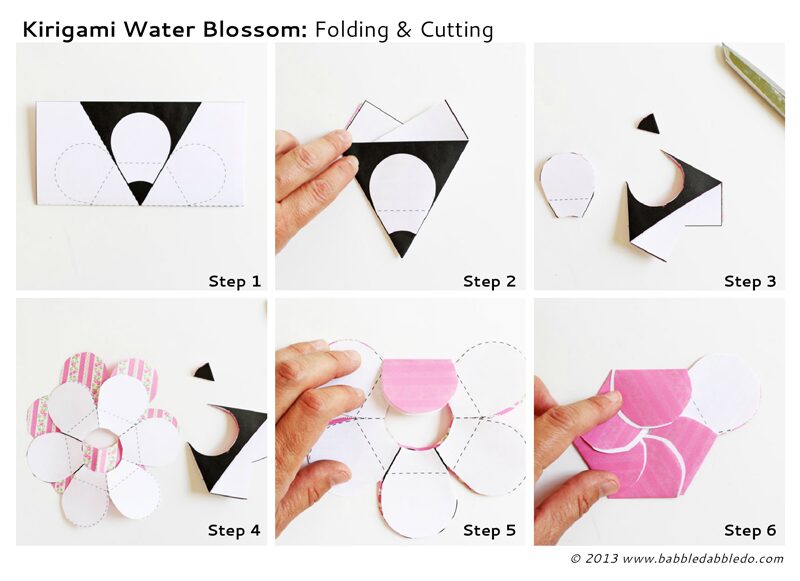
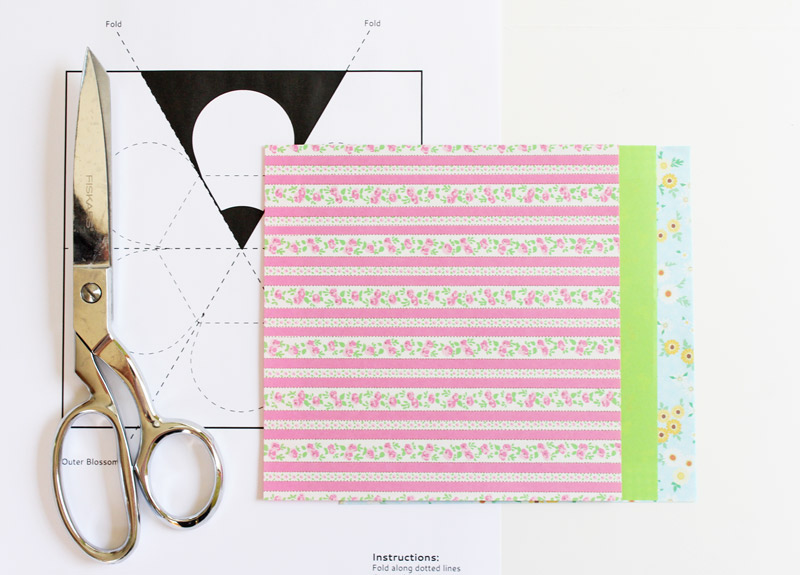
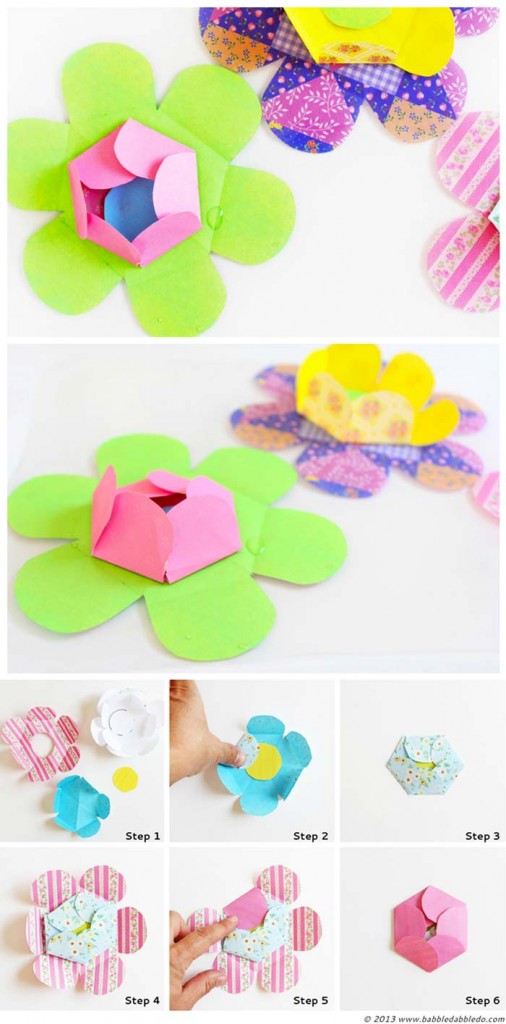
- Steps 1 & 2 Cut out your outer blossom template and lay it over a sheet of 6”x 6” paper. Fold the two sheets according using the basic six sided base instructions above and the template as your guide.
- Step 3 Cut out the black sections of the template
- Steps 4, 5, & 6 Open up the cut flower and fold the petals along the dotted lines
- Step 7 Repeat for inner blossom using a 5 “ x 5” sheet of paper. Cut out circular center.
Assembly
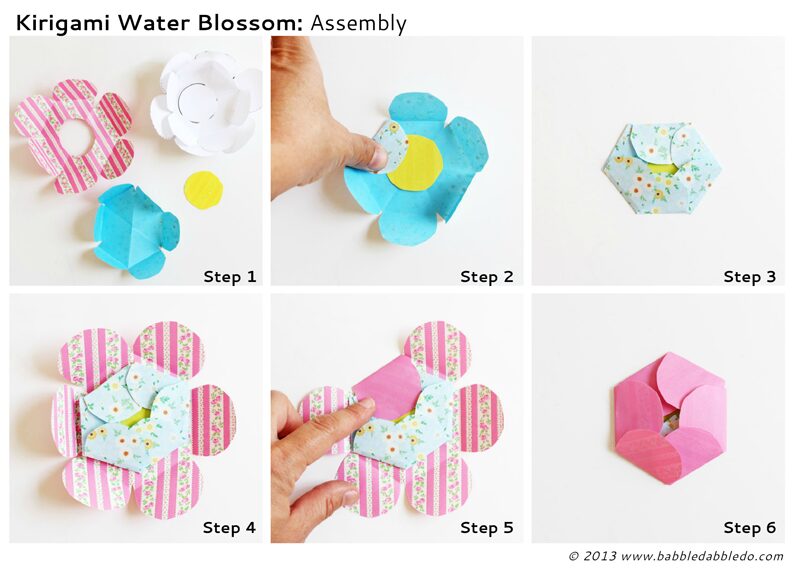
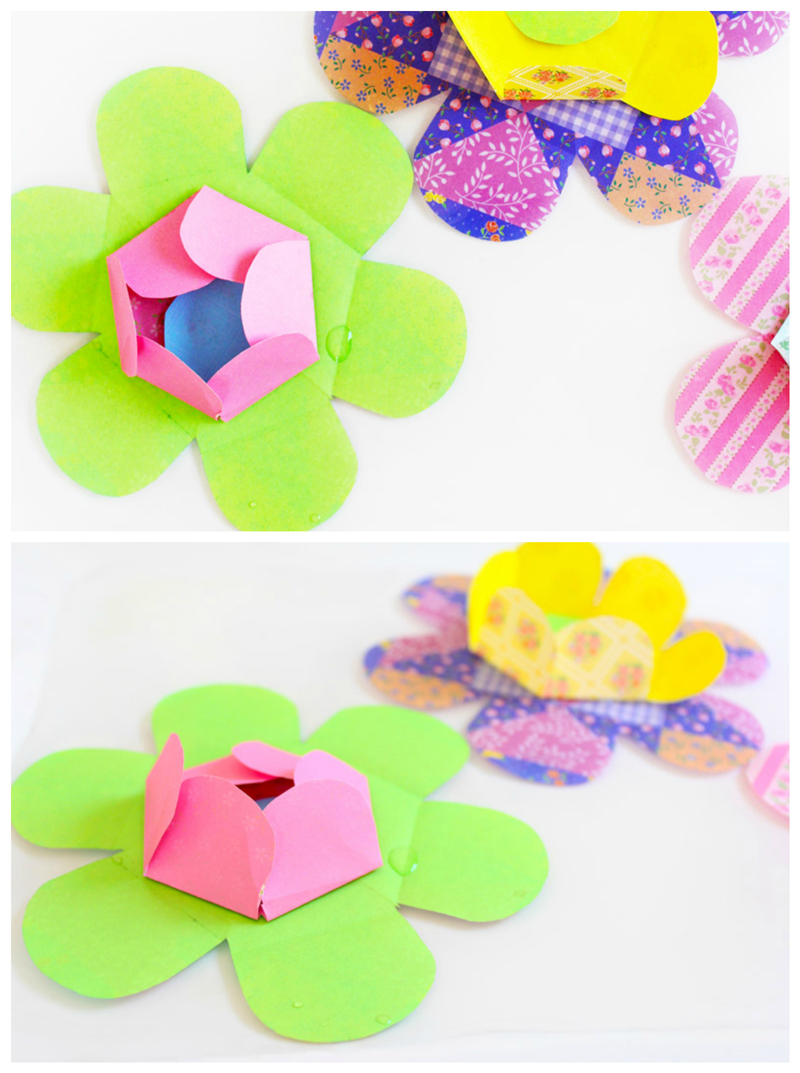
- Step 1, 2, & 3 Place the center circle in the middle of your inner blossom. Refold the petals to cover the circular center.
- Steps 4, 5, & 6 Place the inner blossom in the center of the outer blossom and refold the outer blossom petals to cover the inner blossom.
You’re done! Now grab a shallow tray or bowl and add water. It’s magic time!
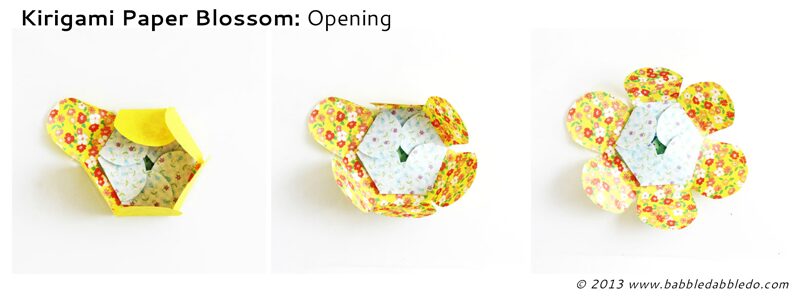 Place your kirigami flower in the water and watch as they begin to open up as the paper absorbs the water! The outer blossoms should open up quickly, the inner blossom may take longer to absorb the water. When the blossoms have fully opened you may carefully remove them from the water and let them dry out. Once they are dry you can refold them and try the experiment again. My kids had a hard time keeping their hands off the flower petals as they opened but trust me the petals will open if you are patient!
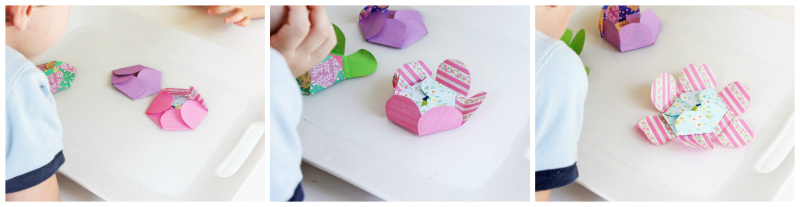
What’s so scientific?
Absorption
This is a simple experiment illustrating the properties of materials. Paper is essentially wood pulp ground up and dried. There are many materials whose basic properties change when they come into contact with water (think how your skin shrivels up in the bath) and wood is one of them. The fibers of the paper (wood) swell when the come into contact with water and the paper seems to magically open. What you are watching is absorption in realtime, as the material absorbs water and expands.
Osmosis
Plants absorb water through osmosis, the movement of water across a membrane from an area of high concentration to an area of low concentration. Osmosis will continue until water has reached a state of equilibrium. When we place a material made from wood in water, in this case paper, it absorbs the water until it every fiber is wet. This is similar to what happened when a wilted plant is watered, its leaves expand and perk up. When our kirigami flower is placed in water, the fibers swell and expand, causing the flower to open!
More
For a similar kirigami flower project that adds in a layer of art and a bonus science lesson on diffusion, head over to our Magical Water Blossoms here. This is one of the most popular paper projects on our website!
And if you are intrigued by the possibilities of Kirigami visit the Origami Resource Center online for basic tips and tricks.
We also love water based science projects here on Babble Dabble Do. One of my favorite science and art activities is making ice sculptures.
I love this experiment/craft – your kirigami instructions are very clear. Thanks!
Thanks Natalie! Kirigami is so much fun!
Hi Ana,
What a cute project! I love it so much that I decided to feature it in our roundup of paper flower crafts! Check it out here: http://www.favecrafts.com/blog/fc/paper-flower-crafts/
Have a great day!
THANK YOU Julia! I’m glad you liked it and I hope your readers enjoy it.
Wow!! This is a must try ! Thank you so much !
Thanks Priyanjana It’s a fun one!