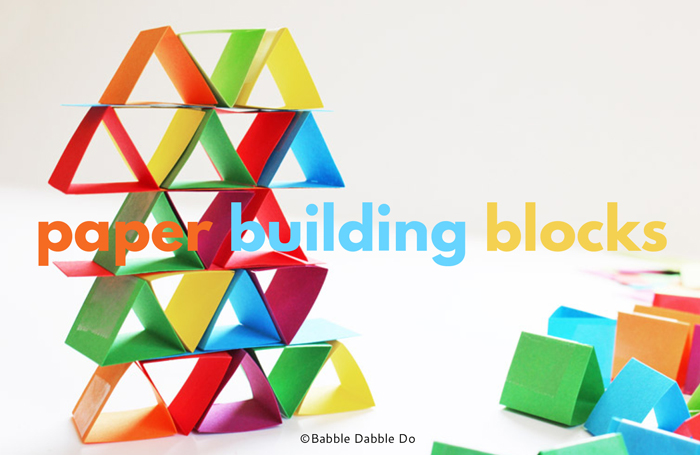
Our simple paper building blocks are a great way to demonstrate engineering for kids. Most paper crafts revolve around creating something fancy out of paper, but did you know that you could use paper as a structural material? Take a material that is weak in and of itself, fold it into a robust shape, like a triangle, and viola, you are now building with paper!
How strong is it? Well, make a few blocks, build a paper structure, and put it to the test! You’ll never guess what we tested ours with……check out the results below.
Note: This post contains affiliate links to products I recommend to my readers.
I originally spotted the idea for paper blocks in one of our favorite books Big Book of Science Things to Make and Do. Simple, colorful, and educational, the best type of project to do!
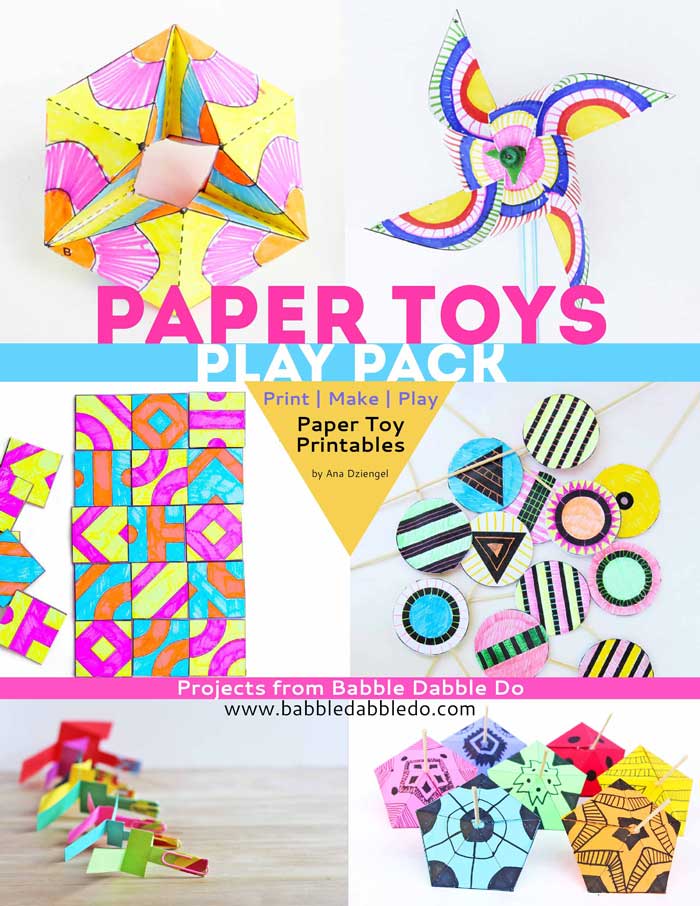
If you love paper toys, check out our Play Pack:
Paper Building Blocks
Age Appropriateness: 6+, Adult help with cutting and scoring
 Materials
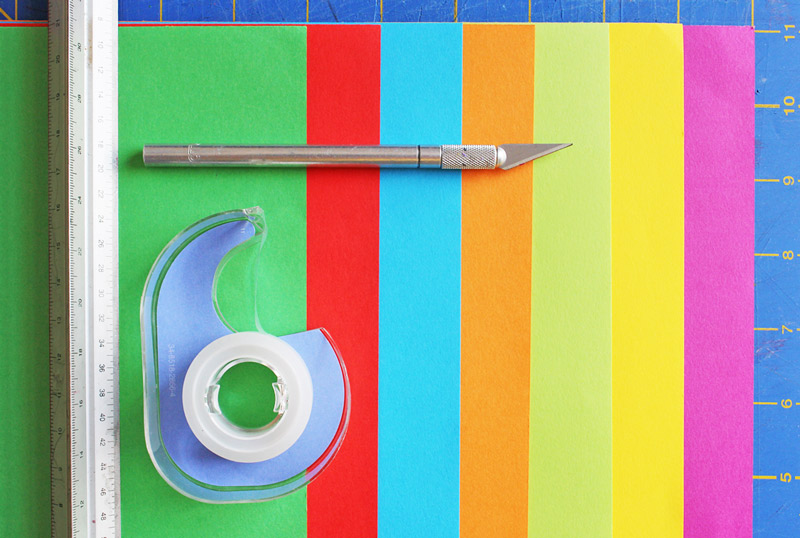
- Thick colored paper (we purchased ours at IKEA but this would make awesome blocks)
- Paper cutter (optional)
- Xacto Knife straightedge, cutting mat
- Tape
Notes:
- Our building blocks are based on a 1-inch module, increase the size proportionally to make bigger blocks
- Adults should be in charge of Steps One-Four
- Kids can take over at Step Five
Paper Building Blocks Instructions:
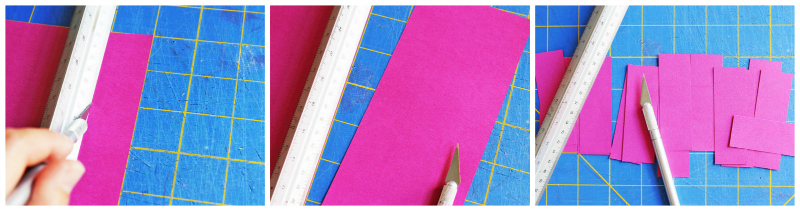
- Step One Select your first piece of paper and place it on your cutting mat. Score your paper vertically at the 1-inch and 2-inch marks and trim your paper completely at the 3-inch mark. To score paper, lightly drag your Exacto blade along your straightedge, making a light line in the paper. This will make folding easier.
- Step Two Repeat the scoring and trimming process with each color of paper.
- Step Three Trim the lengths of scored paper crosswise into 1-inch strips. If you have a paper cutter this would be the fastest method for cutting. I don’t have a paper cutter (I know, can you believe it, a paper lover like me without a paper cutter?) so I trimmed it the old fashioned way with an Exacto and a straightedge.
- Step Four Cut some paper “planks,” 1-inch strips of paper that are not scored. They can be 3 to 6 inches long.
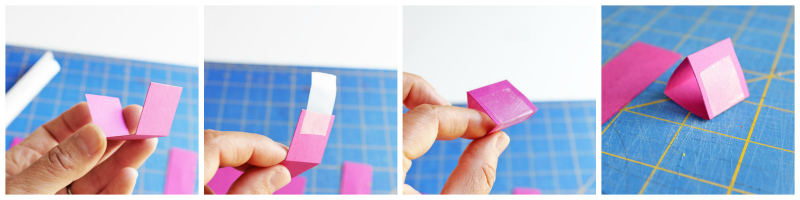
- Step Five Fold your 1-inch strips into thirds along the scored lines.
- Step Six Tape the open edges together to form a triangle.
- Step Seven Repeat folding and cutting until you have a bunch of blocks assembled.
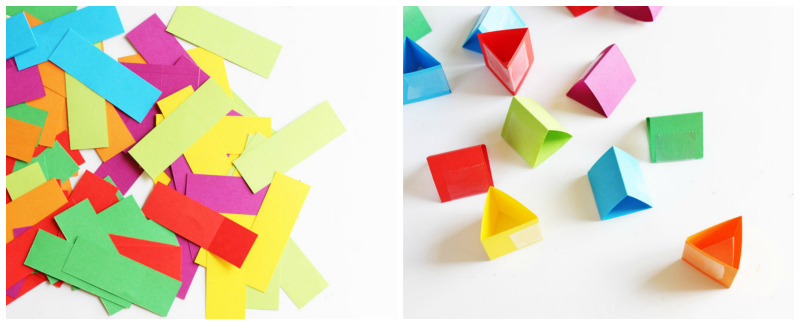
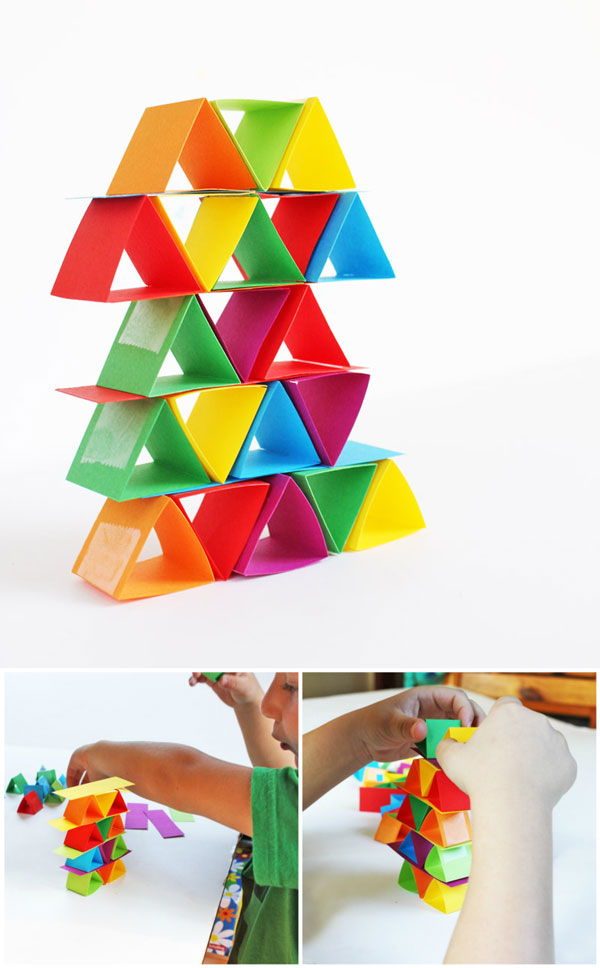
You’re done! Now it’s time to build!
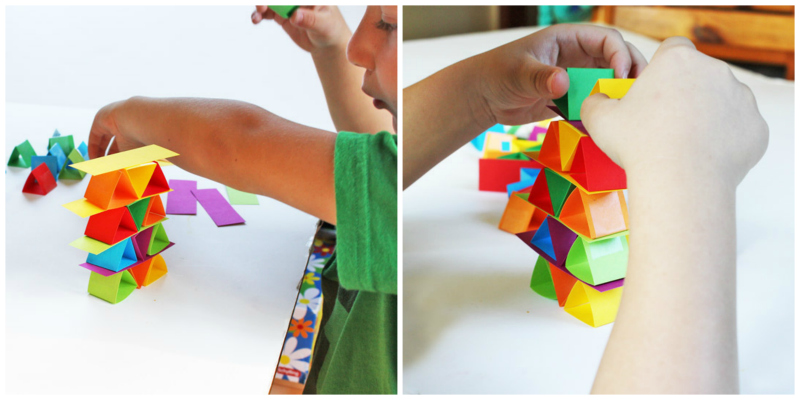
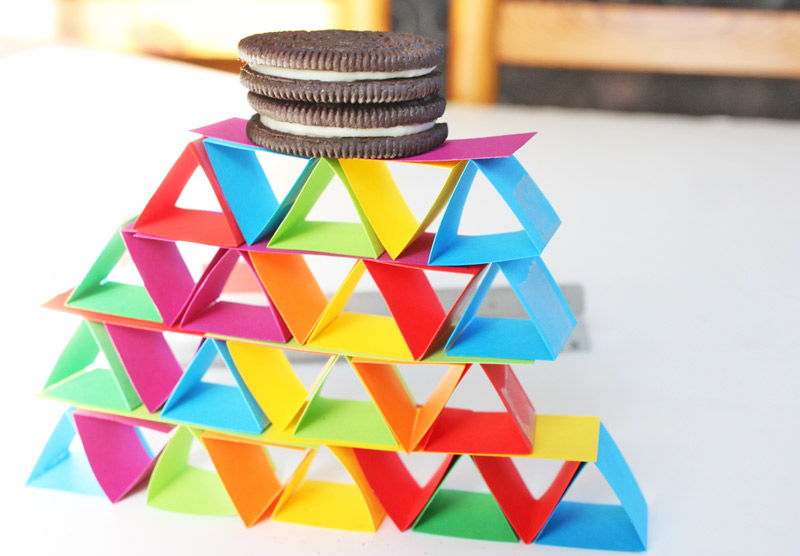
Start positioning the triangles in a row alternating between triangles that are right side up and upside down. Add a plank or two on top of each layer. When you have a few layers you can test how strong your paper structure is by balancing objects on top of it!
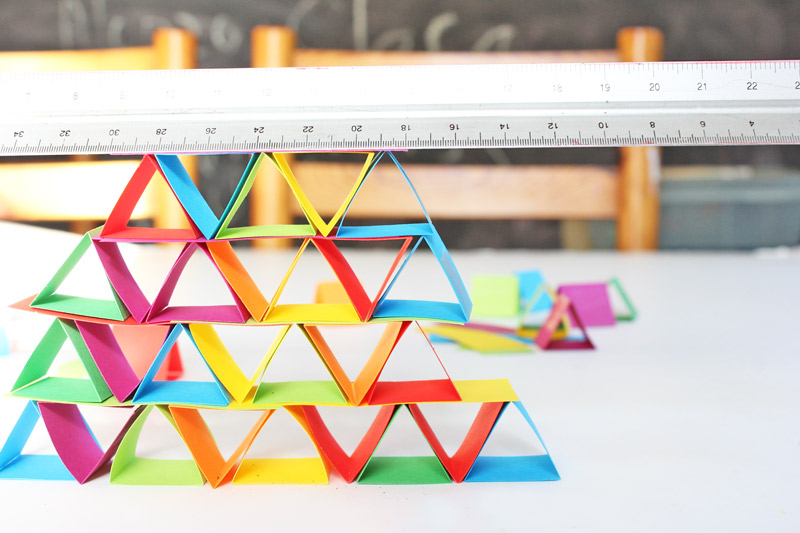
Our heavy metal straightedge was the first test and….it passed! But the piece de la resistance was my son’s desire to balance Oreos on top of the structure. His paper structure definitely passed the “Two Oreo Test!”
Looks Like
Shigeru Ban, one of my all time favorite architects. He actually builds out of paper, not just furniture or objects but BUILDINGS! Check out his paper Church here: Takatori Catholic Church
He typically uses paper tubes as structural elements in many innovative, sometimes temporary, often permanent structures. His recent Cardboard Cathedral in New Zealand is a great example of the versatility of paper Cardboard Cathedral
Paper Structures
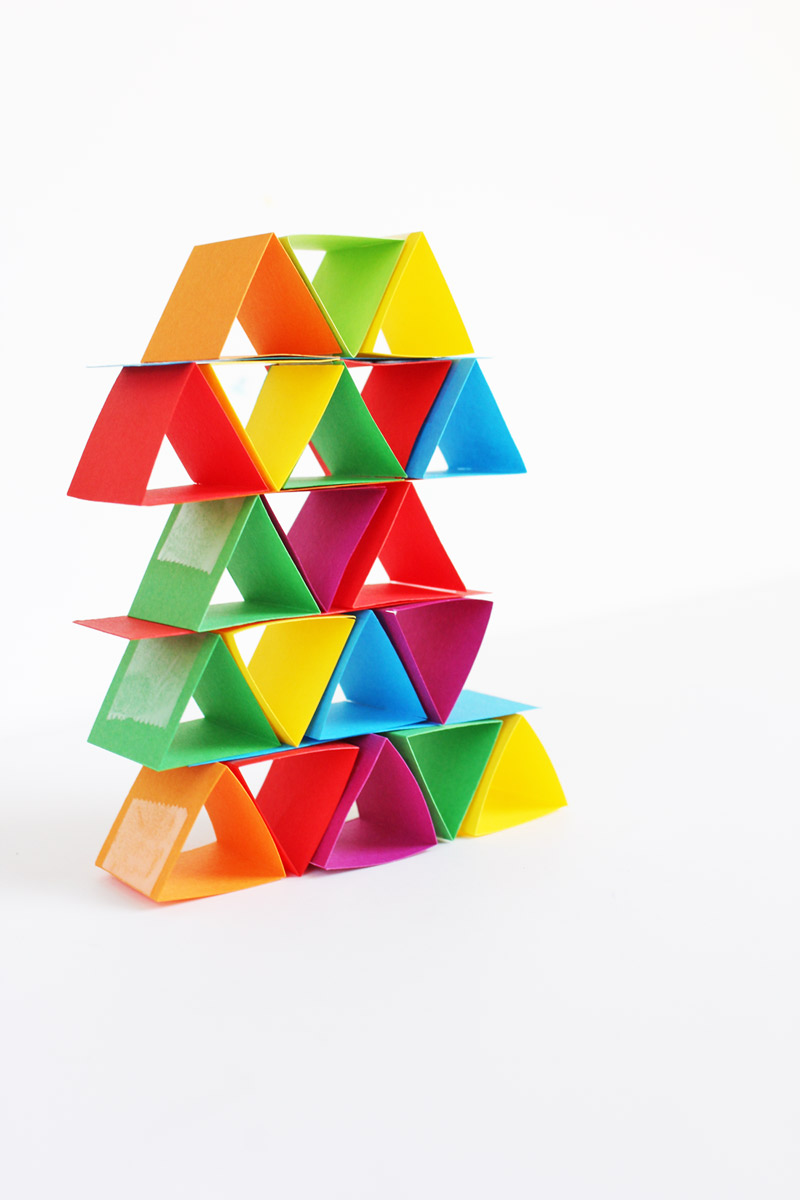
I think I had the most fun building with these simple paper building blocks! Using multicolored paper definitely glammed up this simple science project for kids that illustrates basic engineering principles. Have fun with selecting objects to test the strength of your finished structure. Just be sure to pick objects that are easy to balance otherwise your paper structure might topple over due to balance issues rather than “folding” under the pressure of weight, no pun intended!
Who would have thought paper crafts for kids could be used to teach engineering?
More simple engineering projects for kids
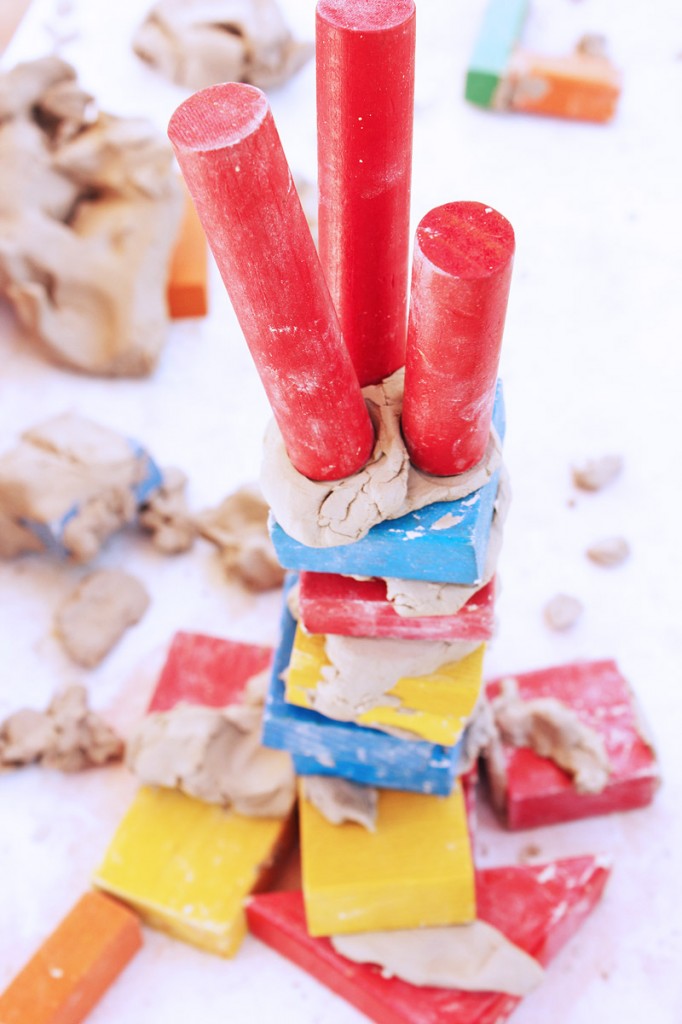
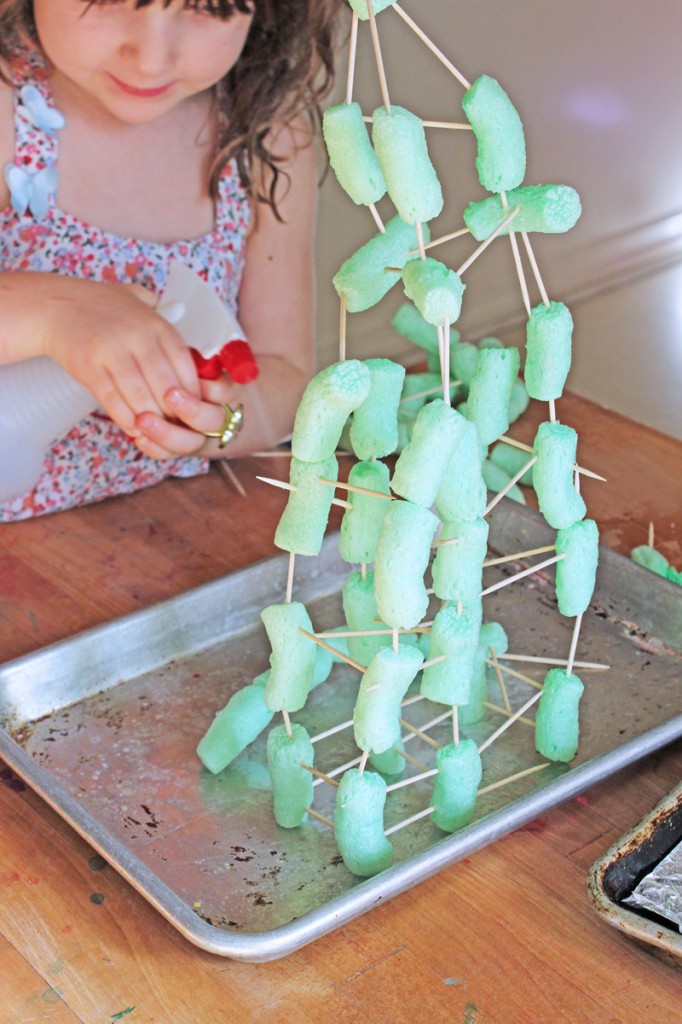
Here are three more simple engineering set-ups for kids:

Have you seen our PAPER TOYS PLAY PACK?
It includes 7 paper toys you can download, print, and play with today!
What a great idea! I might try it with my 6 year old 🙂
Thanks Natalie! My 4 year old thought crushing the blocks was more fun than building with them so now I have proof positive this project is for 6 year olds and up!
So nifty! So simple… my kids are so grateful for your blog, and I am too!
So happy to hear it Kate! You know I love love love Picklebums 😉
This is fabulous! 🙂 I can’t wait to try this!
Thanks Bek! Glad you stopped by!
Awwww sweet! I love these crazy triangles- and the fact that this passed the 2 Oreo test makes it an even better project…
Wow! They’re so bright and beautiful, and really strong! What a fun activity and experiment!
Thanks Jackie! And thanks for hosting Saturday Share!
Ana!! These are SO fabulously simple and cool! Love them. 🙂
Thanks Jen! I’m so happy you liked them. I’m a big fan of Mama Papa Bubba!
Ah, what a fun idea for kids. I can only imagine how much fun kids would have fun trying out a bunch of different items and seeing what the paper blocks will hold. Very neat! Thank you for sharing.
My readers would love to see this DIY. I’d love it if you linked this up over at Living Well Spending Less for Thrifty Thursday this week!
Thanks Ruth! I’ll be sure to pop over to your link party!
I love this! I definitely need to try it. Cheap and fun 🙂
Cheap and simple is my kinda craft! Thanks for stopping by!
Shigeru Ban is one of my favorites, too. In fact, I’d love to see you explore architecture more directly on this site. Maybe you have – I’m a new fan. Keep up the awesome work.
Thanks Amy!
VERY interesting! My kids not interesting in building . like. at all. maybe this will stir some enthusiasm.
Following you on pinterest 🙂
thank you
my son will like it
I hope he does!
That awsome ! The toys help inspire your youngster’s imagination