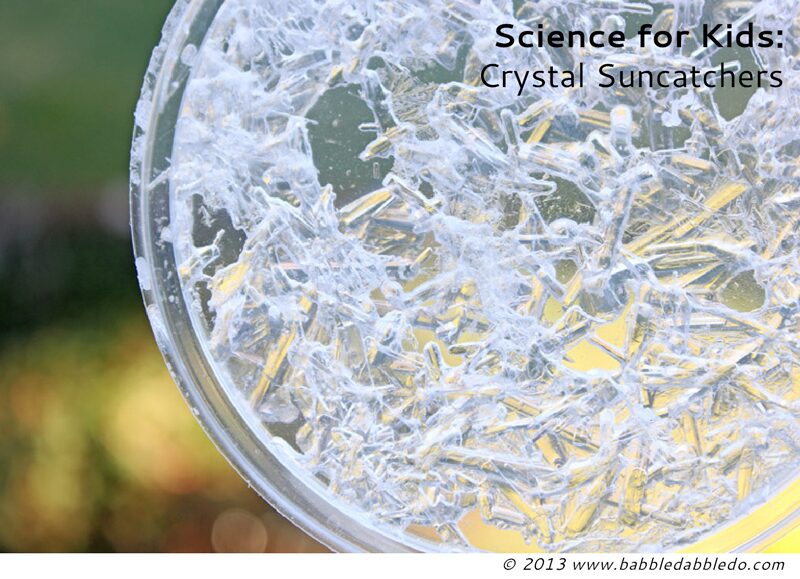
I love a good suncatcher craft over here at Babble Dabble Do, and this crystallized one we just tackled was actually a happy accident. Crystal Suncatchers are a fun science experiment for kids that are an offshoot of our popular crystal growing project: Overnight Crystal Gardens. Consider this project the sequel; it can either be done on its own or as a supplement to the crystal gardens. I recommend doing both projects because they are easy and the results are incredible to look at!
So here’s how this accidental project came to be: After all the experimenting we did testing out Epsom salt crystal gardens, I kept pouring off the excess liquid to look at the gardens and noticed that any water that spilled and dried crystallized. I racked my brain for a way to “preserve” these gorgeous puddles of crystals when it occurred to me to try creating suncatchers using plastic lids.
[clickToTweet tweet=”Turn crystals into suncatchers!” quote=”Turn crystals into suncatchers!”]This post contains affiliate links to products I love and recommend to my readers.
Fun Science Experiment:
Crystal Suncatchers
Materials
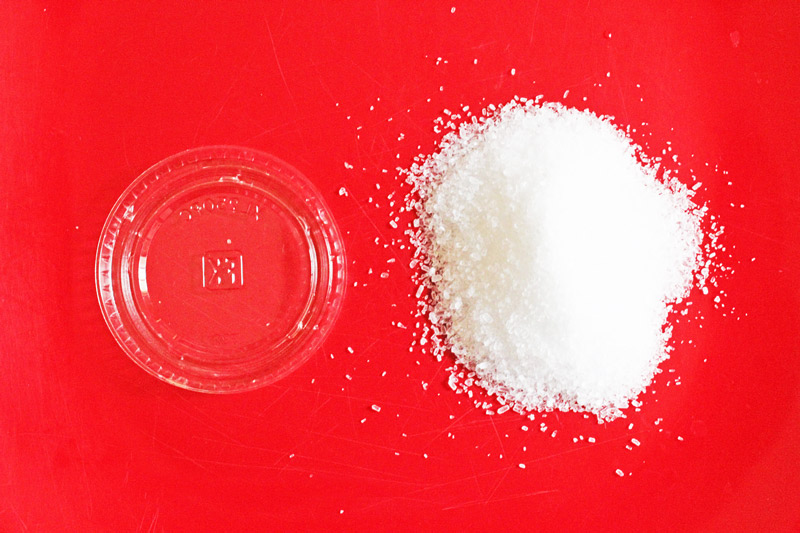
- Epsom Salt
- Clear Recycled Plastic Lids- use the clearest you can find
- Water
- Empty Jar
- Bowl or glass measuring cup
- Fork
- Microwave (optional)
- Tray
- String
- Exacto/Pin
Instructions
If you are doing this experiment on it’s own, start with the following steps:
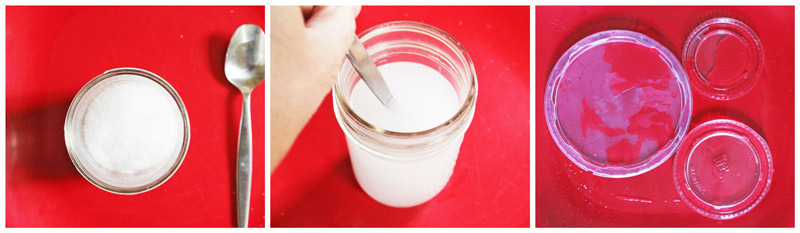
- Step One | Measure You will be using a ratio of 1:1 water to Epsom Salt for this project. Add 1 cup of Epsom salt to an empty glass jar.
- Step Two | Heat the Water Add 1 cup of water to a microwave safe bowl. Heat the water in the microwave for 45 seconds. Alternatively use very hot tap water and skip the microwave.
- Step Three | Combine Pour the water into the jar with the salt. Do this quickly so that the water is warm. Stir the salt and water for 1-2 minutes to dissolve the salt.
- Step Four | Make Your Suncatchers See steps 5-9 below.
If you are doing this experiment as Part 2 of the Crystal Gardens experiment start here:
- Step Five Place several plastic lids on a flat-bottomed tray in a sunny location where they can remain undisturbed.
- Step Six Pour off some of the excess liquid from your jar/crystal garden into the recycled plastic lids. Use just enough to cover the bottom of the lid. DON’T OVERFILL!
- Step Seven Place your lids in sunny location. Depending on how much liquid has been added it will take a few hours or a day to start crystallizing. I know it will look like lids full of water at first but be patient!
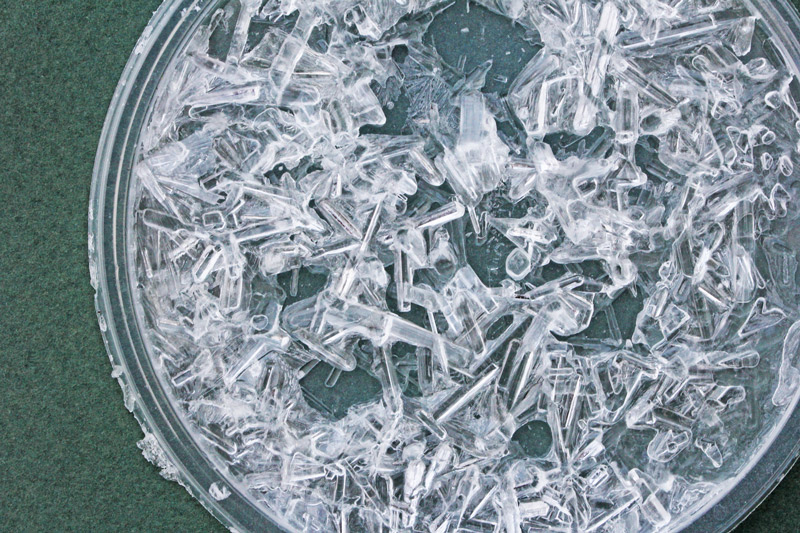
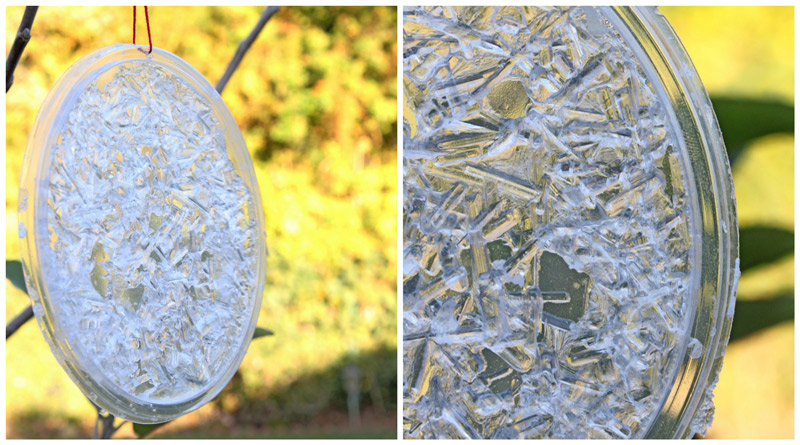
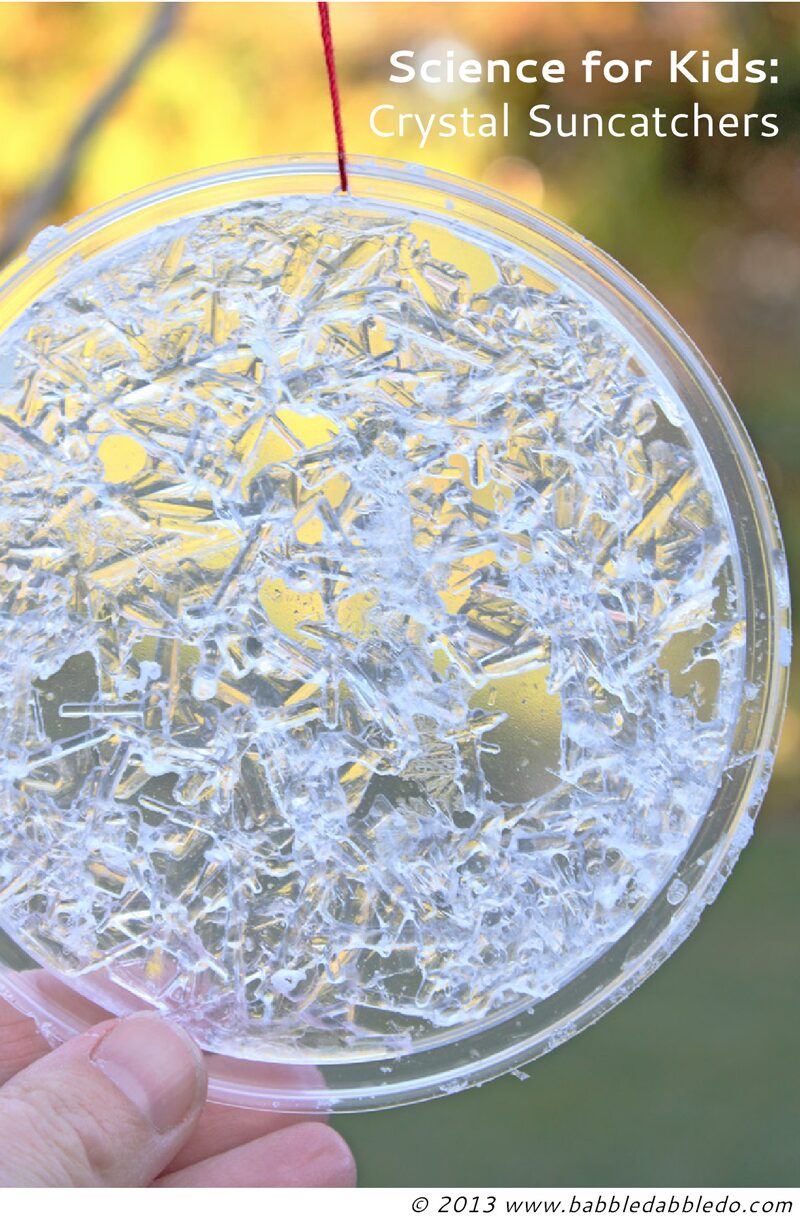
- Step Eight When the liquid has completely evaporated your crystal suncatcher is ready! You will be able to see lovely crystal structures from both side of the lid.
- Step Nine VERY carefully poke a small hole in the edge of the lid and thread a piece of string through the hole. Tie in a knot and hang your suncatcher up!
Tips:
- I recommend using the cooled liquid after the crystal gardens have formed. It will make for the most interesting looking crystals. You will also have a “preview” of some sorts because the type of crystals that have formed in the jar will resemble the types of crystals that will form in the suncatchers. Needle like crystal gardens will form more needle like suncatchers. Gardens that ended up with larger crystals will make for larger crystals in your suncatchers.
- These are VERY fragile! One big bump and your crystal suncatcher may crumble. I recommend an adult handling the threading and hanging part of the project. Make a few in case you lose one!
- Over time your crystals will begin to dry out and harden even more. Eventually they will whiten as the salt dries out completely. These suncatchers will have a limited lifespan. We have just made ours but I would expect that they will last a week or two.
- Use the clearest types of lids you can for this experiment so you can see the crystals from both sides. The best type is the completely clear plastic found in food packaging, some to-go cup lids (like those used for iced coffee) or mini sauce and salsa lids at restaurants.
Looks Like
Victor Vaserely. Crystals always remind me of the work of Op Artist Victor Vaserely. Vaserely’s work is all about warping geometry. This particular print reminds me of what crystal structures would look like if they were man made. My parents had a few Vaserely prints in our house when I was growing up and as a kid I thought they were some strange optical illusions. As an adult I have a deeper appreciation for his work; yes, it does symbolize the 60’s and 70’s because op art was very popular at the time, but the exploration of both color and form in such an eye catching manner is appealing to both kids and adults. For more info on Vaserely click here.

I love accidental projects!
This fun science experiment was definitely a happy side discovery after tackling our Overnight Crystal Gardens. The great thing about this complimentary project is that you can have a better view of the lacey texture and patterns of the crystal structures that form. For further exploration drop a pinch of the super saturated liquid on a slide and look at it under a microscope!
More Fun Science Experiments:

Fill your child’s life with more art, design, science, and engineering!
Subscribe and get our projects delivered straight to your inbox.
This is so COOL! I’m filing this one away for when the twins are a bit older. Great post!
Love this. If I could get to the store and buy Epsom salt we’d do this today. Shared on Facebook!
Thank Jodi! You can usually buy epsom salt in the grocery store too, in the first aid section 🙂
Oh wow! This look amazing. Definitely adding to our must try list.
Thanks Shauna! They are so easy to make it’s kinda like, is that all?
Epsom Salt – Isn’t it amazing? I just can’t get over how it feels and the amazing things it does. Your photography is spectacular!
Thank Suja! Besides doing all these science experiments with epsom salt I made xmas gifts with it too! Eucalyptus bath sats. So easy and they smelled amazing!
I LOVE Blog Me Mom BTW 😉
I love these; we have yet to experiment with Epsom salts and crystal-making, but you have me inspired now… you come up with the coolest science stuff!
So impressed with how these turned out. I will save my cup lids so we can do this soon. Thanks!
Hi Vicky,
So glad you liked them! I save cup lids for so many things 😉
I just love accidental experiments! These are beautiful! I wonder how they would look if you added food coloring? We’ll need to try this one – my kids will love it!
Hi Jaquie,
Glad you liked them! I tried adding some liquid watercolors to one of them but it is a little tricky as the crystals don’t absorb the color, rather the color sort of floats on top. I read that crystallization is a purification process and that may be the reason why the color doesn’t seep into the final crystals. Still it would be worth a try!
Ana
I wonder if you could add color?
Hi Jill,
We tried adding color but crystallization is the process of purification so the color sort of “floats” on top of the crystals and isn’t absorbed if that makes sense 🙂
These are beautiful! I cannot wait until my son is old enough to do this. Actually, we may just have to do it now for me and later for him!
Curious if “sealing” the crystals with something like hair spray, or some other sort of clear spray might make them less fragile and last longer. It might destroy them or make them cloudy, but would be worth trying if you make several.
Good question…I tried white glue but that didn’t work. If you try hairspray and it works let me know!
Perhaps clear liquid acrylic would work to “fix” them. An adult would have to do it but once the crystals had “developed” and dried, you could pour a layer of liquid acrylic on top and let it set.
Interesting idea! I’m not sure of the chemicals in liquid acrylic would change the make-up of the crystals. I tried glue and the whole thing dissolved!
I’m thinking of doing this at the nursing home but adding a bit of liquid watercolor to it to make it easier for them to see. I love the way the crystals look on dark paper too when painting with the mixture. Thanks for sharing!
Sounds like fun Paige! I did find that the crystals tend NOT to absorb color though. Crystallization is a process of purification so the color will most likely not work on the crystals themselves but perhaps the surrounding water or plastic will be tinted.
Hi, I know you said several lids up above when you were making it. Do you think that would be about 4-5 lids at a time? I’m trying to figure out doing this for about 20 kids at a time.
Hi Gina,
I would have one lid per child 🙂 Maybe you can get parents to bring in a few clear plastic lids?
I’m hoping to try this at work with my preschoolers. Do you think it is ok for the lids to be covered while out in the sun? It’s kind of rainy where I live and I wouldn’t want them getting ruined…. Or perhaps, can they dry indoors?
Best to dry them indoors away from moisture 🙂
Very pretty. Thought you might be interested to know that they use epsom salt to make the pretty icy window special effects in the movie business. Not sure the recipe, but they dissolve epsom salts in beer (don’t know why, maybe it evaporates quickly?) and use a paint brush to paint it around the edges of a window to make it look icy or over the entire glass to frost a window.
I didn’t know that but it makes sense! Love hearing it!
Thanks! We had lots of fun with my 3 and 5 yr old. The 3 year old went straight for his magnifying glass! We are going to try the sun catchers now.
Other Tips for leftover liquid: throwing it in the bath! Or, use in it sidewalk cracks for a long lasting kid-safe weed killer (just don’t use it where you want plants to grow later).
Thanks for the awesome tips!