Today we are going to be making simple DIY paper lanterns. This is an easy project with a surprise step!

Quick DEMO
@babbledabbledo How to make a paper lantern! SAFETY NOTE: Only use with battery powered fairy lights! ##tiktokpartner ##learnontiktok ##paper ##papercraft ##craft
♬ original sound – Babble Dabble Do
Lantern LIVE Demo
Simple DIY Paper Lanterns
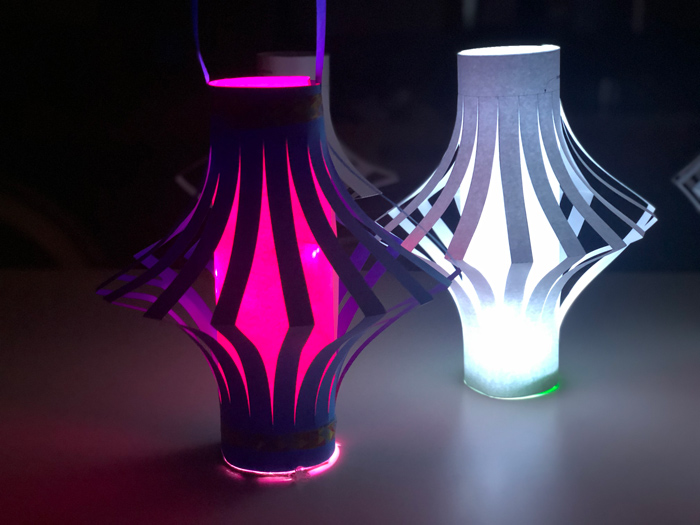
SAFTEY NOTE: Never use a real flame with paper! If you want to add light use fairy lights or a flameless candle.
Materials
- Template
- Paper I recommend different colored paper for a fun effect
- Glue stick
- Tape
- Scissors
- Plastic Lid Optional
- Fairy Lights Optional

Time needed: 10 minutes.
Here are the steps to make simple DIY Paper Lanterns
- Print Templates
Template A is best for younger kids and templates B & C are best for older kids and adults. If possible print inner and outer shell templates on different colors of paper.
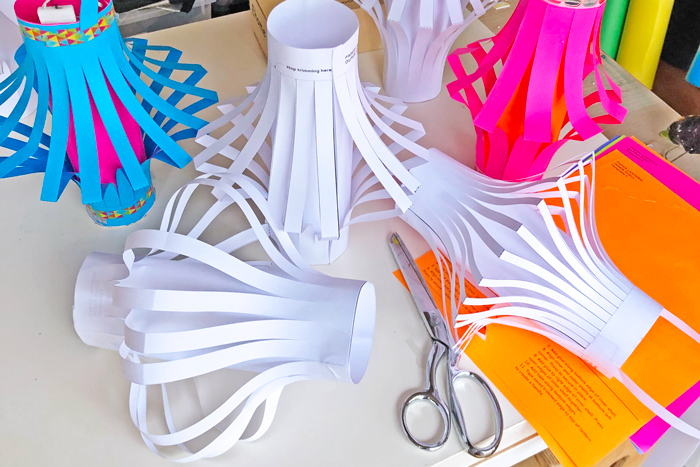
- Cut & Fold Outer Shell
Fold outer shell along dashed line. Trim outer shell along thick solid line. Save trimmed edge for handle. Cut along thin solid lines stopping at dotted line.
- Cut Inner Shell
Trim inner shell along solid line.
- Glue lantern top together
Add glue along top edge of inner shell. Align inner and outer shells at top left corner. Press to secure in place.
- Glue Lantern Bottom
Add glue along bottom edge of inner shell. Align inner and outer shells at bottom left corner. Press to secure in place.
- Glue Edges to Create Lantern
Add glue to right edge of inner shell. Press open edges of inner shell together. Add tape along bottom edges.
- Create Handle
Tape saved trimmed edge to top of lantern to create a handle.
- Add Fairy Lights
Add a strand of fairy lights inside the lantern. If desired, glue a plastic cap to the bottom of the lantern to hold the lights in place.

I used to love making these when I was little (I’m 62 now) and have made them with my Brownies and Rainbows in the past. Aren’t battery lights great – we never had them years ago!
Right? When I was kids it was a fire hazard to light these up!