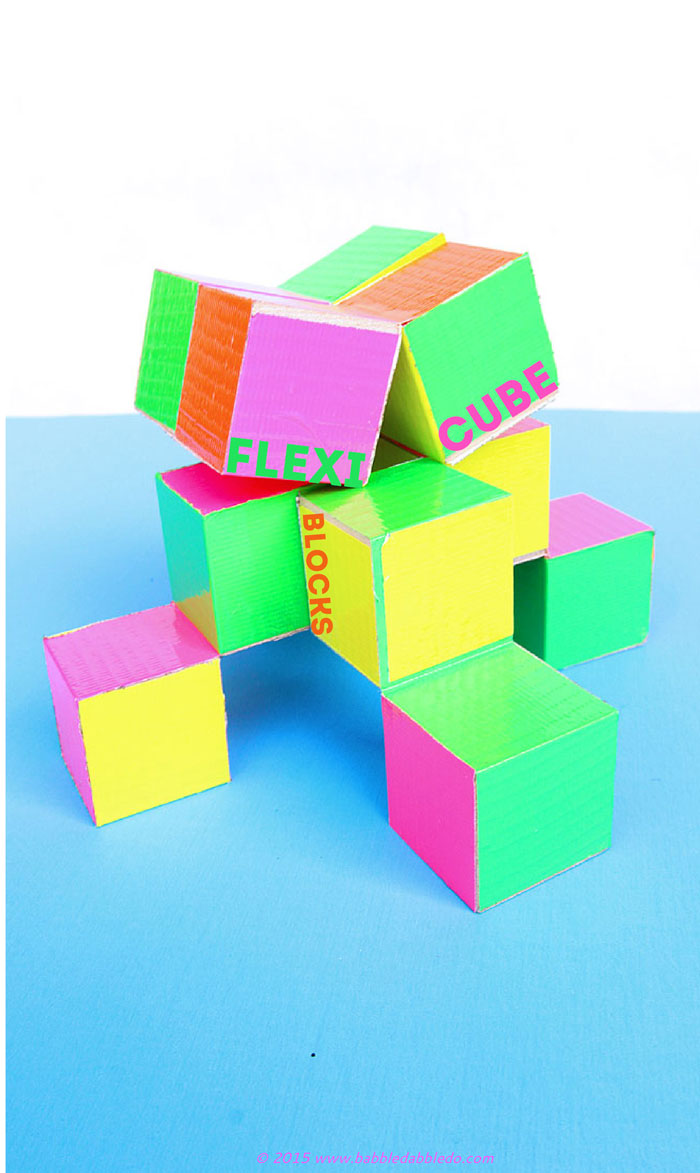
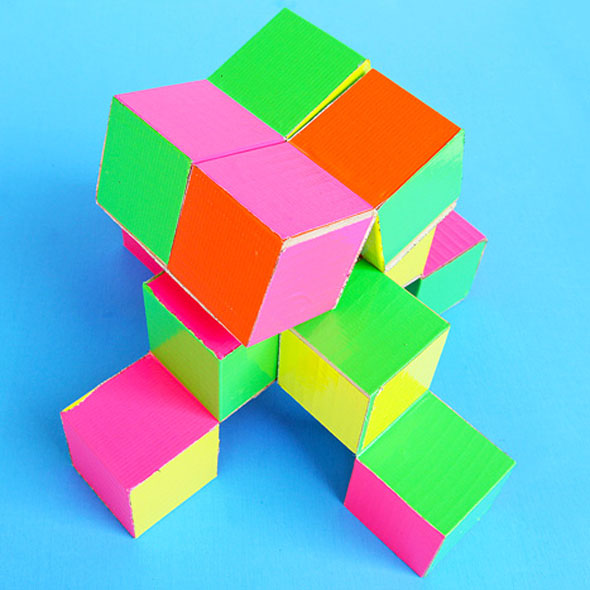
Today I’ve got an easy to make DIY toy that looks deceivingly complex. This toy is simply 4 wood blocks connected with 3 duct tape hinges. But the way it rotates and flexes will have you thinking it’s much more complicated that it really is. Make a couple of these and connect them together and you have an even more interesting Flexicube!
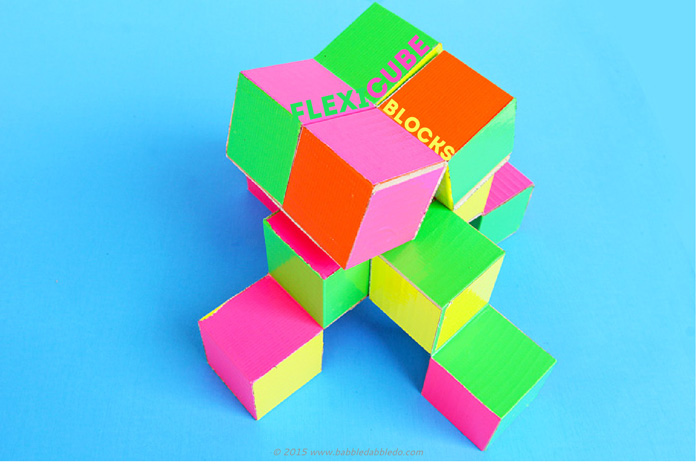
Flexicubes are the brainchild of Phillip Nobel, a Scottish artist who invented them back in 1971 during a stay in the hospital. Flexicubes are typically constructed from paper cubes but I couldn’t help but think that using wood blocks would speed up the process and make a more durable toy. Still if you don’t have wood blocks handy you can construct paper cubes and connect them as shown in the directions.
Either way these folding toys are completely mesmerizing!
This post contains affiliate links to products.
Simple DIY Toy: Flexicube Blocks
 Materials
 Materials
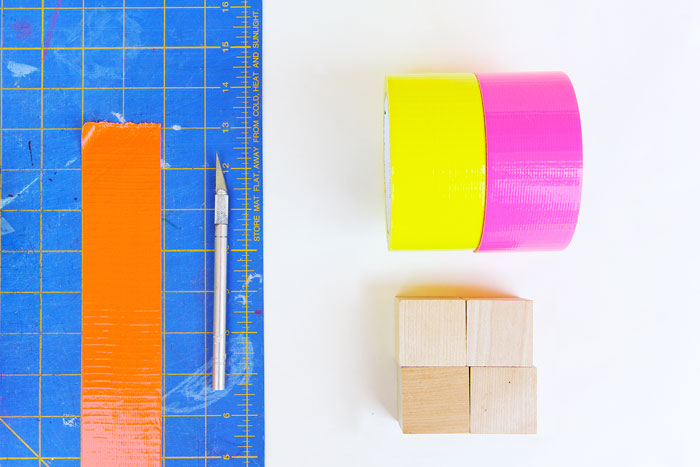
 - 1.5″ Wood Blocks
(4 per puzzle)
- Colorful Duck Tape– Cut into 1 ½” wide strips I used fancy colors like this
- Scissors/X-ACTO
Knife (Adults only)
- Old Credit Card (optional but recommended)
- Marker
Instructions
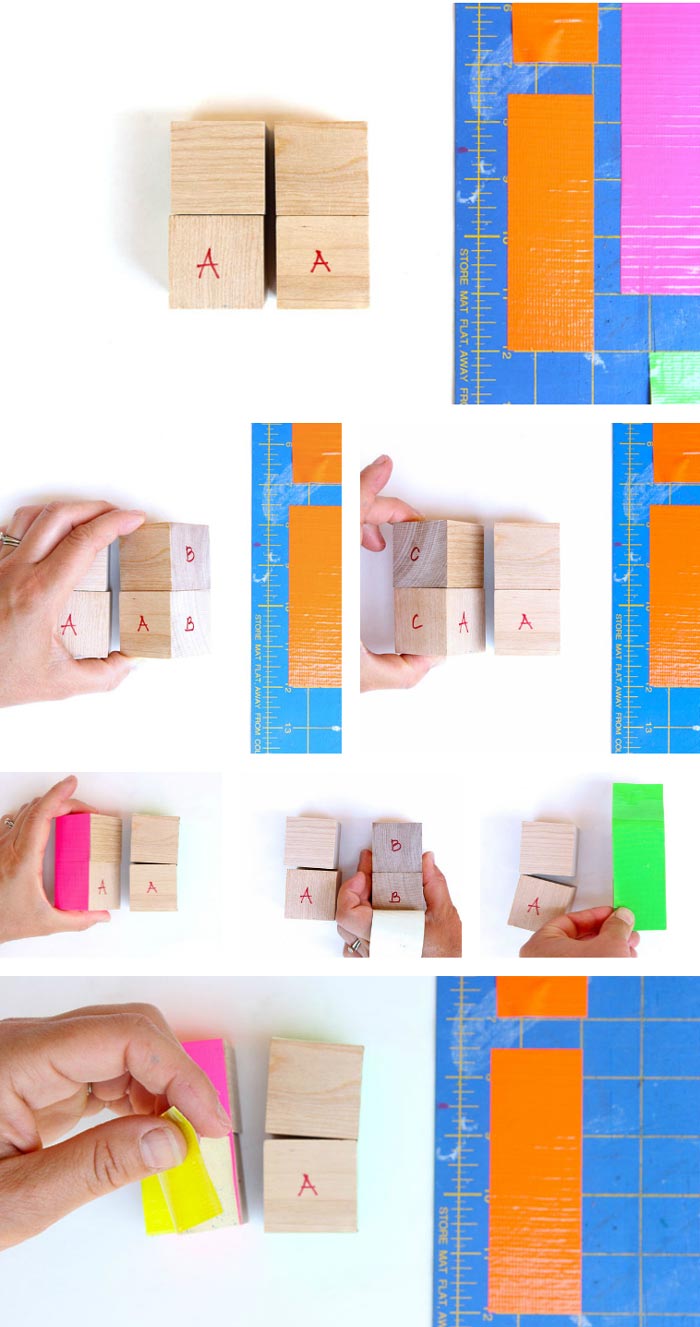
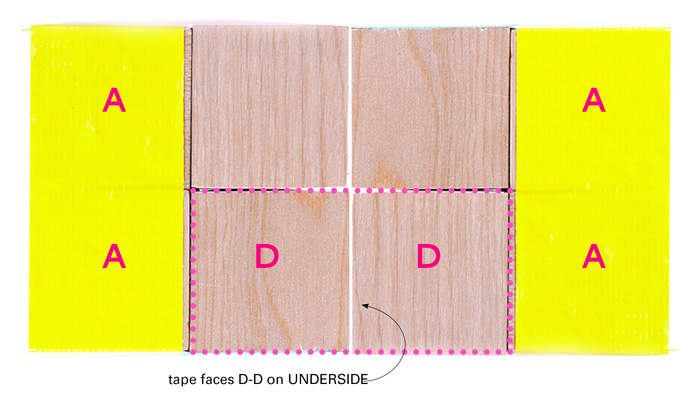
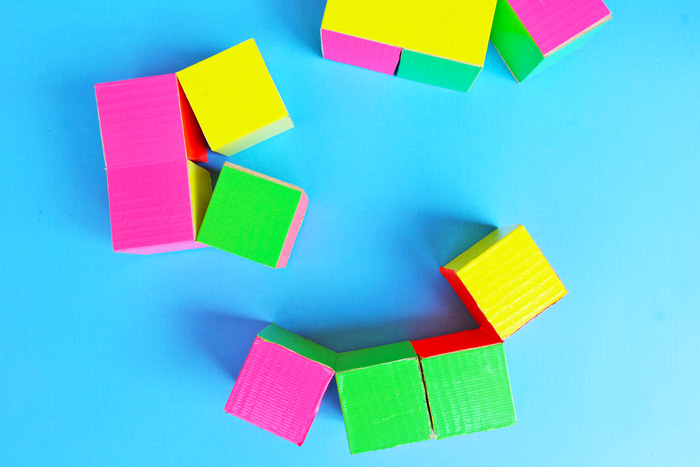
- Step One Arrange your blocks into a square shape. Mark the block faces A-A, B-B, and C-C as shown in the visual . These are your “hinges”
- Step Two Make your first hinge by taping faces C-C together. You want the tape to cover the hinge point and wrap around the adjacent block face. To give the hinge some room to flex, place a credit card between the blocks as you tape. This will provide a small space between the blocks and allow them to flex more easily.
- Step Three Reinforce the hinge point by flipping the hinge over and taping the other side with a 3” strip of duct tape. Again slip a credit card in between the joint to create some wiggle room for the hinge to open completely.
- Step Four Repeat these hinges for faces A-A and B-B.
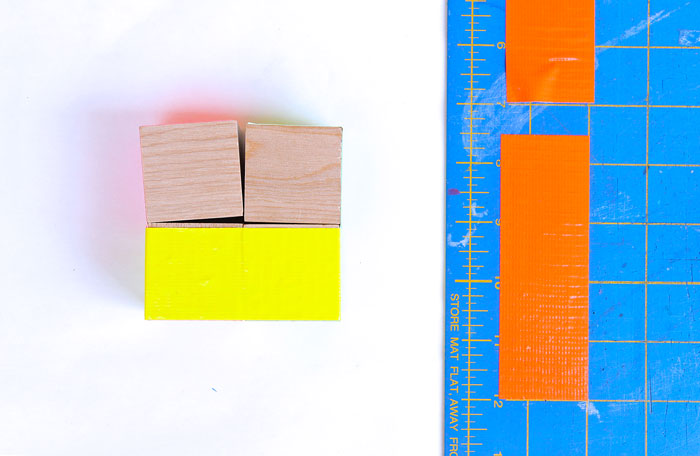
- Step Five The basic puzzle is complete. To give it extra color cover remaining visible block faces with duct tape.
VIDEO TUTORIAL HERE:
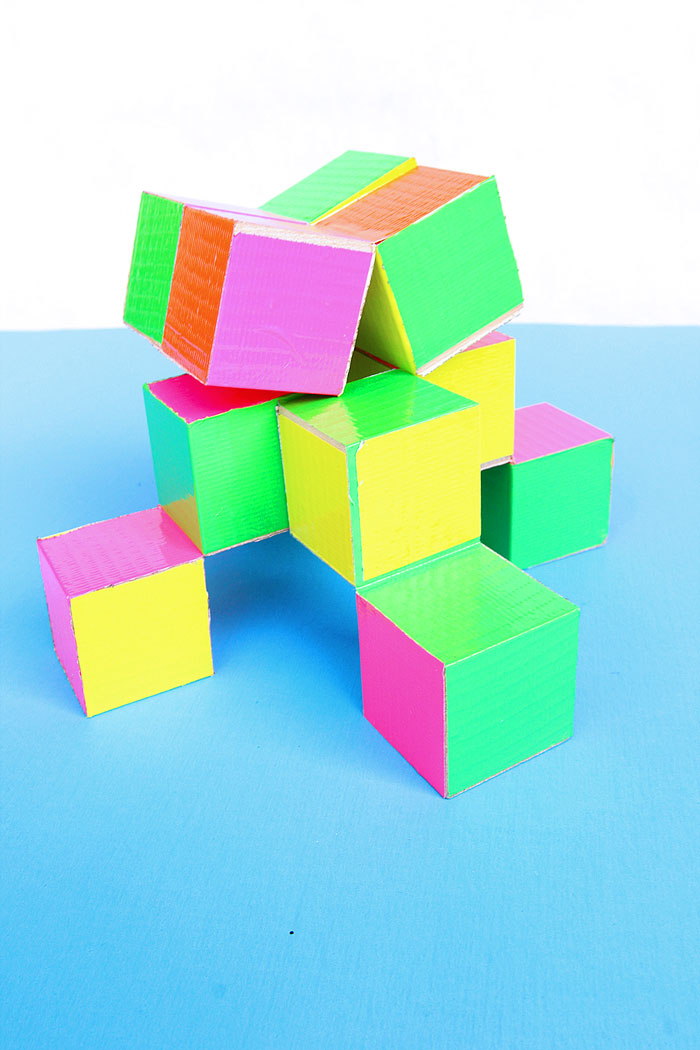
Combine 2 Puzzles Together
Combining two puzzles makes for an even more complex puzzle in the shape of a cube. To do this, lay down two puzzles as shown in the diagram below and connect the UNDERSIDE of faces D-D together with a hinge.
You’re done! Have fun!
Looks Like
Phillip Noble of course! Mr. Noble is a visual artist with a passion for paper, bubbles, and string. Check out his website here. There is a fun little story about how Flexicubes came to be in this letter. Mr. Noble clearly loves all things magical and has delighted folks with fun projects like these for over thirty years. Mr. Noble is also the co-founder of the International String Figure Association You read that right, String Figure Association, you have to see this in action to understand how cool this is!
Conclusion
You don’t need a lot of fancy materials to make your own toys and I love math and geometry toys that surprise and delight! Flexicube Blocks are great little project to throw together and amaze your friends and family with!
40+ more DIY Toys to make here:
Spread creativity like wildfire: Pin This!
FB Share
Looking forward to having a go at making this, hope it’s as easy as it looks. Can see hours of fun with the little ones. Thanks for sharing
Post a pic on our FB page if you make them! https://www.facebook.com/babbledabbledo
Hi where is a good place to get the blocks? I am a preschool teacher and would like to do this project in our summer program !
I bought ours online on amazon. There is a link to the product in the post:) Otherwise some craft stores carry the larger blocks. Post pics on our FB page of your students work! https://www.facebook.com/babbledabbledo
fantastic! growing up my granny had a set of lucite blocks like this. i want to make these!
Wow, lucite blocks like this would be amazing!
I made a smaller set of these out of 3/4″ cubes and thin rolls of duct tape (also 3/4″). They fit easily in a purse or diaper bag, for when you are in a waiting room or otherwise need a quiet distraction for your child.
Fab idea!!!