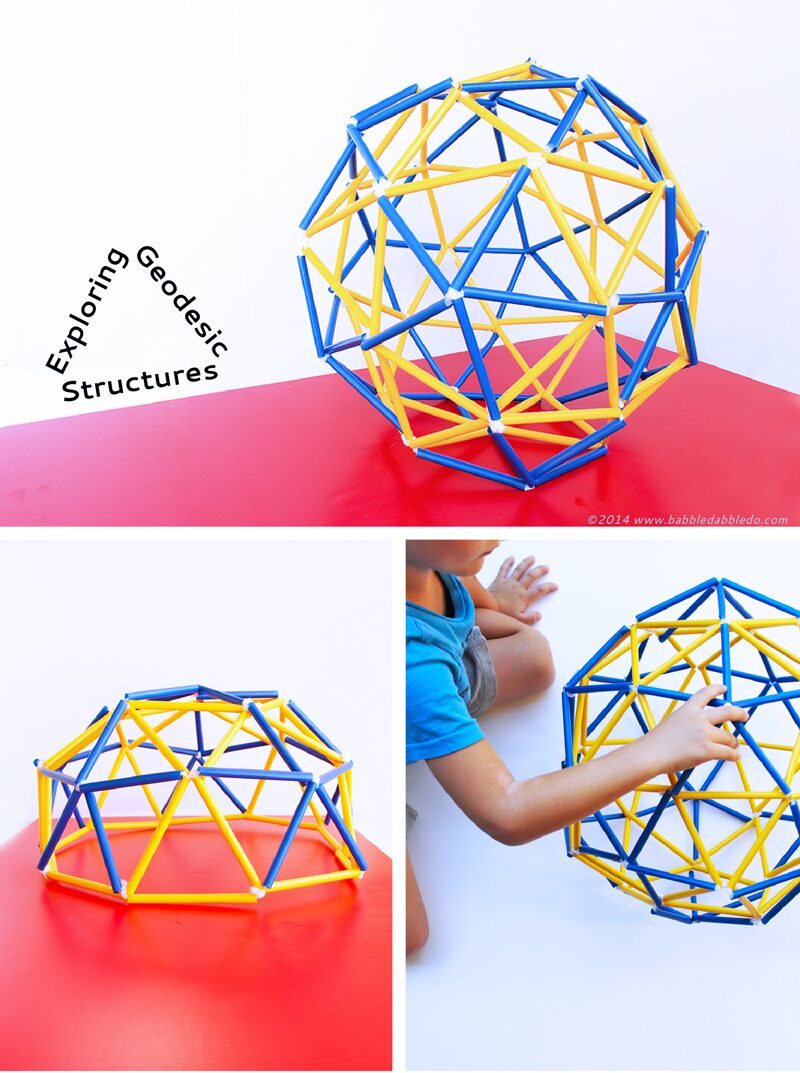
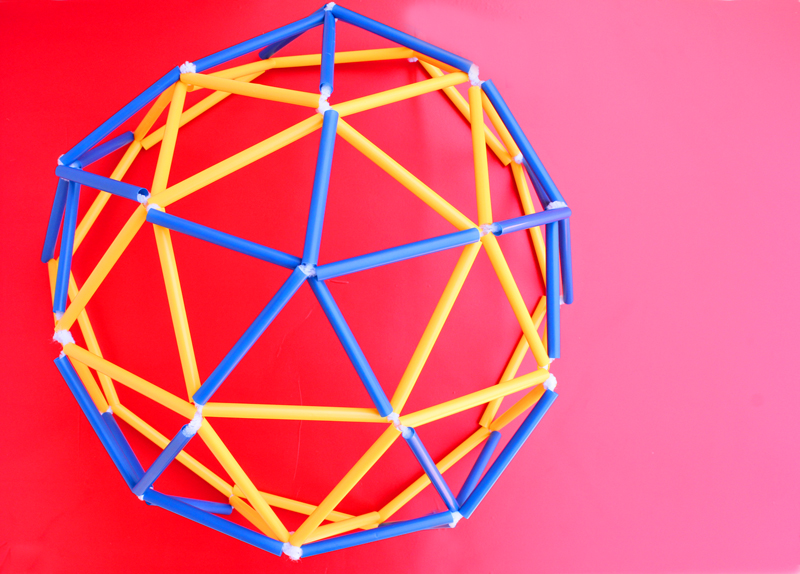
For our third and final straw project (for now….) I’m completely geeking out with this straw geodesic dome & sphere. I have pretty much lived and breathed architecture my entire life (my father is an architect as well) so I have been familiar with geodesic domes practically since I learned to walk…okay maybe not quite that long but you get the picture…..so I’m really curious if everyone else out there is as fascinated by them as me. If you are please leave a comment below telling us your favorite example of a Geodesic Dome!
For those of you that are just tuning into domes scroll down to the “Looks Like” section of the post for a quick primer on domes and their master, the one and only Bucky Fuller, as architects and designers go he considered a legend.
We have a fabulous Geodesic Climbing Dome in our backyard that has provided a lot of fun for my kids over the past few years. My son and I tried to replicate it when building straw structures out of triangles, you can see our version here, but it wasn’t a true geodesic dome. Building a true geodesic dome out of straws involves some math. But don’t be scared by that! I promise it’s only one simple equation that I you can do with a calculator! I also wanted to create a tutorial that makes it about as easy to make a geodesic dome out of straws as humanly possible. I think I got pretty close.
This post contains affiliate links to products I love and recommend to my readers, plus it keeps this little blog o’mine afloat! Thank you!
Straw Geodesic Dome & Sphere
Materials
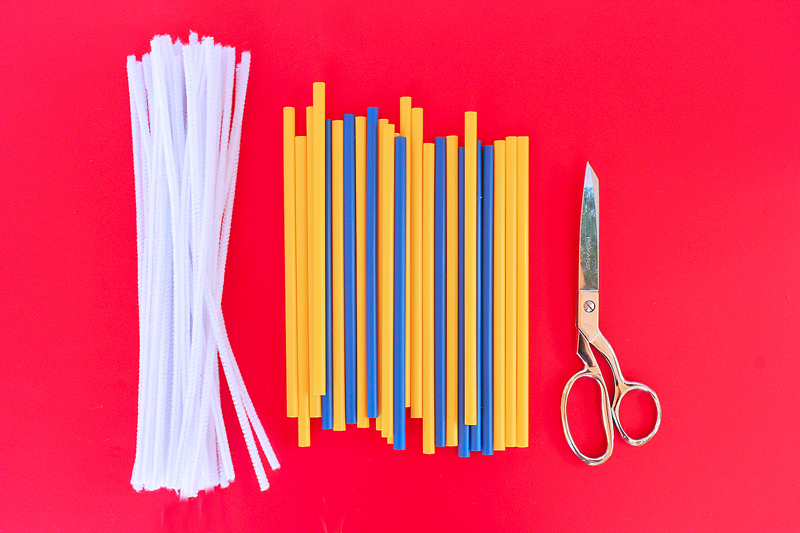
- Straight Straws like these For a dome you will need 33 straws (18 of one color and 15 of a second color). For a full sphere you will need 60 Straws (30 of each color)
- Chenille Stems AKA Pipe Cleaners
- Scissors
- Ruler
Instructions
To visualize this project ahead of time here’s the basic plan:
- Cut straws into two different lengths (Strut A & B)
- Make 6 pentagon sections
- Join them together in the shape of a dome
Yes, it’s that easy.
Note: We will be cutting two sizes of straws. For ease of understanding it’s best to cut the different sizes from different colors. That way it’s easy to keep track of which are the longer struts and which are the shorter.
Basic Pentagon
- Step One Select one color to be Strut A and one to be Strut B. Strut A will be longer than Strut B. For Strut A simply cut each straw in half. Make a total of 35 Strut A’s.
- Step Two Strut B should be smaller than Strut A by a factor of 0.885. To determine what length to cut Strut B measure Strut A then multiply that number by 0.885. Now you have the size of Strut B. Here’s an example:
For an 8” long straw Strut A will be 4” and strut B will be 4” x 0.885 = 3.54”. Round up to 3.5” here people, you don’t have to be that accurate! Just get close to the ratio. Hint- Cut one strut B length and use it as a guide to cut the rest of the straws to that size.
- Step Three Cut a total of 30 Strut Bs.
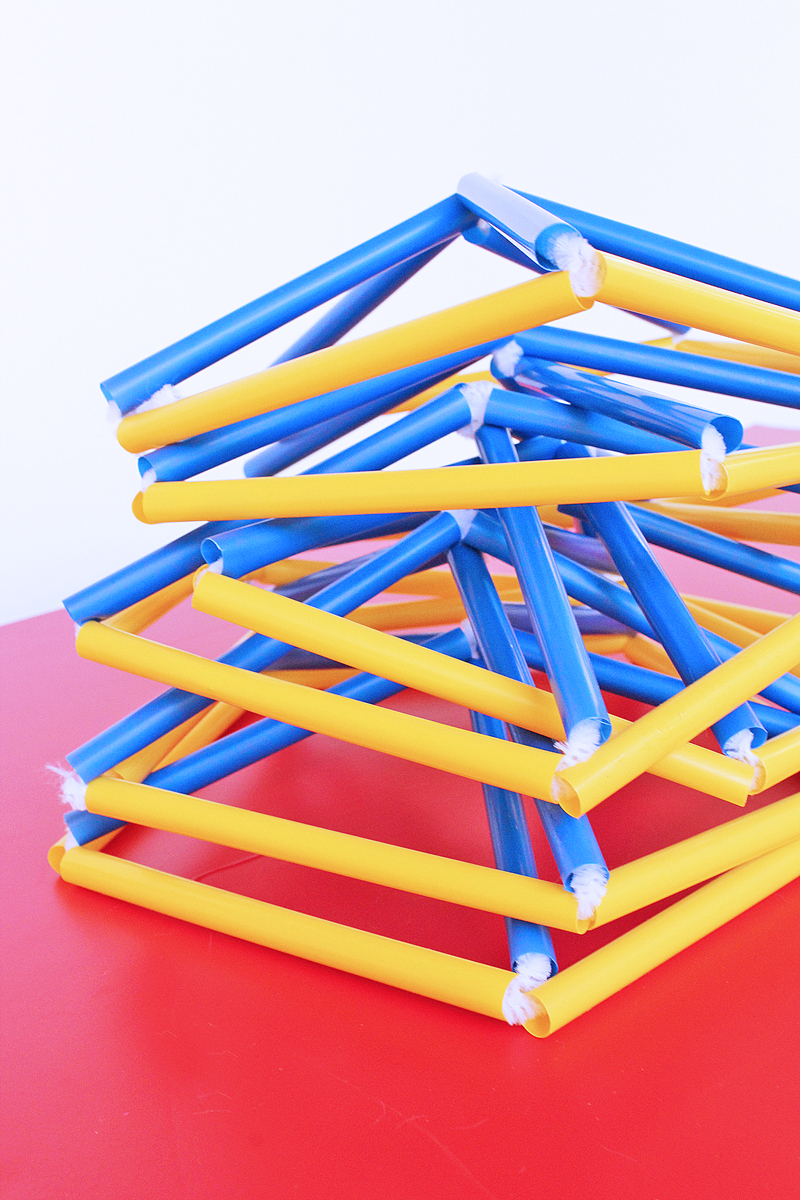
- Step Four Make some pentagons! Strut A will be the outside of each pentagon and Strut B will be the middle sections. Take (1) Strut A and feed a pipe cleaner through it. Bend back the end to secure it in place around the straw. Join additional pipe cleaners on as necessary to make one continuous length of pipe cleaner by twisting the ends of pipe cleaners together tightly.
- Step Five Thread 4 more straws onto the pipe cleaners for a total of 5 straws) then bend into the shape of a pentagon and secure the ends together.
- Step Six Thread (2) Strut B’s onto the long end of the pipe cleaner (adding more pipe cleaners as necessary) then thread the pipe cleaner into an adjacent straw and out the other side.
- Step Seven Thread (2) more Strut B’s through the pipe cleaner and an adjacent straw.
- Step Eight Thread 1 final Strut B onto the pipe cleaner and then secure all Strut B’s at the center of the pentagon. It helps to wrap the pipe cleaner around the joint of one pair of strut B’s and then wrap it around the second pair. Thread the end of the pipe clearer back into one of the straw struts to conceal it.
- Step Nine Make 5 more pentagons as described above. For a full sphere grab a glass of lemonade and make 11 more pentagons!


Make the Dome
Now that you have the basic shape that will form the dome all you need to do is connect them together. For a dome you will need 5 Strut B’s to form the base. If you are making a full sphere you can eliminate the extra struts as the pentagons from one side will join the second side of the sphere.
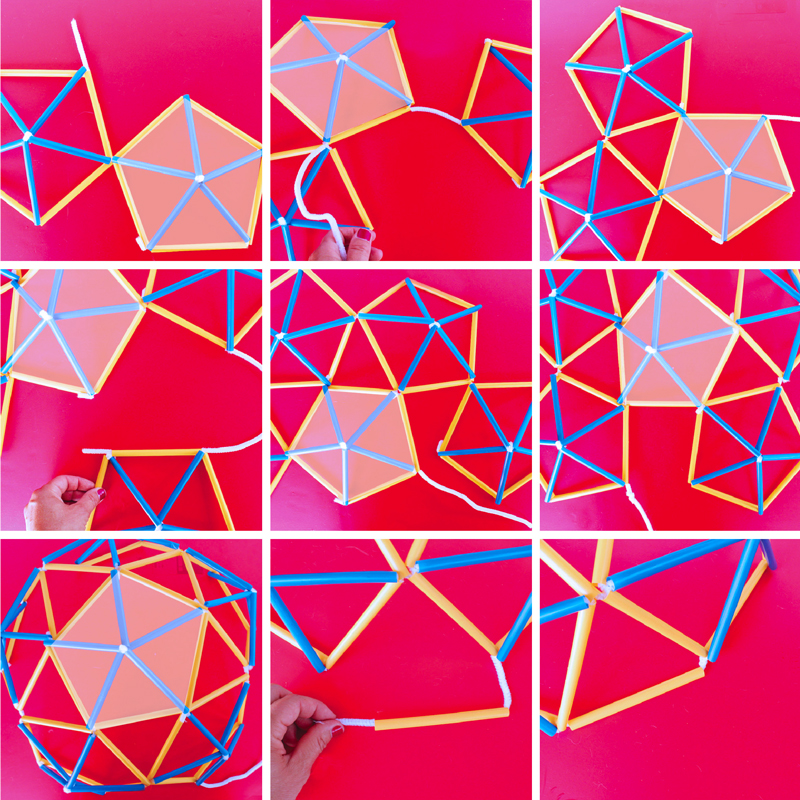
Dome- For ease of reference I have shaded in the center pentagon in this visual tutorial. Trust me, it look more complicated than it is.
- Step One Take one pentagon and thread a pipe cleaner through one side, secure at the end. This will be your center pentagon.
- Step Two Thread the long end of the pipe cleaner through one Strut B of a second pentagon. Make sure the pointed sides of the shapes are facing OUT. Pull them together.
- Step Three Repeat Steps one and two to connect a third, fourth, and fifth pentagon at the joints of the center pentagon. Pull tightly.
- Step Four Take the (5) single Strut B’s and feed them through the base of the row of pentagon at the bottom, alternating pentagons and struts. Pull tightly.
Sphere
- Step One Take one pentagon and thread a pipe cleaner through one side, secure at the end. This will be your center pentagon.
- Step Two Thread the long end of the pipe cleaner through one Strut B of a second pentagon. Make sure the pointed sides of the shapes are facing OUT. Pull them together.
- Step Three Repeat Steps one and two to connect a third, fourth, and fifth pentagon at the joints of the center pentagon. Pull tightly.
- Step Four Repeat Steps one through three to make a second half of a sphere.
- Step Five Join the two side together! Thread a pipe cleaner through Strut B of one pentagon on one sphere. Secure at the end.
- Step Six Instead of threading single Strut B’s around the base as we did to make a dome, you will use the Strut B’s of the second sphere as the connectors. Thread the pipe cleaner through one Strut B on the second sphere half. The second sphere half should be positioned facing the opposite direction of first half. Continue threading pipe cleaners through the bottom loop of both halves to form a complete sphere. Secure the starting and ending points together.


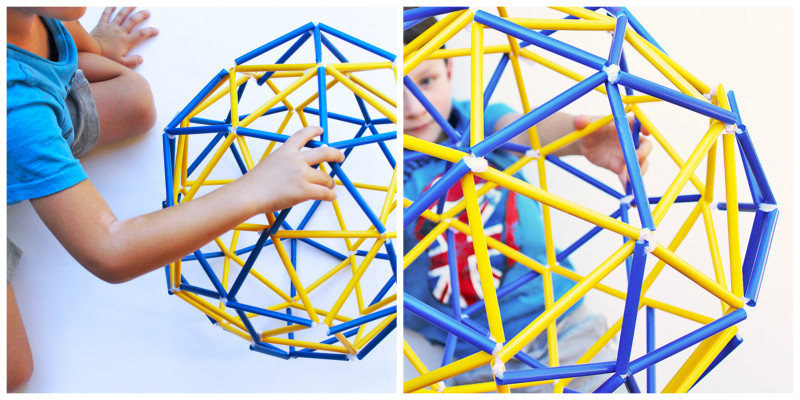
You may think it looks complicated and but it’s actually really easy to make both the dome and sphere once you see the pattern. In all fairness I built this dome and sphere. My kids are just a wee bit young to tackle this project, although my baby had fun trying to thread pipe cleaners through straws… I know it takes some time but breaking this project down to basic shapes made it very easy to build and understand. Here’s my son with the dome so you can see how big it actually is.
About Geodesic Domes
Why are geodesic dome so fascinating to designers?
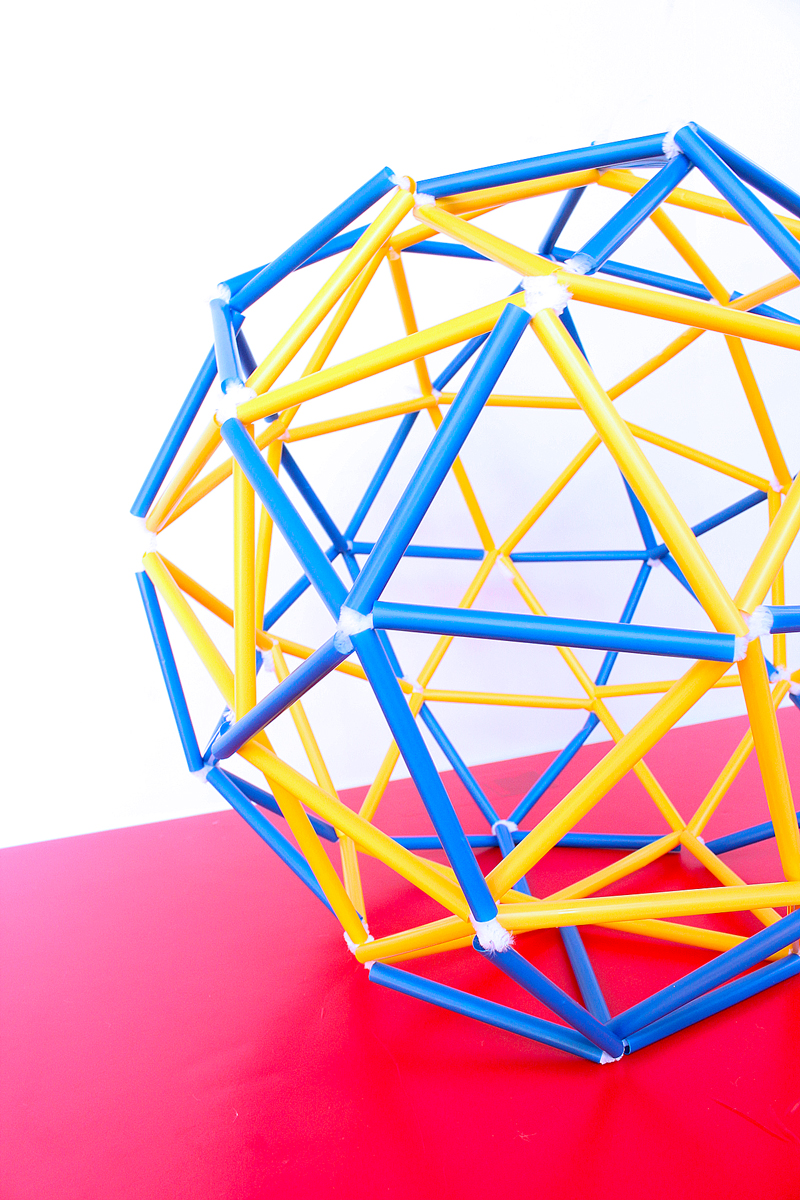
Geodesic domes are very efficient structures. Triangles are inherently stable shapes, so creating structures out of interlocking triangles makes very strong, yet incredibly lightweight structures that can be adapted on a small level, like our project here, to a massive level as in the Montreal Biosphere constructed for the 1967 World’s Fair.
The Math Behind the Dome
The first step in designing a geodesic dome is to determine the frequency of the dome, denoted by the letter V. At a minimum you need a frequency of 2*. In simplified terms it means you need 2 different strut or chord lengths. The more struts/chords you have the more rounded the final shape will be. The straw geodesic dome/sphere here is 2V. 3V and 4V domes are also very popular t make. If you want to build one or even a more complex dome check out this geodesic dome calculator.
*Theoretically a 1-frequency dome is possible but it makes the shape of an icosahedron, which doesn’t quite have a spherical shape.
More on Domes
If you can’t get enough Geodesic domes here are a few more places you should check out:
- Geodesic Domes on the Buckminster Fuller Institute
- Geodesic Domes on Wikipedia
- Geodesic Dome Construction

Looks Like
Buckminster Fuller. Of.course. In the architecture world Bucky Fuller is a legend. He ranks up there with Frank Lloyd Wright and Le Corbusier. Are you familiar with him? Well you are now. He didn’t invent the Geodesic Dome, it was actually invented by Walther Bauersfeld, but Bucky Fuller made it a household word. His love of geodesic domes has spread to generations of young architecture students in the past half-century. He saw the potential in geodesic triangulated structures to build strong yet lightweight super structures was awarded patents for a number of his designs. Bucky Fuller is also renowned in design circles for his forward thinking philosophies. He designed the Dymaxion House in the 1940s to be a mass produced type of housing. Imagine if houses were made like cars in factories. In my opinion this makes him the predecessor to the pre-fab home movement. He also developed theories about the world’s limited amount of natural resources and was a environmental visionary. For these reasons and more he is a hero of mine and many, many other designers.
Conclusion
My father the architect was visiting us this week and helped us make our geodesic straw dome. His verdict on this project? “Incredible!” He was impressed at how we broke down the construction into a few simple repeatable steps using very basic materials. You can do it too! Maybe you want to make one to explore geometry with kids or engineering ideas or maybe just for decorative purposes, I mean who wouldn’t want to hang a geodesic sphere from the ceiling? Ha! In any case I hope you are inspired to try making one and join the ranks of Bucky Fuller fans worldwide!
P.S. This would make a fantastic STEM project for older kids!
If you enjoyed this engineering project for kids check out Tensile Bubbles and Paper Building Blocks for a more structural fun.
Now that you are pumped about geometry here are three amazing toys you might want to consider adding to your collection, they might just turn your kids into the next Bucky Fuller:
- The X-Ball (Magnetic Design Set)
- This building set was always a hit at our co-op preschool: Straws and Connectors Building Kit
- And if you want to go life size this will be a welcome addition to your backyard. We have one and my kids climb on it daily. It’s an economical and designerly alternative to wood play structures: Geometric Dome Climber
Don’t miss out on more STEM projects here on Babble Dabble Do! Your child’s inner Buckminster Fuller thanks you! Subscribe below, like us on FB, or follow along on Pinterest!
Visit Babble Dabble Do’s profile on Pinterest.
We need to discuss these photos immediately. They are insane. This whole post is insane! AMAZING!
You are so funny Meri! I had fun with these pics for sure!
OMG TRUE THAT
This is SO COOL!
Thanks Kate!
GOOGLE GEODESIC HOUSEBOAT
ID LIKE TO SHARE R BUCKMINSTER FULLER SPACE TRUSS INFO TO THIS WONDERFUL SITE
MICHAEL R WEEKES
CONNECT VIA FACEBOOK
OR EMAIL
MICHAELLOVESBUFFALO@GMAIL.COM
FOUNDER – WNY STEM HUB
Can you email me at anadziengel@gmail.com? Thanks!
cool
Great post! I’m looking forward to trying this with kids. I’ll pass along to my colleague who is running an engineering elective at school. Thanks!
Wonderful Sarah!
cool
are u the librarin at the waupaca middle school?
soooo fun
How can I print out these instructions so that I use them with my homeschool kids to make a sphere?
Great project and instructions.
In the dome specific instructions, there are a couple of typos where Strut A is referred to as Strut B.
Oh NO! Thanks for catching that!
Interesting. I’m going to try this with my son this weekend. Thank you very much.
great!
Is there anything else we can use instead of pipe cleaners to make the model?
You can probably use wire but it will be a little loose in the straws. Pipe cleaners are easily available online or in craft stores 🙂