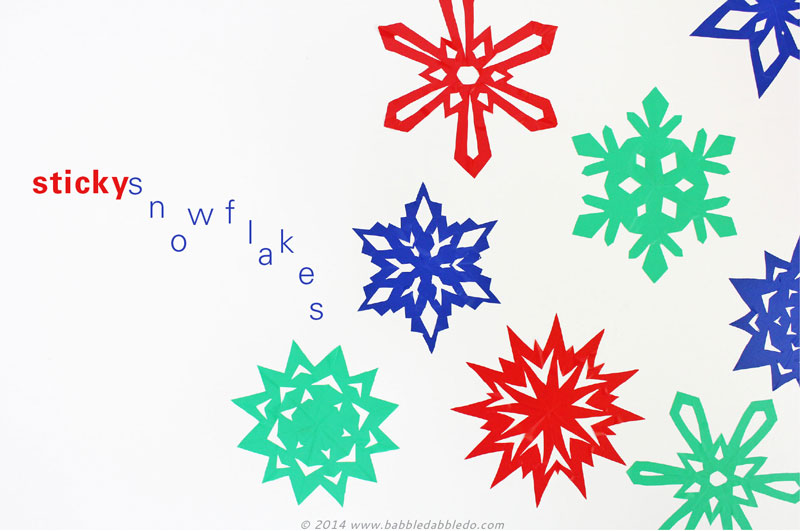
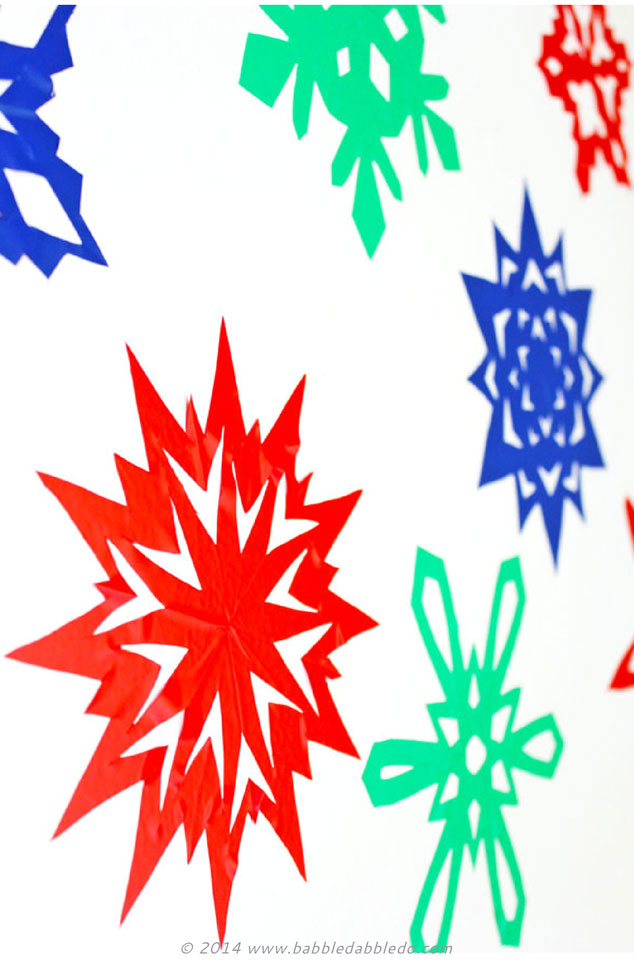
I have a thing for snowflakes. I have since I was kid. I enjoyed cutting them out of paper and unfolding them to see what elaborate designs a few folds and cuts can make. And of course if you saw our Giant Kirigami Spider Webs you also know I like to put a twist on classic projects….soooooo….today’s Sticky Snowflakes are made from something special: Contact Paper! Yup, that way they stick to your wall, sort of like DIY window clings.
Age Appropriateness and Scissor Safety: These snowflakes are fairly elaborate. I suggest the activity for older kids and grown-ups. Cutting intricate snowflakes requires the use of a sharp pair of scissors so only do this activity with kids who can use sharp scissors safely. Dull scissors are frustrating and also dangerous as the scissors can accidentally slip and cut your hand when cutting through layers of paper/contact paper.
This post contains affiliate links to products I love and recommend to my readers, plus it keeps this little blog o’mine afloat! Thank you!
Sticky Snowflakes
Download Template Here
Materials
- Colored Contact Paper
We used Green, Red, and Blue. Amazon has some good deals on green right now
- Scissors
- Template
- Painter’s Tape
Instructions
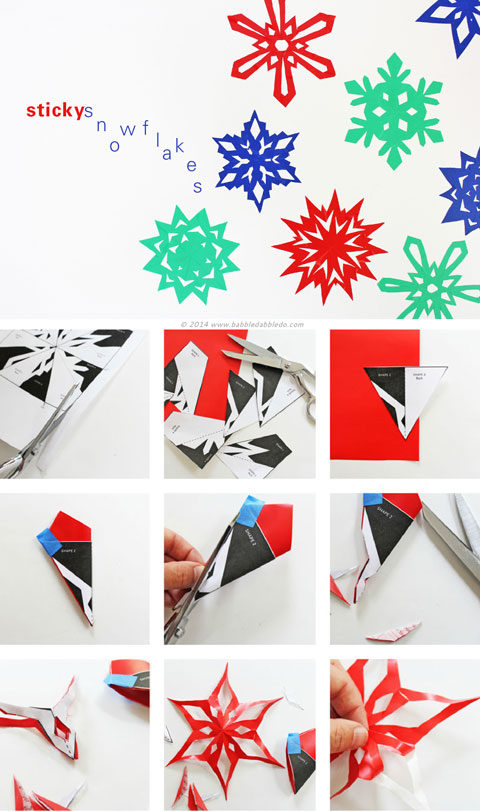
To make a Sticky Snowflake we are first going to learn how to fold paper to create a 6-Sided Snowflake. Once you master that you can use the included templates to cut out a variety of shapes or use your imagination to create unique designs.
Basic Fold for a 6-sided snowflake
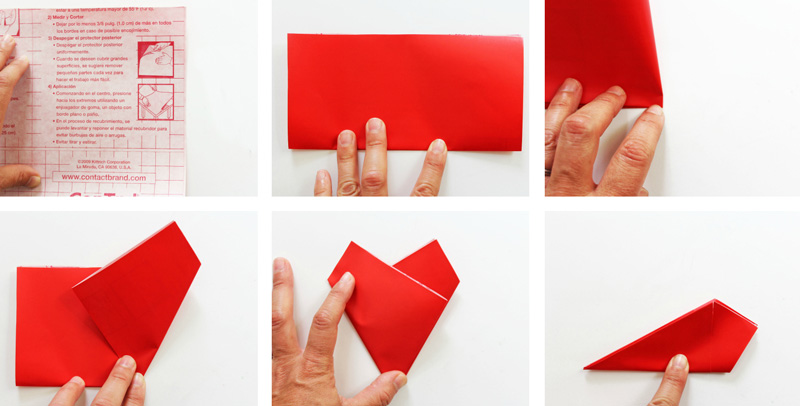
- Step 1 Cut a 7” x 7” square out of contact paper. The back of contact paper has a grid printed on it for easy cutting and measuring.
- Step 2 Fold paper in half.
- Step 3 Make a crease at the center by folding the paper in half again, along the long side. Unfold.
- Step 4 Using the crease as the starting point, fold one side of the paper at a 60-degree angle.
- Step 5 Repeat the 60-degree fold with other side of the paper.
- Step 6 Fold triangle in half. Your snowflake is ready to cut!
Cutting your snowflake using the template
The template included here can be used as a starting point.
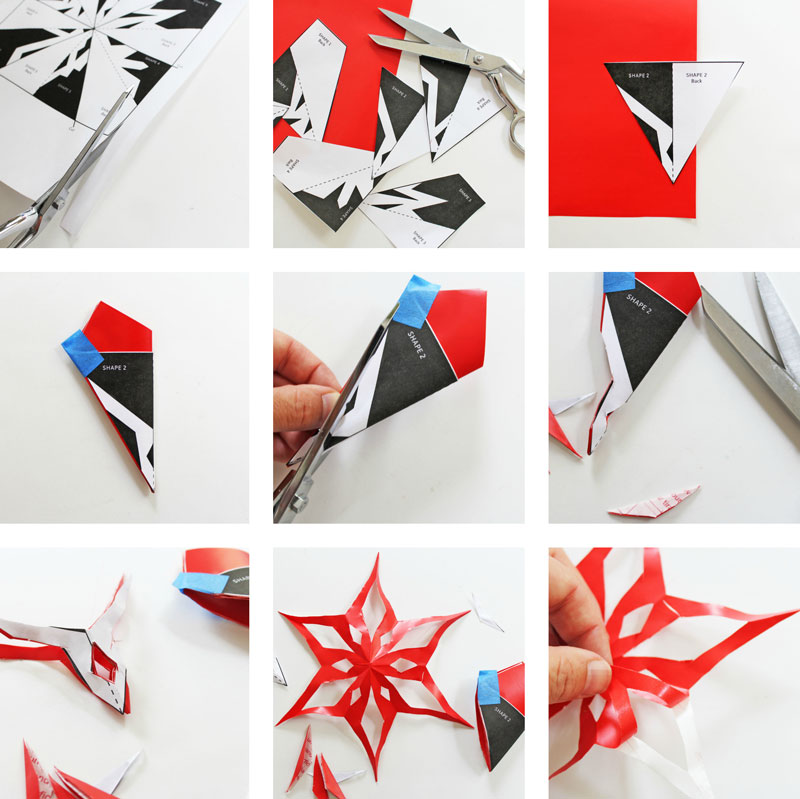
- Step 1 Cut out the triangle template you wish to use.
- Step 2 Fold template in half and wrap it around your folded triangle. Using painter’s tape, tape the template and open edge shut.
- Step 3 Cut out your shape.
- Step 4 Carefully unfold your snowflake.
Sticking your Snowflake to the Wall
- Step 1 Remove the backing from the snowflake and be sure not to let the sticky edges touch each other or the snowflake will stick to itself.
- Step 2 Starting from the center of your snowflake gently tap the snowflake against the wall. Once it’s in place push out the air bubbles, working from the center of the snowflake out.
- Step 3 Burnish the snowflake using your fingertip to remove creases.
Tips
- Contact paper can easily be removed from walls but it’s a good idea to get permission to put these up around you home first!
- Scissors are sharp! Be very careful with your fingers when cutting out the shapes.
- To get the cleanest edges, cut slightly past the end point of the template lines. Just be sure not to cut through the whole snowflake!

Conclusion & More
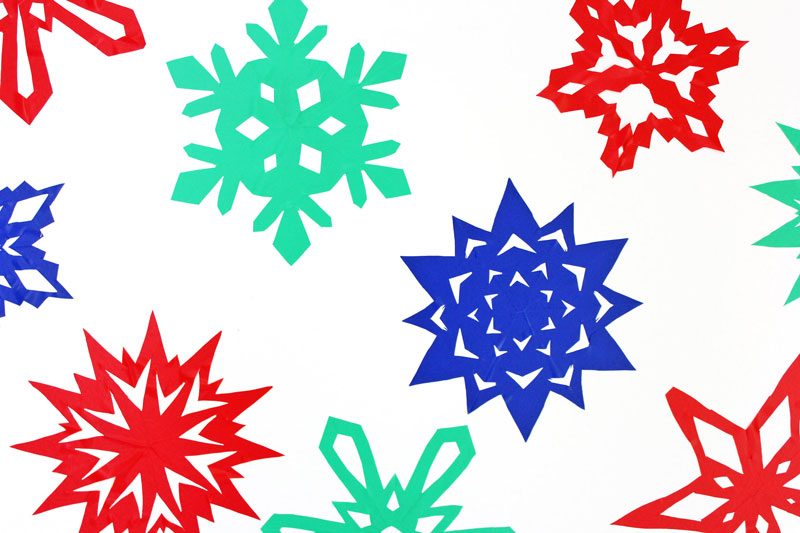
Making snowflakes is a classic winter activity for families. Our “sticky” version makes for a fun way to decorate your walls or windows with them! Be sure to check back later this week when I unveil yet another snowflake extravaganza: Psychedelic Snowflakes….
If you enjoyed this activity check out a few more “Wintery” projects here on Babble Dabble Do:
MORE WINTER ACTIVITIES
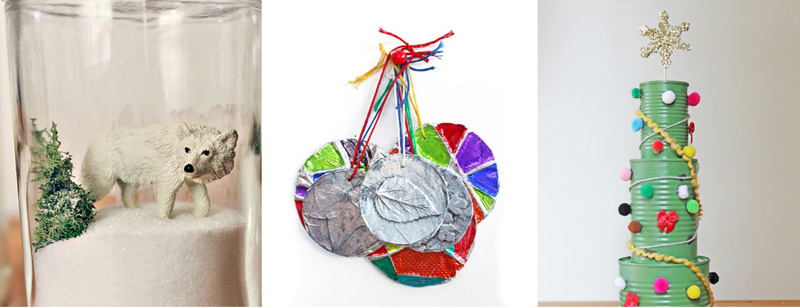 Pictured from left: Mini Terrariums, 5-Minute Embossed Ornaments, and Tin Can Christmas Tree Activity
Fill your child’s life with more art, design, and science:
Visit our FB page where I share tons more creative ideas and resources from around the web.
Leave a Reply