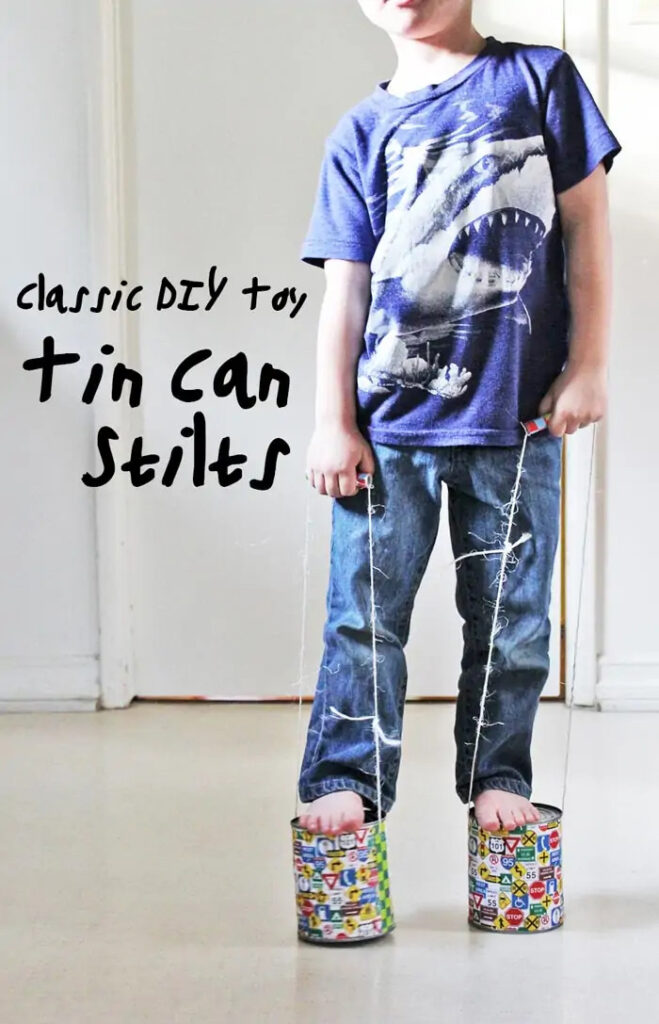
Of all the DIY toys we have made thus far, Tin Can Stilts is the one my kids have been most excited about. My three-year-old Clara particularly loves them and she’s good! Her balance is pretty amazing for a preschooler! And this just proves that not only are these a fun toy but also a fantastic gross motor activity that help children develop balance and coordination.
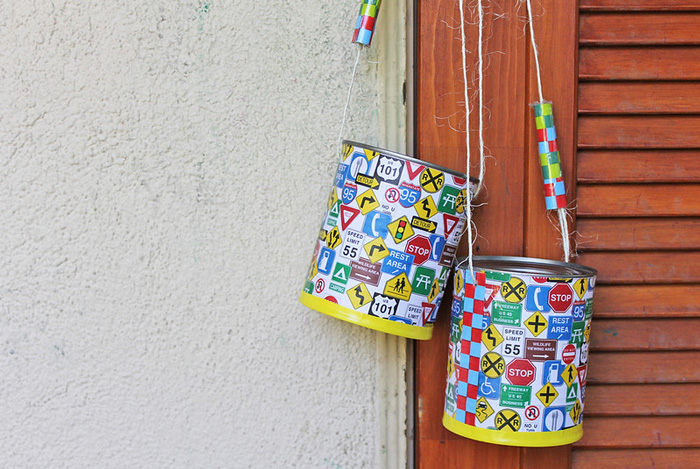
I also love to make DIY toys pretty, the more enticing a product looks the more interest it will generate! So I definitely spent some time fancying up this simple toy. You can keep it simple by skipping the paper and Mod Podge step.
More DIY Toys to make at home: PAPER TOYS
Gross Motor Activity: Tin Can Stilts
Materials
- Clean Tin Cans- preferably the 28 oz size, remove any sharp edges
- Colorful paper (optional)
- Mod Podge & Paintbrush (optional)
- Decorative Tape (optional)
- Cardboard tube We used the ones from wire hanger, cut into (2) 3″ sections.*
- Twine or Heavy Duty String
- Electrical Tape
- Hammer
- Nail
*Some alternatives for the small cardboard tube are:
- Cut a standard cardboard tube lengthwise, trim a section off the tube then compress to size and wrap with duct tape.
- Plastic tubing can also be substituted. It will be soft on the hands too!
Tin Can Stilts Instructions

- Step One If you plan to decorate the cans, start by mod podging some colorful paper around the sides of the cans. Let dry.
- Step Two Cut your twine. The length of the twine really depends on the heights of the children who will use the stilts. My kids are pretty petite so I cut the twine into 3′ lengths.
- Step Three Thread the cardboard tubes onto the twine and knot the end loosely
- Step Four Add some decorative tape to the cardboard tube handles.

- Step Five Make holes in the sides of the cans. Using your hammer and a large nail make a hole on either side of the tin cans close to the top.
- Step Six Thread the string through the holes.
- Step Seven Trim the twine. Have your child stand on one of the cans and trim the twine so that the handles will be placed roughly at the height of their outstretched arm. Children have to pull up on the stilts as they walk so the closer the handles are to their outstretched arm the better.
- Step Eight Knot the twine securely. You may want to hide the knot under the handle, although ours kept slipping out from underneath.
- Step Nine Add some electrical tape along the bottom edge of the can for some slip resistance. We added this step after some testing so the electrical tape is not shown here!

You’re done!
Have your child try them out. As they walk they need to pull up on the handle to keep the stilts tight to the bottom of their foot/shoe. It will take some practice. While they do this, they will be working on their gross motor skills including learning how to balance, coordinate their feet and arm movements, and hold the handles tightly. This is wonderful gross motor activity for kids of a variety of ages.

Tips
- Have your child wear shoes. It’s much easier on the feet although my son refused to wear them.
- Practice in an open space. There is a tendency for children to slip at first so you want to make sure they will not fall onto or into anything dangerous.
- Tin can stilts work best on flat surfaces. We tried the grass thinking it would be the best cushioning but it was pretty tough to balance on although it may work for an experienced stilt walker! A short carpeted area is safest; we had the best results on the rug in our living room.

Hooked on DIY toys like us?
Spread Creativity Like Wildfire: Share this!
So fun! :o) Pinning … thanks for sharing!! Have a fantastic weekend! 🙂
Thanks for stopping in Brenda!!!!
I remember using apple juice cans. We used the punched holes for the twine and did not have cushy handles. This was 50 years ago!
Thanks Kit! You can never go wrong with a classic toy!
Oh what a blast from the past, although ours were NOT pretty like this and I swear the cans were smaller! Thanks for linking up at my Pin Me Linky Party.
Thanks for stopping in Diana! I love retro inspired toys!
i’m going to make these this week! my kids will LOVE me, thanks!
Hope they enjoy them as much as my kids did!